

1) Wendy’s Copycat Chili Recipe
Recipe card
1) Wendy’s Copycat Chili Recipe
Ingredients
- 1 pound ground beef (browned and drained)
- 1 can tomato sauce (29 ounces)
- 1 can stewed tomatoes (29 ounces)
- 1 can dark kidney beans (15 ounces, drained and rinsed)
- 1 can light red kidney beans (15 ounces, drained and rinsed)
- 1 can pinto beans (15 ounces, drained and rinsed)
- 1 can small red beans (15 ounces, drained and rinsed)
- 2 cups chicken broth
- 1/2 cup diced celery
- 1/4 cup diced green pepper
- 1 1/2 tablespoons chili powder
- 1 teaspoon ground cumin (or up to 2 teaspoons for more Wendy’s flavor)
- 1 1/2 teaspoons garlic powder
- 1 teaspoon salt
- 1/4 teaspoon ground black pepper
- 1/2 teaspoon dried oregano
- 1/8 teaspoon cayenne pepper
Cooking Instructions
- Brown ground beef in a large Dutch oven or heavy stockpot over medium-high heat, breaking it into small crumbles, until no pink remains.
- Drain the fat completely and return beef to the pot.
- Add tomato sauce, stewed tomatoes with juice, drained beans, chicken broth, celery, green pepper, chili powder, cumin, garlic powder, salt, black pepper, oregano, and cayenne. Stir well.
- Bring chili to a boil over medium-high heat, stirring occasionally.
- Reduce heat to Low and simmer uncovered at least 1 hour, stirring every 15 to 20 minutes. Simmer 2 hours for thicker, deeper flavor if time allows.
- Taste and adjust salt, cumin, and cayenne before serving.
- Serve hot with shredded cheddar, sour cream, crackers, Fritos, onion, or jalapeño.
Notes: Drain and rinse the beans so the chili does not taste canned. Do not rush the simmer; one hour is good and two hours gives a thicker Wendy’s-style texture. This chili improves overnight and keeps refrigerated for up to 5 days. Freeze portions for up to 3 months and reheat with a splash of broth if thickened.

2) Beef and Cheese Enchiladas
Recipe card
2) Beef and Cheese Enchiladas
Ingredients
- Ingredients
- 1 pound ground beef
- 1 can refried beans
- 1 10-ounce can red enchilada sauce
- 2 cups mild cheddar cheese (shredded)
- 10 flour or corn tortillas (soft taco size)
- cooking spray (for the baking dish)
Cooking Instructions
- Instructions
- Preheat the oven to 350°F. Lightly grease a 9×13 baking dish with cooking spray.
- Cook the ground beef in a large skillet over medium-high heat, breaking it up as it cooks, until browned with no pink remaining. Drain the fat.
- Reduce heat to medium. Add the refried beans and stir until combined with the beef and warmed through. Remove from heat.
- Spoon about 3 tablespoons of filling down the center of each tortilla. Add a pinch of cheese if desired, roll tightly, and place seam-side down in the baking dish.
- Pour the enchilada sauce evenly over the rolled enchiladas and spread it so every tortilla is coated. Sprinkle the remaining cheese over the top.
- Cover tightly with foil and bake for 25 minutes. Remove the foil for the last 5 minutes if you want the cheese bubbly and spotted.
- Let rest for a few minutes before serving with toppings such as sour cream, lettuce, tomato, jalapenos, or hot sauce.
Notes: Warm corn tortillas before rolling so they do not crack. Do not overfill the tortillas or they can split during baking. Place enchiladas seam-side down so they stay rolled. Assemble up to 24 hours ahead and add about 10 minutes to the bake time if baking straight from the refrigerator.
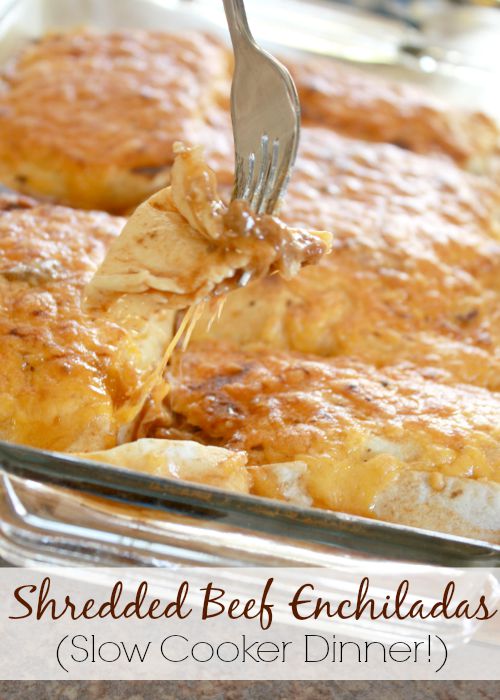
3) Shredded Beef Enchiladas: Crock Pot Dinner
Recipe card
3) Shredded Beef Enchiladas: Crock Pot Dinner
Ingredients
- 1 pound stew beef (or 2 to 3 pound chuck roast for a larger batch)
- 1 large can red enchilada sauce (19 ounces, divided)
- 2 beef bouillon cubes
- 1/2 can refried beans
- 3 cups shredded Mexican blend or cheddar cheese (divided)
- 6 burrito-size flour tortillas
- 1 small can diced green chiles (optional)
- Sour cream and rice (for serving)
Cooking Instructions
- Place beef in the slow cooker. Pour about three-quarters of the enchilada sauce over the beef and reserve the rest for topping.
- Add beef bouillon cubes, cover, and cook on Low for 8 hours, until beef shreds easily.
- Drain off most of the braising liquid, saving a little in case the filling needs moisture. Shred beef with two forks.
- Stir refried beans into the shredded beef. Add diced green chiles if using.
- Warm tortillas under a damp paper towel in the microwave for 30 to 45 seconds so they roll without cracking.
- Grease a 9×13 baking dish. Fill tortillas with beef mixture and some cheese, roll tightly, and place seam-side-down in the dish.
- Pour reserved enchilada sauce over the top and sprinkle with remaining cheese.
- Broil or bake until cheese is melted and the sauce is bubbling. Serve with sour cream and rice.
Notes: Do not drain all the braising liquid before shredding; a few tablespoons keep the filling moist. Warm tortillas before rolling so they do not split. The beef filling can be made up to 3 days ahead or frozen for up to 3 months. Assembled enchiladas can be refrigerated up to 24 hours before heating.
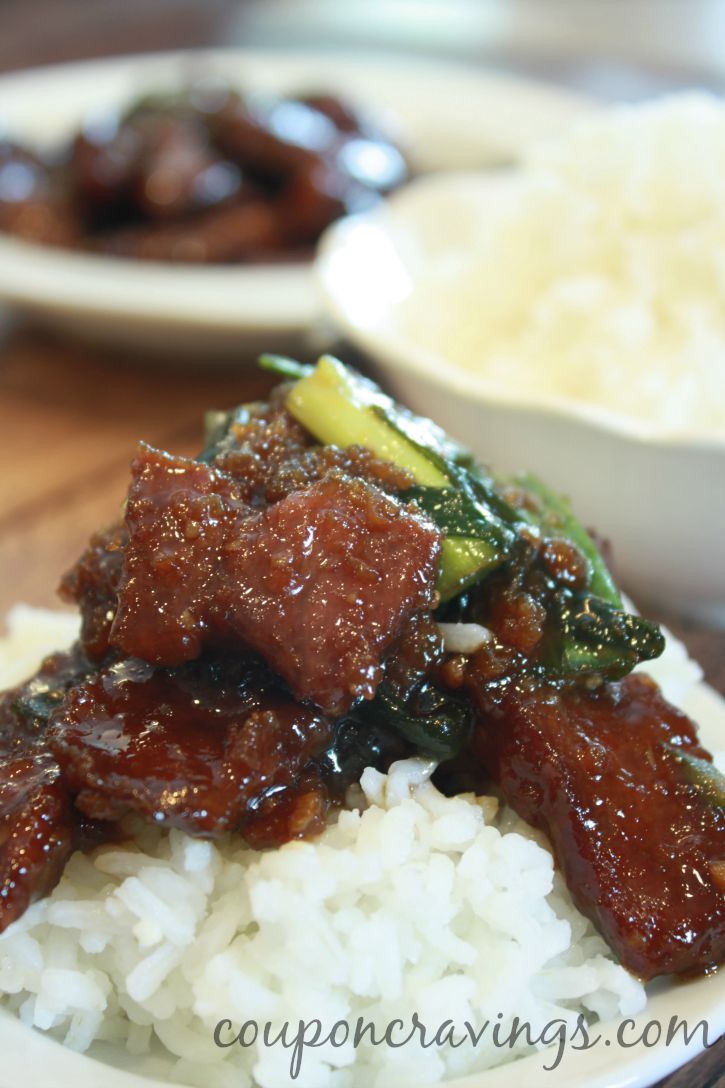
4) Easy, Inexpensive Mongolian Beef
Recipe card
4) Easy, Inexpensive Mongolian Beef
Ingredients
- Ingredients
- 1 pound flank steak or flat iron steak (thinly sliced against the grain)
- 1/4 cup cornstarch
- 2 teaspoons oil (for sauce)
- 1 cup oil (for frying, more if needed)
- 2 cloves garlic (minced)
- 1 teaspoon fresh ginger (minced)
- 1/2 cup low sodium soy sauce
- 1/2 cup water
- 3/4 cup dark brown sugar
- green onions (sliced)
- rice (for serving)
Cooking Instructions
- Instructions
- Heat 2 teaspoons oil in a saucepan over medium-low. Add garlic and ginger and whisk as they sizzle.
- Pour in soy sauce, water, and brown sugar. Bring to a boil and cook about 5 minutes. Remove from heat.
- Slice steak into 1/4-inch strips at a 45-degree angle against the grain.
- Toss steak with cornstarch until lightly coated and let sit about 10 minutes.
- Heat frying oil over medium-high until shimmering. Cook beef 2 to 3 minutes, stirring, until edges are browned and crisp.
- Remove beef to a paper-towel-lined plate. Pour oil out of pan.
- Return beef to pan over medium heat. Add sauce and green onions. Toss until sauce thickens and coats beef.
- Serve immediately over rice.
Notes: Use low-sodium soy sauce because regular soy sauce will make the dish too salty. Let the cornstarch-coated beef rest before frying so the coating sticks. Do not crowd the pan or the beef will steam instead of crisp. Serve immediately because the crispy coating softens once sauced.
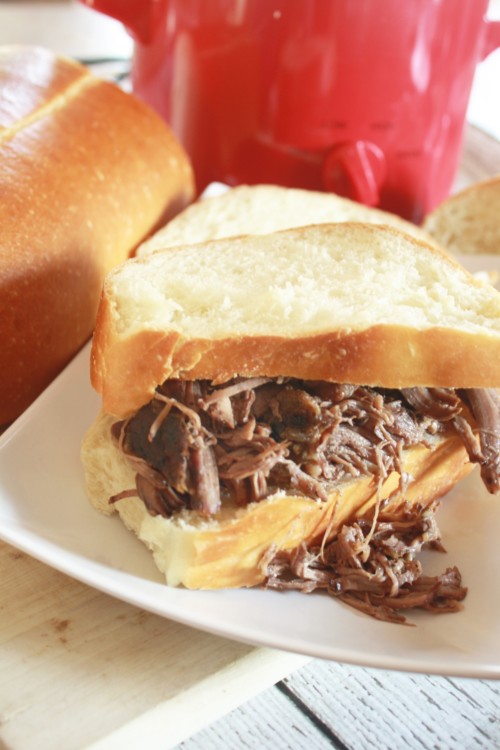
5) Easy Pulled Beef Sandwich Recipe
Recipe card
5) Easy Pulled Beef Sandwich Recipe
Ingredients
- Ingredients
- 1 pound beef chuck roast
- 2 teaspoons canola oil (for searing, optional)
- 1/2 cup Coca-Cola (not diet)
- 1/8 cup Worcestershire sauce
- 1 clove garlic (minced)
- 1 tablespoon white vinegar
- 1 teaspoon beef bouillon granules
- 1/2 teaspoon chili powder
- 1/2 teaspoon ground mustard
- 1/4 teaspoon cayenne pepper
- hoagie rolls or French bread (for serving)
Cooking Instructions
- Instructions
- Stir together Coca-Cola, Worcestershire sauce, garlic, white vinegar, bouillon granules, chili powder, ground mustard, and cayenne.
- Pat chuck roast dry. Sear in canola oil 2 to 3 minutes per side if desired.
- Place roast in the slow cooker and pour marinade over and around the beef.
- Cover and cook on low for 8 to 10 hours, until beef shreds easily with two forks.
- Remove beef and shred, discarding any large fat pieces.
- Return shredded beef to the slow cooker and toss with the cooking liquid.
- Toast rolls with butter if desired, pile on beef, and serve with extra cooking liquid for dipping.
Notes: Use regular Coca-Cola because the sugar helps flavor the braising liquid. Searing is optional but adds browned flavor. Do not lift the slow cooker lid during cooking because it adds time. Use sturdy rolls so they hold the beef and dipping juice.
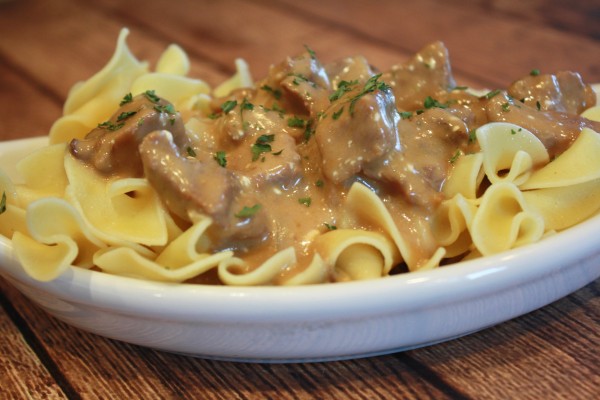
6) Beef Stroganoff in Crock Pot
Recipe card
6) Beef Stroganoff in Crock Pot
Ingredients
- 1 can Campbell’s Golden Mushroom soup
- 1 can Cream of Mushroom soup
- 1/2 packet onion soup mix
- 1/2 cup chopped onion (optional)
- 1 can drained mushrooms (optional)
- beef bouillon cube
- 1 pound stew meat (I always have the butcher cut the pieces smaller, 1/2 inch by 1/2 inch)
- 1/2 cup water
- 1 garlic clove
- 4 oz cream cheese
- dollop sour cream
- 1 1/2 packages egg noodles
Cooking Instructions
- Put first nine ingredients in slow cooker
- Cook on low 6 hours
- Boil and drain egg noodles using directions on the bag
- Just before serving:
- Add cream cheese and stir completely
- Add sour cream
- Stir to combine sauce and serve over egg noodles

7) Philly Cheese Steak Crock Pot Recipe
Recipe card
7) Philly Cheese Steak Crock Pot Recipe
Ingredients
- 2 1/2 to 3 pounds beef round steak (sliced thin)
- 2 green peppers (sliced thin)
- 1 onion (sliced thin)
- 1 envelope dry Italian dressing mix
- 2 cups beef stock
- 2 teaspoons black pepper
- 3 teaspoons garlic salt
- 6 hoagie buns
- 12 slices provolone cheese
Cooking Instructions
- Spray the crock pot with cooking spray.
- Cut beef round steak into thin slices and brown briefly in a hot pan for color.
- Add browned beef, green peppers, onion, beef stock, garlic salt, black pepper, and Italian dressing mix to the crock pot. Stir to combine.
- Cover and cook on Low for 8 hours, until beef is tender.
- Line a baking sheet with foil or parchment.
- Spoon the beef and vegetable mixture onto sliced hoagie buns.
- Top each sandwich with 2 slices of provolone cheese, overlapping as needed.
- Bake at 350°F or broil on low for a few minutes, just until the cheese melts.
- Serve warm.
Notes: Brown the beef briefly before slow cooking if you have time; it adds more flavor than adding raw beef straight to the crock pot. Use a slotted spoon when filling buns so they do not get soggy. The beef mixture can be made a day ahead and reheated before assembling sandwiches. Leftovers keep refrigerated for up to 4 days.
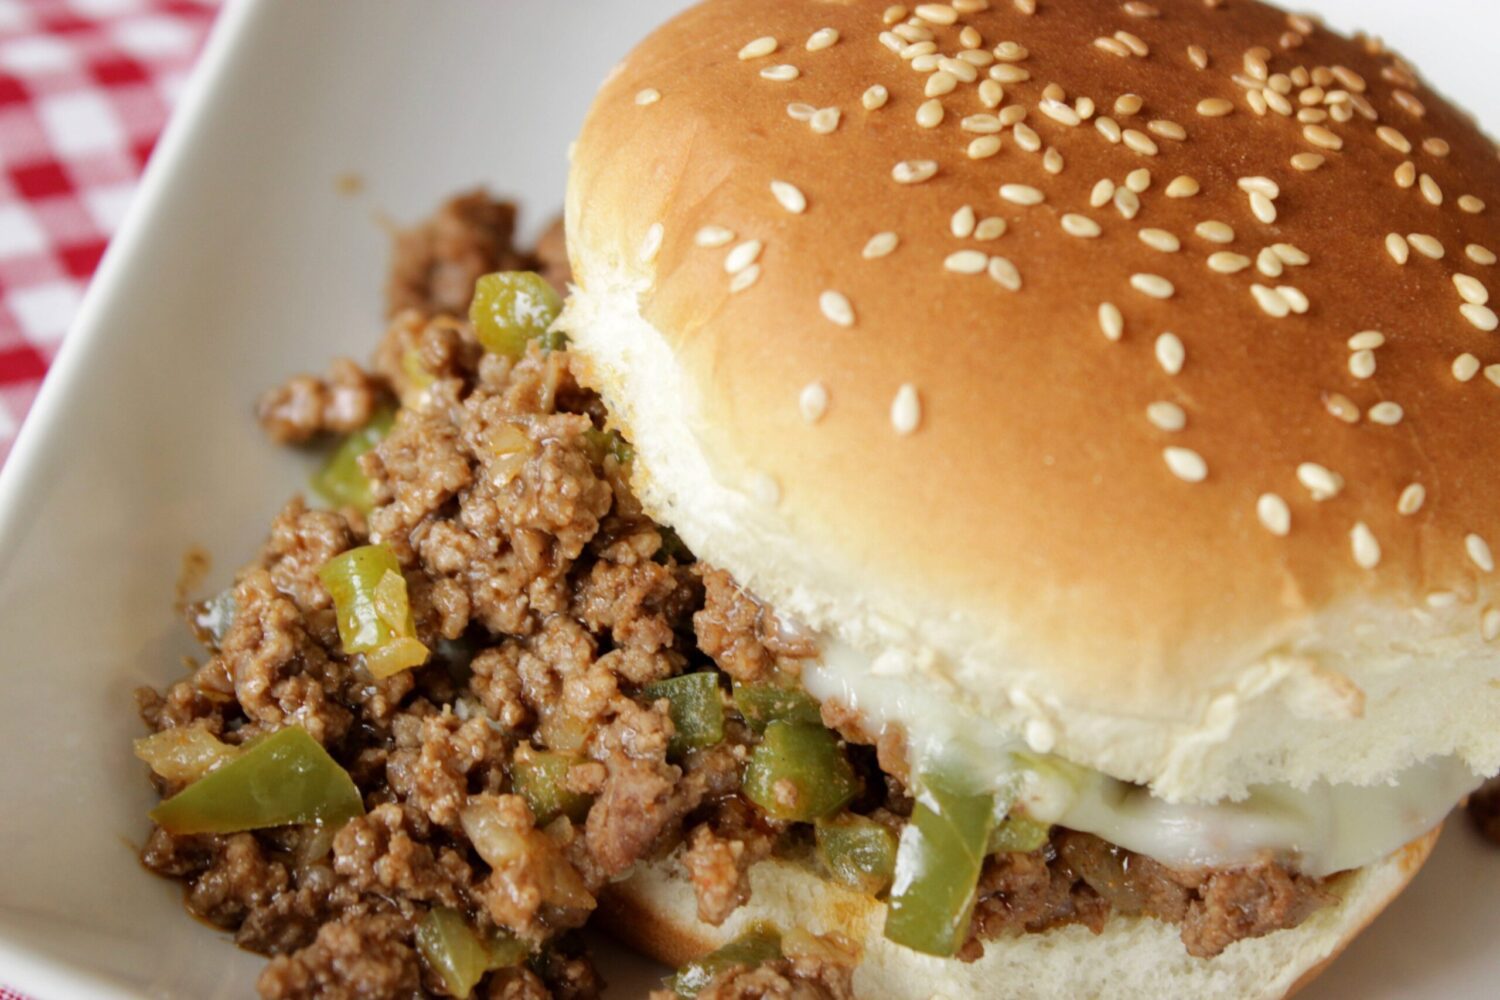
8) Philly Cheesesteak Sloppy Joes
Recipe card
8) Philly Cheesesteak Sloppy Joes
Ingredients
- 1 teaspoon cornstarch
- 1/2 cup low-sodium chicken broth
- 2 teaspoons olive oil
- 1 small yellow onion (diced)
- 1 small green bell pepper (diced)
- 1 1/2 pounds lean ground beef
- 2 tablespoons ketchup
- 2 tablespoons Worcestershire sauce
- 2 teaspoons taco seasoning
- 6 to 8 slices provolone cheese
- 6 to 8 hamburger buns
Cooking Instructions
- Whisk cornstarch and chicken broth together in a small bowl until smooth. Set aside.
- Heat olive oil in a large nonstick skillet over medium-high heat. Add onion and bell pepper and sauté 3 to 4 minutes, until tender.
- Add ground beef and cook 3 to 5 minutes, breaking it up, until browned with no pink remaining. Drain excess fat.
- Stir in ketchup, Worcestershire sauce, and taco seasoning. Cook 1 minute.
- Pour in the cornstarch slurry, stir well, reduce heat to medium-low, and simmer 6 to 7 minutes until thickened.
- Set oven to broil. Open buns and place them cut-side-up on a sheet pan.
- Scoop meat mixture onto bottom buns and top each with provolone.
- Broil 2 to 4 minutes, watching closely, until cheese melts and buns are toasted.
- Add bun tops and serve warm.
Notes: Whisk the cornstarch into cold broth before adding it to the skillet so it does not clump. Cook peppers and onions separately if you need a picky-eater version. Watch the broiler closely because buns can burn quickly. Store meat without buns for up to 4 days, or freeze the meat mixture for up to 3 months.
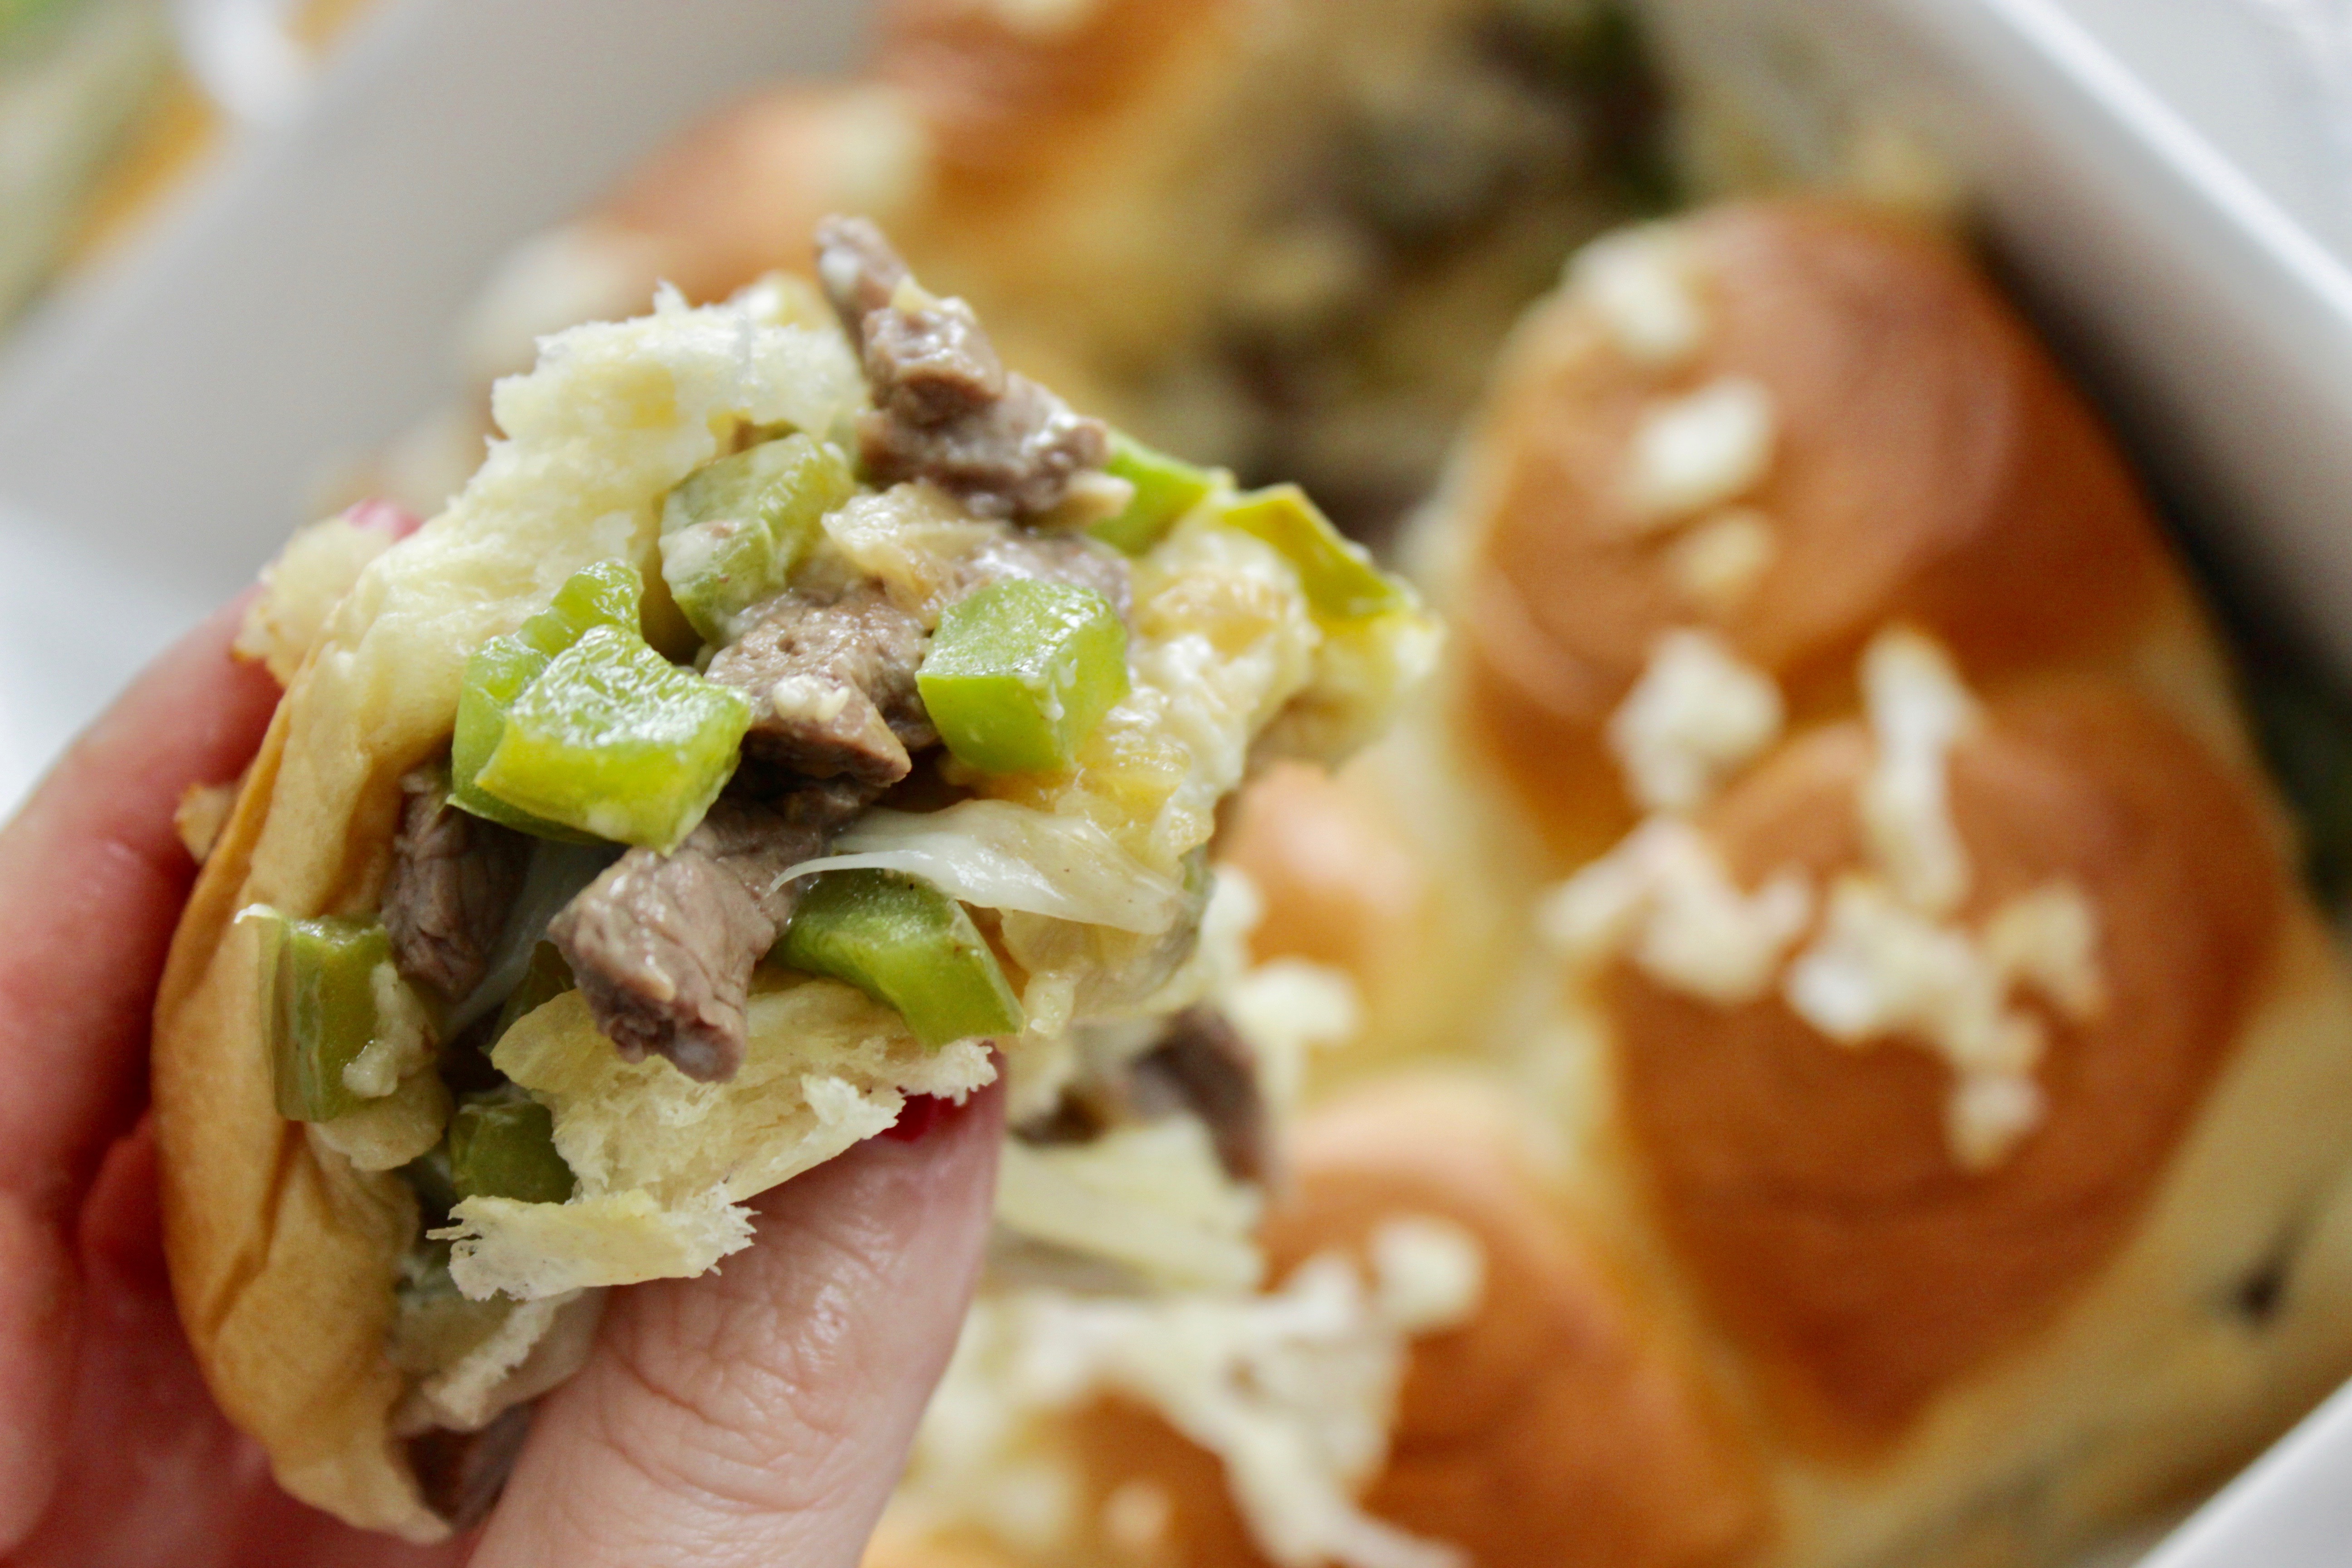
9) Philly Cheese Steak Sliders
Recipe card
9) Philly Cheese Steak Sliders
Ingredients
- 12 King’s Hawaiian Original Dinner Rolls
- 1 pound boneless sirloin strip steak (sliced thin)
- 1 green pepper (diced)
- 1/2 onion (diced and divided)
- 1 tablespoon olive oil
- 4 slices provolone cheese
- 4 tablespoons mayonnaise
- 1 teaspoon garlic powder
- 3 tablespoons butter (melted)
Cooking Instructions
- Preheat oven to 350°F. Dice the green pepper and onion, reserving about 2 tablespoons onion for topping.
- Heat olive oil in a large skillet over medium heat. Add green pepper and most of the onion and cook 5 to 6 minutes, until softened. Remove from pan.
- Add thin-sliced sirloin to the same skillet. Cook until just browned through, then sprinkle with garlic powder and cut any large pieces into slider-sized bites.
- Slice the connected sheet of rolls horizontally and place the bottom half in a 9×13 baking dish.
- Spread mayonnaise lightly over both cut sides of the rolls.
- Layer sautéed vegetables, steak, and provolone over the bottom rolls. Add the top layer of rolls.
- Brush melted butter over the tops and scatter reserved onion over the rolls.
- Cover tightly with foil and bake at 350°F for 10 minutes.
- Remove foil and bake 10 more minutes, until tops are golden and cheese is melted.
- Rest 2 minutes, cut along the seams, and serve warm.
Notes: Freeze steak for 20 to 30 minutes before slicing so you can cut it thinly. Do not skip the light mayo layer; it keeps the rolls from drying out without making them taste like mayonnaise. Use a snug 9×13 dish so the rolls hold together. If the tops brown too quickly, tent loosely with foil.
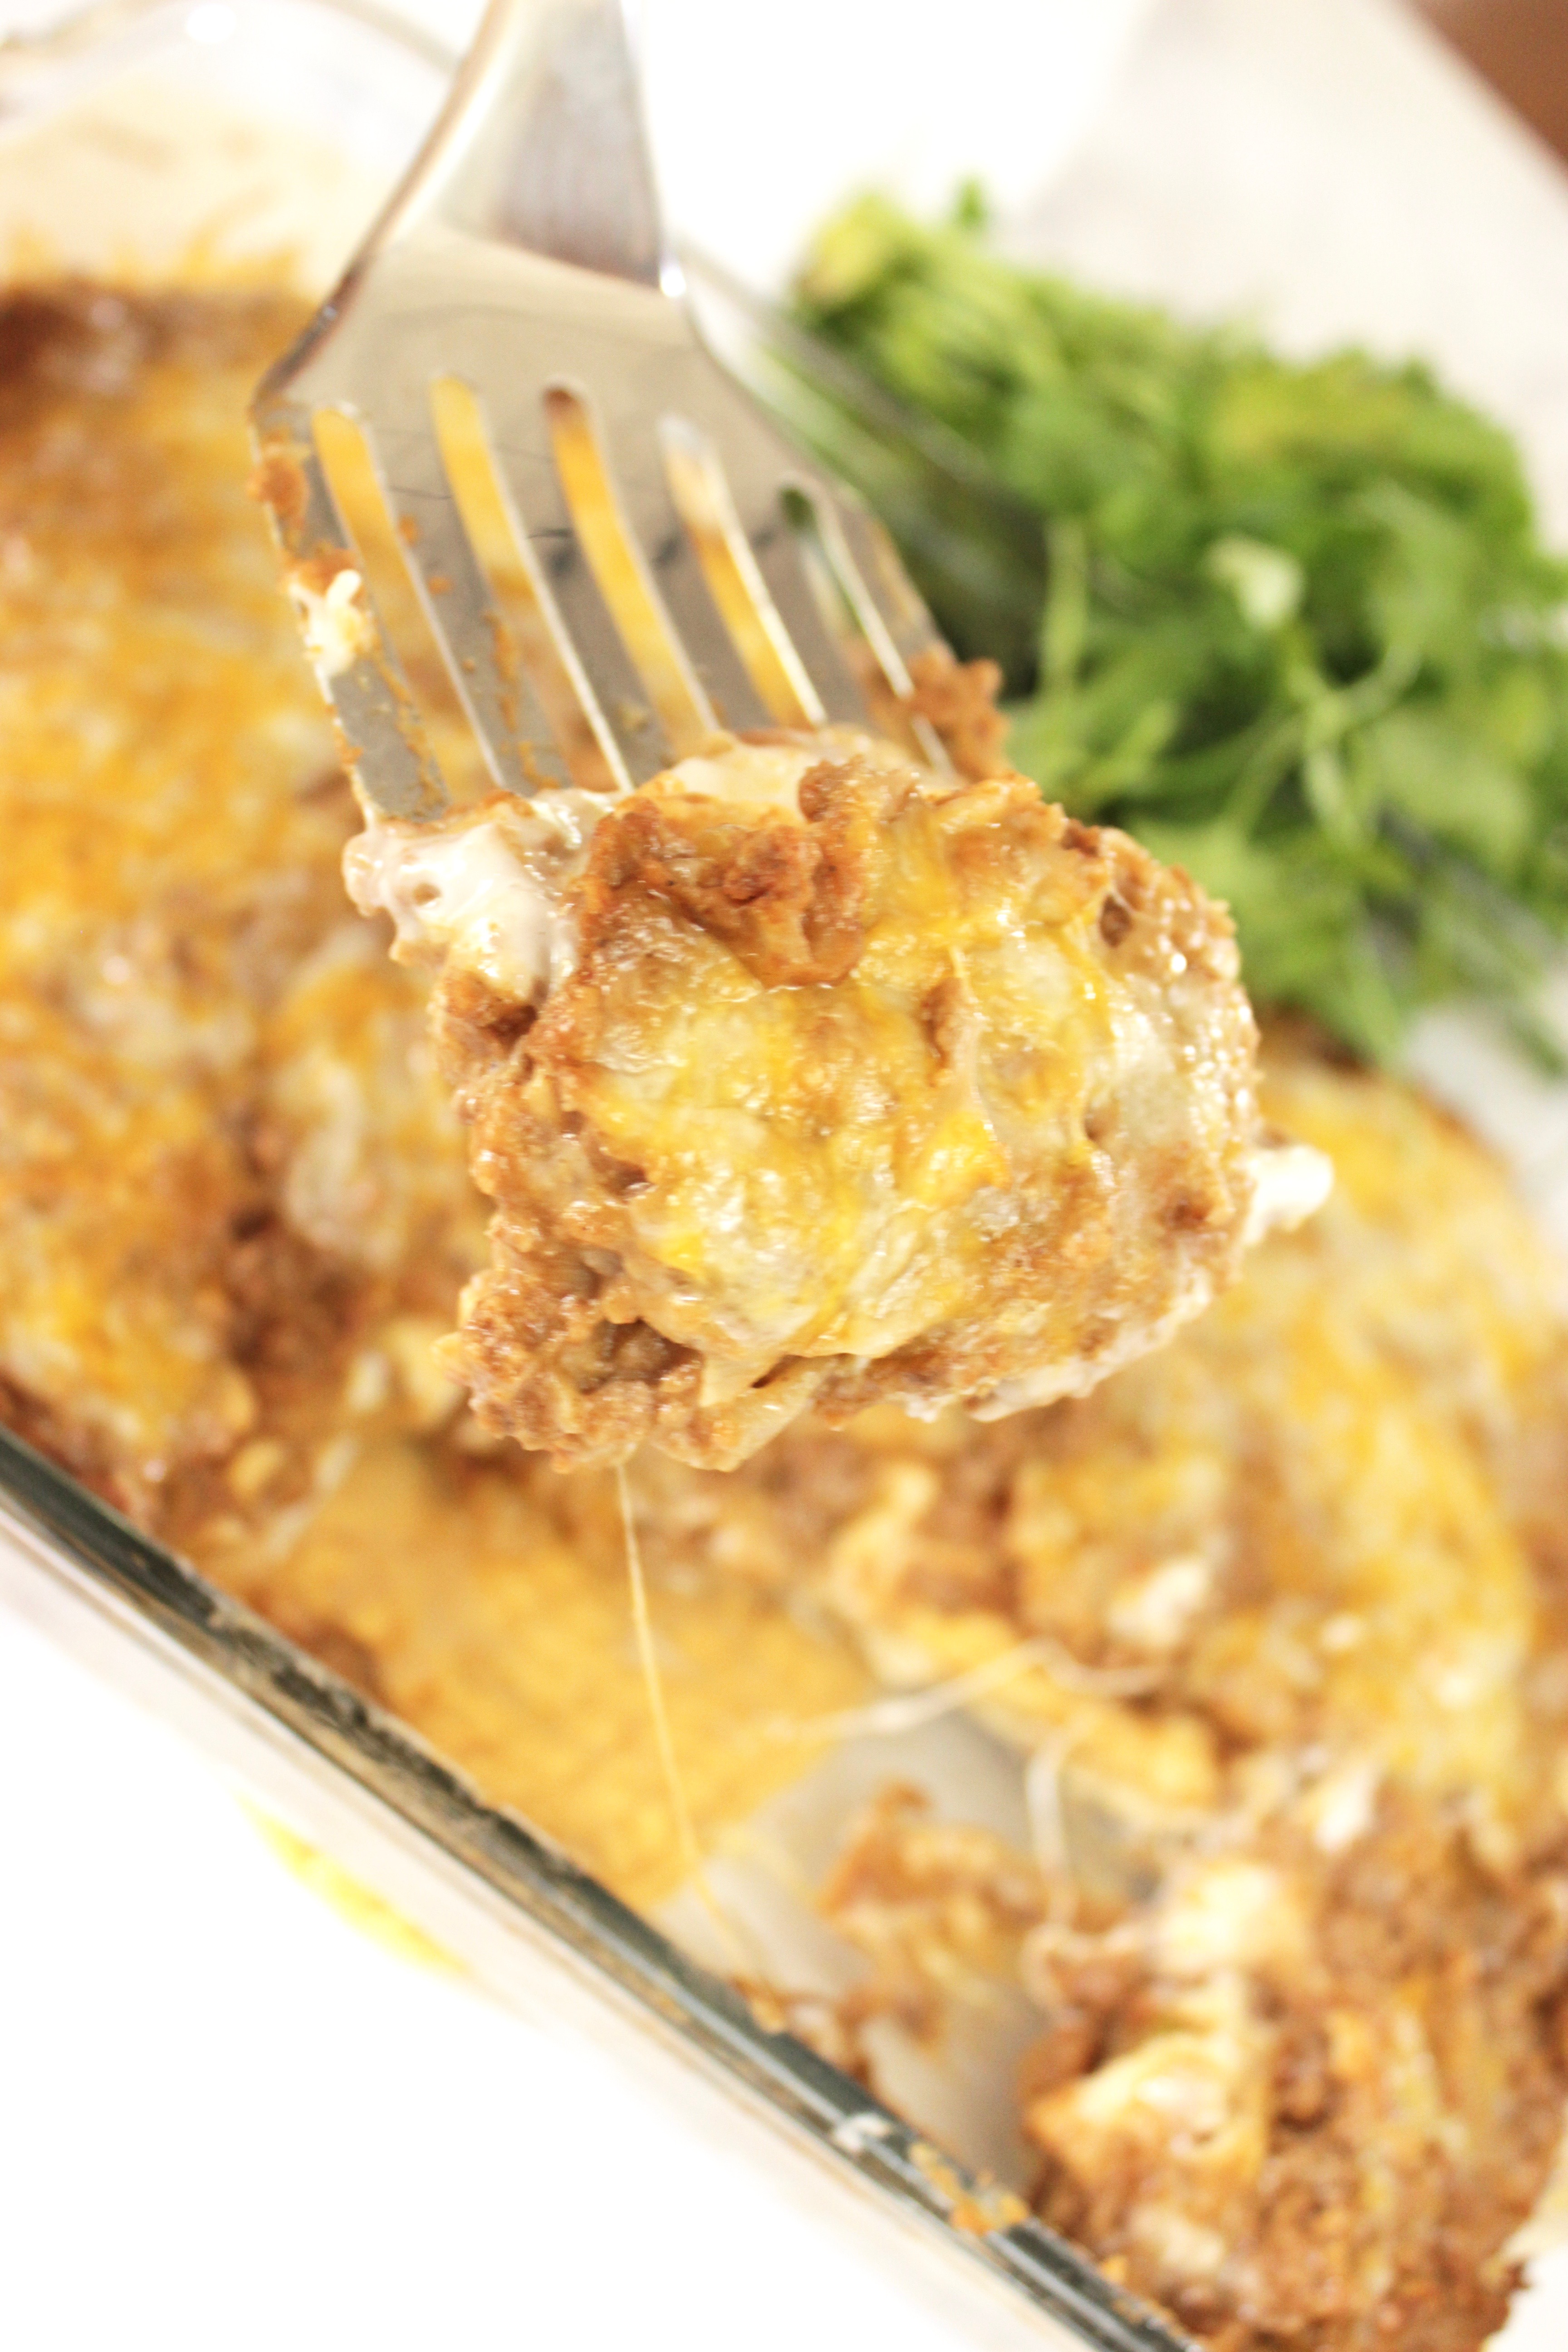
10) Beef Burrito Casserole Dinner Recipe
Recipe card
10) Beef Burrito Casserole Dinner Recipe
Ingredients
- Ingredients
- 1 pound ground beef
- 1 onion (diced)
- 1 packet taco seasoning
- 1 can fat-free refried beans
- 1 can cream of mushroom soup
- 1/2 cup sour cream
- 1 package 6-inch flour tortillas
- 2 cups Mexican blend shredded cheese
Cooking Instructions
- Instructions
- Preheat the oven to 350°F and spray a 9×13 baking dish with cooking spray.
- Brown the ground beef and diced onion in a skillet over medium-high heat until the beef is fully cooked and the onion is soft. Drain well.
- Add the taco seasoning and refried beans to the beef mixture. Stir until fully combined and warmed through.
- In a separate bowl, stir together the sour cream and cream of mushroom soup until smooth.
- Cut two tortillas in half so you can fit them around the edges of the baking dish.
- Spread half the sour cream mixture in the bottom of the pan. Layer with tortillas, half the beef mixture, and 1 cup cheese.
- Repeat with the remaining sour cream mixture, tortillas, beef mixture, and cheese.
- Cover tightly with foil and bake for 20 minutes. Remove foil and broil for 3 to 5 minutes, watching closely, until the cheese is golden and bubbly.
- Let the casserole sit for 5 minutes before cutting.
Notes: Drain the beef well so the casserole does not get greasy. Six-inch tortillas fit the pan better than burrito-size tortillas. Full-fat sour cream holds up better during baking. Let the casserole rest for 5 minutes before slicing so the layers hold together.
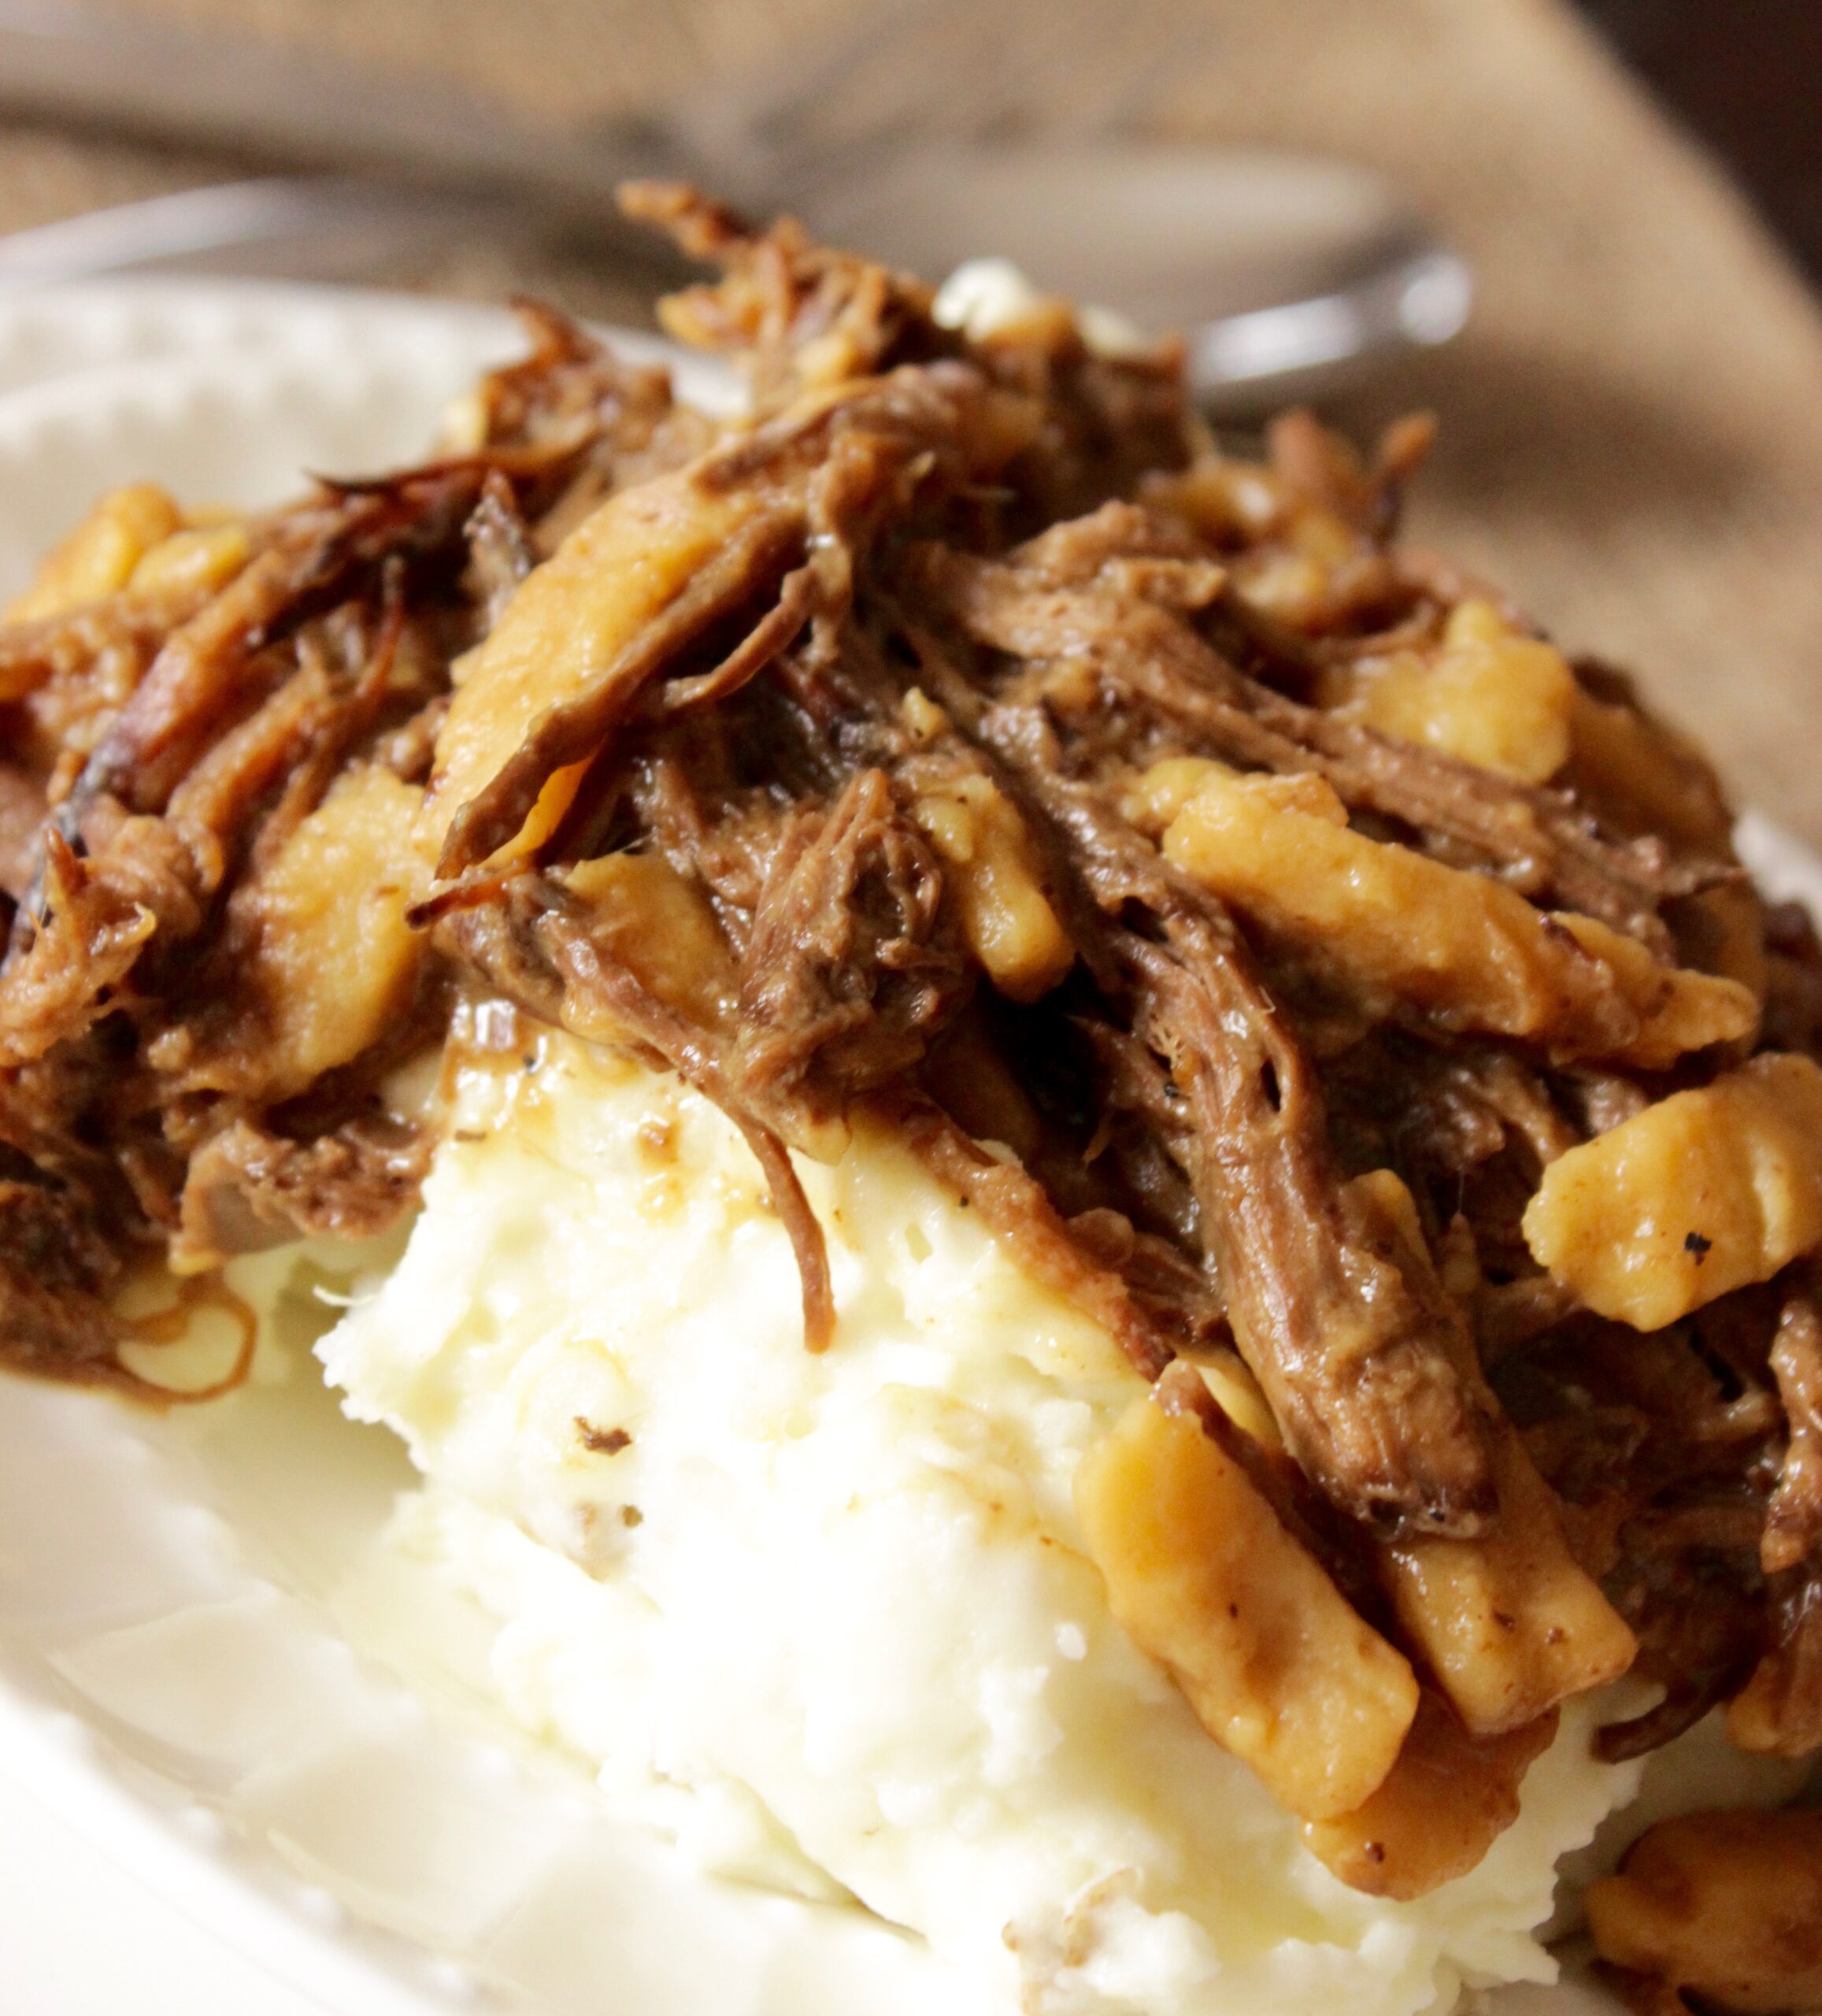
11) Beef and Noodle Casserole Recipe
Recipe card
11) Beef and Noodle Casserole Recipe
Ingredients
- 2 pounds chuck roast
- 2 tablespoons vegetable oil (for searing)
- 1 tablespoon steak seasoning (Montreal Steak Seasoning recommended)
- salt and pepper (to taste)
- 1/2 onion (diced)
- 4 cups water
- 4 heaping teaspoons Better than Bouillon concentrated beef base (start with 3, taste, add 4th if needed)
- 2 teaspoons Worcestershire sauce
- 1 teaspoon minced garlic
- 24 oz bag Reames frozen egg noodles
Cooking Instructions
- Pat the chuck roast dry with paper towels. Season all over with steak seasoning, salt, and pepper.
- Heat vegetable oil in a large skillet over medium-high until shimmering. Sear the roast 2–3 minutes per side until a dark crust forms. Set aside.
- Place the seared roast and diced onion in a 6-quart crockpot. Cover and cook on low 6–8 hours. Do not add any liquid at this stage.
- Remove the roast and shred with two forks, discarding any large pieces of fat. Return shredded beef to the crockpot.
- Whisk together water, Better than Bouillon, Worcestershire sauce, and minced garlic until the bouillon is dissolved. Pour over the shredded beef and stir to combine. Set crockpot to low and simmer 30 minutes.
- Bring a large pot of salted water to a boil. Cook Reames frozen egg noodles per package directions, about 20–40 minutes. Drain.
- Stir noodles into the crockpot. Taste the broth and adjust salt if needed. Serve hot in bowls or over mashed potatoes.
Notes: Start with 3 teaspoons of Better than Bouillon, taste the broth, and add the 4th only if you want more depth. The broth can get salty — the bouillon, steak seasoning, and Worcestershire all add salt. Cook the noodles separately and stir them in just before serving. Freeze the beef and broth without noodles for up to 3 months — cook fresh noodles when you reheat.
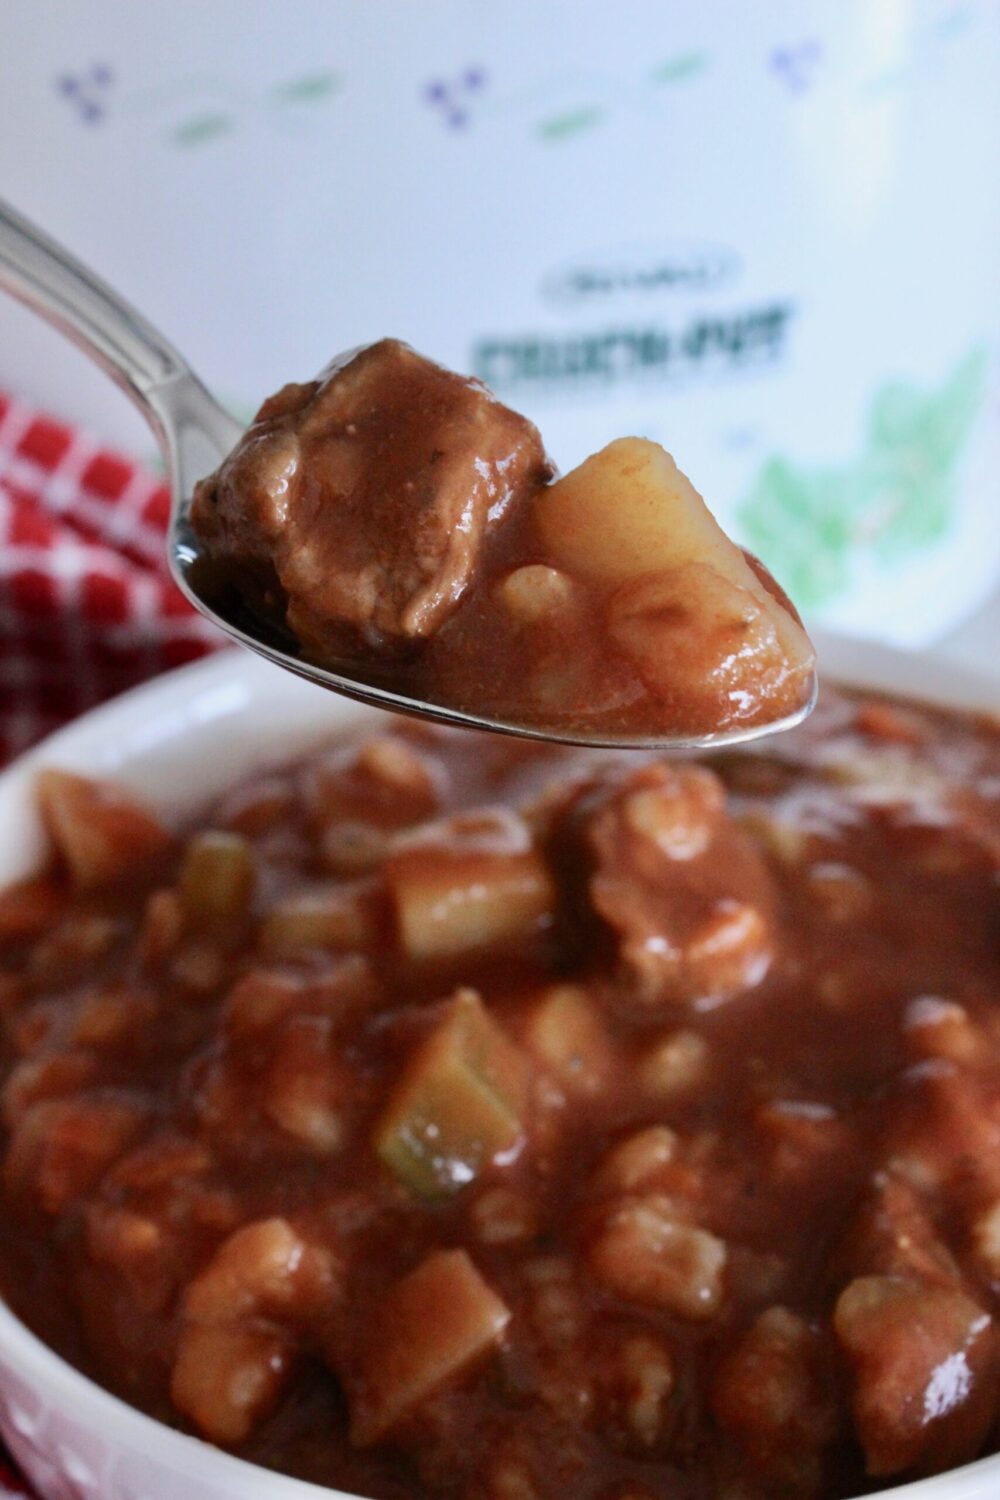
12) Beef Stew Recipe
Recipe card
12) Beef Stew Recipe
Ingredients
- Ingredients
- 2 pounds stew meat
- 1/2 tablespoon vegetable oil
- 1 tablespoon salt
- 1/2 teaspoon dried basil
- 1/4 teaspoon pepper
- 1/4 teaspoon garlic powder
- 2/3 cup diced carrots
- 2 stalks celery (diced)
- 2 Russet potatoes (peeled and diced)
- 46 ounces tomato juice
- 2 cups chicken broth
- 1 bay leaf
- 1/2 tablespoon sugar
- 1/2 cup quick barley
Cooking Instructions
- Instructions
- Toss the stew meat with salt, basil, pepper, and garlic powder until evenly coated.
- Heat vegetable oil in a skillet over medium-high heat. Brown the stew meat in a single layer, working in batches if needed.
- Transfer the browned beef to the slow cooker. Add the tomato juice, chicken broth, carrots, celery, potatoes, bay leaf, and sugar. Stir to combine.
- Cover and cook on low for 7 hours without lifting the lid.
- Stir in the quick barley, replace the lid, and cook on low for 1 more hour.
- Remove the bay leaf before serving. Ladle into bowls and serve with rolls or crackers.
Notes: Cut large pieces of stew meat so they cook evenly. Brown the beef in batches if needed so it sears instead of steams. Add quick barley only during the final hour so it does not overcook. Remove the bay leaf before serving.
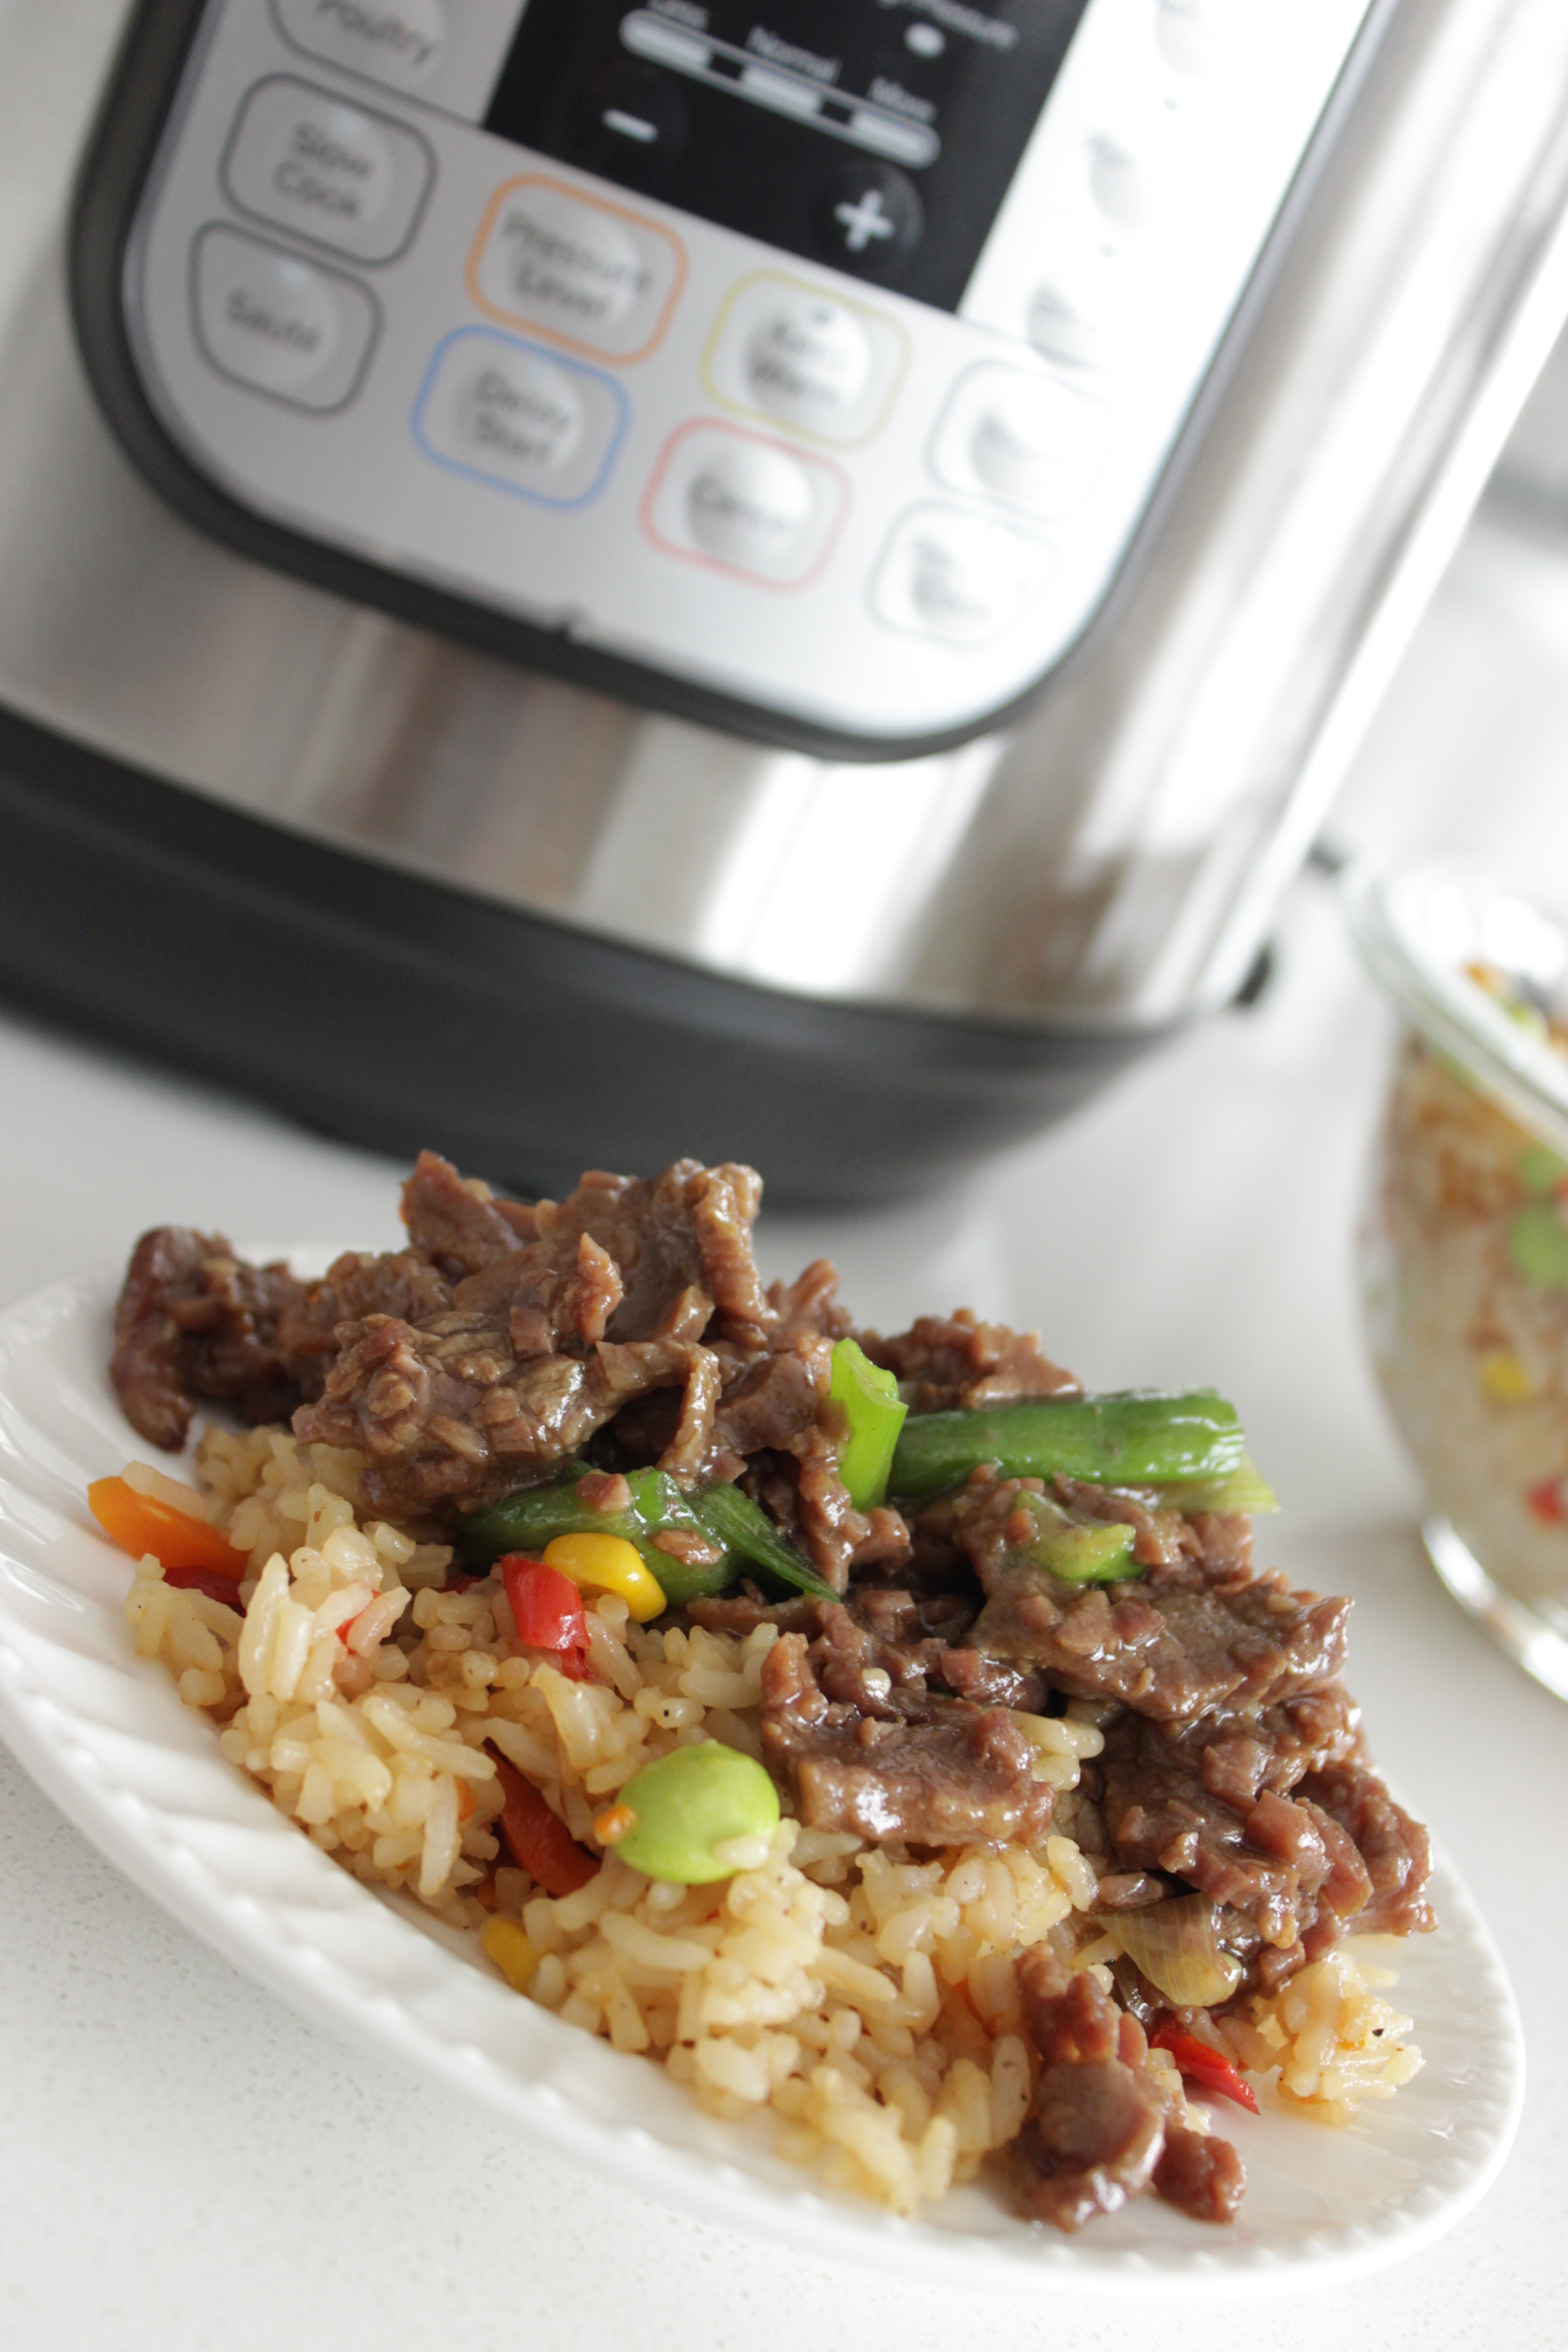
13) Instant Pot Mongolian Beef with Fried Rice
Recipe card
13) Instant Pot Mongolian Beef with Fried Rice
Ingredients
- 2 pounds flank steak (sliced thinly against the grain)
- 2 tablespoons vegetable oil
- 4 cloves garlic (minced)
- 1/4 cup soy sauce
- 3/4 cup beef broth
- 1/3 cup dark brown sugar
- 1/2 teaspoon fresh minced ginger
- 2 tablespoons cornstarch
- 3 tablespoons cold water
- 3 green onions (sliced into 1-inch pieces)
- Fried rice or steamed rice (for serving)
Cooking Instructions
- Add vegetable oil to the Instant Pot and select Sauté. Let the oil heat until shimmering.
- Brown beef strips in batches for 1 to 2 minutes per side. Do not crowd the pot. Transfer browned beef to a plate.
- Add minced garlic to the pot and sauté about 1 minute, stirring constantly.
- Add soy sauce, beef broth, brown sugar, and ginger. Scrape up browned bits from the bottom of the pot.
- Return beef and any juices to the pot. Lock the lid, set valve to sealing, and cook on high pressure for 12 minutes.
- Quick release the pressure carefully, then switch back to Sauté.
- Whisk cornstarch with cold water to make a slurry. Stir it into the pot and simmer 1 to 2 minutes, stirring, until the sauce is glossy and thickened.
- Stir in green onions and serve immediately over fried rice or steamed rice.
Notes: Slice flank steak against the grain so it stays tender. Brown the beef in batches instead of crowding the pot, or it will steam instead of sear. The sauce is supposed to be sweet-savory; reduce brown sugar to 1/4 cup if you prefer it less sweet. The cook time stays the same if doubling, but use an 8-quart Instant Pot if possible.
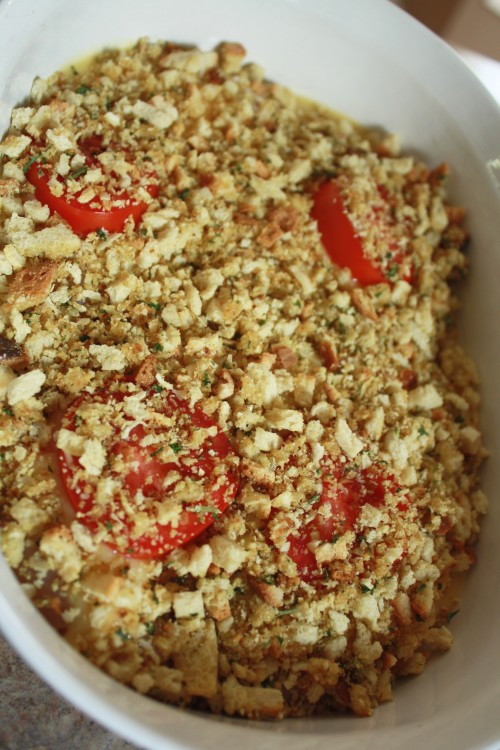
14) Easy Chicken Casserole with Stuffing
Recipe card
14) Easy Chicken Casserole with Stuffing
Ingredients
- Ingredients
- 4 skinless chicken breast halves
- 4 slices American or Swiss cheese
- 1 can cream of chicken soup
- 1/2 cup milk
- 4 thin slices tomato
- 2 tablespoons butter (melted)
- 1 cup Stovetop stuffing (crushed)
- hot cooked rice (for serving)
Cooking Instructions
- Instructions
- Preheat oven to 400°F and lightly grease a 3-quart oblong baking dish.
- Place chicken breast halves in a single layer in the dish.
- Lay one slice of cheese on top of each chicken breast.
- Stir cream of chicken soup and milk until smooth, then spread over the cheese layer.
- Place tomato slices on top of the soup layer.
- Crush stuffing and mix with melted butter. Sprinkle evenly over the tomatoes.
- Bake uncovered for 25 minutes, until chicken reaches 165°F and stuffing is golden. Serve with hot cooked rice.
Notes: Do not cover the casserole or the stuffing topping will steam instead of crisp. Tuck thin ends of chicken under if pieces are uneven. Crush the stuffing so it spreads evenly. Use a thermometer to confirm the thickest chicken piece reaches 165°F.
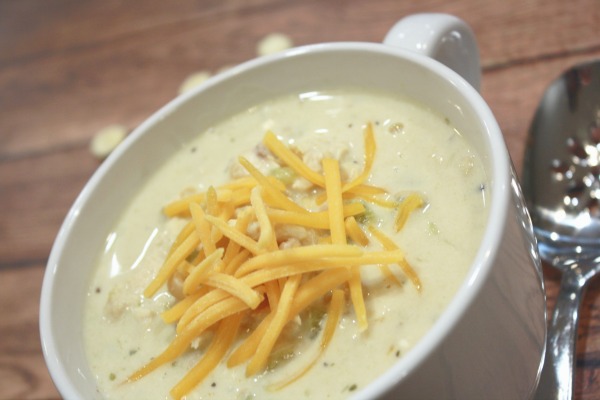
15) Crock Pot Chicken Chili Recipe
Recipe card
15) Crock Pot Chicken Chili Recipe
Ingredients
- Ingredients
- 1.5 pounds boneless chicken (cubed)
- 1 medium yellow onion (chopped)
- 1.5 teaspoons vegetable oil
- 1.5 teaspoons garlic powder
- 2 15-ounce cans great northern beans (drained and rinsed)
- 2 4-ounce cans chopped green chiles (undrained)
- 14 ounces chicken broth
- 1 teaspoon salt
- 1/2 teaspoon pepper
- 1 teaspoon ground cumin
- 1 teaspoon dried oregano
- 1/4 teaspoon cayenne pepper
- 1 cup sour cream
- 1/2 cup heavy whipping cream
Cooking Instructions
- Instructions
- Heat oil in a large pot over medium-high heat. Add cubed chicken and chopped onion and cook about 15 minutes, until chicken is white with no pink and onion is soft.
- Stir in garlic powder near the end of the saute so it does not scorch.
- Add drained beans, undrained green chiles, chicken broth, salt, pepper, cumin, oregano, and cayenne. Stir to combine.
- Bring to a boil, then reduce heat to medium-low and simmer uncovered for 30 minutes, stirring occasionally.
- Remove from heat. Stir in sour cream and heavy whipping cream until smooth.
- Taste and adjust seasoning. Serve hot with cheddar, tortilla chips, jalapenos, cilantro, lime, or avocado.
Notes: Add the sour cream and heavy cream off the heat so the dairy stays smooth. Do not drain the green chiles because their liquid seasons the chili. Simmer for the full 30 minutes so the beans thicken the broth. Chicken thighs can be used instead of breasts for a juicier result.
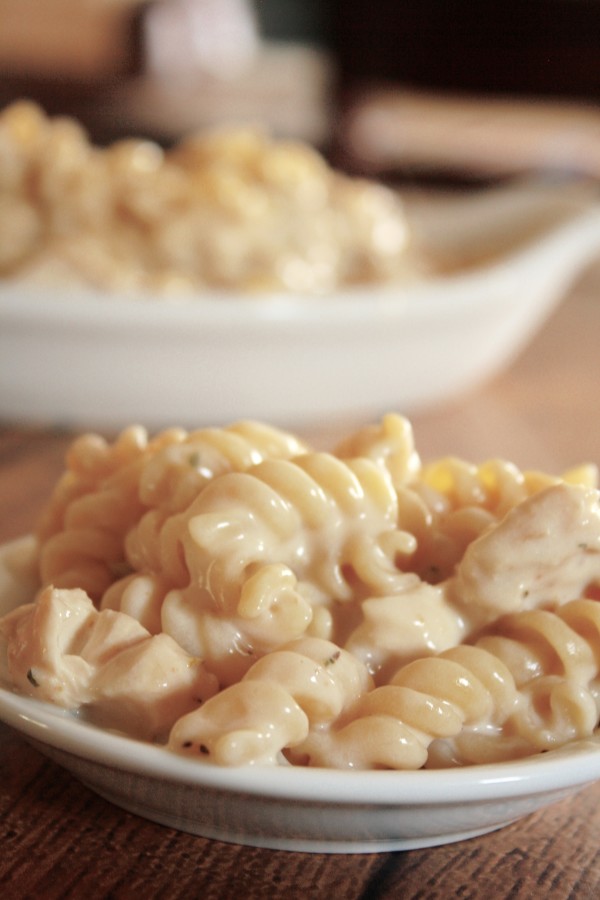
16) Easy Italian Pasta & Chicken Dish Recipe
Recipe card
16) Easy Italian Pasta & Chicken Dish Recipe
Ingredients
- Ingredients
- 2 chicken breasts (cooked and diced)
- Montreal Chicken seasoning (to taste)
- 16 ounces rotini pasta
- 16 ounces Alfredo sauce
- 1 cup milk
- 1/2 teaspoon Italian seasoning
- salt and pepper (to taste)
- 1 cup shredded mozzarella cheese
Cooking Instructions
- Instructions
- Cook rotini in salted water according to package directions until al dente. Drain, rinse with cold water, and set aside.
- Season chicken breasts with Montreal Chicken seasoning and cook through by your preferred method. Rest 5 minutes, then dice into 3/4-inch cubes.
- In a large skillet over medium heat, whisk together Alfredo sauce and milk until combined.
- Add Italian seasoning, salt, and pepper. Simmer gently for about 5 minutes, stirring occasionally.
- Add cooked rotini and diced chicken to the sauce. Toss to coat.
- Cook on low for about 10 minutes, stirring occasionally, so the pasta absorbs some sauce.
- Add shredded mozzarella and stir until melted through. Serve immediately.
Notes: Rinse the pasta after cooking so it does not clump before going into the cream sauce. Use Montreal Chicken seasoning generously so the chicken tastes seasoned. Keep the sauce at a gentle simmer and low heat after adding pasta. Do not use fresh mozzarella because it can make the sauce watery.
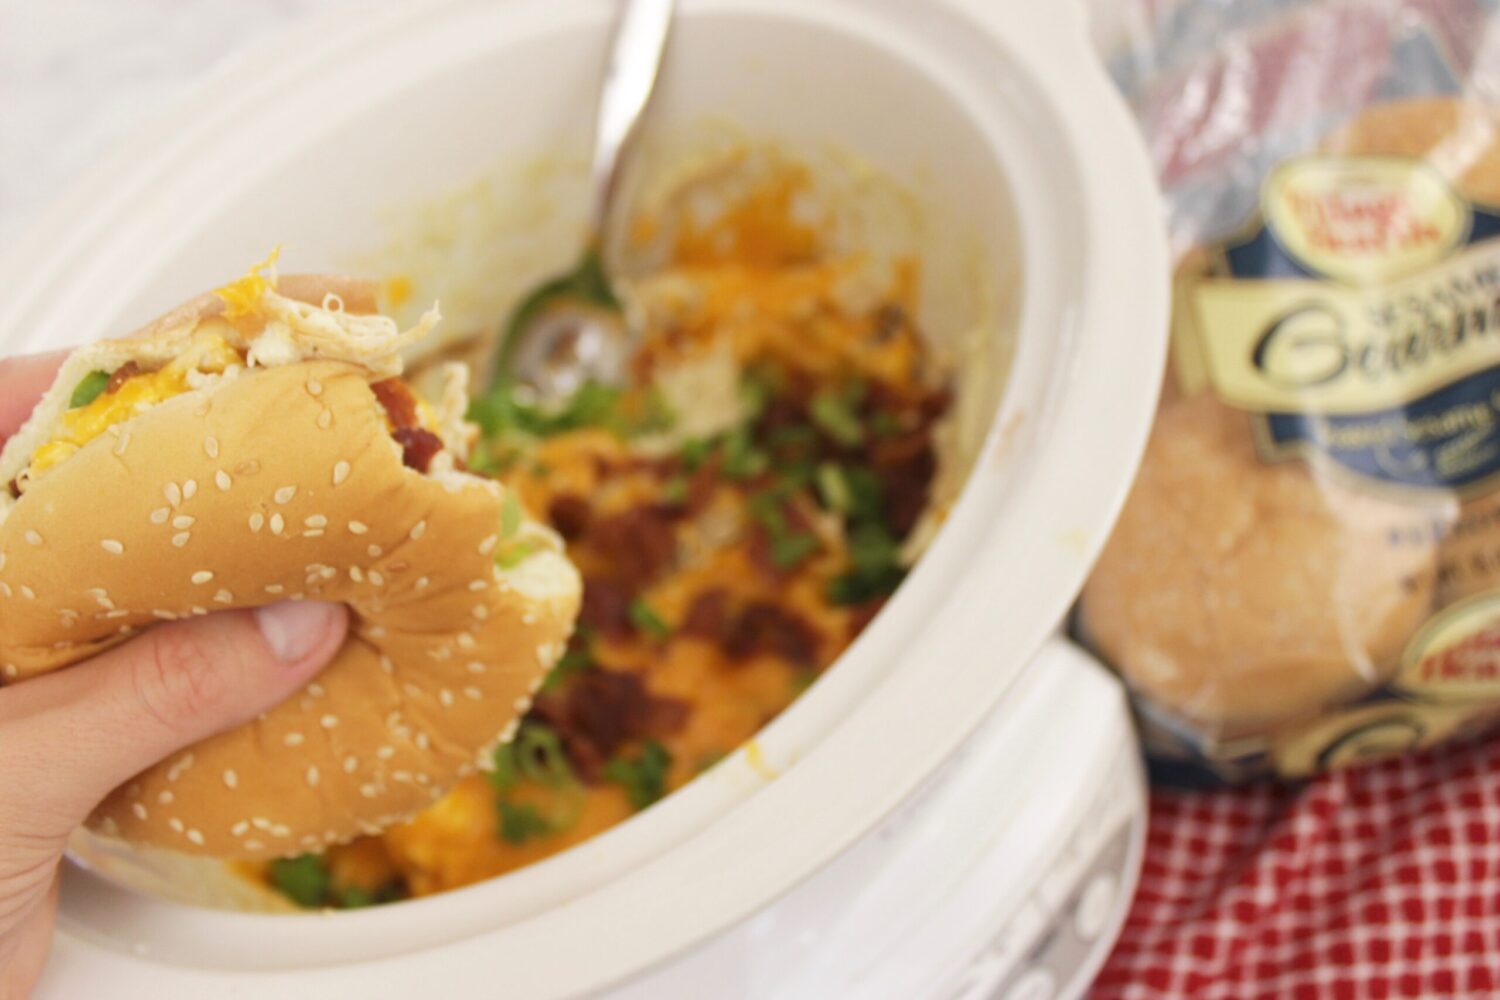
17) Crockpot Chicken Sandwiches
Recipe card
17) Crockpot Chicken Sandwiches
Ingredients
- Ingredients
- 4 boneless skinless chicken breasts (about 2 pounds)
- 8 ounces cream cheese (softened)
- 1 packet ranch dressing mix
- 8 strips bacon (cooked and crumbled)
- 2 cups shredded cheddar cheese
- green onions (for serving)
- hamburger buns (toasted if desired)
Cooking Instructions
- Instructions
- Place chicken breasts in a single layer in a 4-quart or larger slow cooker. Set softened cream cheese on top.
- Sprinkle the ranch packet over everything. Cover and cook on low for 6 hours.
- While chicken cooks, cook bacon until crisp, then cool and crumble.
- Shred the chicken into the cream cheese sauce with two forks or a hand mixer on low.
- Add shredded cheddar and crumbled bacon. Cover and let sit on warm for 15 minutes, until cheese melts.
- Stir to combine, scatter green onions over the top, and serve hot on buns.
Notes: Soften the cream cheese so it melts evenly. Cook the bacon before adding it because raw bacon does not render well in the slow cooker. Toast the buns so they hold up to the creamy filling. A hand mixer on low can shred the chicken quickly right in the crockpot.
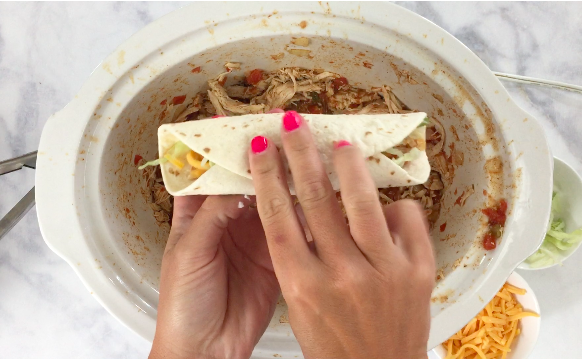
18) Crockpot Shredded Chicken Tacos
Recipe card
18) Crockpot Shredded Chicken Tacos
Ingredients
- 1 1/2 to 2 pounds boneless skinless chicken thighs or breasts
- 1 packet taco seasoning (about 1 ounce, or 2 tablespoons homemade taco seasoning)
- 1 jar salsa (16 ounces, medium or mild, or 1 can Rotel plus 1/2 cup chicken broth)
- Juice of 1/2 lime (optional but recommended)
- Fresh cilantro (optional)
- Flour or corn tortillas (for serving)
- Toppings of choice (such as shredded cheese, sour cream, lettuce, pico de gallo, avocado, jalapeños, and hot sauce)
Cooking Instructions
- Place chicken in the bottom of the slow cooker in as close to a single layer as possible.
- Sprinkle taco seasoning evenly over the chicken.
- Pour salsa, or Rotel plus broth, over the chicken until mostly coated.
- Cook on Low for 4 to 6 hours, until chicken pulls apart easily with a fork. Check breasts closer to 4 hours and thighs closer to 5 to 6 hours.
- Shred the chicken directly in the slow cooker with two forks.
- Replace the lid and let the shredded chicken rest in the sauce for 10 minutes so it absorbs the liquid.
- Squeeze lime juice over the chicken, stir, taste, and adjust seasoning if needed. Stir in cilantro if using.
- Serve in warm tortillas with your favorite toppings.
Notes: Store leftover shredded chicken with the juices so it stays moist. Reheat gently with a splash of chicken broth if needed. The chicken freezes well with the sauce for up to 3 months. For meal prep, add the chicken, seasoning, and salsa to the slow cooker insert the night before, refrigerate, then cook the next day.
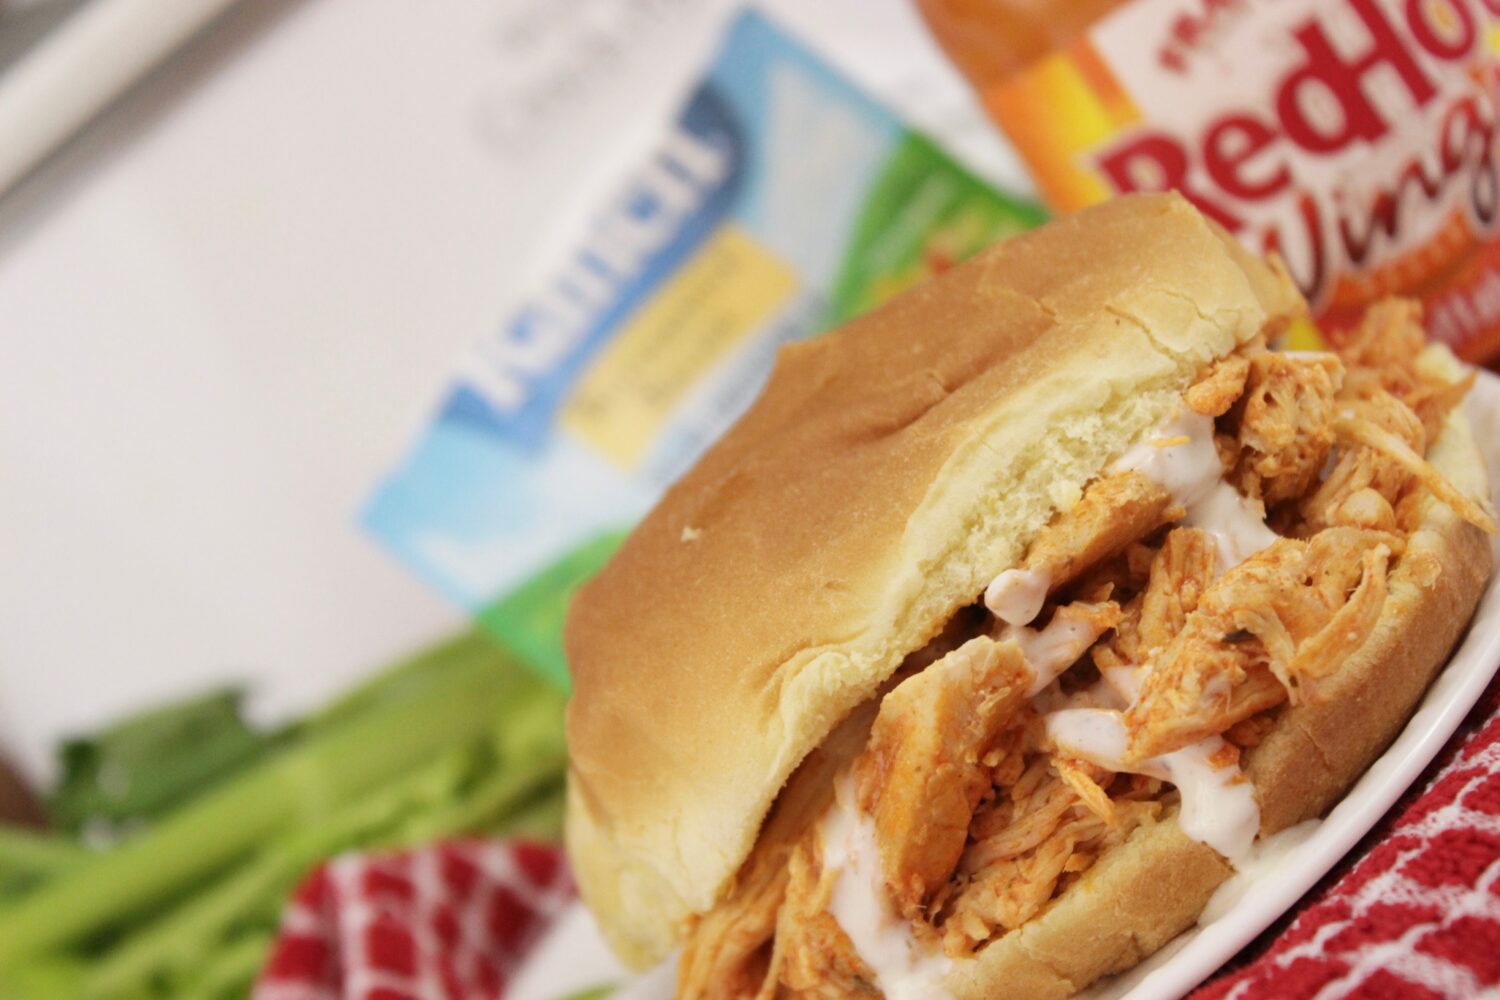
19) Buffalo Chicken Crock Pot Sandwiches
Recipe card
19) Buffalo Chicken Crock Pot Sandwiches
Ingredients
- Ingredients
- 4 boneless skinless chicken breasts
- 12 ounces Frank’s Buffalo Sauce
- 8 ounces cream cheese (full-fat preferred)
- 1 packet Hidden Valley Ranch Seasoning
- 6 hamburger buns (toasted if desired)
- blue cheese, ranch, celery, or red onion (optional toppings)
Cooking Instructions
- Instructions
- Lay the chicken breasts flat in the bottom of the slow cooker.
- Pour the full bottle of buffalo sauce over the chicken. Place the block of cream cheese on top and sprinkle the ranch seasoning over everything.
- Cover and cook on low for 6 to 7 hours or on high for 3 to 4 hours, until the chicken is tender.
- Shred the chicken directly in the slow cooker with two forks. Stir until the cream cheese and sauce become a uniform creamy orange coating.
- Taste and add a pinch of salt or a splash more buffalo sauce if desired.
- Toast the buns, pile the shredded buffalo chicken on top, and serve immediately with optional toppings.
Notes: Use Frank’s buffalo sauce for the classic buffalo wing flavor. Cook on low for the juiciest chicken if you have time. Do not lift the lid repeatedly during cooking because it lets moisture and heat escape. Toast the buns so they hold up better under the saucy filling.
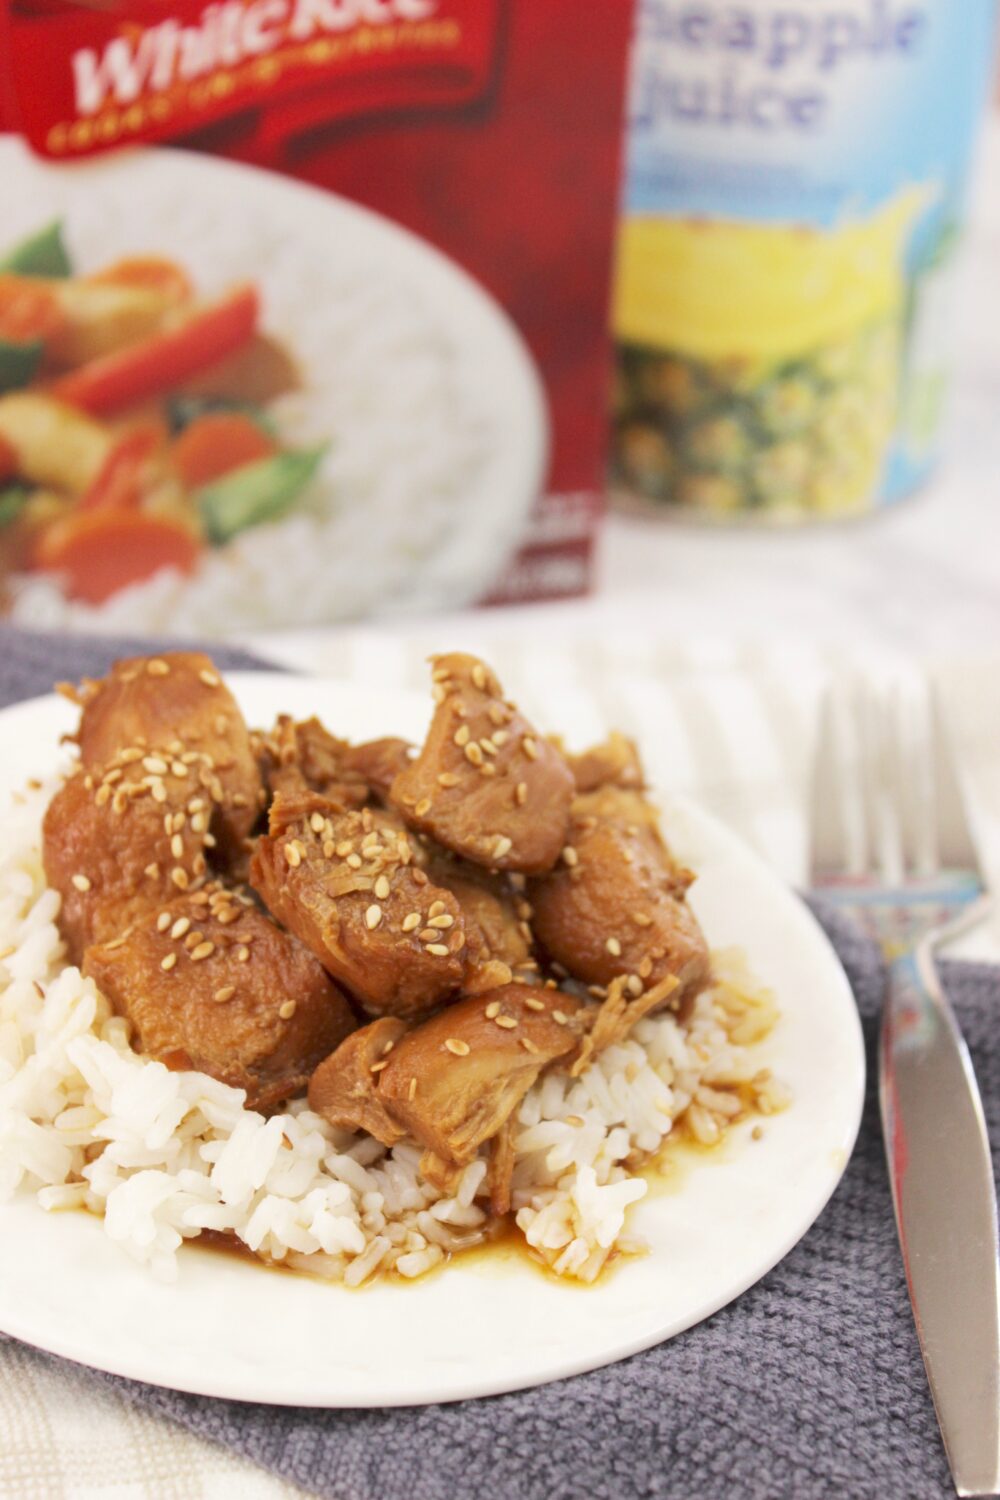
20) Crockpot Hawaiian Chicken Recipe
Recipe card
20) Crockpot Hawaiian Chicken Recipe
Ingredients
- Ingredients
- 20 ounces chicken tenderloins (cut into 1- to 2-inch pieces)
- 1/2 cup pineapple juice
- 1/4 cup brown sugar
- 1 ounce soy sauce (about 2 tablespoons)
- white rice (for serving)
- sesame seeds (optional)
Cooking Instructions
- Instructions
- Cut chicken tenderloins into 1- to 2-inch pieces and place in the slow cooker.
- In a measuring cup or small bowl, stir together pineapple juice, brown sugar, and soy sauce until mostly dissolved.
- Pour sauce over chicken. Cover and cook on low for 6 hours.
- Serve chicken over cooked white rice and spoon extra sauce from the slow cooker over the top.
- Sprinkle with sesame seeds if desired.
Notes: Chicken tenderloins cook evenly and stay moist, but chicken breasts or thighs can also work if cut into similar pieces. Do not skip the pineapple juice because it adds both flavor and tenderness. Spoon the sauce from the bottom of the slow cooker over the rice. Reduce brown sugar to 2 tablespoons if you prefer it less sweet.
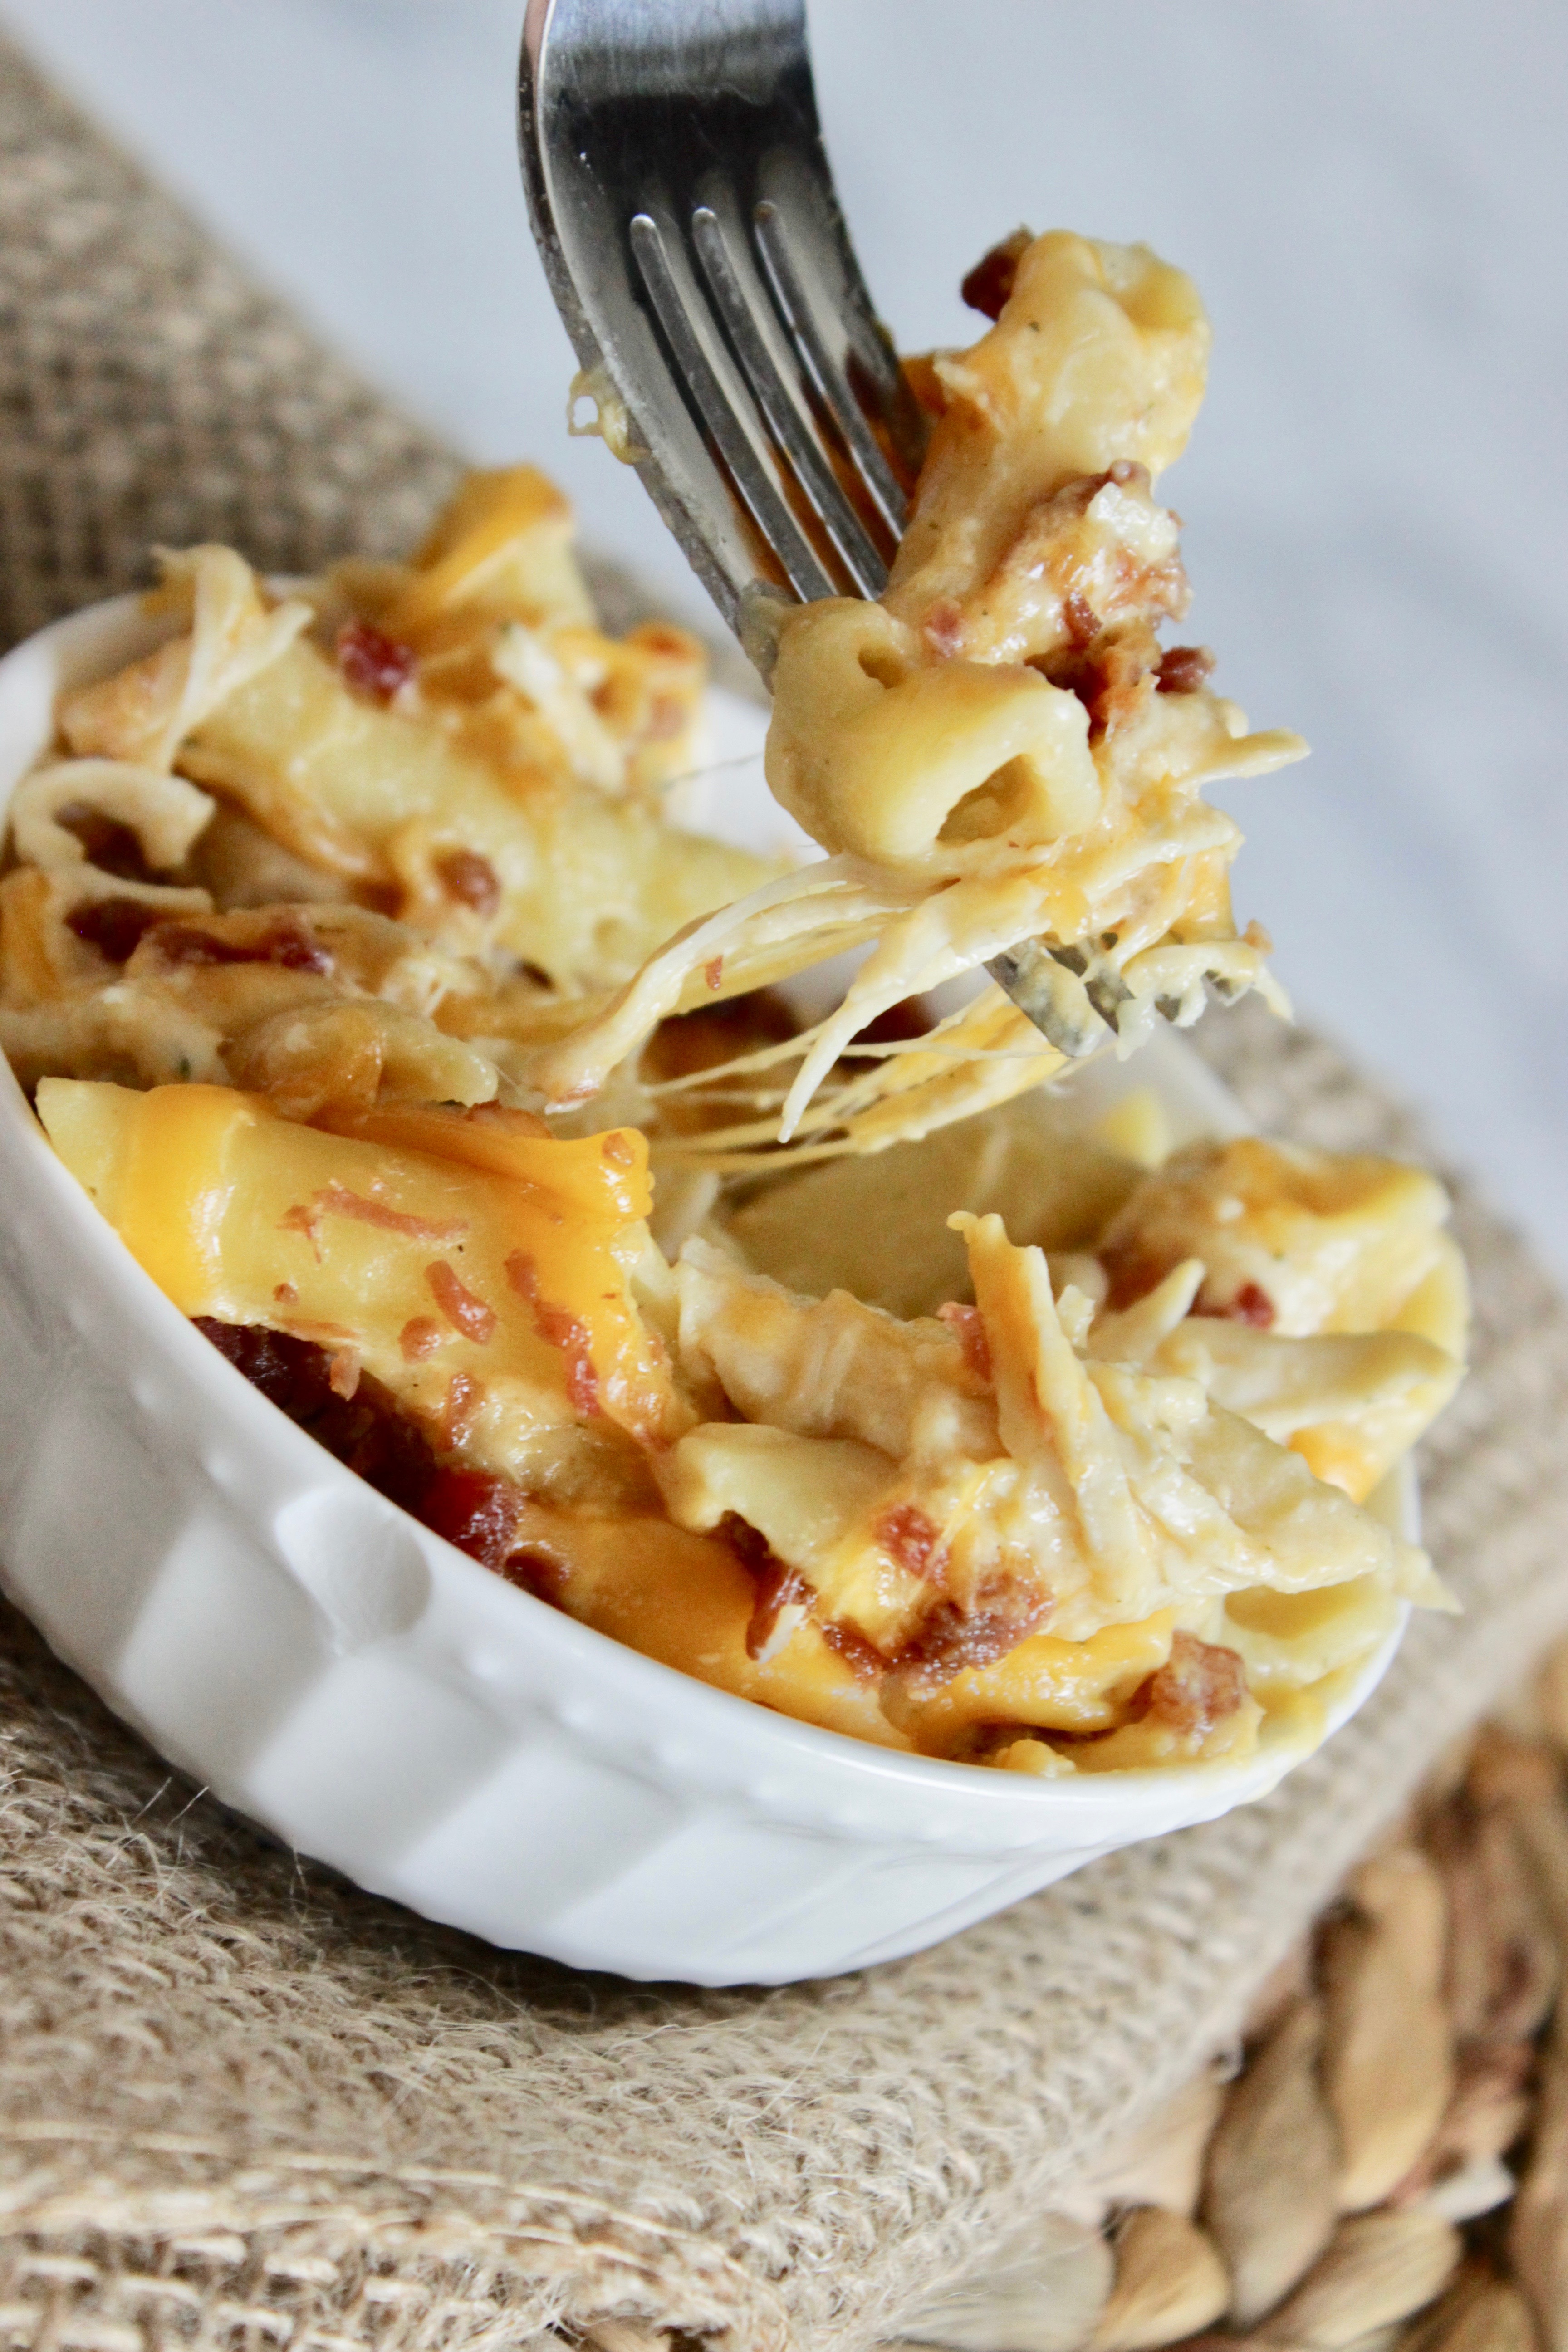
21) Slow Cooker Crack Chicken Pasta
Recipe card
21) Slow Cooker Crack Chicken Pasta
Ingredients
- 5 cups shredded rotisserie chicken
- 1 can cream of chicken soup (10.5 ounces)
- 8 ounces Velveeta (cubed)
- 2 cups chicken broth
- 1 cup water
- 1 packet Hidden Valley Buttermilk Recipe Ranch dry seasoning
- 3 cups uncooked penne or mostaccioli pasta
- 1 1/2 cups mild cheddar cheese
- 1 cup bacon pieces
Cooking Instructions
- Shred or dice rotisserie chicken until you have about 5 cups.
- In a 4-quart slow cooker, combine chicken, ranch packet, cream of chicken soup, chicken broth, water, and cubed Velveeta.
- Cover and cook on High for 3 hours.
- Add uncooked pasta and stir well.
- Cover and cook on High for 20 more minutes.
- Stir again, replace the lid, and continue cooking until pasta is tender, checking every 10 to 15 minutes.
- Stir in mild cheddar cheese and bacon pieces.
- Let sit a few minutes so the sauce thickens.
- Serve warm.
Notes: Do not add the pasta at the beginning or it will turn mushy. Stir after adding pasta so it cooks evenly in the sauce. Slow cookers vary, so start checking the noodles after 20 minutes. Leftovers thicken as they cool; reheat with a splash of chicken broth or milk to loosen the sauce.
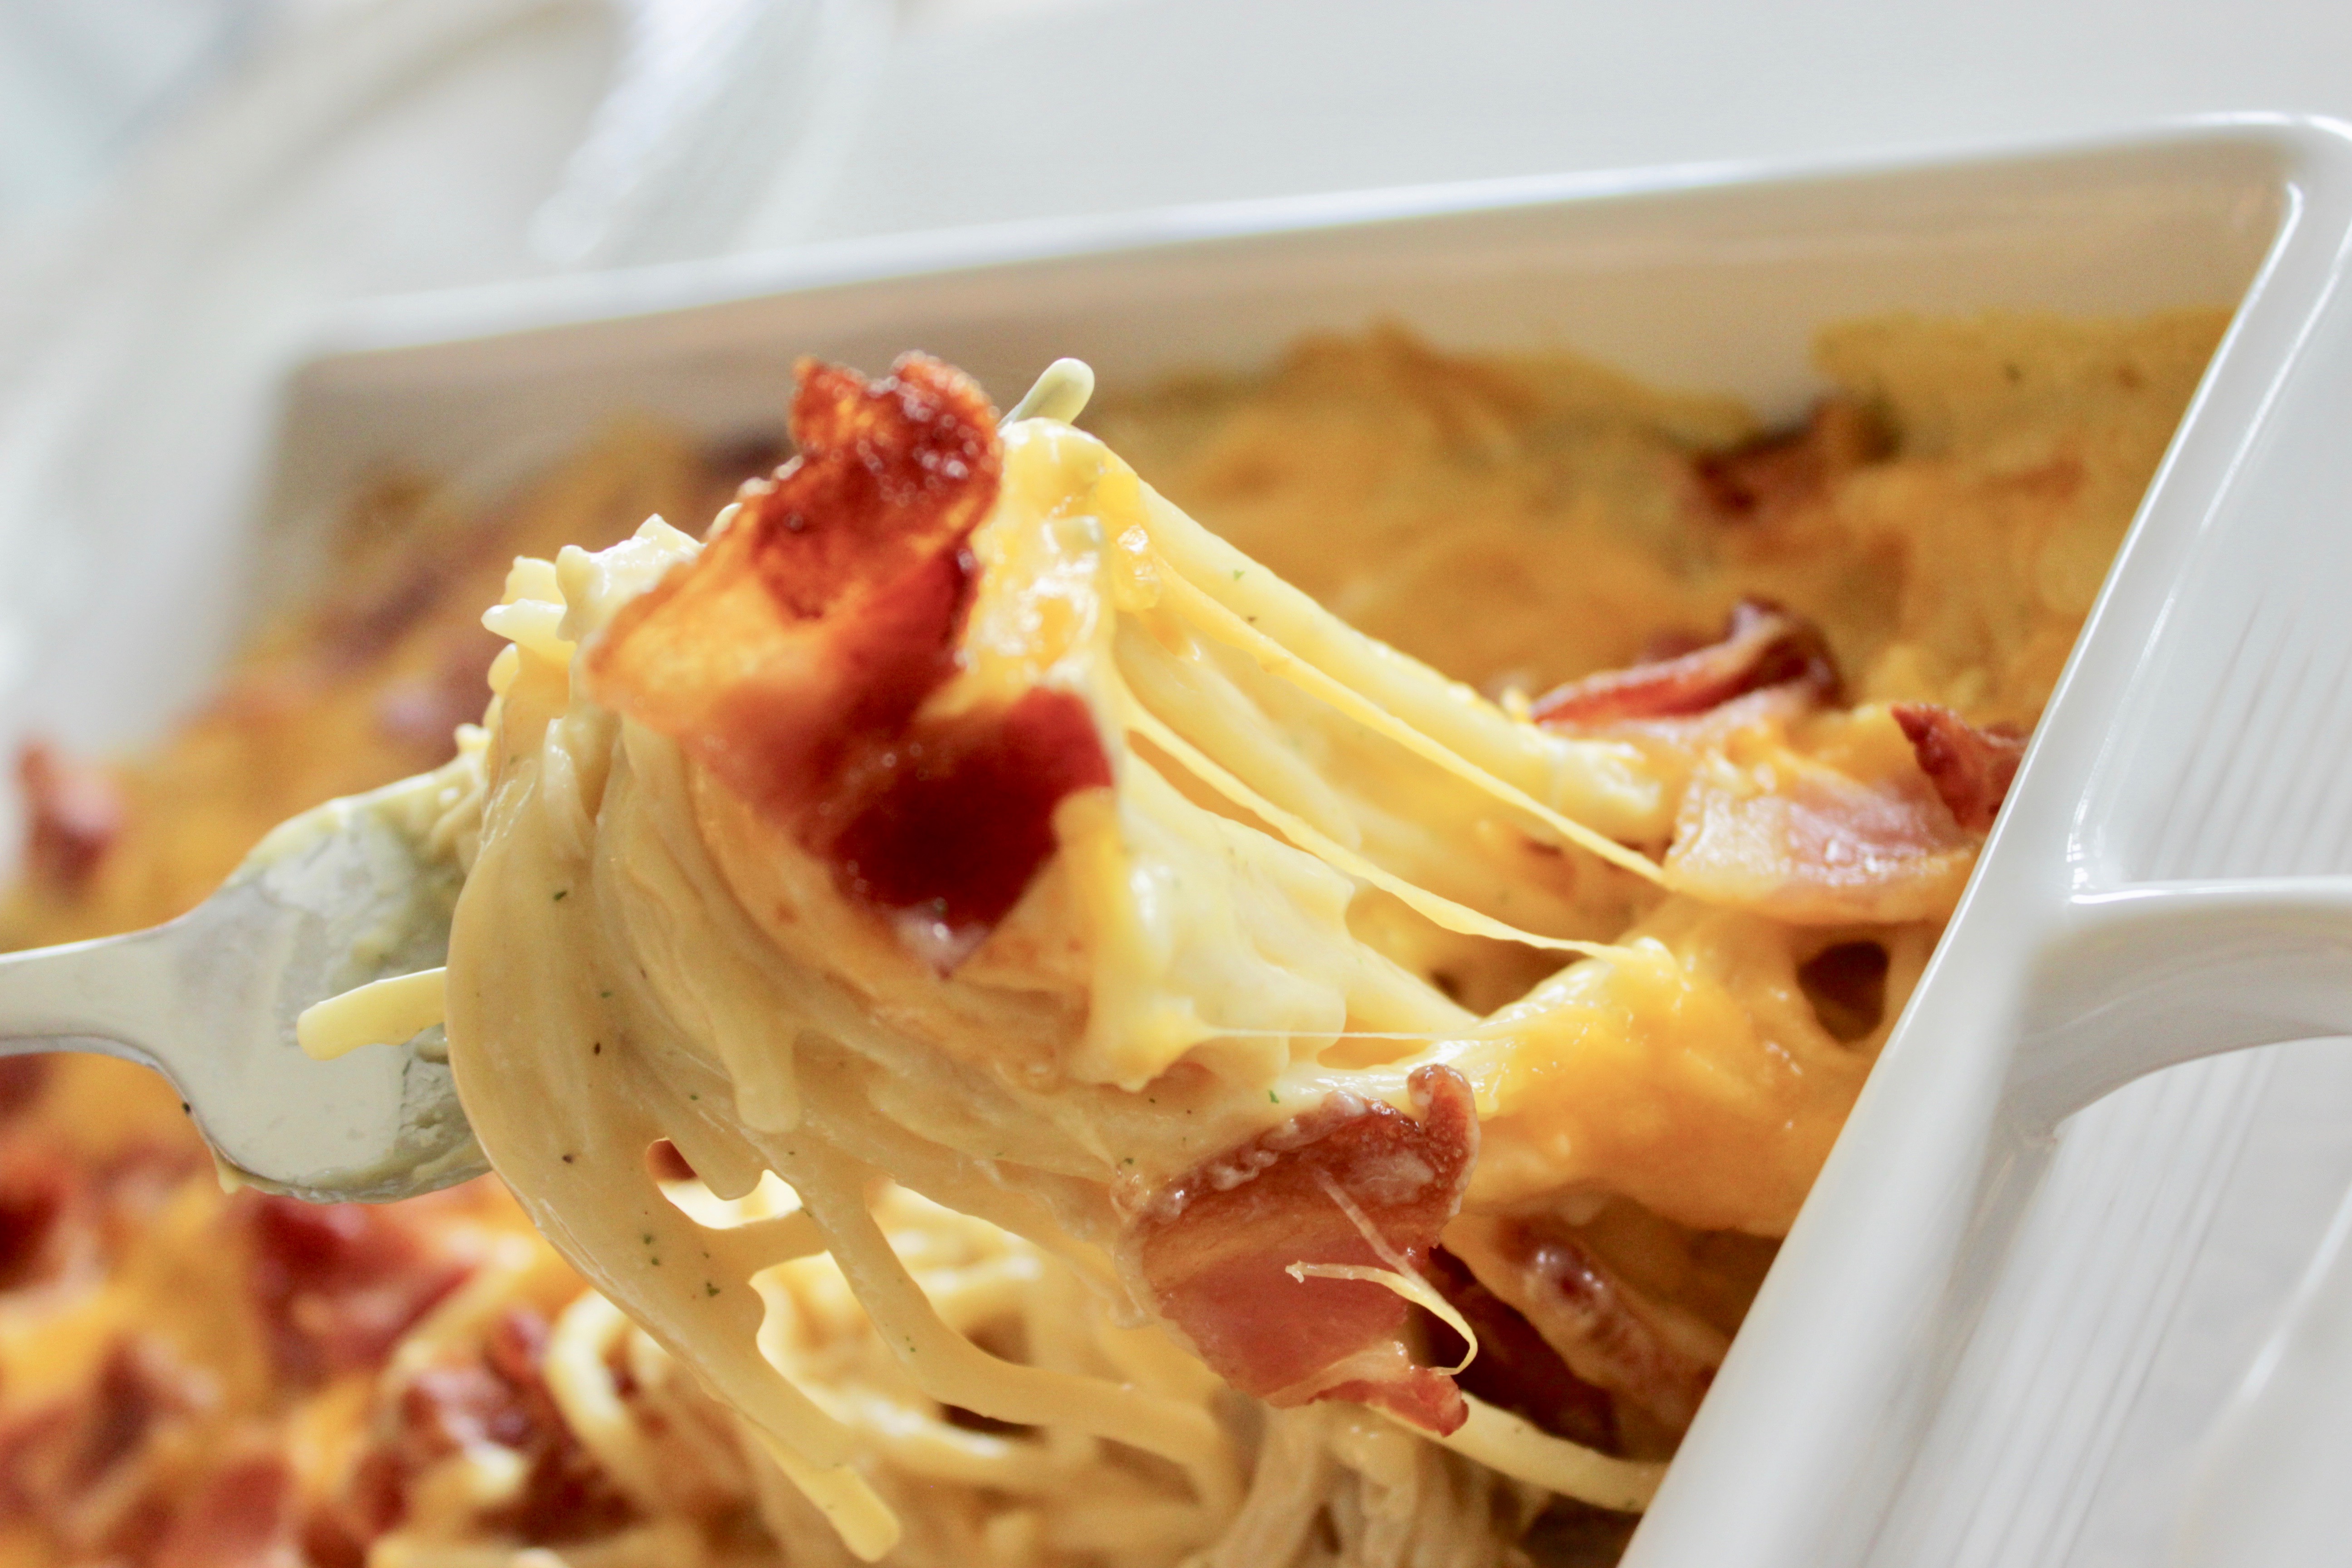
22) Chicken Bacon Ranch Casserole
Recipe card
22) Chicken Bacon Ranch Casserole
Ingredients
- Ingredients
- 16 ounces spaghetti (cooked al dente)
- 2 10.75-ounce cans cream of chicken soup
- 16 ounces Velveeta cheese (cubed)
- 1 cup low-sodium chicken broth (warmed)
- 1/2 cup milk
- 1 packet ranch dressing mix
- 3 cups cooked chicken (shredded or cubed)
- 5-7 slices bacon (cooked and chopped)
- 1 cup sharp cheddar cheese (shredded)
Cooking Instructions
- Instructions
- Preheat the oven to 350°F. Cook the spaghetti to al dente, drain, and set aside.
- Cook the bacon if needed, then cool and chop.
- In a very large mixing bowl, combine the spaghetti, cream of chicken soup, cubed Velveeta, warmed chicken broth, milk, ranch mix, and cooked chicken. Stir until the sauce starts to come together.
- Pour the mixture into a 9×13 baking dish and spread evenly.
- Top with shredded cheddar, then sprinkle chopped bacon over the cheese.
- Bake uncovered for 30 minutes, until bubbling around the edges and melted on top.
- Let rest for 5 to 10 minutes before serving.
Notes: Cook the pasta 1 to 2 minutes shy of package directions so it does not get mushy in the oven. Warm the chicken broth so the Velveeta melts more easily. Cook the bacon before adding it to the casserole. Let the casserole rest before serving so the sauce thickens.
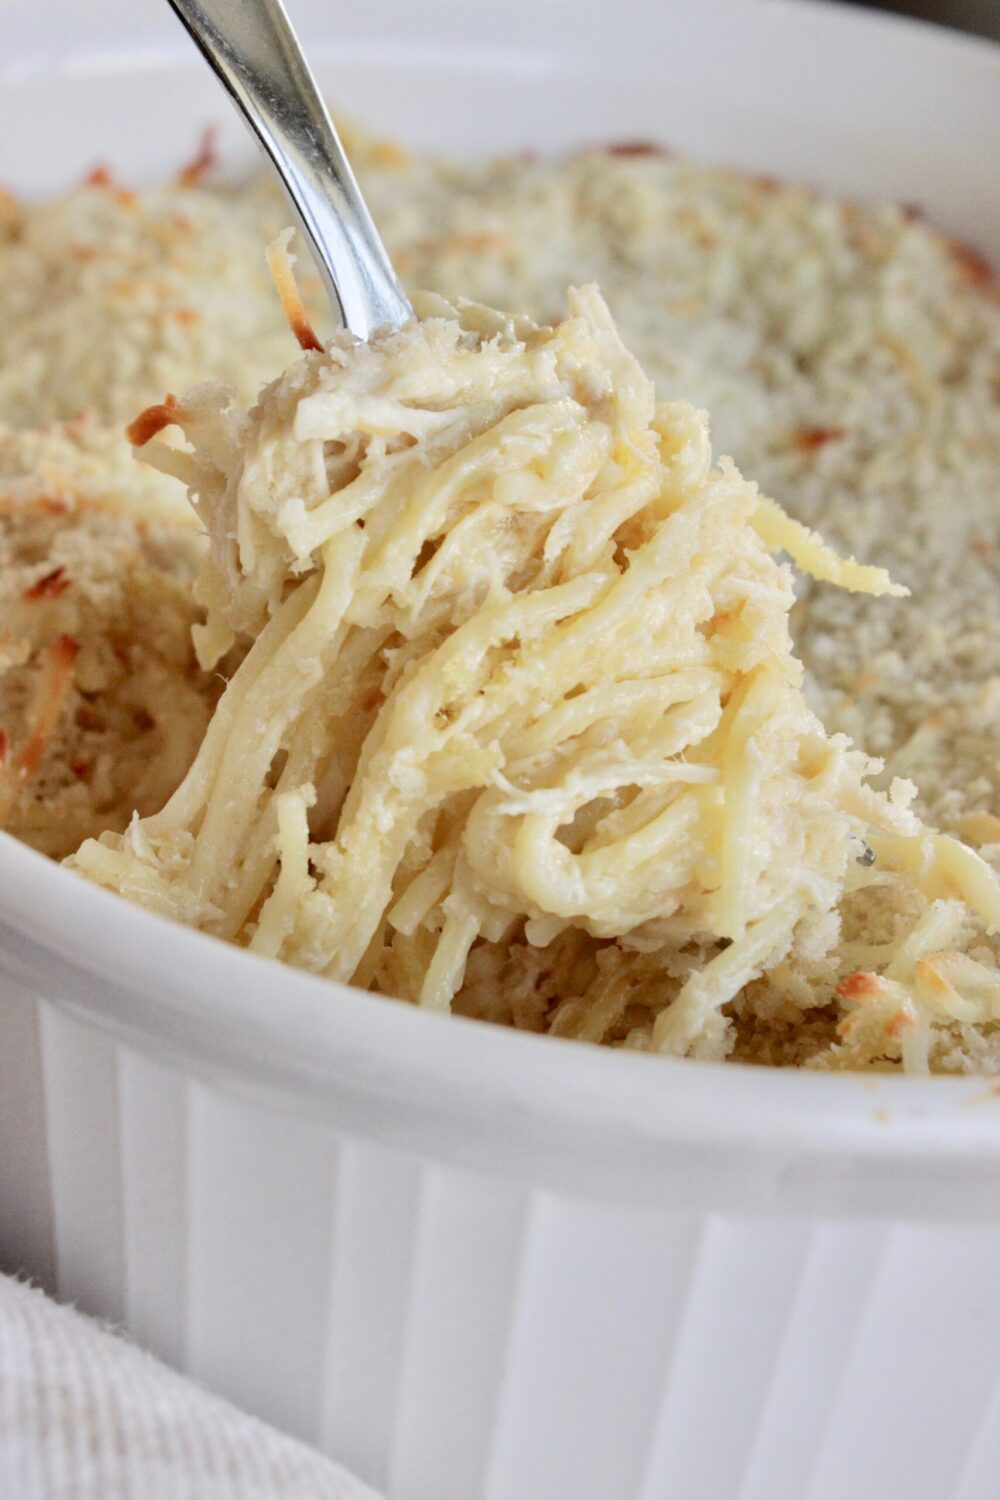
23) Easy Chicken Tetrazzini
Recipe card
23) Easy Chicken Tetrazzini
Ingredients
- Ingredients
- 16 ounces thin spaghetti
- 4 cups cooked shredded chicken
- 2 10.5-ounce cans cream of chicken soup
- 2 cups sour cream
- 1/2 cup butter (melted)
- 1/2 cup milk
- 2 tablespoons Parmesan cheese
- 2 cups shredded mozzarella cheese
- 1/2 to 1 cup Panko breadcrumbs
- salt and pepper (to taste)
Cooking Instructions
- Instructions
- Preheat oven to 350°F and grease a 9×13 baking dish.
- Cook thin spaghetti 1 minute less than package directions. Drain and rinse with cold water.
- In a large bowl, combine melted butter, chicken, cream of chicken soup, sour cream, milk, salt, pepper, and Parmesan.
- Fold in drained spaghetti until evenly coated.
- Spread mixture in the prepared baking dish and top with mozzarella.
- Bake 30 minutes, until edges are bubbling and cheese is melted.
- Sprinkle Panko over the top and bake 10 more minutes, until golden and crisp.
- Let rest 5 minutes before serving.
Notes: Cook the pasta slightly underdone because it finishes in the oven. Rinse the pasta after draining to stop cooking and prevent clumping. Add Panko only during the last 10 minutes so it stays crisp. Let the casserole rest before serving for cleaner scoops.
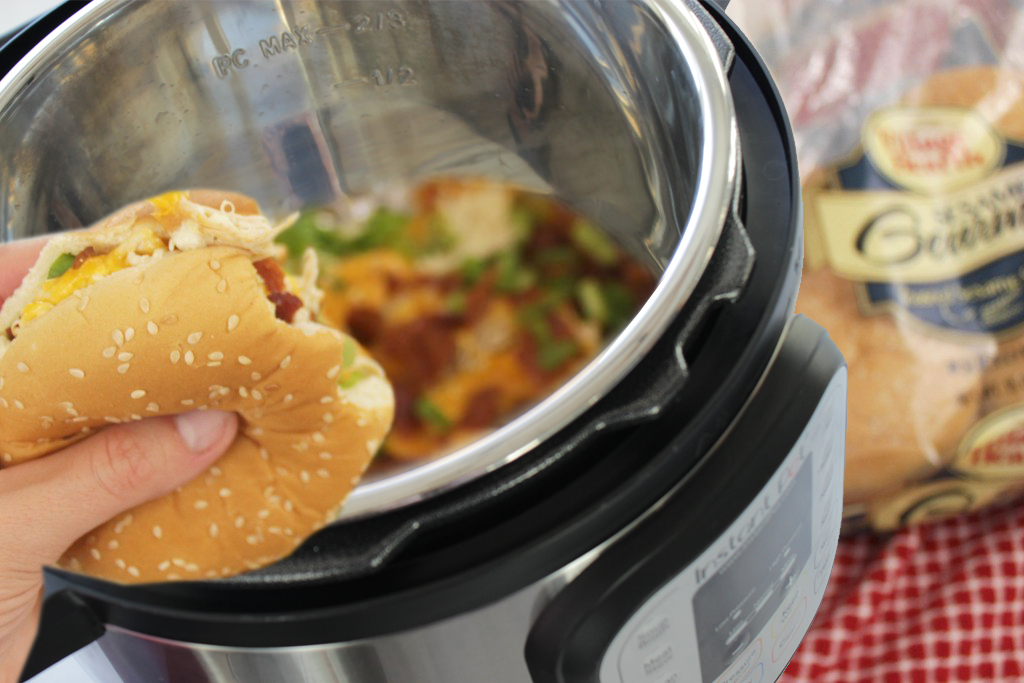
24) Crack Chicken Instant Pot Recipe
Recipe card
24) Crack Chicken Instant Pot Recipe
Ingredients
- Ingredients
- 1 pound bacon (diced)
- 4 boneless skinless chicken breasts (cut in half if thick)
- 1 packet Hidden Valley Buttermilk Ranch seasoning
- 8 ounces cream cheese (cubed)
- 1/2 cup chicken broth
- 1 cup shredded cheddar cheese
- mayonnaise (optional)
- green onions (chopped, for serving)
Cooking Instructions
- Instructions
- Set the Instant Pot to saute on high. Add diced bacon and cook 8 to 10 minutes, until cooked through and starting to crisp. Remove bacon with a slotted spoon and leave drippings in the pot.
- Add chicken pieces to the bacon drippings and sear for about 2 minutes per side, if desired.
- Pour in chicken broth and scrape the bottom of the pot thoroughly to loosen browned bits. Stir in ranch seasoning.
- Nestle chicken into the broth, place cream cheese cubes on top, and add the cooked bacon back to the pot.
- Secure the lid, set valve to sealing, and cook on manual high pressure for 15 minutes. Let pressure release naturally for 5 minutes, then quick release remaining pressure.
- Remove chicken and shred with two forks. Stir cream cheese into the sauce until fully melted and incorporated.
- Return shredded chicken to the pot. Stir in cheddar cheese and optional mayonnaise.
- Stir in green onions right before serving.
Notes: Deglaze the pot thoroughly after sauteing to help prevent a burn notice. Add cheddar after pressure cooking, not before, so it melts smoothly. The 5-minute natural release helps keep the chicken tender. Add a splash of broth when reheating because the sauce thickens as it cools.
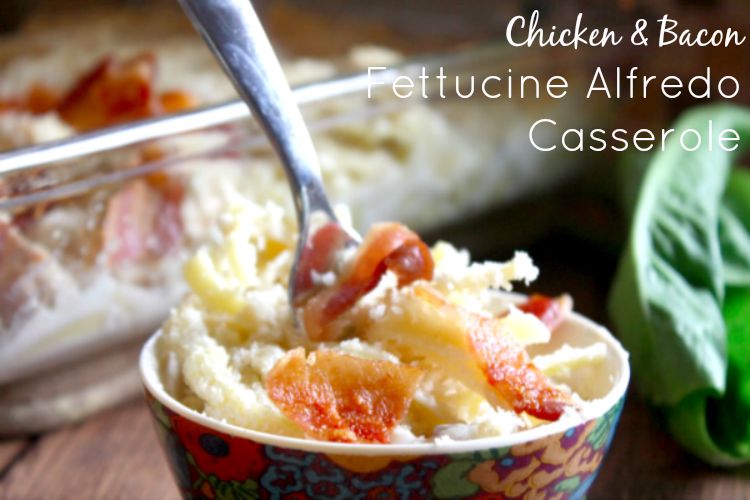
25) Easy Chicken Bacon Fettuccine Alfredo Casserole
Recipe card
25) Easy Chicken Bacon Fettuccine Alfredo Casserole
Ingredients
- Ingredients
- 1 can cream of mushroom soup
- 8 ounces cream cheese (softened)
- 4 ounces sliced mushrooms (drained)
- 1 cup whipping cream
- 1/2 cup butter (softened)
- 1/4 teaspoon garlic powder
- 1/2 cup grated Parmesan cheese (plus 2 tablespoons for topping)
- 1/2 cup shredded mozzarella cheese
- 3 cups cooked shredded chicken
- 1/2 pound bacon (cooked and chopped)
- 8 ounces fettuccine (cooked al dente)
- 1 cup panko breadcrumbs
- 2 tablespoons melted butter (for topping)
Cooking Instructions
- Instructions
- Preheat oven to 350°F and grease a 9×13 baking dish.
- Cook bacon until crispy, drain, and chop. Cook fettuccine to al dente, drain, and toss lightly with olive oil if needed.
- In a large saucepan over medium heat, combine cream of mushroom soup, cream cheese, mushrooms, whipping cream, butter, and garlic powder. Stir until smooth and glossy.
- Reduce heat to low and stir in Parmesan and mozzarella until melted.
- Add shredded chicken, half the bacon, and cooked fettuccine. Stir until evenly coated.
- Transfer to the baking dish.
- Mix panko with melted butter and Parmesan. Sprinkle over casserole with remaining bacon.
- Bake until hot, bubbling, and golden on top, about 30 to 35 minutes.
Notes: Cook the pasta al dente so it does not turn mushy in the oven. Soften the cream cheese so the sauce melts smoothly. Put some bacon in the filling and some on top for better texture. Add the panko topping right before baking if assembling ahead.

26) Cheesy Tortellini Casserole Recipe
Recipe card
26) Cheesy Tortellini Casserole Recipe
Ingredients
- Ingredients
- 1 7-ounce package cheese tortellini
- 12 ounces marinara sauce
- 8 ounces Alfredo sauce
- 1 1/2 teaspoons dried Italian seasoning (divided)
- 1 cup mozzarella cheese (shredded)
- 1/4 cup Parmesan cheese (grated)
Cooking Instructions
- Instructions
- Bring a large pot of salted water to a boil.
- In a medium saucepan, combine marinara sauce, Alfredo sauce, and 1/2 teaspoon Italian seasoning. Simmer for 10 minutes, stirring occasionally.
- Cook the tortellini according to package directions, using the shorter end of the range. Drain well.
- Stir the drained tortellini into the sauce until coated. Transfer to a greased 9-inch pie dish or similar baking dish.
- Top with mozzarella, Parmesan, and the remaining Italian seasoning.
- Broil 1 to 3 minutes, watching closely, until the cheese bubbles and develops golden spots.
- Let rest 2 to 3 minutes before serving.
Notes: Watch closely under the broiler because the cheese can go from golden to burned quickly. Do not rinse the tortellini after draining because the starch helps the sauce cling. Refrigerated tortellini cooks faster, but dried tortellini also works. Let the casserole rest briefly before serving so it scoops more cleanly.

27) Four Cheese Baked Mostaccioli Recipe
Recipe card
27) Four Cheese Baked Mostaccioli Recipe
Ingredients
- Ingredients
- 1 pound mostaccioli pasta
- 1/2 pound Italian sausage
- 1/2 pound ground beef
- 1 small yellow onion (chopped)
- 2 cloves garlic (minced)
- 1/2 cup heavy whipping cream
- 2 14.5-ounce cans petite diced tomatoes
- 1 6-ounce can tomato paste
- 2 teaspoons Italian seasoning
- 15 ounces ricotta cheese
- 1 cup shredded Parmesan cheese (divided)
- 2 ounces goat cheese
- 1 large egg (lightly beaten)
- 1 teaspoon salt
- 1/2 teaspoon black pepper
- 8 ounces fresh mozzarella (cubed)
Cooking Instructions
- Instructions
- Preheat oven to 350°F. Cook mostaccioli 1 minute less than package directions. Drain but do not rinse.
- Cook Italian sausage, ground beef, and onion in a large skillet until no pink remains and onion is soft. Add garlic and cook 1 minute. Drain excess fat.
- Pour in heavy cream and simmer 5 minutes. Add diced tomatoes, tomato paste, and Italian seasoning. Simmer 5 minutes more until thickened.
- In a bowl, mix ricotta, 1/2 cup Parmesan, goat cheese, egg, salt, and pepper.
- Stir drained pasta into meat sauce.
- In greased 9×13 dishes, layer pasta and sauce, cheese mixture, then remaining pasta and sauce.
- Bake uncovered for 25 minutes, until bubbling.
- Top with cubed mozzarella and remaining Parmesan. Bake 5 more minutes.
- Let rest 5 minutes before serving.
Notes: Undercook the pasta by 1 minute so it finishes in the oven. Heavy cream rounds out the tomato sauce and helps it cling to the pasta. Add fresh mozzarella near the end so it melts without overcooking. Let the baked pasta rest before serving for cleaner portions.
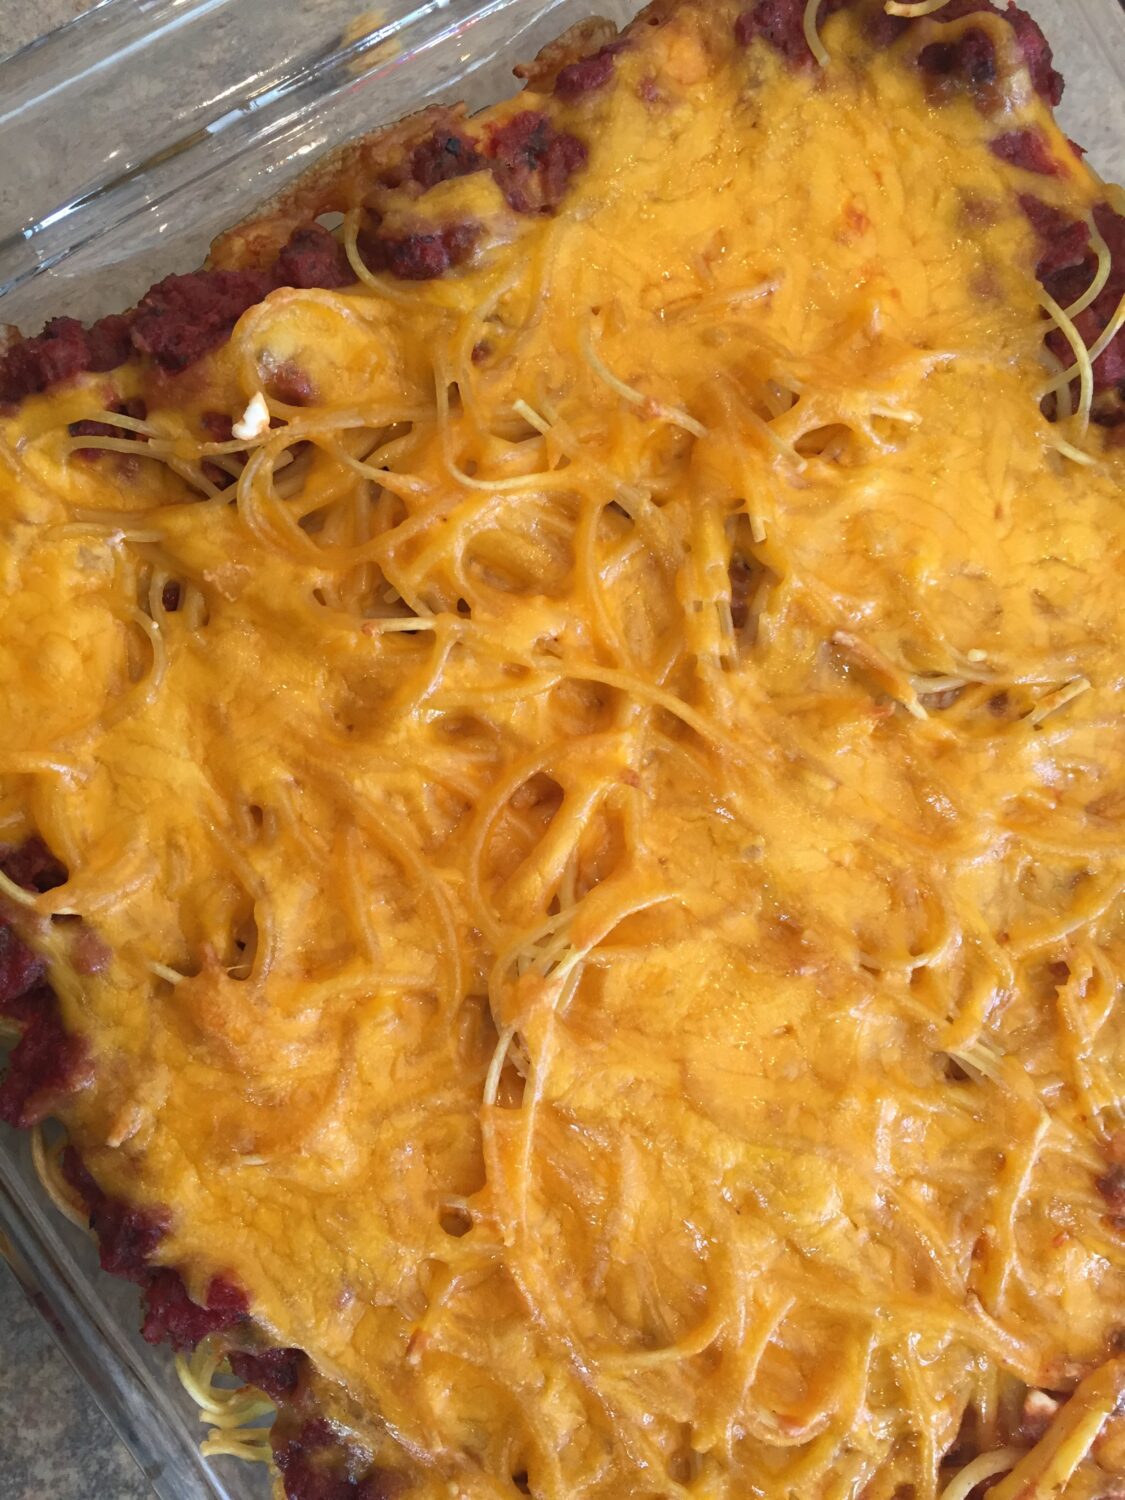
28) Spaghetti Casserole Dinner Recipe
Recipe card
28) Spaghetti Casserole Dinner Recipe
Ingredients
- 1 pound spaghetti
- 1 pound ground beef (80/20 preferred)
- 24 ounces marinara or pasta sauce
- 1 teaspoon Italian seasoning
- 1/2 teaspoon garlic powder
- Salt and pepper (to taste)
- 8 ounces cream cheese (softened to room temperature)
- 1/2 cup sour cream
- 4 tablespoons butter (sliced into pats)
- 2 cups shredded mozzarella cheese
Cooking Instructions
- Preheat oven to 350°F and grease a 9×13 baking dish.
- Cook spaghetti in salted boiling water until just barely al dente, about 1 minute less than package directions. Drain well.
- Brown ground beef in a large skillet over medium-high heat, breaking it up as it cooks. Drain fat.
- Add pasta sauce, Italian seasoning, garlic powder, salt, and pepper to the beef. Stir and simmer on Low for 5 minutes.
- In a large bowl, mix softened cream cheese and sour cream until smooth. Add drained spaghetti and toss until coated.
- Spread cream cheese pasta into the prepared baking dish. Lay butter slices over the noodles.
- Pour meat sauce over the top and spread to the edges. Sprinkle mozzarella evenly over everything.
- Cover tightly with foil and bake 30 to 35 minutes, until hot and bubbling.
- Remove foil and bake 10 more minutes, until cheese is melted and lightly golden. Rest briefly before serving.
Notes: Make sure cream cheese is fully softened before mixing or it will stay lumpy. Cook pasta slightly under al dente so it does not get mushy in the oven. Drain ground beef well to avoid a watery casserole. Assemble up to 24 hours ahead, or freeze baked or unbaked for up to 3 months.
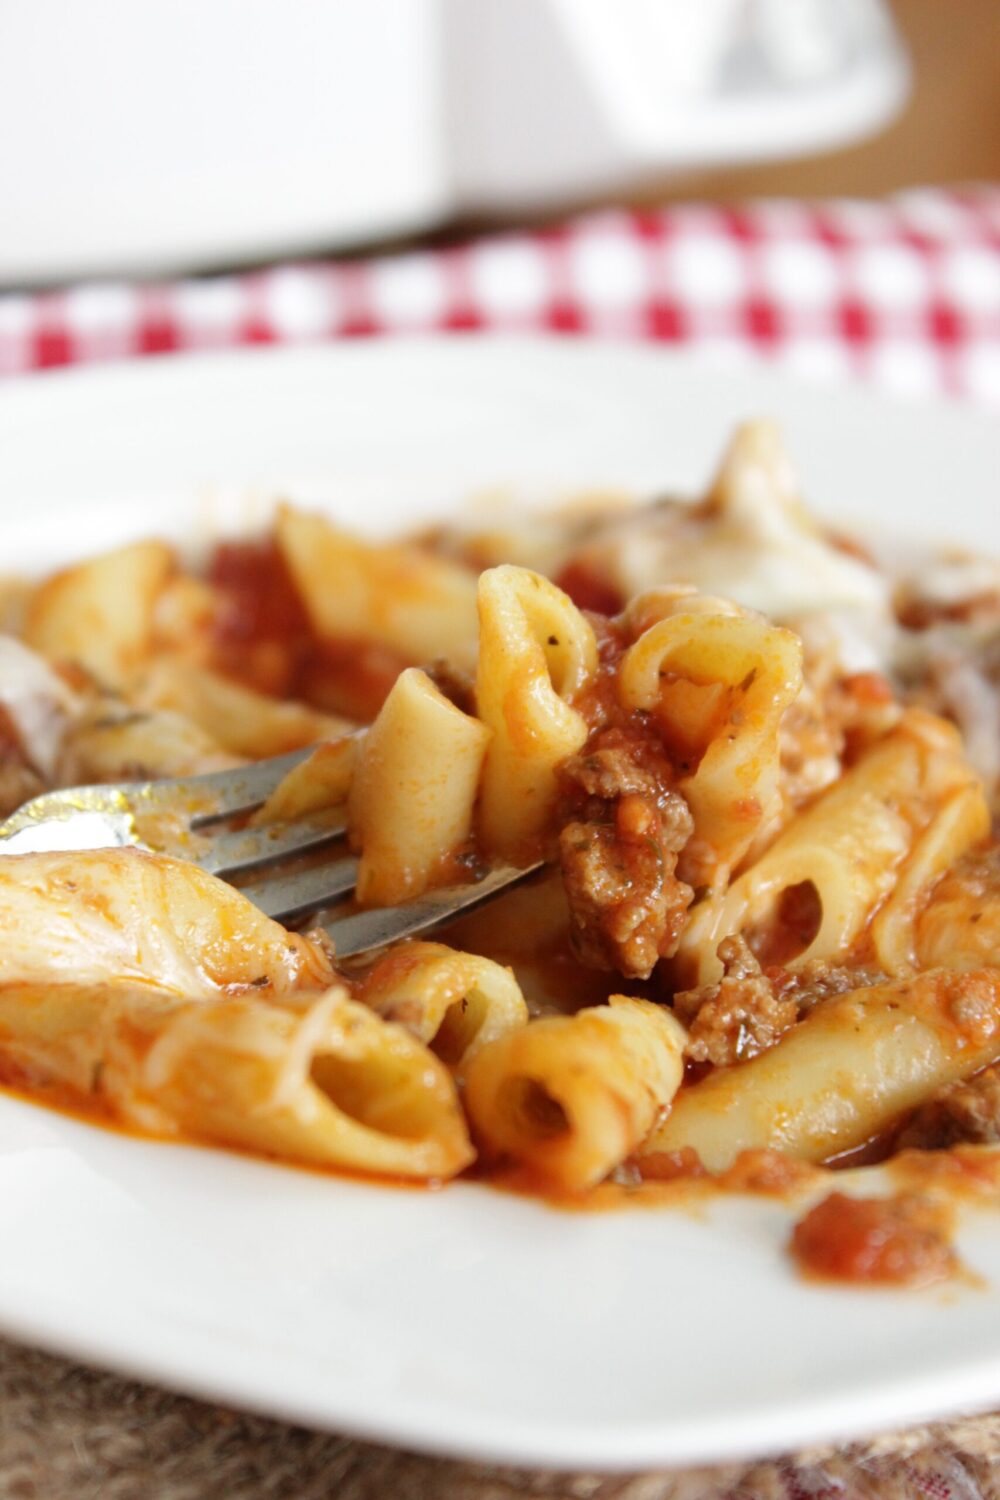
29) Crockpot Baked Spaghetti
Recipe card
29) Crockpot Baked Spaghetti
Ingredients
- Ingredients
- 1 pound ground beef
- 1/2 yellow onion (finely chopped)
- 1 teaspoon minced garlic
- 1 teaspoon dried basil
- 1 teaspoon dried parsley
- 28 ounces diced tomatoes (undrained)
- 2 1/2 cups pasta sauce
- 2 1/2 cups chicken broth
- 3 cups dry mostaccioli pasta (or penne)
- 1 cup shredded mozzarella cheese
Cooking Instructions
- Instructions
- Brown the ground beef, onion, and garlic in a skillet over medium-high heat until beef is cooked through and onion is soft. Drain fat.
- Transfer beef mixture to a 4-quart or larger slow cooker. Add diced tomatoes with juice, pasta sauce, chicken broth, basil, and parsley. Stir to combine.
- Cover and cook on high for 3 hours, until the sauce deepens and thickens.
- Stir in dry mostaccioli and push pasta down into the sauce. Cover and cook on high for 20 minutes.
- Stir thoroughly from the bottom up, then cook 15 to 20 more minutes, until pasta is tender.
- Sprinkle mozzarella over the top, replace lid, and let sit on high for 5 minutes until melted. Serve immediately.
Notes: Add the pasta dry near the end so it cooks in the sauce without getting mushy. Stir halfway through the pasta cook time so the bottom noodles do not stick. Use chicken broth instead of water for better flavor. Serve right away because the pasta continues to absorb sauce as it sits.
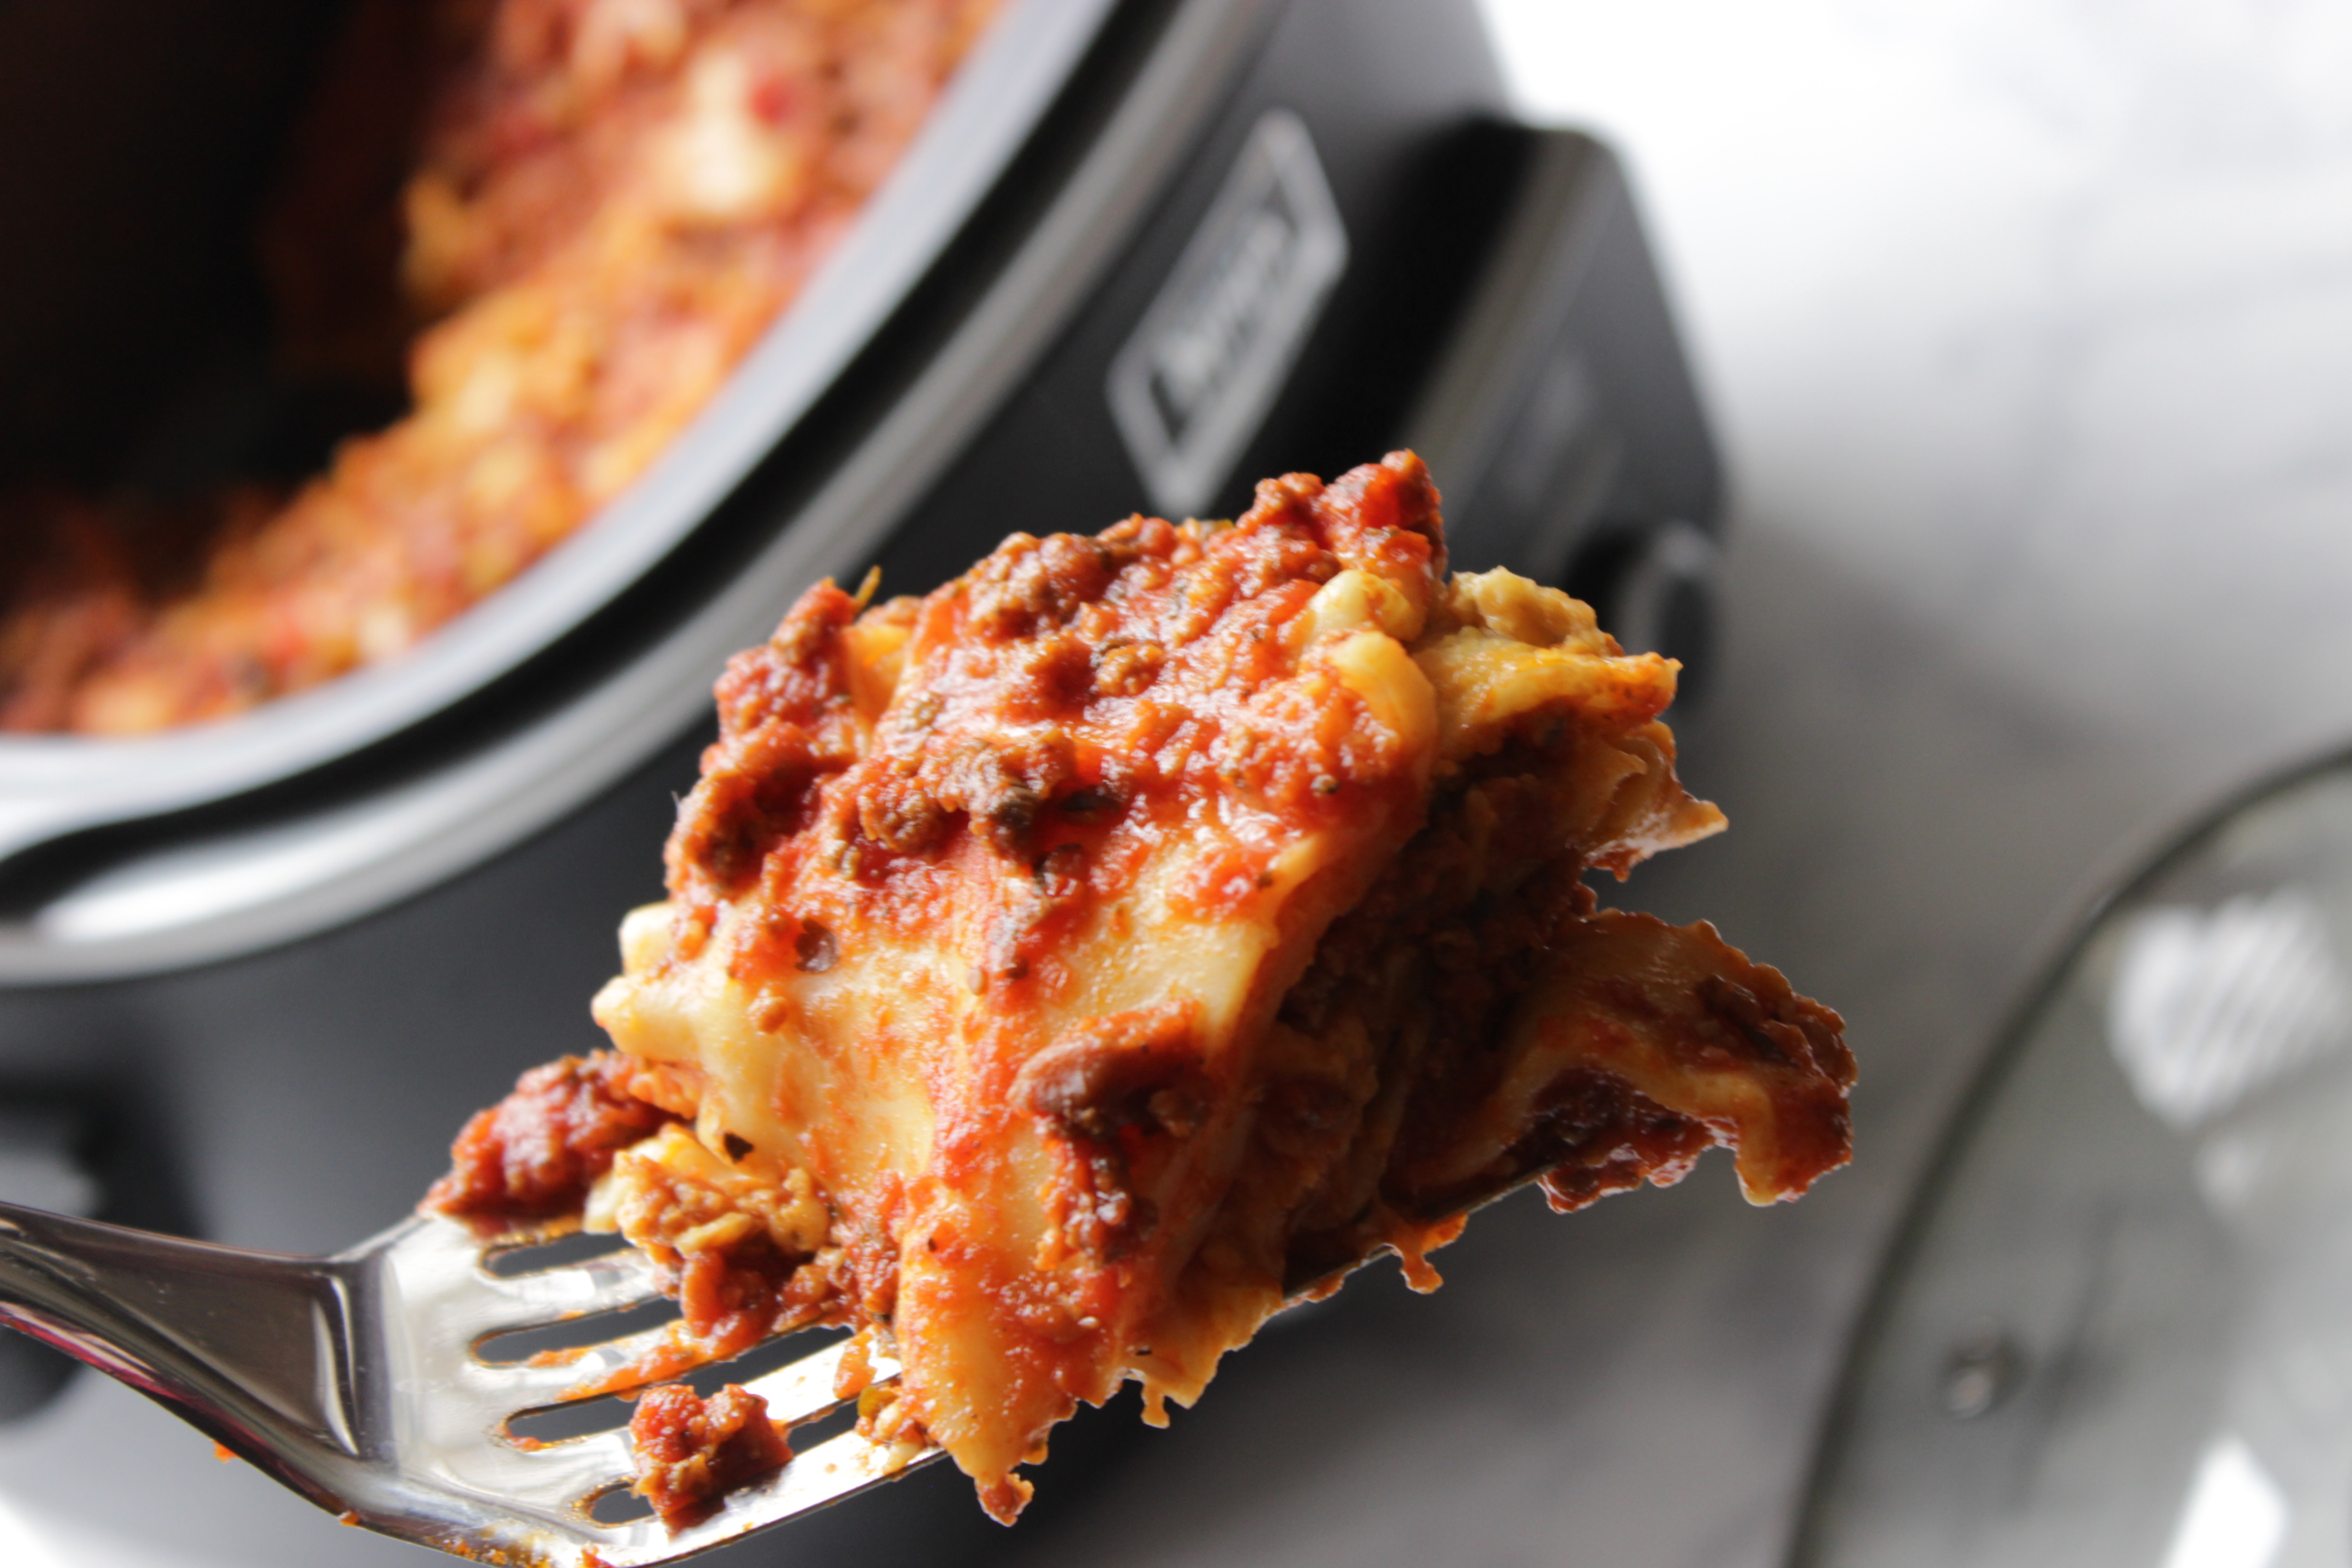
30) Crockpot Lasagna Easy Dinner Recipe
Recipe card
30) Crockpot Lasagna Easy Dinner Recipe
Ingredients
- Ingredients
- 1/2 pound Italian sausage
- 1/2 pound ground beef
- 45 ounces spaghetti sauce
- 20 ounces small-curd cottage cheese
- 1 large egg (beaten)
- 1/2 cup shredded Parmesan cheese
- 1 tablespoon Italian seasoning
- 2 cups shredded mozzarella cheese (divided)
- 9 regular lasagna noodles (broken in half)
Cooking Instructions
- Instructions
- Brown Italian sausage and ground beef in a skillet over medium-high heat until no pink remains. Drain well.
- Stir spaghetti sauce into the browned meat and warm through.
- In a bowl, combine cottage cheese, egg, Parmesan, and Italian seasoning until uniform.
- Spray a 6-quart slow cooker. Layer one-third meat sauce, 3 broken noodles, half the cottage cheese mixture, and 1 cup mozzarella.
- Repeat with one-third meat sauce, 3 noodles, remaining cottage cheese mixture, remaining 3 noodles, and final one-third meat sauce.
- Cover and cook on low for 4 hours, until noodles are tender.
- Sprinkle remaining 1 cup mozzarella on top during the last 30 minutes.
- Turn off slow cooker and let lasagna rest 10 to 15 minutes before serving.
Notes: Use regular dry lasagna noodles, not no-boil noodles, for the best slow cooker texture. Do not reduce the sauce because the dry noodles need that liquid. Let the lasagna rest before serving so the layers firm up. Avoid lifting the lid during cooking because it adds time.
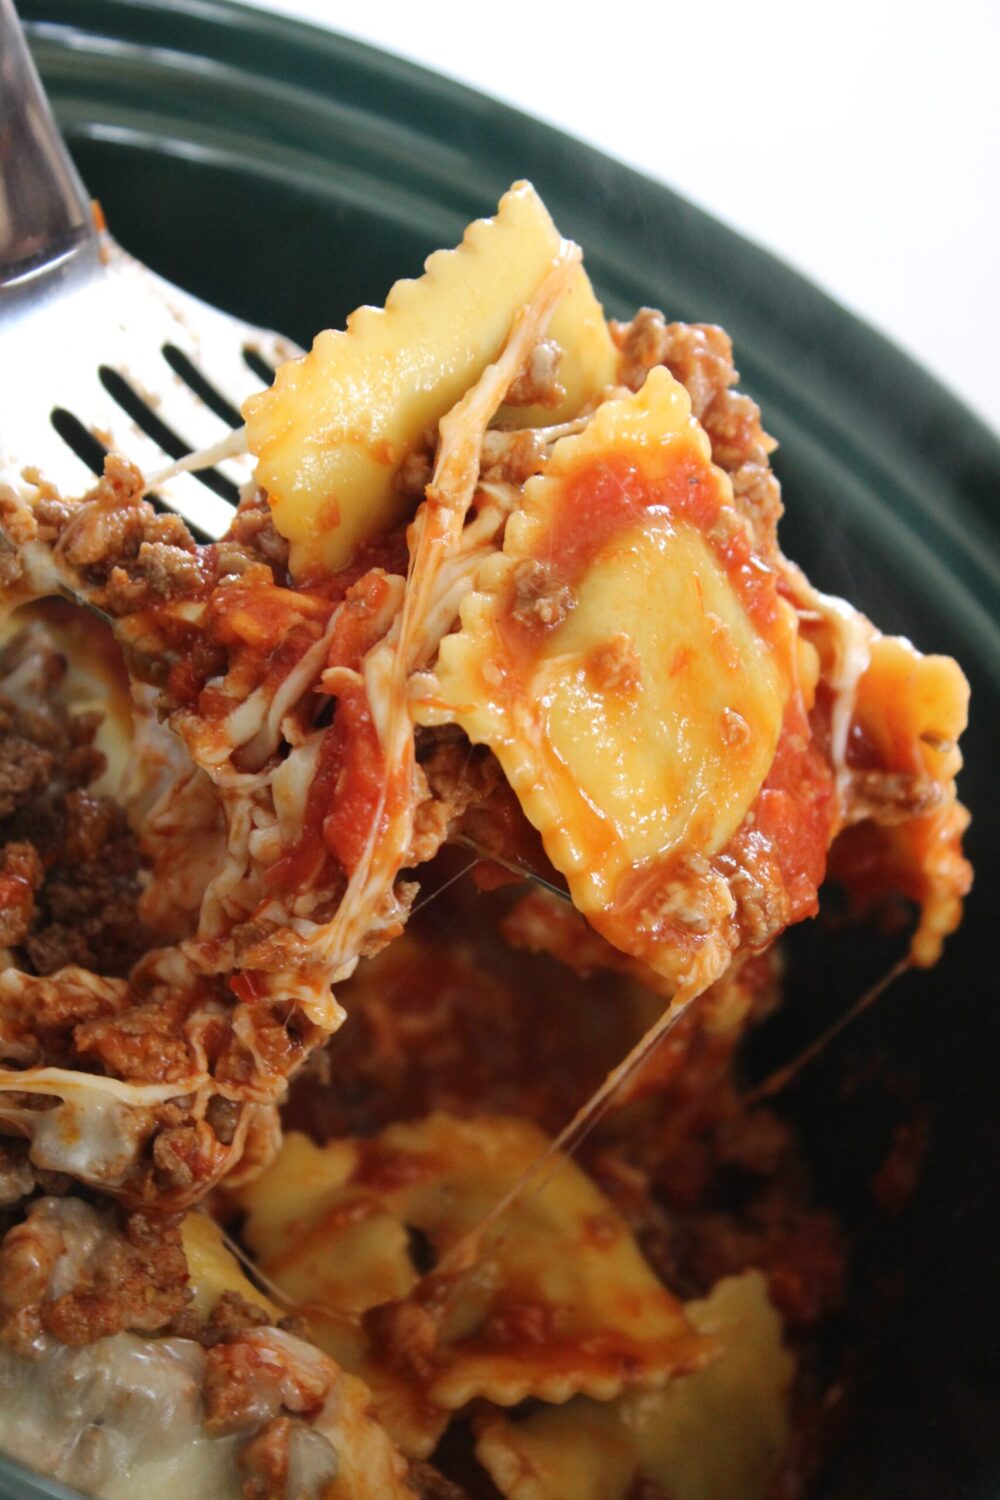
31) Crockpot Ravioli Casserole Recipe
Recipe card
31) Crockpot Ravioli Casserole Recipe
Ingredients
- Ingredients
- 20 ounces frozen ravioli
- 24 ounces pasta sauce
- 1 pound ground Italian sausage
- 4 cups shredded mozzarella cheese
Cooking Instructions
- Instructions
- Brown the Italian sausage in a skillet, breaking it into crumbles. Drain well.
- Spray the slow cooker insert with cooking spray.
- Spread a thin layer of sauce in the bottom of the slow cooker.
- Layer half the frozen ravioli, half the sausage, sauce, and mozzarella. Repeat layers one more time.
- Cover and cook on low for about 3 1/2 hours or high for about 1 hour 45 minutes, until ravioli is tender and cheese is melted.
- Let sit for about 10 minutes before serving so the layers scoop cleanly.
Notes: Use frozen ravioli, not fresh, so it holds up in the slow cooker. Brown and drain the sausage first so the casserole does not get greasy. Grease the crockpot insert because melted cheese sticks around the edges. Rest briefly before serving for cleaner scoops.
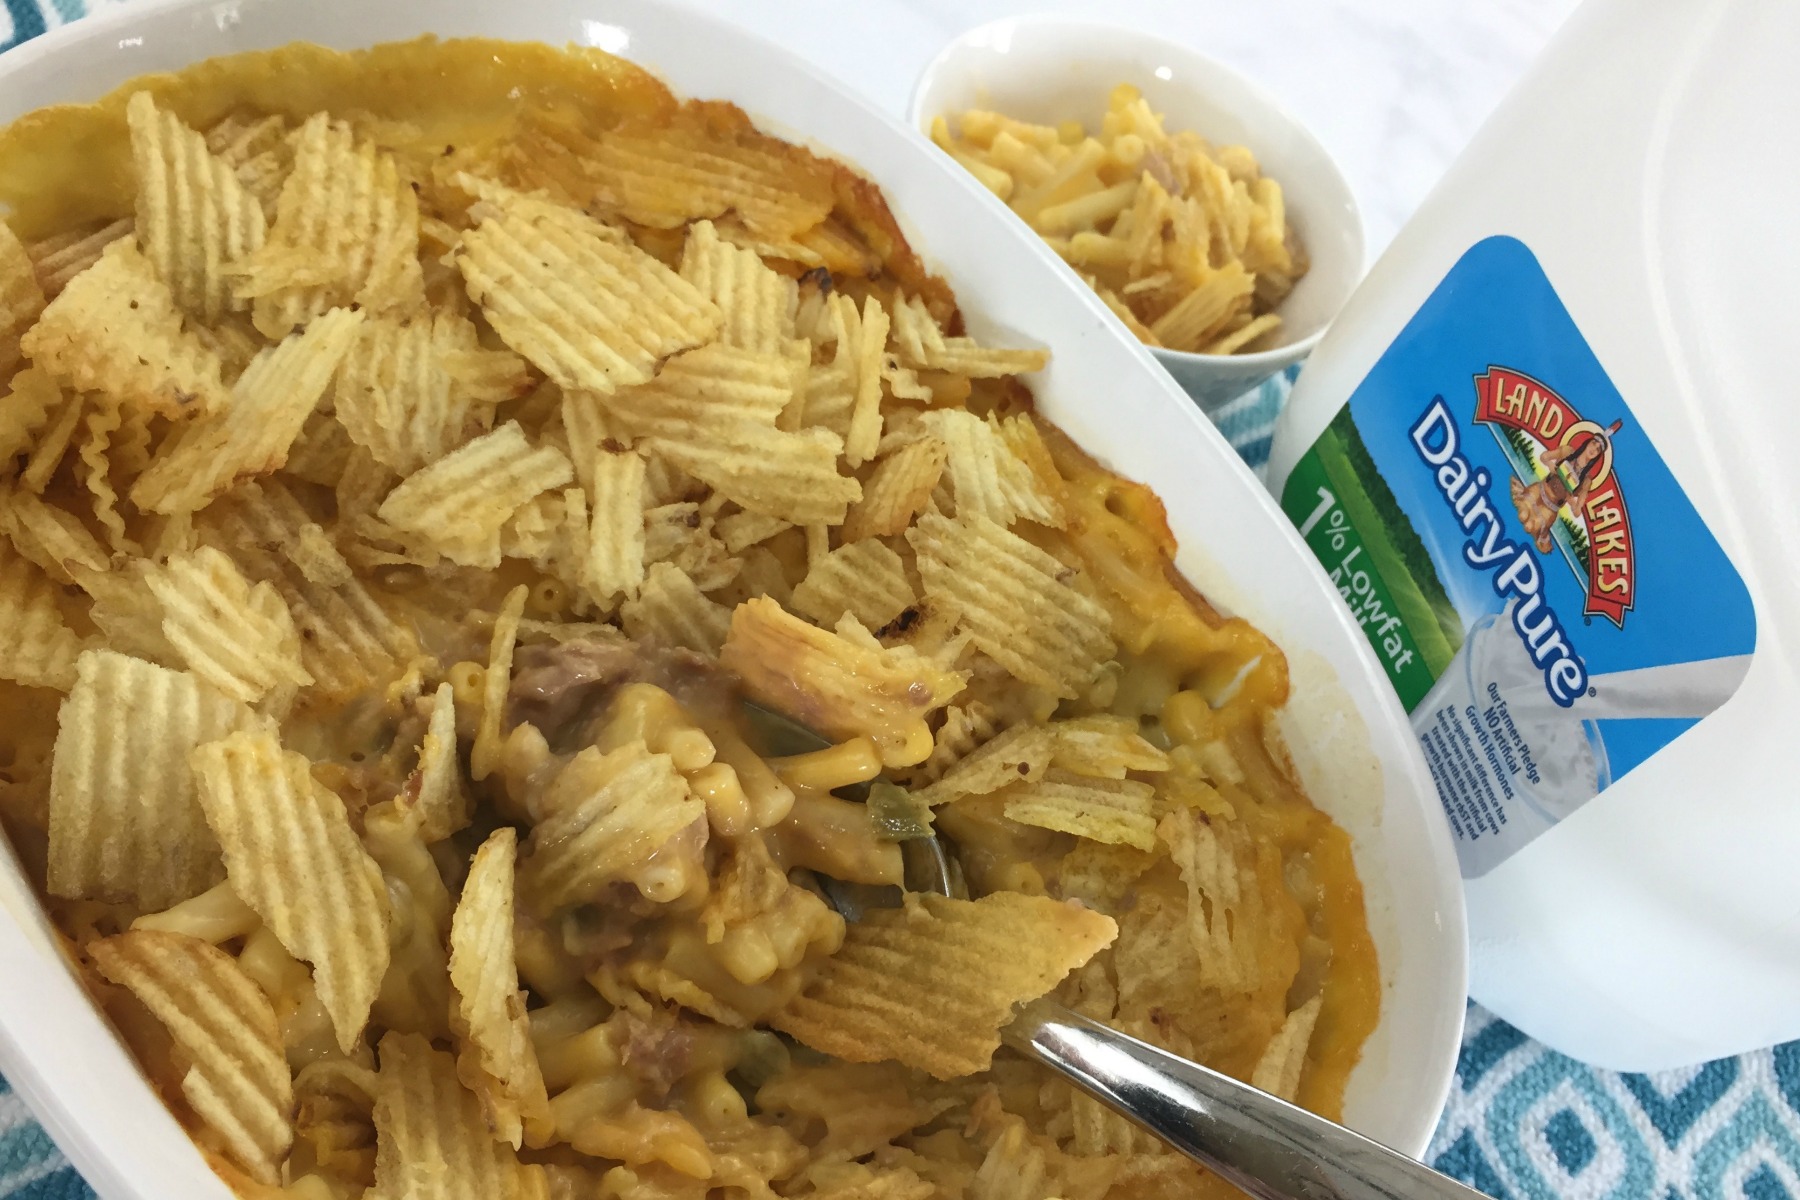
32) Easy Tuna Noodle Casserole Recipe
Recipe card
32) Easy Tuna Noodle Casserole Recipe
Ingredients
- Ingredients
- 1 box macaroni and cheese (prepared as directed)
- 1 10.5-ounce can cream of celery soup (undiluted)
- 1 cup milk
- 2 pouches or cans tuna (drained well)
- 1 cup crushed potato chips
- frozen peas or diced celery (optional)
Cooking Instructions
- Instructions
- Prepare macaroni and cheese according to package directions. Transfer to a 2.5- to 3-quart baking dish.
- Preheat oven to 350°F.
- Stir undiluted cream of celery soup and milk into the macaroni and cheese until smooth.
- Gently fold in drained tuna and optional vegetables, keeping some tuna pieces intact.
- Scatter crushed potato chips evenly over the top without pressing them down.
- Bake for 30 minutes, until edges are bubbling and chip topping is golden.
- Let sit a few minutes before serving.
Notes: Drain tuna well so the casserole does not get soupy. Fold tuna gently so it stays in pieces instead of turning into paste. Do not press the potato chips down because they crisp best sitting on top. Cream of mushroom can replace cream of celery if preferred.
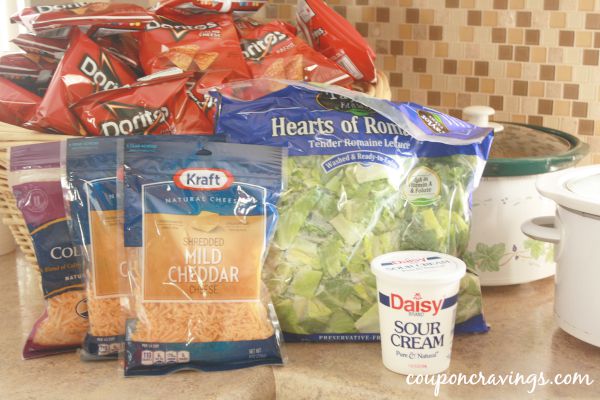
33) Walking Tacos
Recipe card
33) Walking Tacos
Ingredients
- 5 pounds ground beef
- Taco seasoning for 5 pounds ground beef
- 40 individual 1-ounce bags Doritos
- 2 small bags shredded lettuce
- 2 16- ounce containers sour cream
- 6 cups mild shredded cheddar cheese
- Salsa (for serving)
Cooking Instructions
- Brown ground beef in batches, breaking it into small crumbles.
- Drain fat well. Add taco seasoning and water according to packet directions, then simmer until liquid is absorbed.
- Transfer cooked taco meat to slow cookers set to Low or Warm.
- Set out Doritos bags, lettuce, sour cream, cheese, salsa, and any extra toppings buffet-style.
- To serve, lightly crush chips in the bag, tear open the top, and add taco meat and toppings.
- Serve immediately while the meat is warm and the chips are crunchy.
Notes: Drain the beef well so the walking tacos are not greasy. Keep taco meat warm in a slow cooker for 2 to 3 hours for parties. Taco meat can be made up to 2 days ahead and reheated with a splash of water or broth if needed. Set up two topping lines for large groups so guests move through faster.
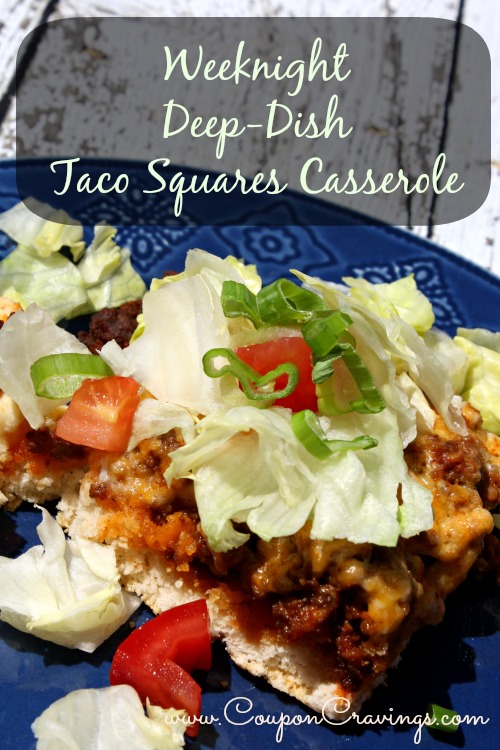
34) Weeknight Deep-Dish Taco Squares Casserole Recipe
Recipe card
34) Weeknight Deep-Dish Taco Squares Casserole Recipe
Ingredients
- 2 cups biscuit baking mix
- 1/2 cup water
- 1 pound ground beef
- 1/8 teaspoon garlic powder
- 1 8- ounce can tomato sauce
- 1 packet taco seasoning mix
- 1 cup shredded cheddar cheese
- 1 cup sour cream
- 1/3 cup mayonnaise
- 1/4 teaspoon paprika
- Sour cream (chopped tomatoes, green onions, and chopped or shredded lettuce, for topping)
Cooking Instructions
- Preheat oven to 375°F and lightly grease a 9×13 baking dish.
- Combine biscuit baking mix and water until a soft dough forms. Spread evenly in the prepared dish.
- Bake uncovered for 9 minutes, then remove from oven and set aside.
- Brown ground beef in a skillet over medium-high heat and drain fat well.
- Add taco seasoning, tomato sauce, and garlic powder to the beef. Stir to combine.
- Spread beef mixture evenly over the baked crust.
- Combine sour cream, shredded cheddar, and mayonnaise in a bowl.
- Spoon sour cream mixture over the beef layer and spread gently.
- Sprinkle paprika over the top.
- Bake uncovered at 375°F for 25 more minutes.
- Cut into squares and top each piece with sour cream, tomatoes, green onions, and lettuce.
Notes: Drain the ground beef very well so the crust does not get greasy. Spread the biscuit dough thin and even for the best texture. Let the casserole rest briefly before cutting cleaner squares. Leftovers keep refrigerated for up to 4 days and reheat well in a 350°F oven.
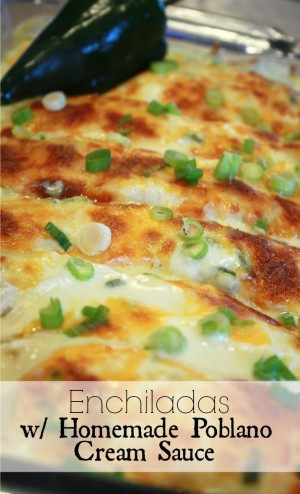
35) Pork Shoulder Slow Cooker Enchiladas with Poblano Cream Sauce
Recipe card
35) Pork Shoulder Slow Cooker Enchiladas with Poblano Cream Sauce
Ingredients
- 3 pounds pork shoulder or pork butt
- 1 12- ounce can Coca-Cola
- 1/3 cup brown sugar
- 1 tablespoon apple cider vinegar
- 2 teaspoons liquid smoke
- 2 teaspoons garlic powder
- 1 teaspoon minced onion
- 1 teaspoon salt
- 1/2 teaspoon pepper
- 1/2 teaspoon paprika
- 1 teaspoon fresh ginger (or 1/2 teaspoon ground ginger)
- 3 tablespoons unsalted butter
- 3 tablespoons flour
- 2 cups chicken broth
- 1 cup sour cream
- 1/3 fresh poblano pepper (seeded and diced)
- 8 to 10 medium tortillas
- 2 cups Monterey Jack or Colby Jack cheese
- 5 tablespoons green onions (for garnish)
Cooking Instructions
- Lightly spray a 4 to 6 quart slow cooker and add pork shoulder.
- Whisk Coca-Cola, brown sugar, apple cider vinegar, liquid smoke, garlic powder, minced onion, salt, pepper, paprika, and ginger together. Pour over pork.
- Cover and cook on Low for 10 hours, until pork shreds easily.
- Remove pork to a cutting board and shred with two forks. Reserve about 2 cups plain shredded pork for enchiladas.
- Melt butter in a saucepan over medium-low heat. Whisk in flour and cook 1 to 2 minutes.
- Slowly whisk in chicken broth and cook 3 to 5 minutes, until thickened and smooth.
- Remove sauce from heat and cool 5 minutes, then stir in sour cream and diced poblano until smooth.
- Preheat oven to 350°F and spray a 9×13 baking dish.
- Fill tortillas with reserved pork, roll tightly, and place seam-side-down in the baking dish.
- Pour poblano cream sauce over enchiladas and sprinkle with cheese.
- Bake uncovered at 350°F for 20 to 25 minutes, until cheese is melted and sauce bubbles at the edges.
- Optional: broil 2 to 3 minutes for a lightly browned top, watching closely. Rest 5 minutes and garnish with green onions.
Notes: Let the cream sauce cool for 5 minutes before stirring in sour cream so it stays smooth and does not break. Reserve plain shredded pork for the enchiladas before adding any barbecue sauce or extra cooking liquid. Pork shoulder or butt works best because lean pork can dry out over 10 hours. Assemble up to 24 hours ahead and add 10 to 15 minutes to the bake time if baking cold.
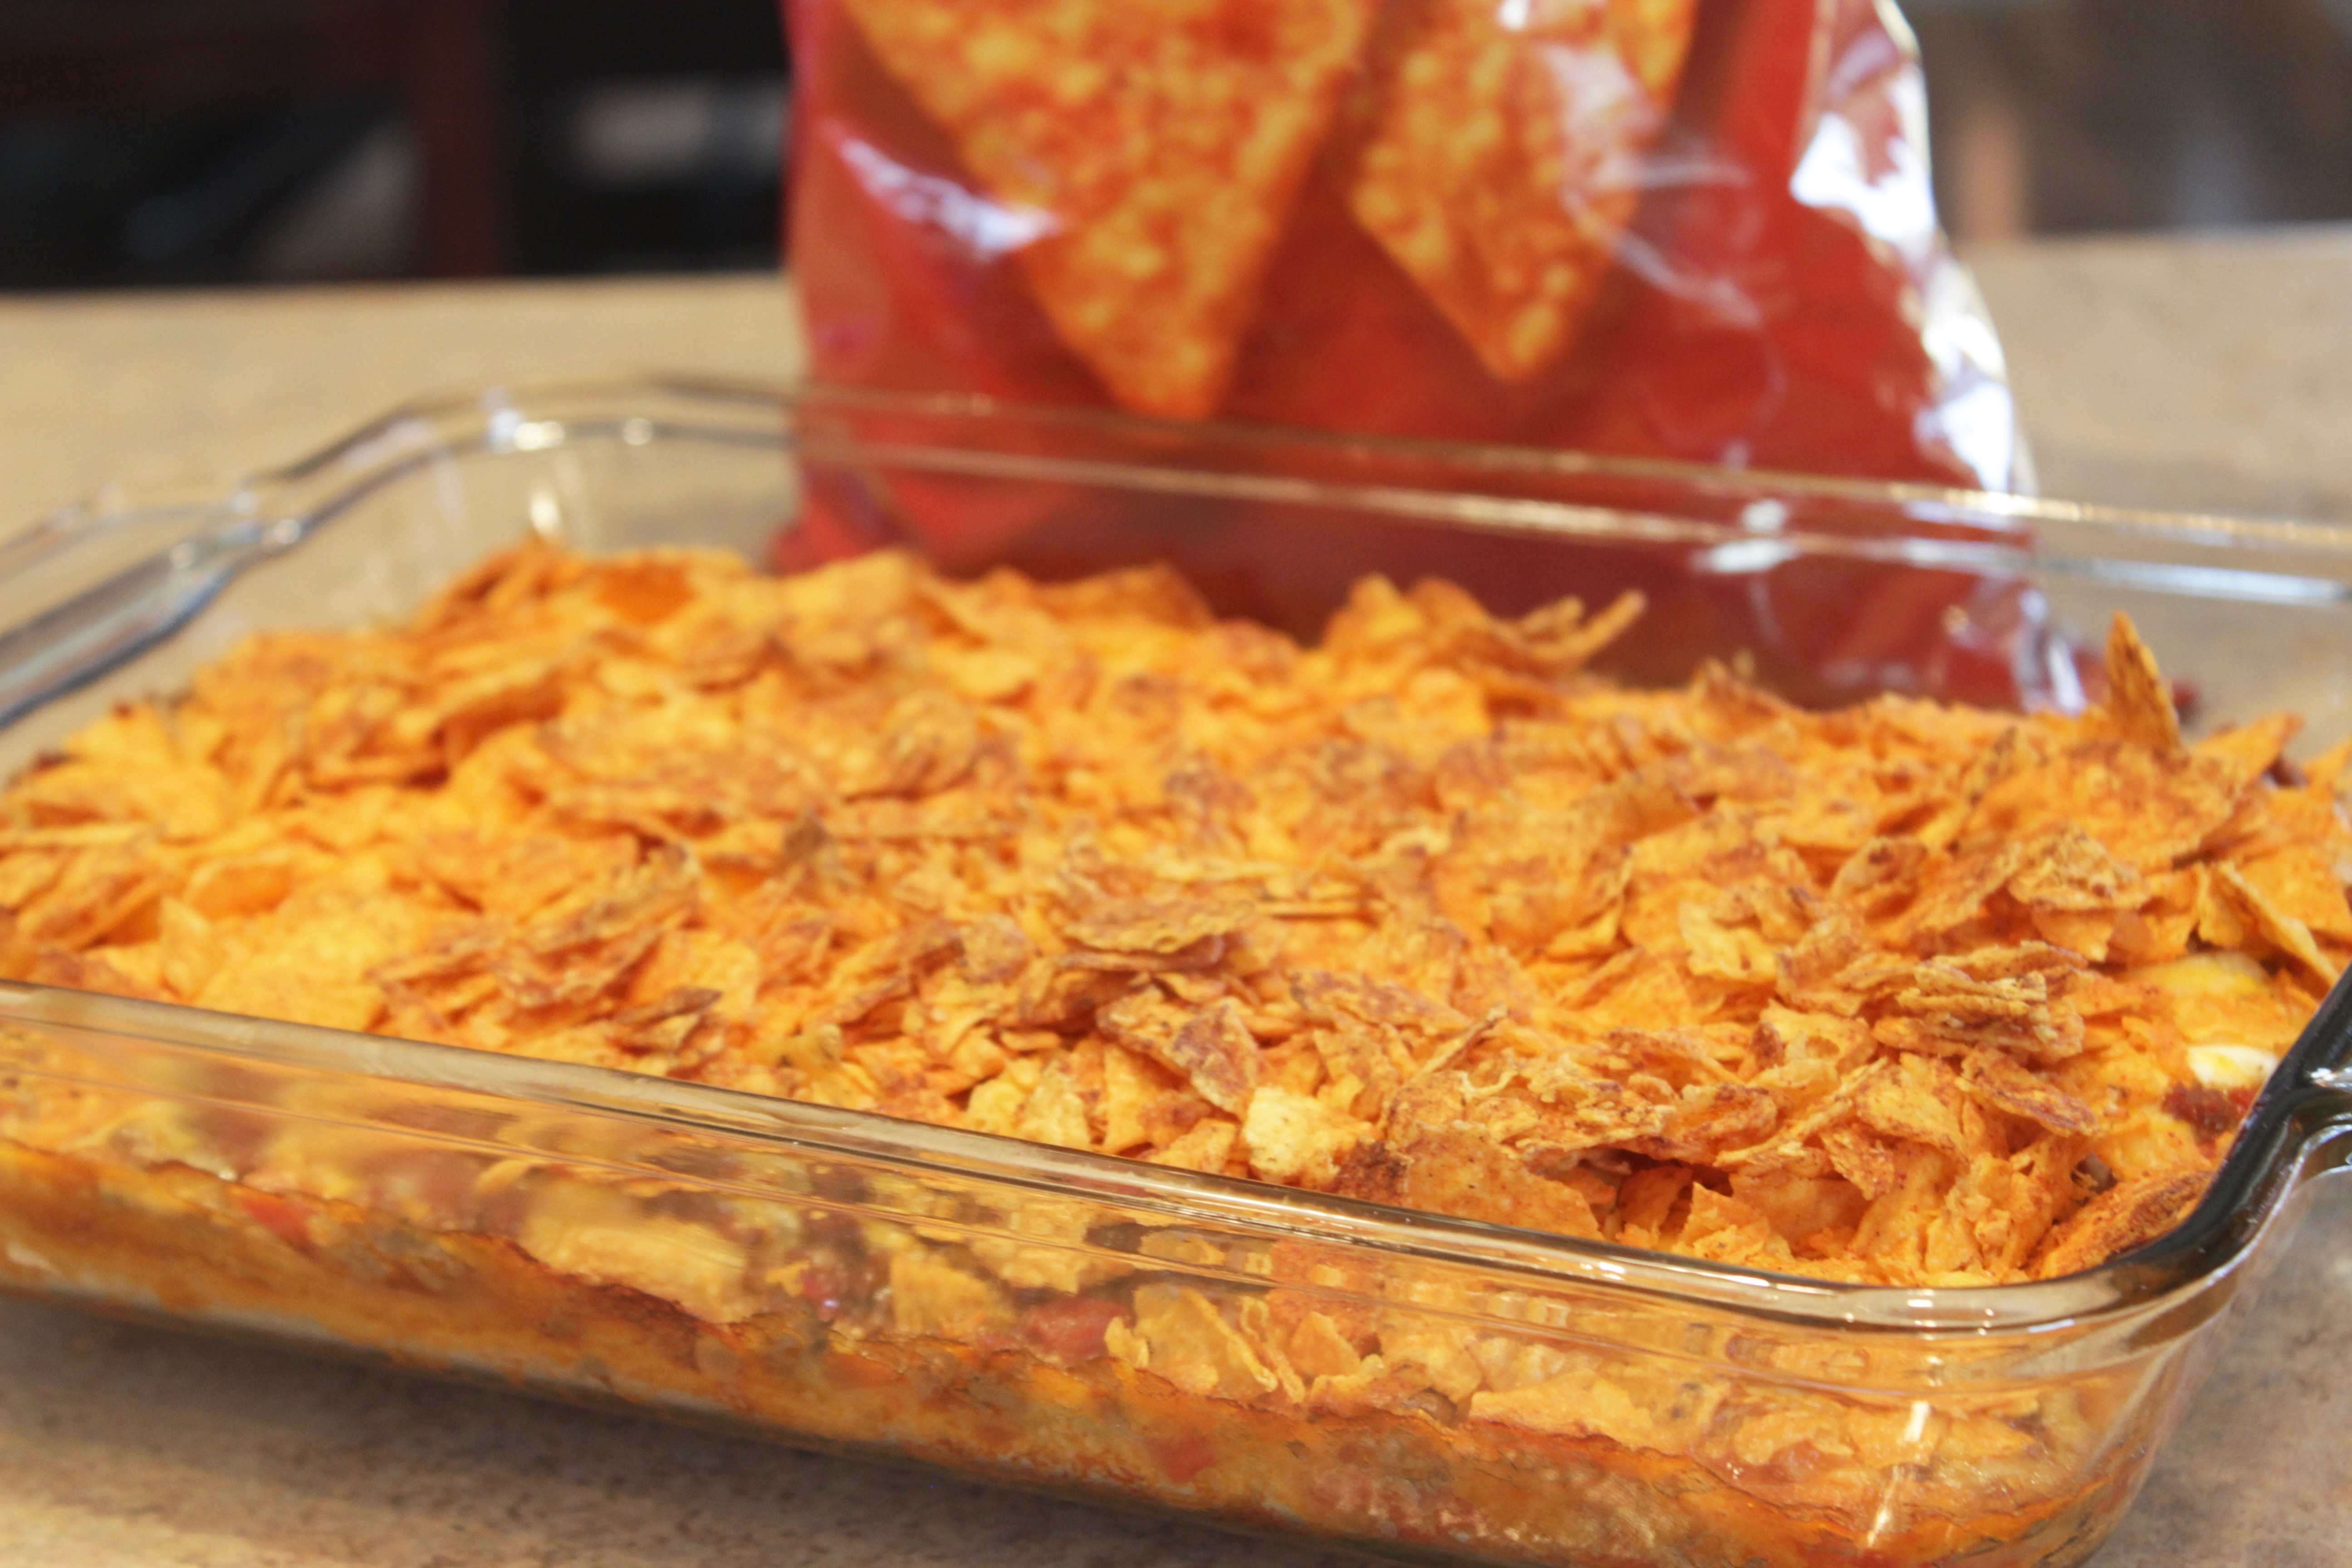
36) Taco Crescent Bake
Recipe card
36) Taco Crescent Bake
Ingredients
- 2 cans crescent roll dough
- 2 to 3 cups cooked taco meat
- 1 can diced tomatoes (drained, or tomato sauce)
- 1 cup sour cream
- 2 cups shredded cheese
- 1 to 2 cups crushed Doritos or tortilla chips (optional)
Cooking Instructions
- Preheat oven to 375°F and spray a 9×13 baking dish.
- Press crescent dough into the bottom of the dish, sealing seams to make one solid crust.
- Optional: pre-bake crust for 6 to 8 minutes for a firmer base.
- Spread cooked taco meat evenly over the crust.
- Add drained tomatoes or tomato sauce over the meat.
- Spread sour cream over the warm meat layer.
- Top with shredded cheese.
- Bake for 15 minutes, until cheese is melted and edges are bubbling.
- Sprinkle crushed chips evenly over the top.
- Bake another 10 to 15 minutes, until hot and bubbly.
- Let rest 5 minutes before cutting into squares.
Notes: Pre-bake the crust if you want a firmer base. Drain diced tomatoes very well or use tomato sauce for picky eaters. Add chips near the end so they stay crisp. Leftovers keep refrigerated for up to 3 days; add fresh chips after reheating if the topping softens.
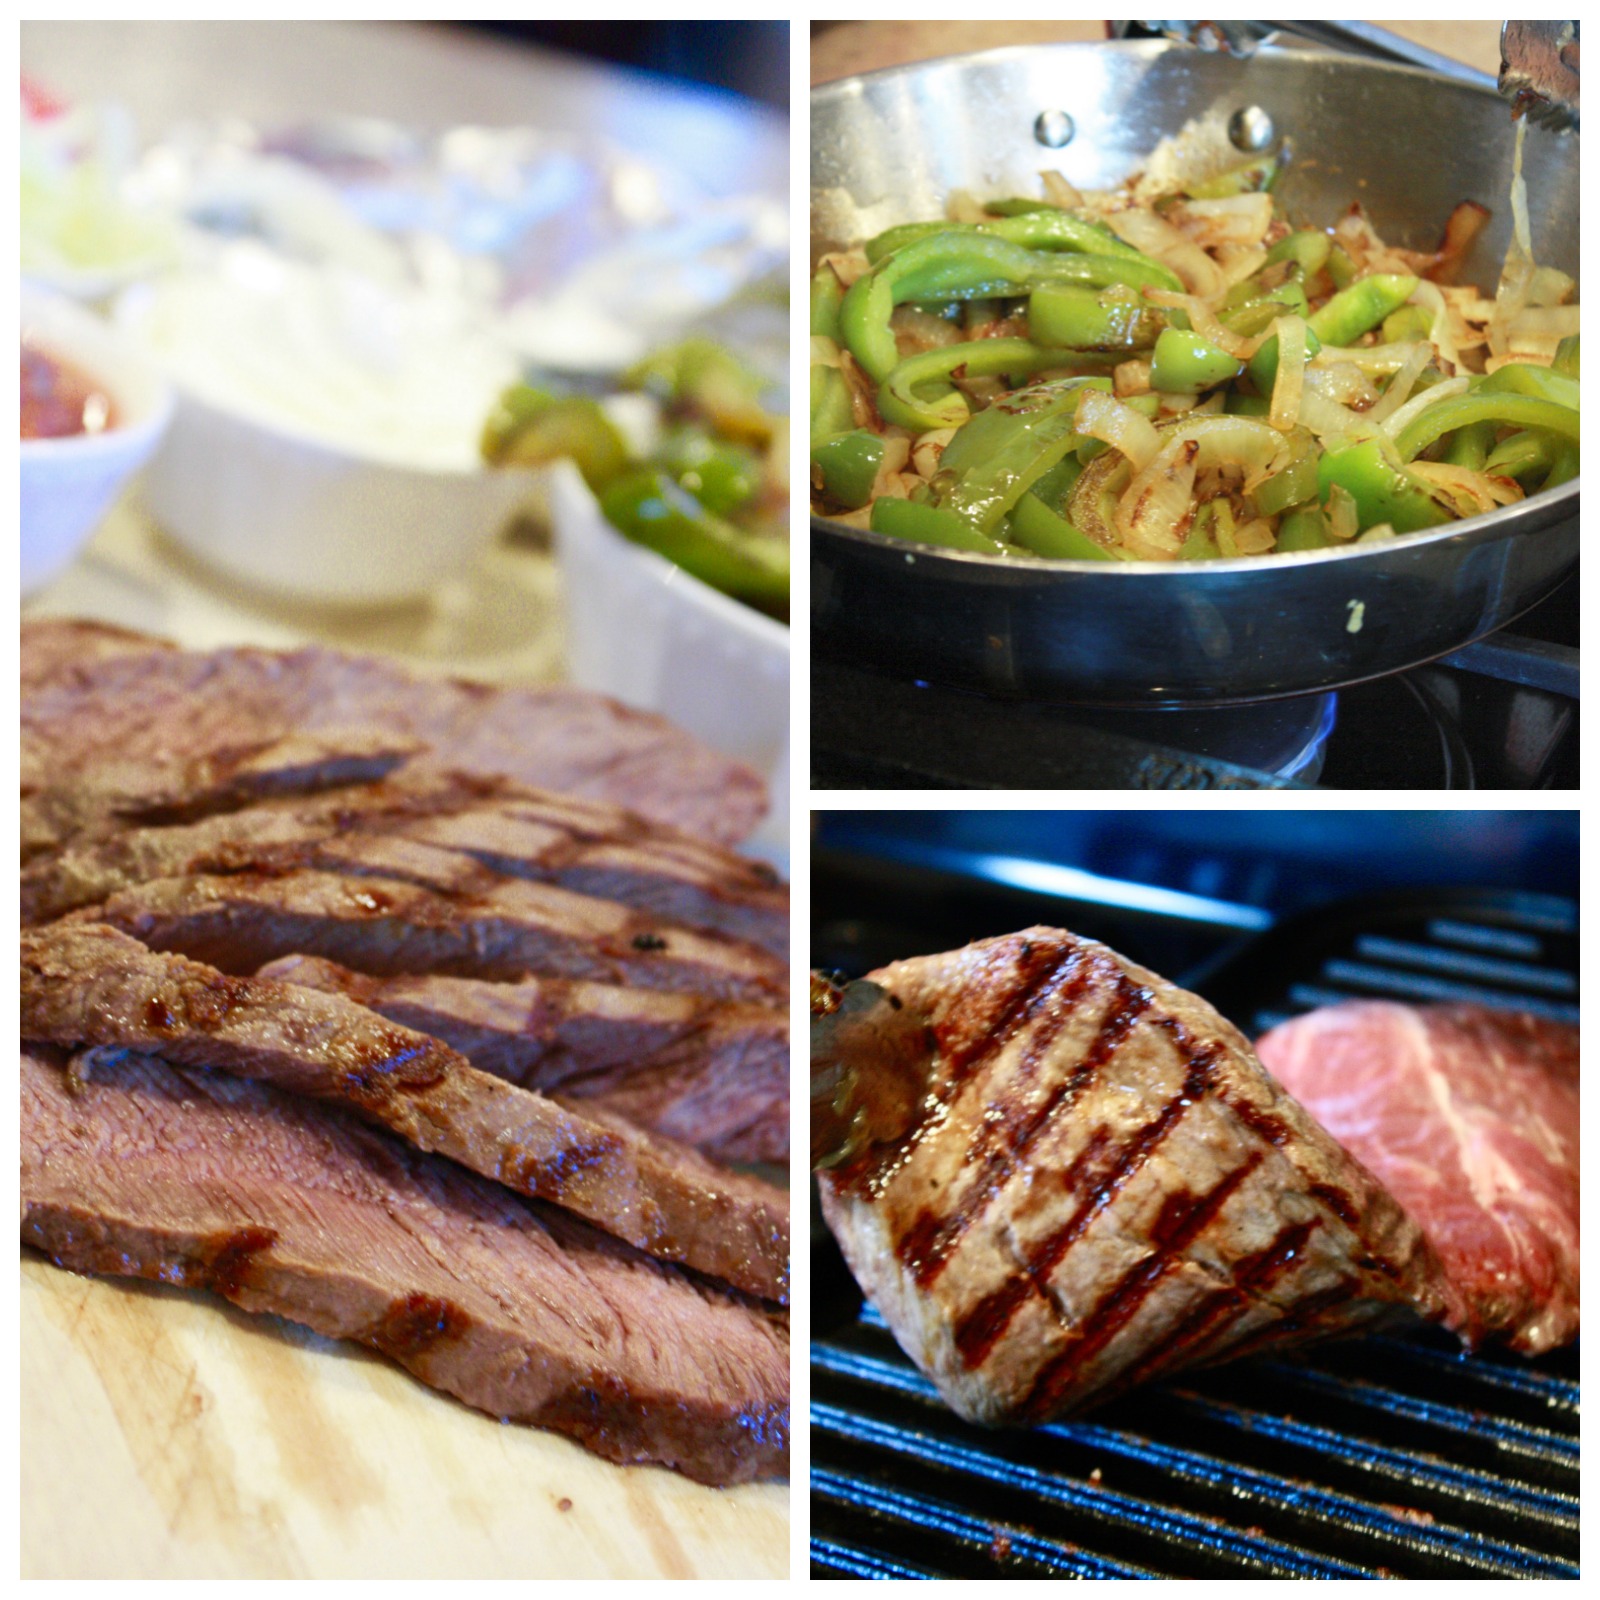
37) Steak Fajitas Restaurant Style
Recipe card
37) Steak Fajitas Restaurant Style
Ingredients
- 1 flat iron steak
- 1/2 cup lime juice
- 2 teaspoons minced garlic
- 2 tablespoons olive oil (for marinade)
- 1 teaspoon ground cumin
- Salt and freshly ground black pepper (to taste)
- 2 yellow onions (sliced)
- 2 green bell peppers (sliced)
- 1 tablespoon sugar
- 1 tablespoon olive oil (for vegetables)
- Flour tortillas (warmed)
- Sour cream (shredded cheese, guacamole, shredded lettuce, and salsa, for serving)
Cooking Instructions
- Whisk lime juice, garlic, 2 tablespoons olive oil, cumin, salt, and pepper in a shallow bowl or zip-top bag.
- Add steak, turn to coat, cover, and refrigerate 4 to 6 hours.
- Remove steak from marinade and let it sit at room temperature 15 to 20 minutes before cooking.
- Heat 1 tablespoon olive oil in a large skillet over medium-low heat. Add onions and peppers, sprinkle with sugar, and cook 12 to 15 minutes, stirring occasionally, until soft and lightly caramelized.
- Heat a cast iron grill pan over high heat for 2 to 3 minutes. Pat steak dry with paper towels.
- Cook steak 4 to 5 minutes per side for medium, depending on thickness.
- Transfer steak to a cutting board and rest 5 minutes.
- Slice steak thinly against the grain.
- Serve steak with peppers, onions, warm tortillas, and toppings.
Notes: Do not marinate flat iron steak longer than 6 hours or the lime juice can affect the texture. Pat the steak dry before cooking so it sears instead of steams. Let steak rest before slicing, then cut against the grain for tenderness. Cook vegetables over medium-low heat so they caramelize instead of just softening.
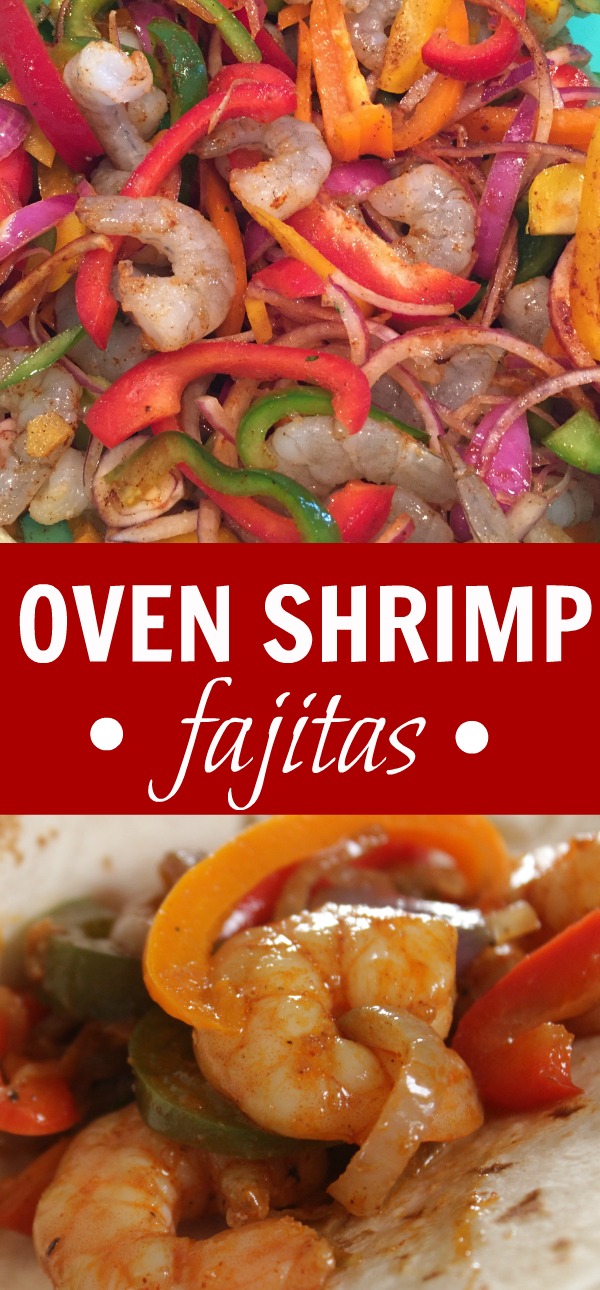
38) Mexican Shrimp Fajitas Recipe
Recipe card
38) Mexican Shrimp Fajitas Recipe
Ingredients
- 2 pounds raw shrimp (peeled and deveined, tails removed)
- 1 small red onion (sliced thin)
- 1 green bell pepper (sliced thin)
- 1 yellow bell pepper (sliced thin)
- 1 red bell pepper (sliced thin)
- 1 orange bell pepper (sliced thin)
- 2 tablespoons extra virgin olive oil
- 1 teaspoon fajita seasoning blend
- 1/2 teaspoon smoked paprika
- 1 teaspoon chili powder
- 1/2 teaspoon garlic powder
- 1/2 teaspoon onion powder
- 1/2 teaspoon ground cumin
- 1 teaspoon sea salt
- 1/4 teaspoon black pepper
- Flour tortillas and fresh lime (for serving)
Cooking Instructions
- Thaw shrimp if frozen, remove tails, and pat very dry with paper towels.
- Slice peppers and red onion into thin strips.
- In a large bowl, combine shrimp, peppers, onion, olive oil, fajita seasoning, smoked paprika, chili powder, garlic powder, onion powder, cumin, salt, and pepper. Toss until evenly coated.
- Cover and refrigerate for 2 hours. Toss once more before cooking.
- Preheat oven to 450°F and spray two large baking sheets with cooking spray.
- Spread shrimp and vegetables in even layers on the baking sheets.
- Bake for 10 minutes.
- Broil on low for 2 to 4 minutes, watching closely, until shrimp and vegetables are lightly browned. Serve with tortillas and fresh lime.
Notes: Dry the shrimp well before marinating or they will steam instead of roast. Two hours of marinating is ideal; do not go much past 4 hours because shrimp texture can soften. Reheat leftovers gently in a skillet instead of the microwave so the shrimp does not turn rubbery. Freeze only the raw marinated mixture, not the cooked fajita filling.

39) Crockpot Enchilada Soup
Recipe card
39) Crockpot Enchilada Soup
Ingredients
- Ingredients
- 1 to 1 1/2 pounds boneless chicken breast
- 2 10-ounce cans red enchilada sauce
- 28 ounces diced tomatoes (undrained)
- 14.5 ounces chicken broth (low sodium)
- 1 can black beans (undrained)
- 10 ounces frozen corn (thawed)
- 1 onion (chopped)
- 2 cloves garlic (minced)
- 1 tablespoon chili powder
- 1 tablespoon ground cumin
- 1/4 cup fresh cilantro (chopped)
- salt and pepper (to taste)
- vegetable oil (for browning chicken)
Cooking Instructions
- Instructions
- Season chicken breast on both sides with salt and pepper. Brown in a skillet with vegetable oil for about 3 minutes per side, if desired.
- Add chicken to the slow cooker. Pour in diced tomatoes, enchilada sauce, chicken broth, and undrained black beans.
- Add thawed corn, onion, garlic, chili powder, cumin, and cilantro. Stir to combine.
- Cover and cook on high for 2 hours, until chicken is cooked through and shreds easily.
- Remove chicken and shred with two forks, then return it to the soup.
- Taste for salt and pepper and serve with toppings.
Notes: Browning the chicken first adds flavor, but the soup still works if you skip that step. Do not drain the black beans because their liquid helps thicken the broth. Thaw frozen corn before adding so it does not cool the slow cooker. Use two cans of enchilada sauce for a fuller broth flavor.
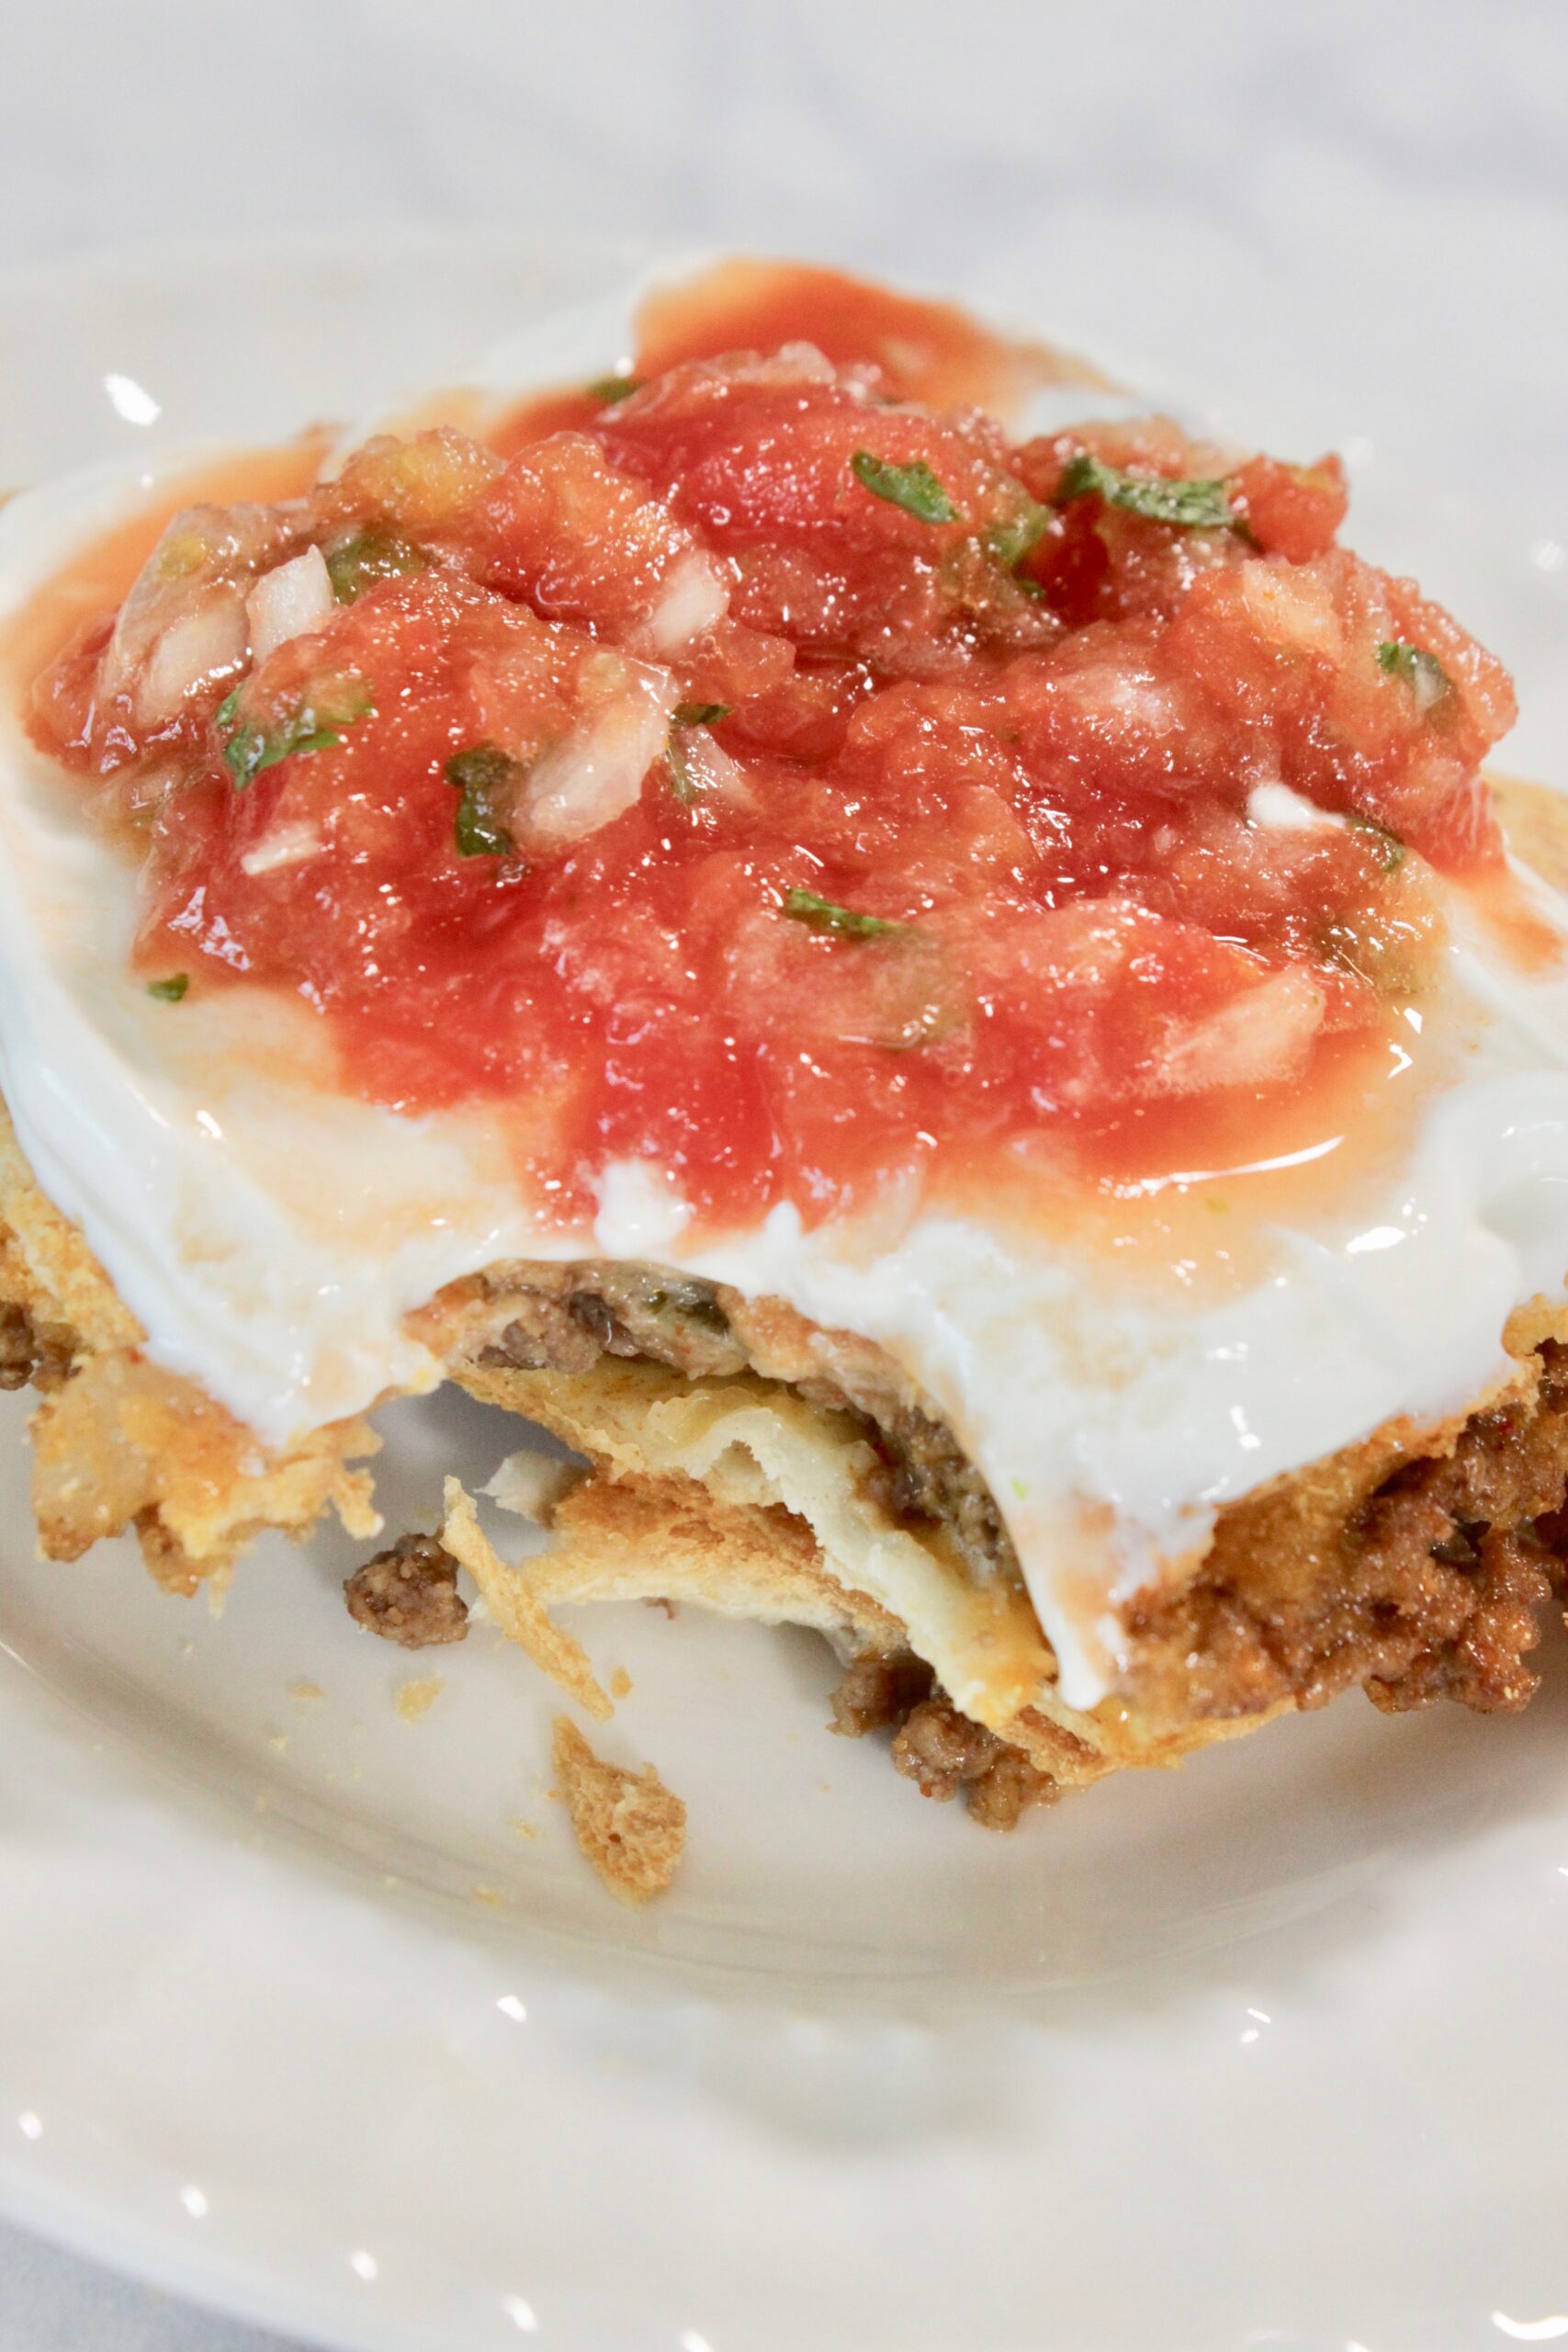
40) Sheet Pan Oven Quesadillas
Recipe card
40) Sheet Pan Oven Quesadillas
Ingredients
- 8 large flour tortillas (10-inch burrito size)
- 1 tablespoon olive or vegetable oil
- 1/2 onion (diced)
- 1 1/2 pounds ground beef
- 1 packet taco seasoning (1 ounce or about 3 tablespoons)
- 1 teaspoon ground cumin
- 1/2 teaspoon smoked paprika
- Salt and pepper (to taste)
- 1 cup shredded cheddar cheese
- 1 cup shredded Colby Jack cheese
- 2/3 cup sliced green onions
- Sour cream (salsa, and guacamole, for serving)
Cooking Instructions
- Preheat oven to 425°F.
- Heat oil in a large skillet over medium heat. Add diced onion and cook until soft and translucent, about 5 minutes.
- Add ground beef and cook, breaking it up, until no pink remains and the meat has browned, about 5 to 7 minutes. Drain fat.
- Stir in taco seasoning, cumin, and smoked paprika. Taste and adjust salt and pepper. Remove from heat.
- On a 13×18-inch sheet pan, arrange 6 tortillas around the edges with about half of each hanging over the sides. Place 1 tortilla in the center to cover the bottom.
- Spread seasoned beef evenly over the tortillas. Top with cheddar, Colby Jack, and green onions.
- Place the last tortilla in the center on top, cutting if needed to cover gaps. Fold overhanging tortilla edges over the filling.
- Place a second sheet pan on top and bake 20 minutes.
- Remove the top pan and bake 15 more minutes, until golden and crisp.
- Rest briefly, slice into squares, and serve with sour cream, salsa, and guacamole.
Notes: Use burrito-size tortillas so they overlap and fold over the filling properly. A second sheet pan keeps the quesadilla compact while baking and gives it a pressed texture. Watch the final uncovered bake closely so the top browns without burning. Leftovers reheat best in a 350°F oven or air fryer so the tortillas crisp again.

41) Pork Chop and Hashbrown Casserole Dinner Recipe
Recipe card
41) Pork Chop and Hashbrown Casserole Dinner Recipe
Ingredients
- 5 bone-in pork chops
- 1 tablespoon oil
- 1 cup sour cream
- 1 can cream of chicken condensed soup (10 3/4 ounces)
- 1/2 cup milk
- 32 ounces frozen hashbrowns
- 1 cup chopped onion
- 1 cup shredded cheddar cheese
- 1/2 teaspoon salt
- 1/4 teaspoon pepper
Cooking Instructions
- Preheat oven to 375°F.
- Heat oil in a skillet over medium-high heat. Brown pork chops 2 to 3 minutes per side, then set aside.
- In a large bowl, combine sour cream, cream of chicken soup, and milk until smooth.
- Add frozen hashbrowns, onion, cheddar cheese, salt, and pepper. Mix until evenly coated.
- Spread hashbrown mixture into an ungreased 9×13 baking dish.
- Lay browned pork chops on top in a single layer, pressing them slightly into the filling.
- Bake uncovered at 375°F for 45 to 50 minutes, until the casserole is hot and pork chops reach 145°F internally.
- Rest 5 minutes before serving.
Notes: Bone-in pork chops stay juicier during the long bake, but boneless chops work if you check them earlier. Use condensed soup straight from the can, not diluted. Store leftovers covered in the refrigerator for up to 3 days and reheat with a splash of milk or broth if the hashbrown layer looks dry.
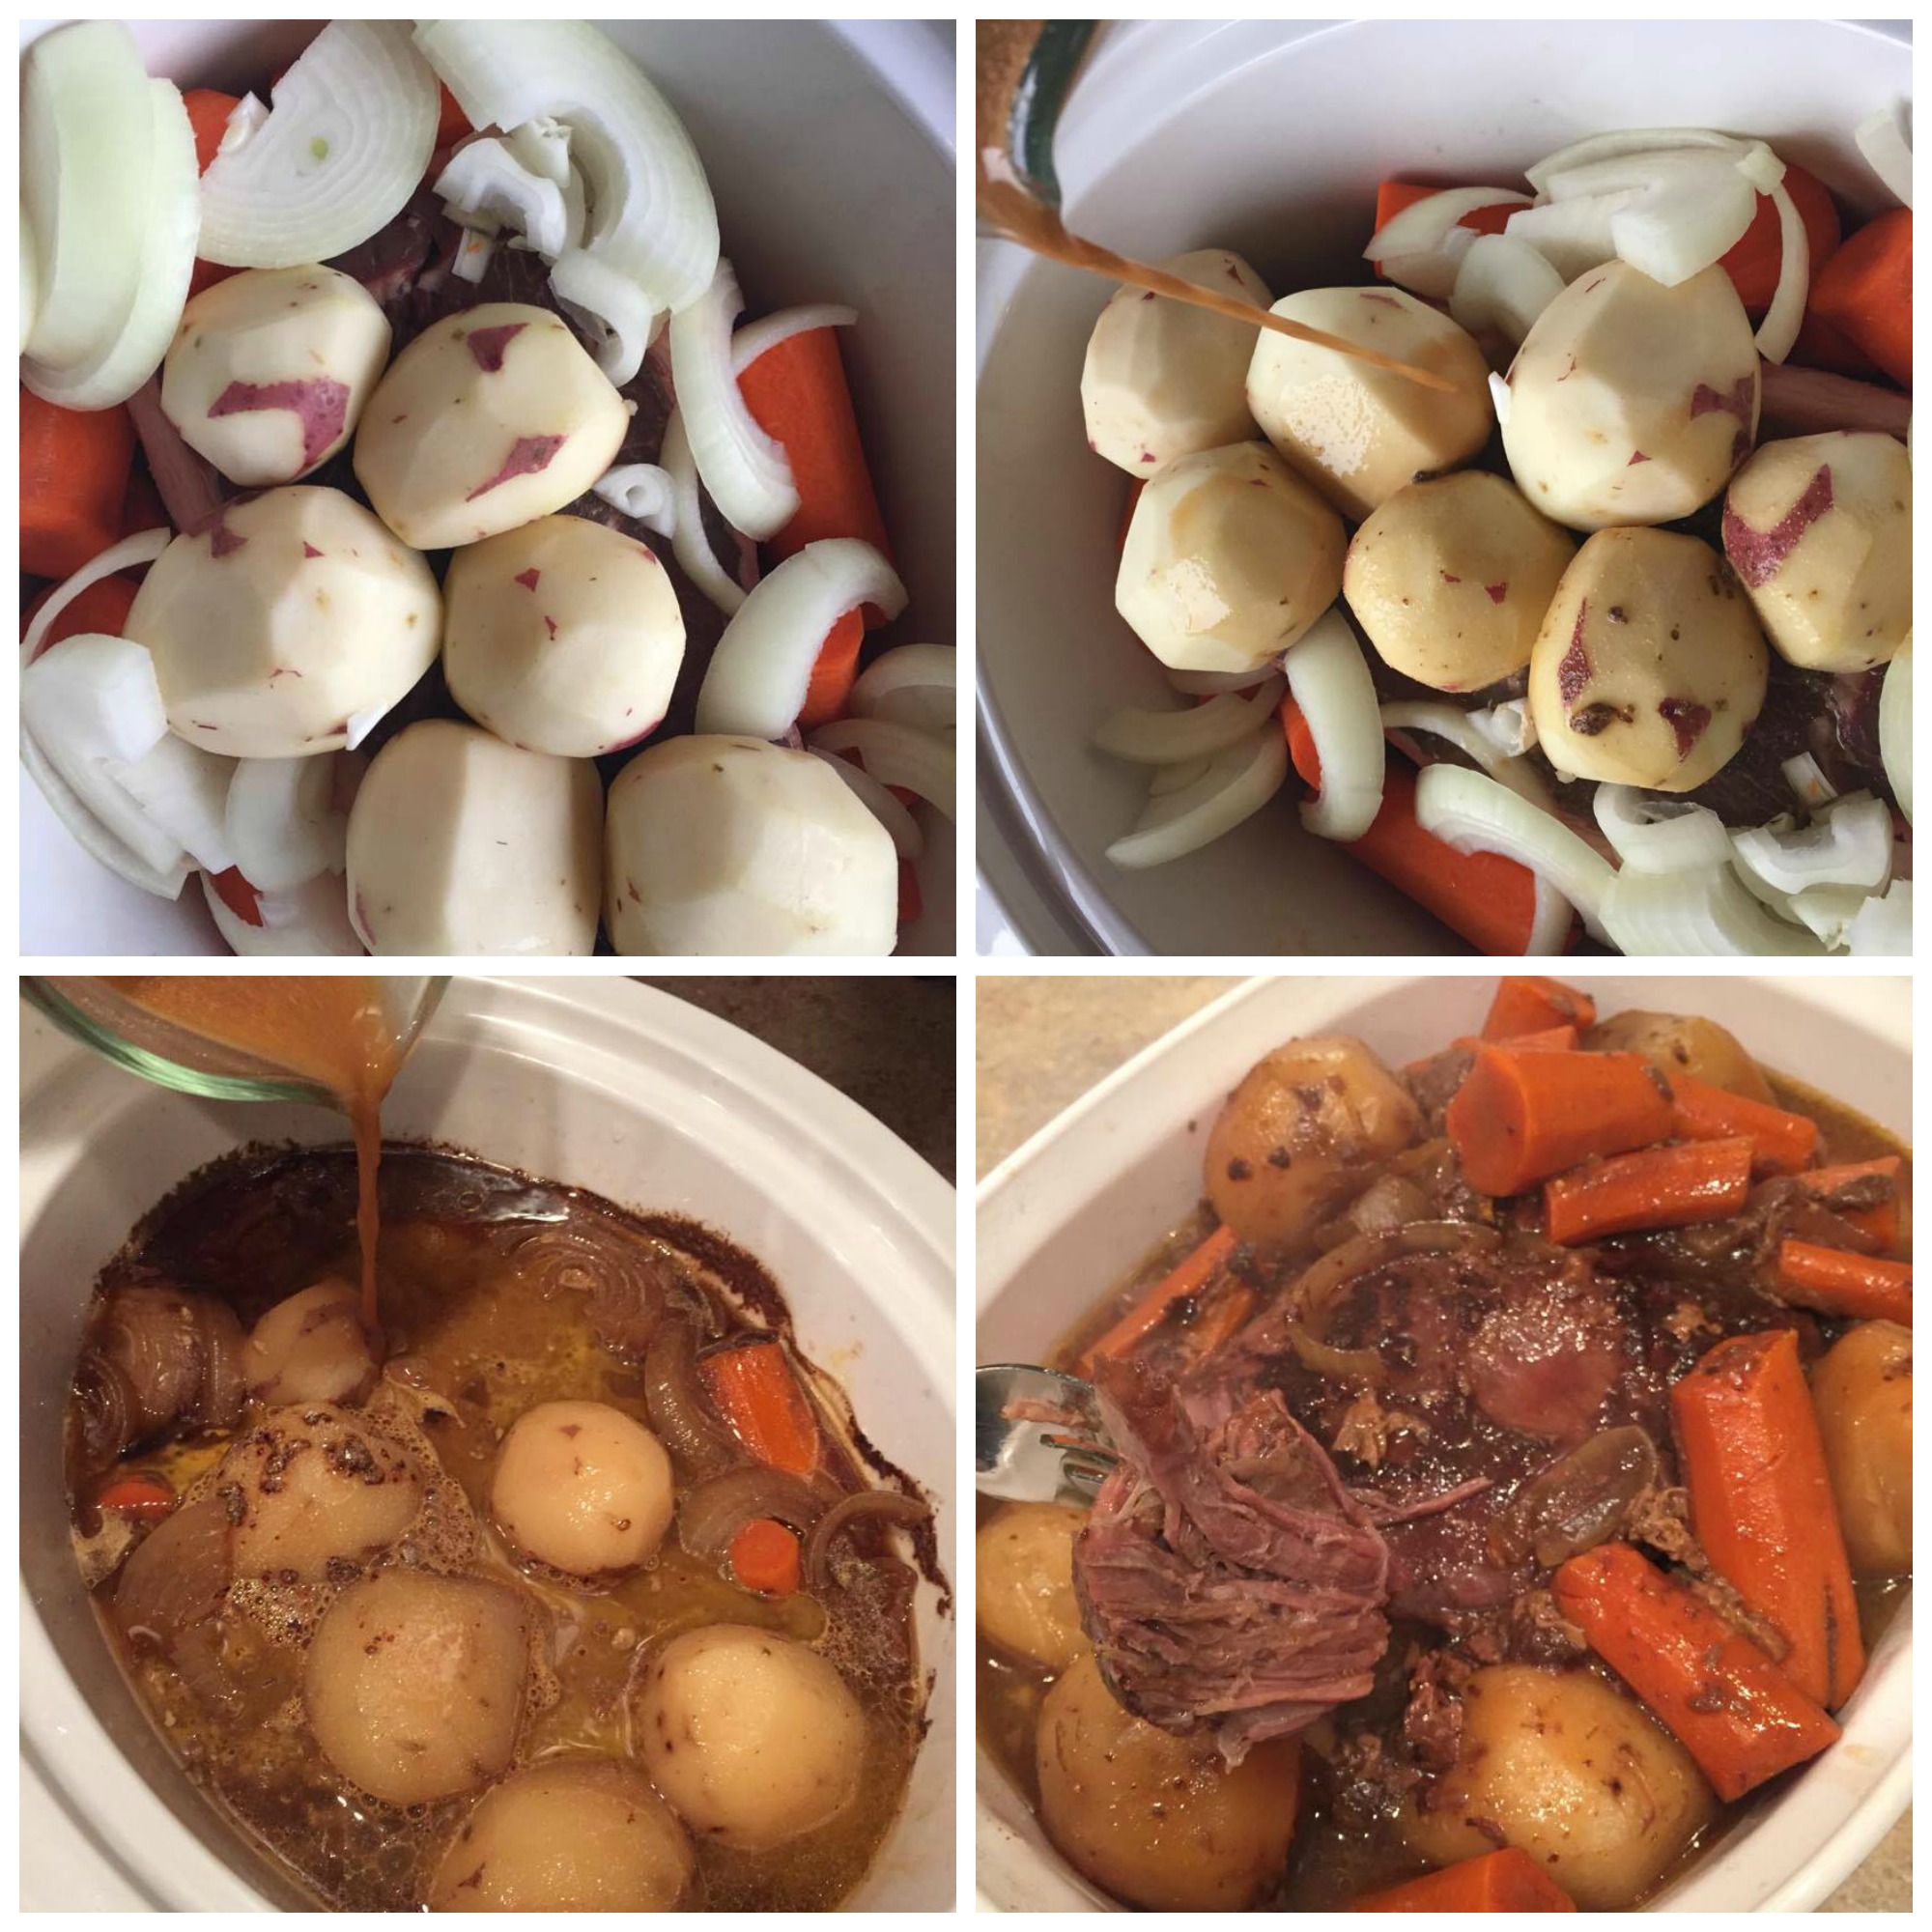
42) Slow Cooker Pot Roast
Recipe card
42) Slow Cooker Pot Roast
Ingredients
- 2 to 3 pounds beef chuck roast
- 4 to 6 red potatoes (peeled)
- 4 to 5 large carrots (peeled and cut into 2-inch pieces)
- 1 medium onion (sliced)
- 1 teaspoon garlic powder
- 2 packets brown gravy mix
- 2 cups cold water (divided)
- Cooking spray
Cooking Instructions
- Spray the inside of the slow cooker with cooking spray.
- Place carrots on the bottom of the slow cooker. Set chuck roast on top of the carrots. Scatter potatoes and onion around and over the roast.
- Whisk 1 packet brown gravy mix with 1 cup cold water and garlic powder until smooth. Pour over roast and vegetables.
- Cover and cook on Low for 7 hours without lifting the lid.
- At the 7-hour mark, whisk the second packet of brown gravy mix with the remaining 1 cup cold water. Pour over the roast.
- Cover and cook on Low for 1 more hour.
- Transfer vegetables to a platter with a slotted spoon or tongs.
- Lift out roast carefully, spoon gravy over everything, and serve.
Notes: Use chuck roast, not a lean cut, for the most tender result. Mix gravy packets with cold water so they do not clump. Do not add extra liquid at the start because the meat and vegetables release moisture as they cook. If the gravy is too thin, thicken a cup of liquid with a cornstarch slurry and stir it back in.
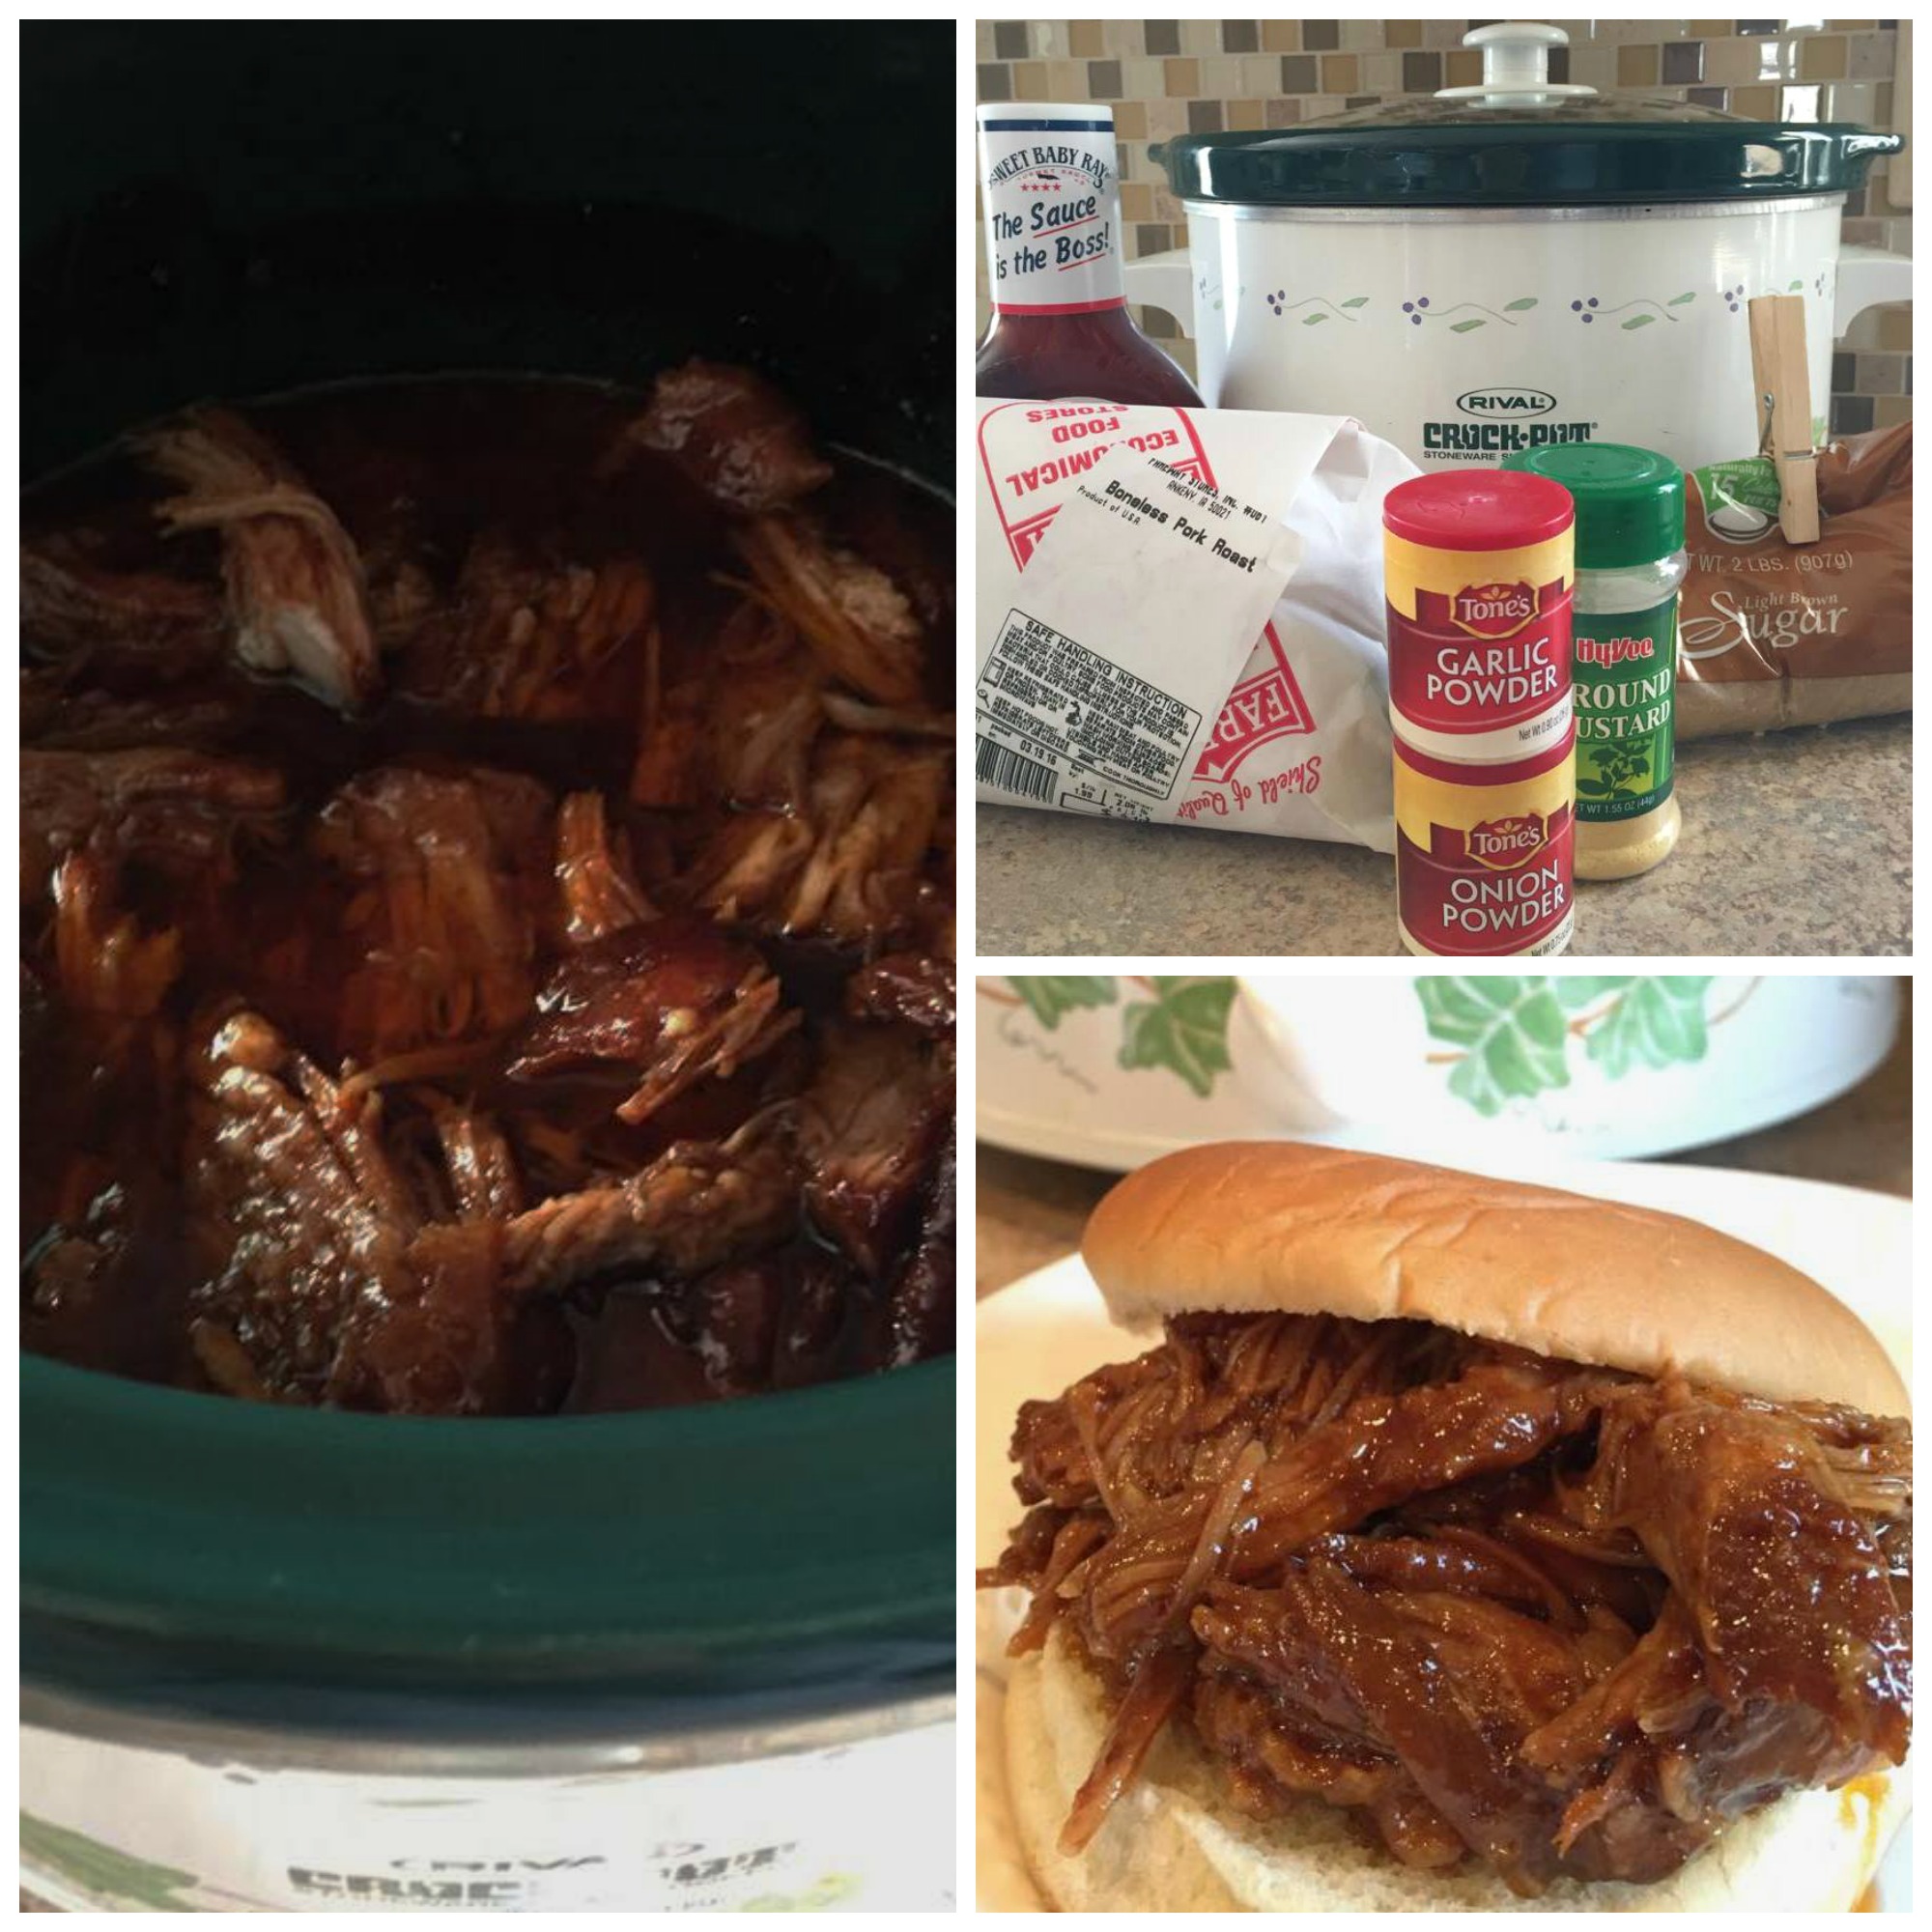
43) Slow Cooker Pulled Pork
Recipe card
43) Slow Cooker Pulled Pork
Ingredients
- 2 pounds boneless pork roast or boneless pork riblets
- 1/2 bottle barbecue sauce (about 9 ounces)
- 1/2 teaspoon dry mustard
- 1/4 teaspoon onion powder
- 1/2 teaspoon garlic powder
- 1/4 cup packed light brown sugar (optional)
- Hamburger buns (for serving)
Cooking Instructions
- Pour about one-quarter of the barbecue sauce into the bottom of the slow cooker.
- Place pork roast on top of the sauce, fat-side-up if it has a visible fat cap.
- Pour remaining barbecue sauce over the pork. Sprinkle dry mustard, onion powder, garlic powder, and brown sugar over the top.
- Cover and cook on Low for 6 to 8 hours, until pork shreds easily with a fork.
- Shred pork with two forks and mix it back into the cooking liquid and sauce.
- Taste and adjust seasoning or add more barbecue sauce if needed.
- Serve warm on hamburger buns.
Notes: Use a barbecue sauce you like because it is a major part of the flavor. The sauce layer under the pork helps prevent scorching and keeps the roast moist. Store leftovers with cooking liquid mixed in so reheated pork does not dry out. Pulled pork freezes well for up to 3 months in meal-sized portions.
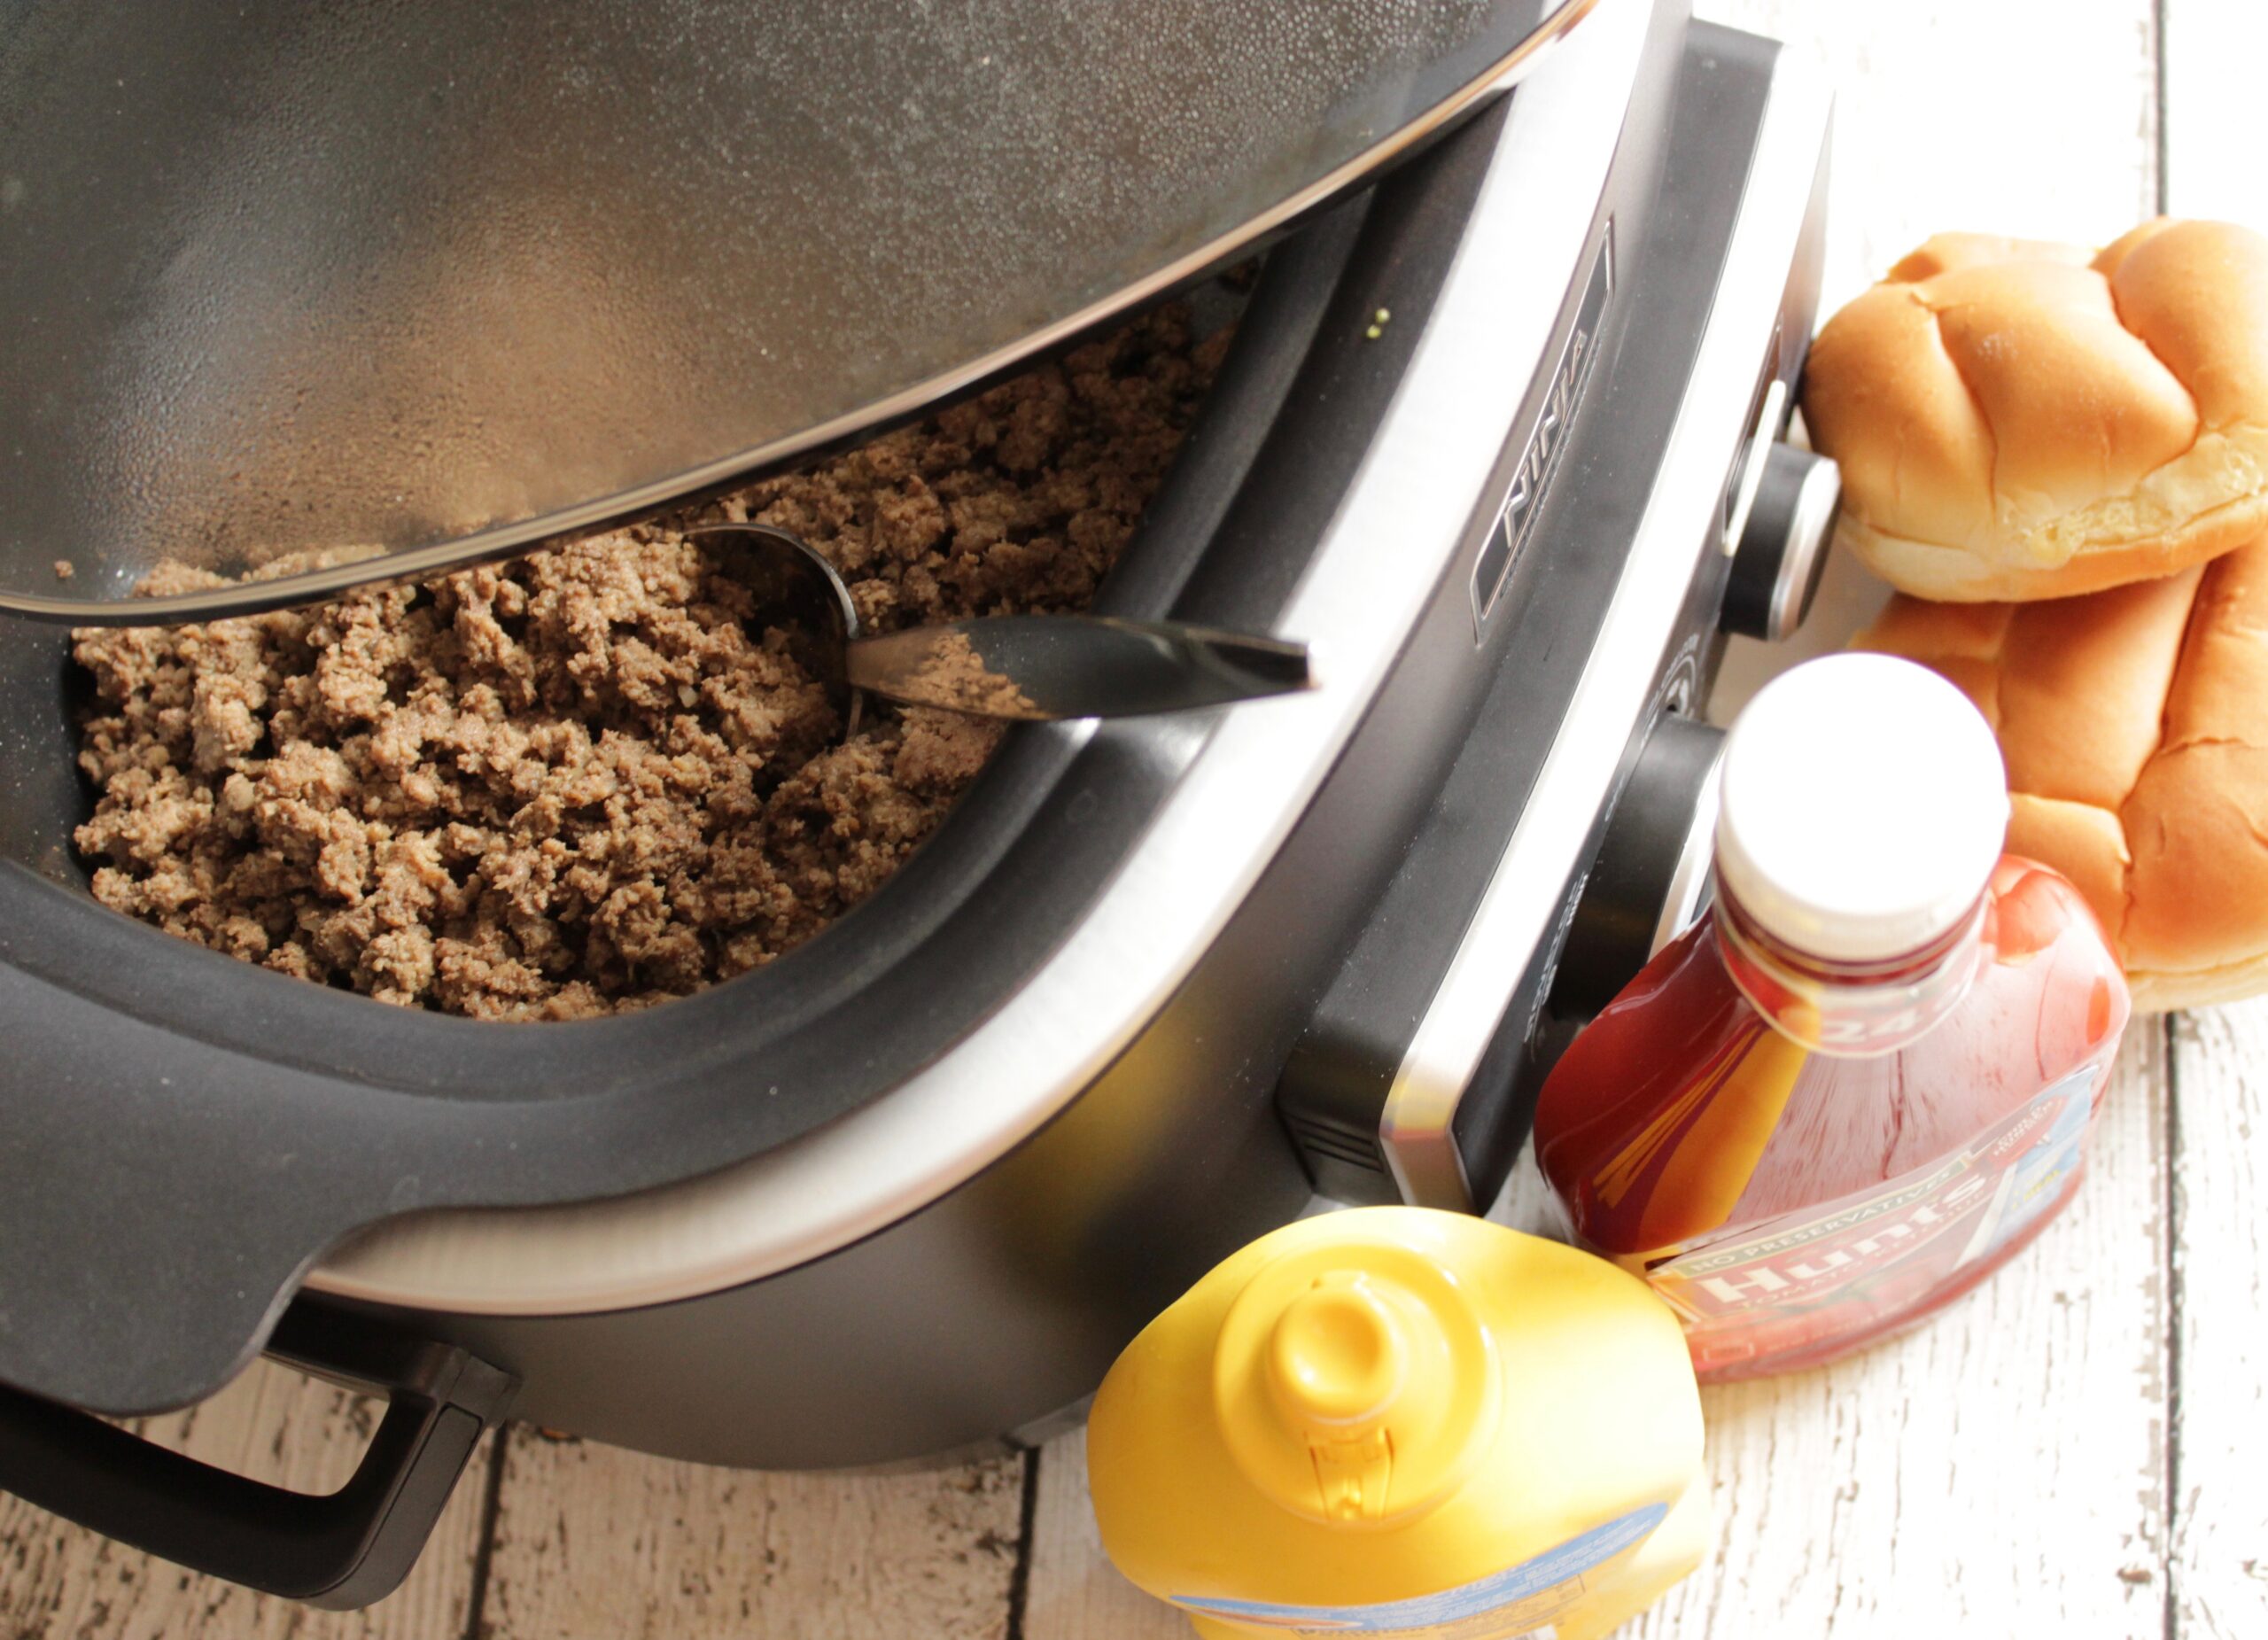
44) Maid Rite Recipe in the Crock Pot
Recipe card
44) Maid Rite Recipe in the Crock Pot
Ingredients
- 2 pounds lean ground beef (uncooked)
- 1 cup warm water
- 3/4 tablespoon dried minced onion
- 1 1/2 tablespoons packed light brown sugar
- 3/4 teaspoon low-sodium beef base
- 3/4 teaspoon low-sodium chicken base
- 1 1/2 tablespoons apple cider vinegar
- 1 1/2 tablespoons Worcestershire sauce
- 3/4 tablespoon low-sodium soy sauce
- 8 hamburger buns
- Ketchup (mustard, and pickles, for serving)
Cooking Instructions
- Set slow cooker to High. Add ground beef and break it into smaller chunks.
- In a measuring cup, combine warm water, dried onion, brown sugar, beef base, chicken base, apple cider vinegar, Worcestershire, and soy sauce. Stir until dissolved.
- Pour seasoning liquid over the beef and stir until the meat is coated.
- Cover and cook on High for 1 hour.
- Remove lid and break the meat into very small crumbles with a meat chopper or firm spatula.
- Turn slow cooker to Low and cook uncovered for 2 1/2 to 3 hours, stirring occasionally and breaking up any clumps.
- Continue cooking until most liquid has evaporated and the beef is finely crumbled with a glossy sheen.
- Serve a generous spoonful on warm hamburger buns with ketchup, mustard, pickles, or other toppings.
Notes: Use lean ground beef, ideally 90/10 or 93/7, so the meat stays juicy without getting greasy. Do not skip the uncovered cook-down because that step concentrates the flavor and creates the loose meat texture. Leftover meat keeps refrigerated for up to 4 days or frozen for up to 3 months. Reheat with a splash of broth or water.
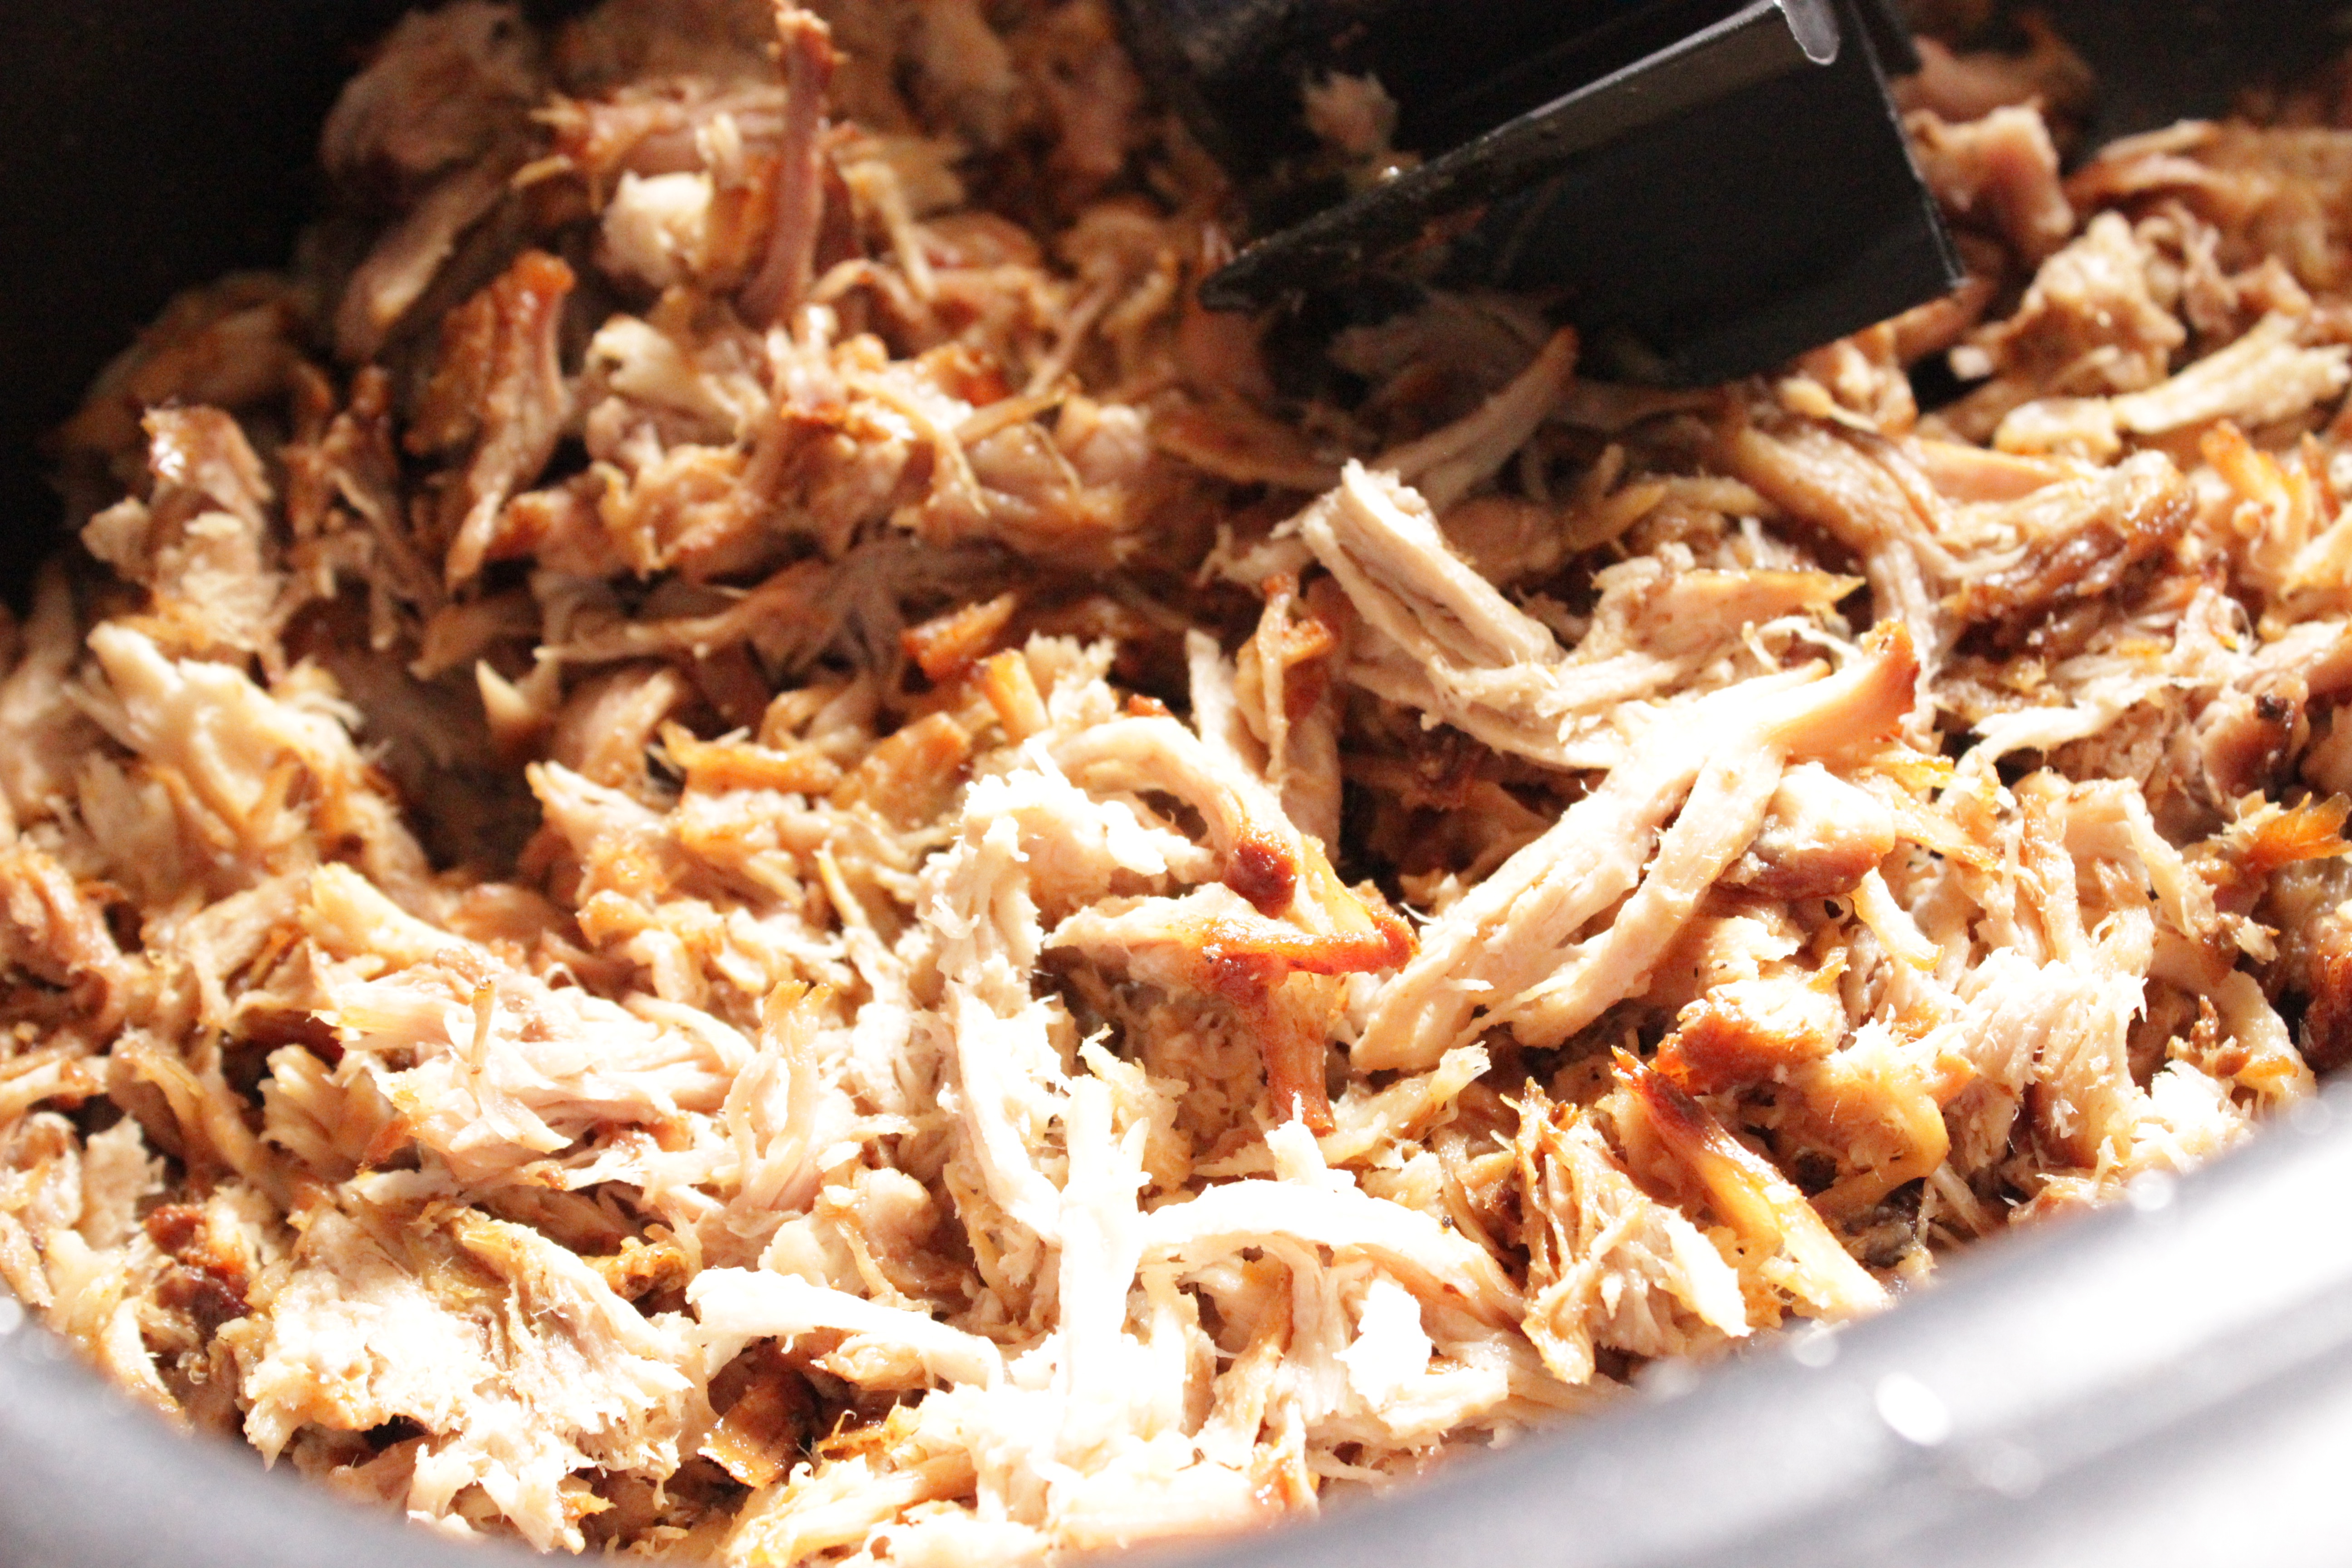
45) Slow Cooker Pork Roast Dinner Recipe
Recipe card
45) Slow Cooker Pork Roast Dinner Recipe
Ingredients
- 2 tablespoons vegetable oil
- 1 3- pound boneless pork roast
- Salt and pepper (to taste)
- 1 cup chicken or vegetable broth
- 1/4 cup balsamic vinegar
- 1/2 cup Coca-Cola
- 1/4 cup soy sauce
- 2 tablespoons honey
- 2 teaspoons minced garlic
Cooking Instructions
- Heat vegetable oil in a heavy skillet over high heat. Season pork roast with salt and pepper.
- Brown roast on all sides for 1 to 2 minutes per side.
- Transfer browned roast to the slow cooker.
- Whisk broth, balsamic vinegar, Coca-Cola, soy sauce, honey, and minced garlic together.
- Pour mixture over the roast.
- Cover and cook on Low for 8 to 10 hours, until pork shreds easily with a fork.
- Remove pork to a cutting board and shred, discarding visible fat.
- Skim fat from the cooking liquid. Return pork to the slow cooker with some of the liquid.
- Serve as sandwiches or with your favorite sides.
Notes: Keep some braising liquid with the shredded pork so it stays moist when reheated. If the roast resists shredding, cook another 30 to 60 minutes. Pork shoulder or pork butt gives the juiciest result, while pork loin is leaner and can dry out. Freeze leftovers with a few spoonfuls of cooking liquid for up to 3 months.
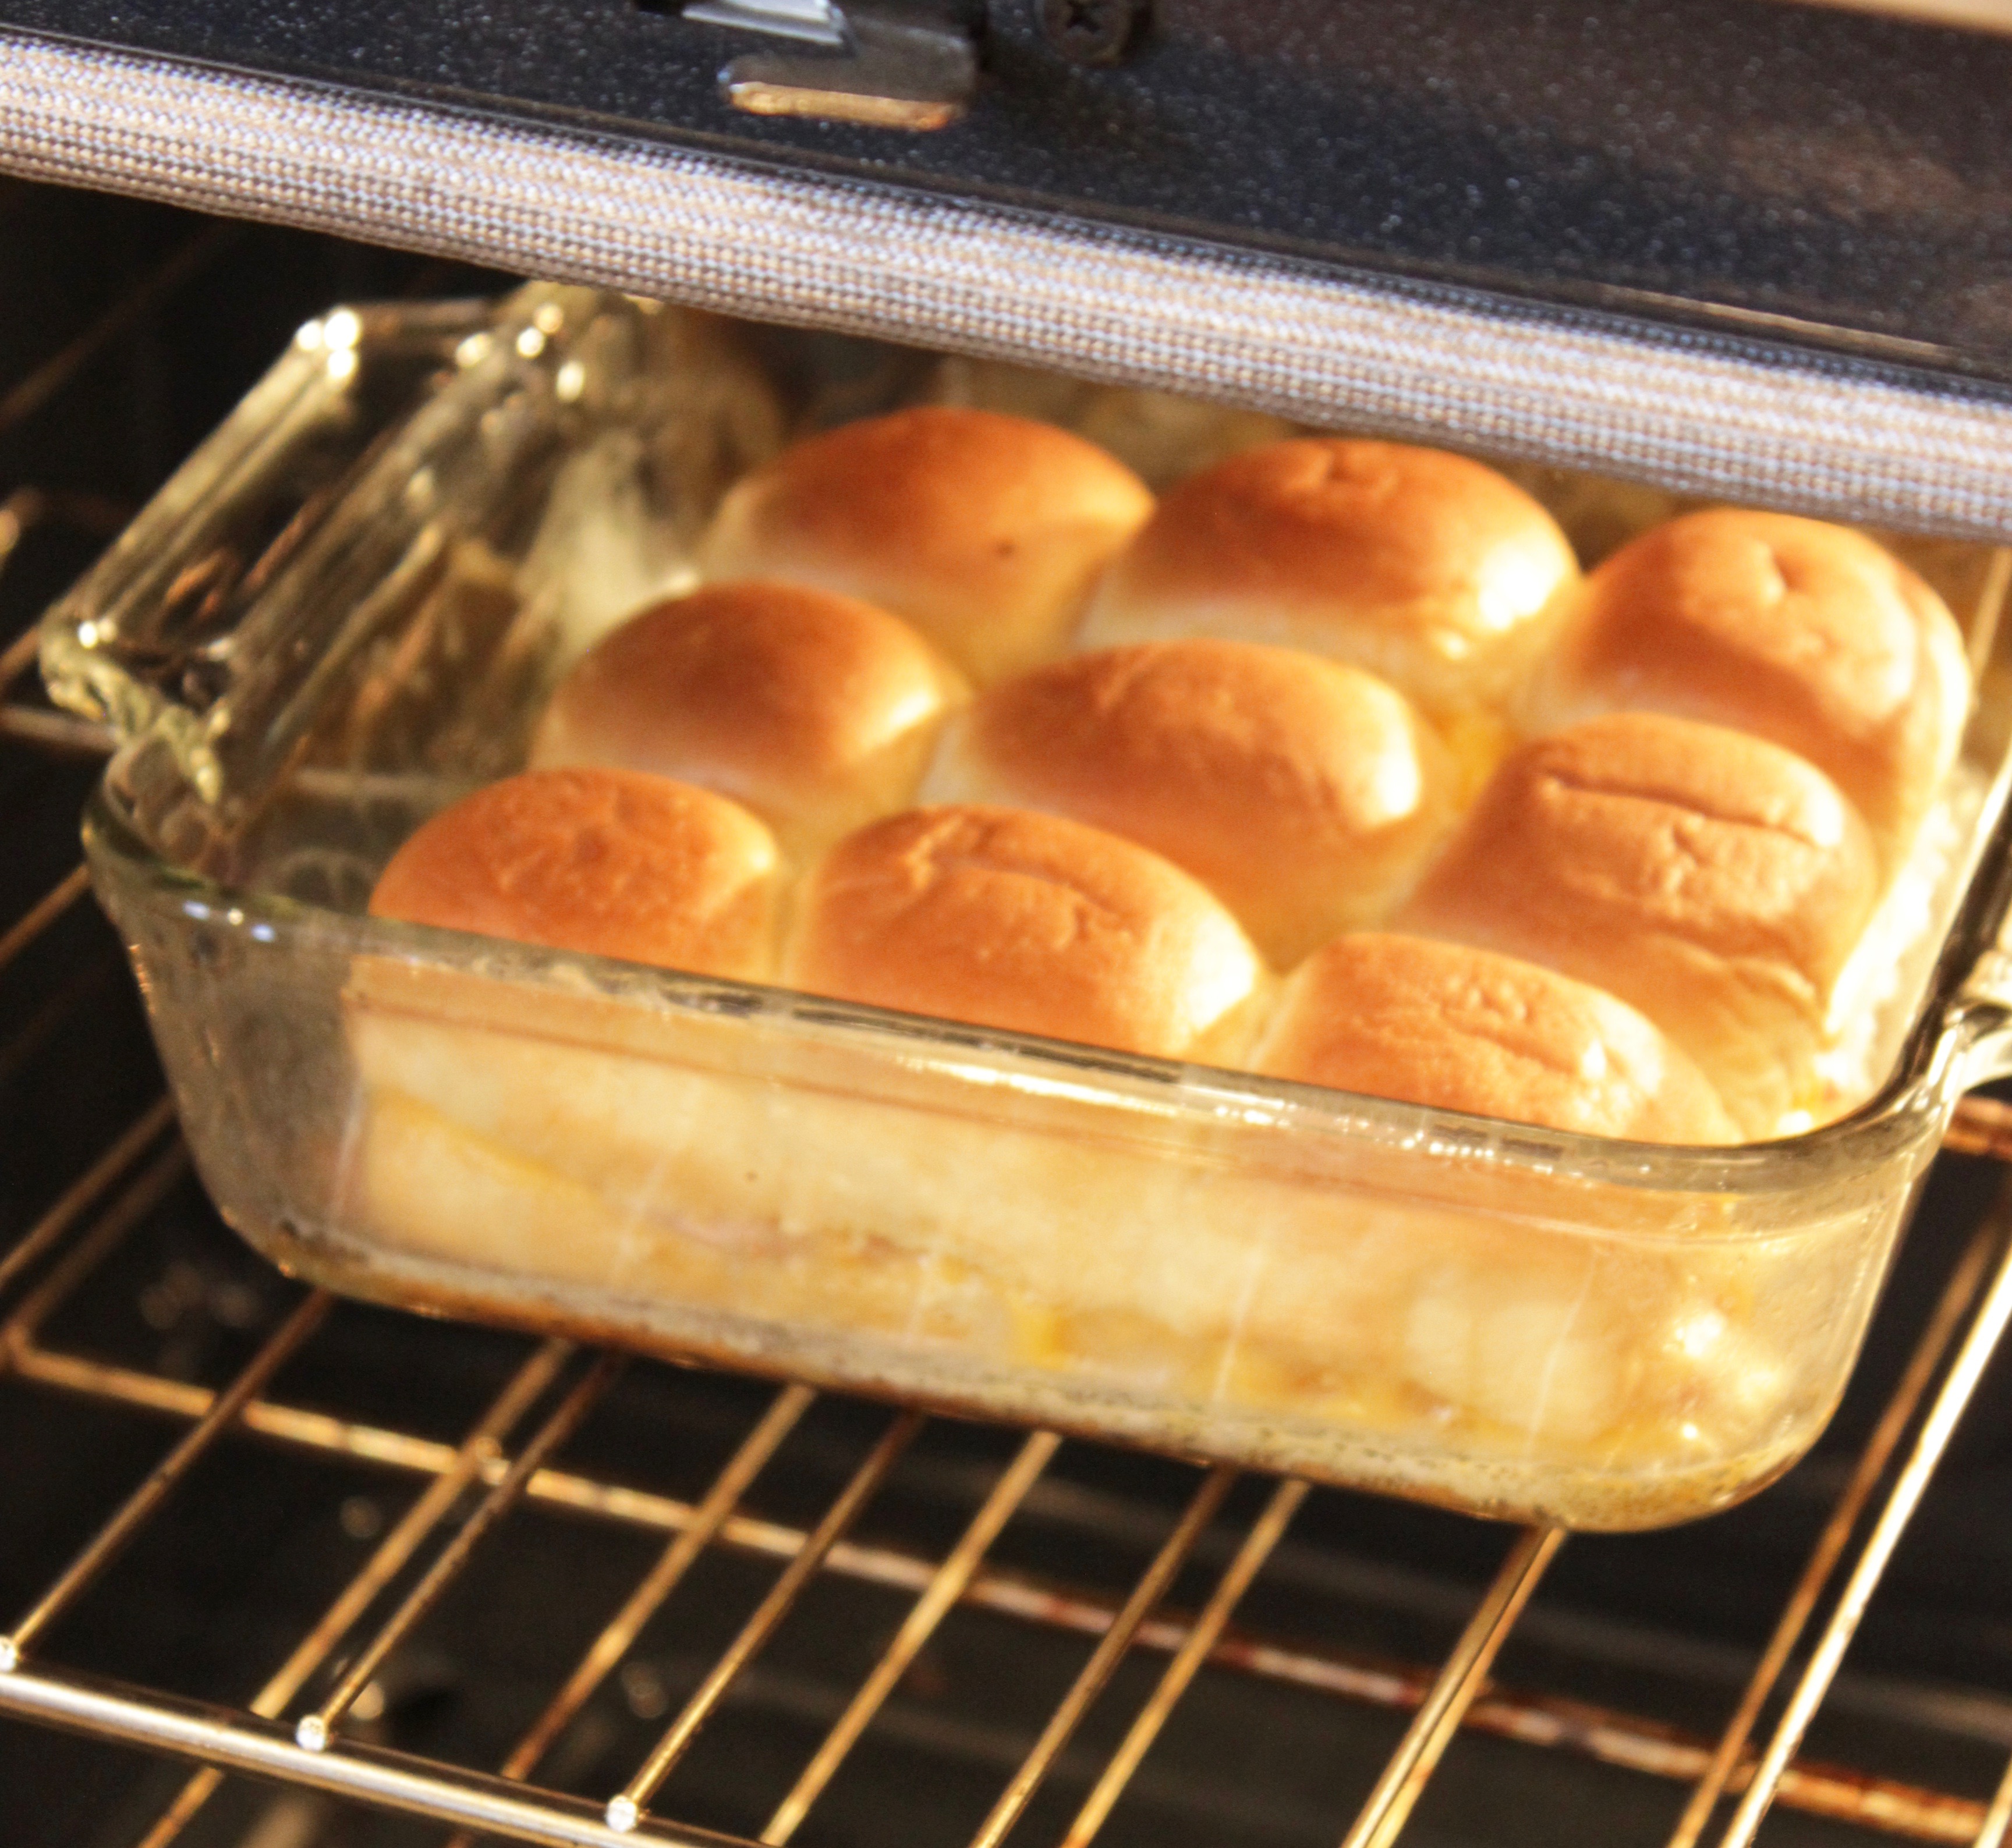
46) Hot Ham and Cheese Rolls
Recipe card
46) Hot Ham and Cheese Rolls
Ingredients
- 9 King’s Hawaiian sweet rolls (cut from a 12-count pack)
- 12 slices deli ham (thinly sliced from the deli counter)
- 4 slices American cheese (from the deli counter if possible)
- 1/4 cup butter (melted)
- 1 teaspoon Dijon mustard (optional)
Cooking Instructions
- Preheat oven to 350°F.
- Without separating the individual rolls, slice the connected block of 9 rolls in half horizontally and place the bottom half in a baking dish.
- Layer ham evenly over the bottom half, then place cheese slices over the ham.
- Place the top half of the rolls back on.
- Stir Dijon into the melted butter if using, then brush the butter evenly over the tops of the rolls.
- Bake uncovered at 350°F for 20 minutes, until the tops are golden and the cheese is melted.
- Cut into individual sandwiches and serve warm.
Notes: Brush the butter over the tops instead of pouring it in one spot so every roll browns evenly. Assemble the ham and cheese up to a day ahead, then add butter right before baking. Refrigerate leftovers for up to 3 days and reheat in a 350°F oven for 8 to 10 minutes for the best texture.

47) Foil Packet Dinner: Shrimp Boil Packets
Recipe card
47) Foil Packet Dinner: Shrimp Boil Packets
Ingredients
- Ingredients
- 10 red potatoes (cubed)
- 1 ear corn (cut into pieces)
- 1/2 ring andouille sausage (sliced)
- 24-30 raw shrimp (peeled and deveined)
- 1/2 lemon (juiced)
- 2 tablespoons Old Bay seasoning
- 2 tablespoons minced garlic
- 1/8 teaspoon salt
- 1/8 teaspoon black pepper
- 3 tablespoons melted butter
- 4 tablespoons butter (for brown butter dipping sauce)
Cooking Instructions
- Instructions
- Bring a large pot of water to a boil. Add potatoes and corn and cook for 10 minutes, then drain.
- In a large bowl, combine shrimp, par-cooked potatoes, corn, and sausage.
- Add lemon juice, Old Bay, garlic, salt, pepper, and melted butter. Toss to coat.
- Divide mixture among four heavy-duty foil sheets and seal tightly into packets.
- Grill over medium-high heat for 10 minutes, flip, then cook 5 to 6 minutes more. Or bake packets on a sheet pan at 400°F for about 20 minutes.
- While packets cook, melt 4 tablespoons butter over medium-low until foamy, then golden brown and nutty. Pour into a bowl for dipping.
- Open packets carefully and serve with brown butter sauce.
Notes: Par-cook the potatoes and corn before sealing the packets so they turn tender. Seal the foil tightly so steam stays inside. Do not overcook the shrimp because residual heat continues cooking after the packets come off the grill or out of the oven. Watch the brown butter closely because it can burn quickly.
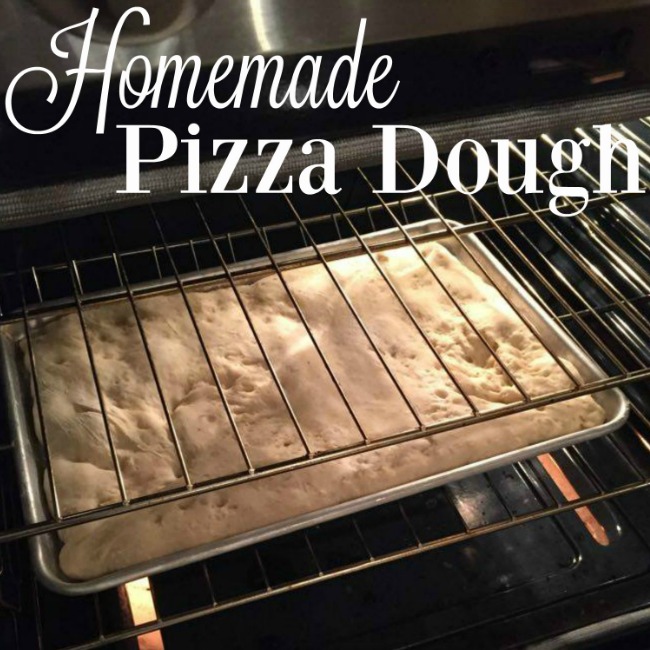
48) Easy Homemade Pizza Dough
Recipe card
48) Easy Homemade Pizza Dough
Ingredients
- Ingredients
- 1 1/3 cups warm water
- 1/4 cup extra virgin olive oil
- 3 1/2 cups unbleached all-purpose flour
- 1 tablespoon sugar
- 1 1/2 teaspoons sea salt
- 1/2 teaspoon garlic powder
- 1/2 teaspoon Italian seasoning
- 1 packet active dry yeast (or 2 1/4 teaspoons)
Cooking Instructions
- Instructions
- Add warm water to the bread machine pan, followed by olive oil, flour, sugar, salt, garlic powder, and Italian seasoning.
- Make a small well in the flour and add yeast last.
- Run the bread machine dough cycle, about 90 minutes.
- Remove dough to a lightly floured surface, shape loosely into a ball, cover, and rest 30 minutes.
- Grease a half sheet pan and press dough toward the edges. Rest 5 minutes if it snaps back.
- Preheat oven to 450°F and let shaped dough sit 10 minutes.
- Bake bare crust for 15 minutes, until set and lightly golden at the edges.
- Add sauce, cheese, and toppings. Bake 10 to 12 minutes more, until cheese is melted and crust is deep golden.
- Cool 5 minutes before cutting.
Notes: Add ingredients to the bread machine in the listed order so yeast stays away from salt until mixing begins. Let the dough rest after the cycle so it stretches without tearing. Prebake the crust before topping for better structure. Let the pizza cool briefly before cutting so the cheese sets.
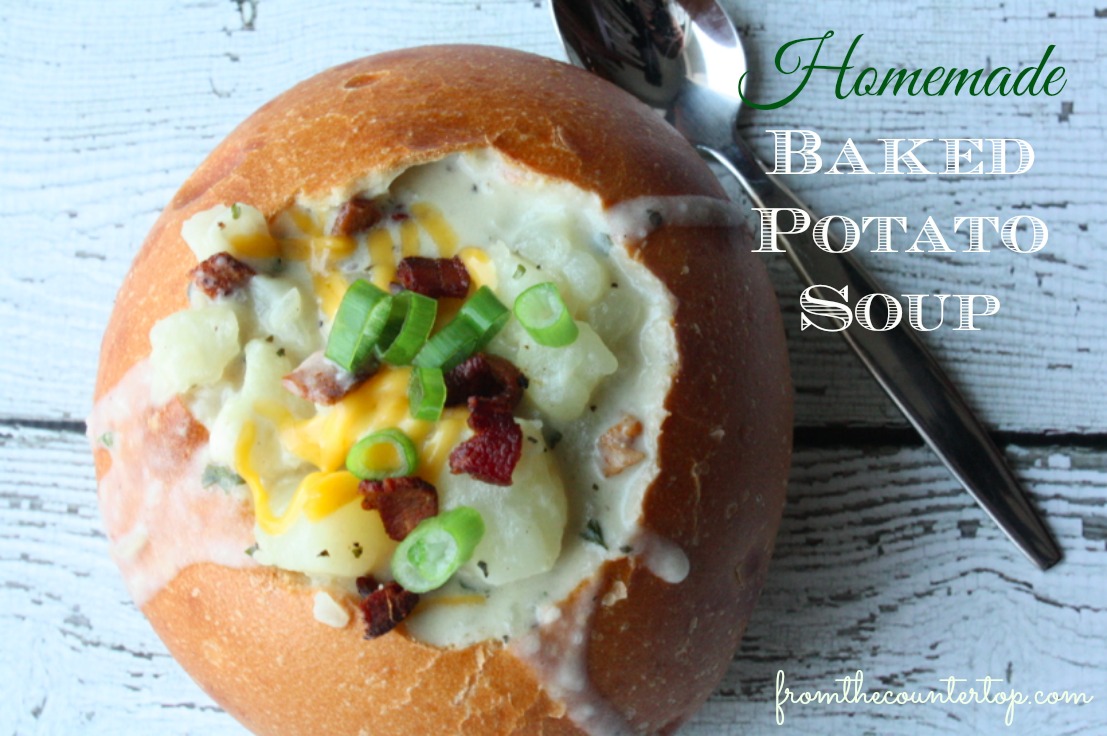
49) Homemade Baked Potato Soup Recipe
Recipe card
49) Homemade Baked Potato Soup Recipe
Ingredients
- 1/2 pound bacon (cut into small pieces, plus more for garnish)
- 1 cup chopped onion
- 2/3 cup all-purpose flour
- 6 cups chicken stock
- 4 cups peeled and chopped russet potatoes (about 5 medium potatoes)
- 2 cups heavy cream
- 1/2 cup fresh parsley (diced)
- 1 clove garlic (minced)
- 1 1/2 teaspoons dry ground basil
- 1 teaspoon salt (plus more to taste)
- 1 1/2 teaspoons black pepper
- 1 cup shredded cheddar cheese (plus more for garnish)
- Chopped green onion (for garnish)
Cooking Instructions
- Cut bacon into small pieces and cook in a large soup pot over medium heat until crispy. Remove with a slotted spoon and leave about 2 tablespoons drippings in the pot.
- Add chopped onion to the bacon drippings and cook over medium heat until translucent, about 5 minutes. Add garlic and cook 60 seconds more.
- Warm about 3 cups of the chicken stock, then whisk in the flour until smooth with no lumps.
- Pour the flour-stock mixture into the pot with the onions. Add the remaining 3 cups stock and bring to a simmer, stirring often, until it starts to thicken, about 5 to 7 minutes.
- Add cubed potatoes, reduce heat to medium-low, and cook until fork-tender, about 15 to 20 minutes.
- Stir in heavy cream, parsley, basil, salt, pepper, and half of the cooked bacon. Simmer gently for 5 to 10 minutes, then taste and adjust seasoning.
- Remove the pot from heat and stir in shredded cheddar until melted. Serve with reserved bacon, extra cheddar, and green onion.
Notes: Do not boil the soup after adding the cream or it can separate. Add the cheese off heat so it melts smoothly instead of turning grainy. The soup thickens in the refrigerator; reheat with a splash of chicken stock or milk. Store toppings separately if making ahead.
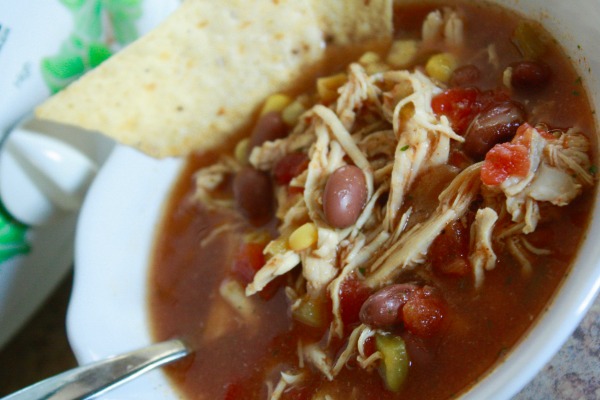
50) Slow Cooker Tortilla Soup
Recipe card
50) Slow Cooker Tortilla Soup
Ingredients
- 1 pound chicken breast
- 1/2 cup chopped onion
- 1 can corn (drained and rinsed)
- 1 can red beans (drained and rinsed)
- 1 can Rotel diced tomatoes (undrained)
- 1 can stewed tomatoes (undrained)
- 1 packet Hidden Valley Ranch dry ranch mix
- 1 packet taco seasoning
- 4 cups chicken broth
- Sour cream (cheese, cilantro, and tortilla chips, for garnish)
Cooking Instructions
- Place chicken breasts in the bottom of the slow cooker.
- Add chopped onion, drained corn, drained beans, Rotel, stewed tomatoes, ranch mix, taco seasoning, and chicken broth.
- Stir gently to distribute the seasoning.
- Cover and cook on Low for 4 to 6 hours or High for 2 to 3 hours, until chicken is cooked through and shreds easily.
- Remove chicken, shred with two forks, and return it to the soup.
- Let soup simmer another 10 to 15 minutes on Low or Warm.
- Serve hot with sour cream, cheese, cilantro, and tortilla chips.
Notes: Add a splash of chicken broth when reheating if the soup thickens in the refrigerator. Do not add tortilla chips or sour cream before freezing. The soup keeps refrigerated for up to 5 days and freezes well for up to 3 months. Day two tastes even better as the flavors settle.