
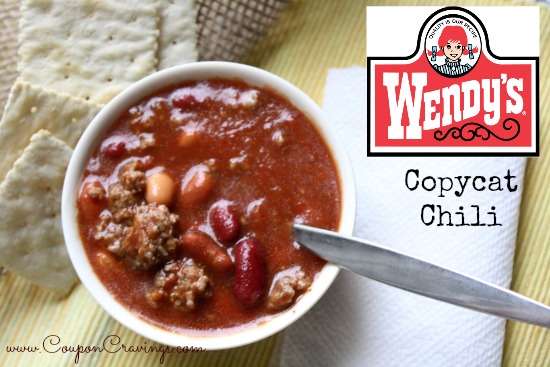
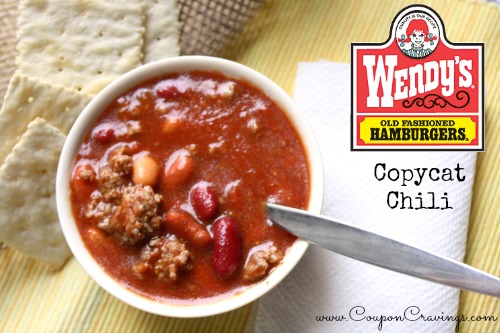
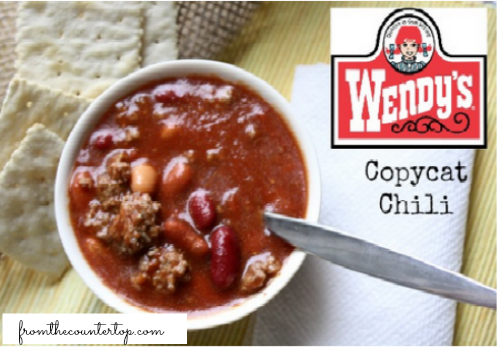
Wendy’s Copycat Chili Recipe
Wendy’s chili is a perfect option for a below-zero Iowa winter day when it’s been days since you’ve seen the sun. It’s thick with plenty of beef and beans; the subtle tang from the tomato base is delicious. I was driving through Wendy’s too often and my budget noticed! So, I figured out how to make it at home.
I believe I have done it! The same kind of consistency, layers of spice, and mildly tangy tomato base which differentiates Wendy’s chili from a standard homemade version. You get a lot of chili from this and it tastes even better the next day. One warning, though. The recipe calls for a lot of canned ingredients. So, get ready for the can opener.
What Makes Wendy’s Chili Taste Like Wendy’s Chili
Have you ever made a pot of regular homemade chili and thought, “This is good, but it doesn’t taste like Wendy’s?” You’re not imagining it. There are a few Wendy’s proprietary practices that most home recipes don’t do, and once you know what those are, the copycat becomes evident.
The four-bean combination
Unlike most chili recipes, which usually call for 1 to 2 types of beans, Wendy’s chili uses *four* types of beans! You can find dark kidney, light kidney, pinto, and small red beans. It’s also worthwhile to note that using multiple types of beans serves a purpose other than aesthetic variety. Each type of bean has a different texture and flavor that contributes to the overall dish. The dark kidney beans are earthy and provide a firmer structure to the chili, whereas light kidney beans offer a slightly softer texture. Pinto beans are creamy and provide a different texture as well. Finally, small red beans maintain their shape and add more body to the dish. Wendy’s chili offers the perfect combo of beans to add variety, and combined with the other ingredients, helps make the chili feel hearty without becoming monotonous.
Stewed tomatoes plus tomato sauce — not one or the other
Many chili recipes mention using crushed or diced tomatoes and leaving it at that. Wendy’s, however, utilizes two distinct tomato products, each serving a different purpose. The chili is thickened by and gets its concentrated tomato taste from the tomato sauce whereas the stewed tomatoes contribute sweetness as well as chunks and herbal notes from the processing of the stewed tomatoes. Removing either of these elements would lead to a noticeable difference. Without the stewed tomatoes, the sauce would be too uniform, and without the body from the sauce, the stewed tomatoes would be lacking.
Chicken broth as the liquid base
I was surprised to see this ingredient in the Wendy’s style recipe — chicken broth in beef chili? I didn’t expect that to work, but it does. Water would make the chili taste thin and flat. Using beef broth is ok, but it can make the flavor muddy. Chicken broth adds a clean, savory depth and makes everything taste richer — without actually tasting like chicken. It essentially acts as a flavor amplifier in the background.
Cumin is the star spice
Have you tried Wendy’s chili? If you have, and you wanted to know what the warm and smoky flavor is, then, it is cumin. Many chili recipes have cumin but it is not usually in excess. Wendy’s however, goes for the over-the-top approach. The recipe below suggests 1 teaspoon of cumin, but if you want the chili to be almost exactly like Wendy’s, you could safely use 1 ½ to 2 teaspoons. Cumin is what separates this from other average chili recipes, and what makes it unique to Wendy’s.
A long, patient simmer
Sorry, but I don’t think I’m going to write about this because I’m not a food blogger, but I will write about the challenges. As for the writing challenge, the only shortcut for you is 45 minutes, and there will probably need to be a level of acceptance as to what will be produced; I suspect less is more here. However, I imagine that 1 hour will produce a level of bounty; 2 hour yields more, and I suspect that it will likely a feel of crocked, where bounty will experience a feel as if it has been simmering a crock for a whole day. Again, these feel/simmer time to allow the spices to bloom; base of the tomato; thickening and beans to absorb what I likely suspect to be a spoon. When something is definitely no prize, and attention is not; simply just be prepared. The other hour is likely contracted to be more than just prize. Set and stir.
Equipment You’ll Want
While it does make a big pot and requires long simmering, it is not a complicated recipe. Two pieces of equipment really help.
First, a good pot. A heavy-bottomed Dutch oven is ideal here; it distributes heat evenly so you don’t get hot spots that can scorch the bottom during the long simmer. If you have ever had chili stick and burn in a thin pot, you know exactly why this matters. A 6-quart size handles the full recipe with room to stir. If you don’t have a Dutch oven, a heavy stockpot works—just watch the heat and stir more often.
Second up, we have a meat chopper. A meat chopper is helpful for getting that fine, chili-texture grind because it breaks the beef into finer crumbles much quicker than a spoon. Wendy’s chili has very fine, almost sand-like ground beef (not big chunks), and a chopper gets you there in about a quarter of the time a spatula or spoon would.
A lot of cans are going to be opened. You will have to open six cans of beans, as well as two large cans of tomato products. A solid can opener isn’t optional. If yours isn’t up to the task, this might be a solid enough reason to buy a new one.
What to Know Before You Start
Brown and drain the ground beef before doing anything else. The drained fat is what keeps this from being greasy—don’t skip it. After that, everything else is just opening cans and dumping them in. Seriously. There’s no sauté step for the vegetables, no building a roux, no complicated technique. The celery and green pepper soften and cook down during the simmer.
The cumin really is that important. The recipe suggests 1 teaspoon, but you could go up to 1½ or even 2 teaspoons if you want to taste it more like the Wendy’s version. Wendy’s chili has a strong presence of cumin, and that is part of what makes the chili taste different from every other pot of chili.
This makes a big batch, so prepare for leftovers, which are even better than day one!
The Ingredients and What Each One Does
Every ingredient in this recipe has a specific purpose. Here’s what they do and why.
1 lb ground beef
If you want flavor, use 80/20 beef, but drain it after browning so the chili doesn’t get greasy. 90/10 is less greasy and needs less draining. Don’t use ultra-lean beef (96/4) because it lacks the rich, brown flavor from sufficient fat.
1 can (29 oz) tomato sauce
This is the main source for the chili’s liquid base. It gives body, a concentrated taste of tomato, and the slightly tangy quality that’s very Wendy’s. Use a simple tomato sauce – no added seasoning, no marinara. You’re going to add your own spices.
1 can (29 oz) stewed tomatoes
Do not drain these. You should add the entire can, juice and all. The juice is incorporated into the base and the tomato bits give you texture throughout. For this recipe, stewed tomatoes are ideal because they are softer and a bit sweeter than the diced variety.
Four cans of beans (dark kidney, light red kidney, pinto, red beans)
Drain and rinse all four. The canning liquid is salty and can make the chili taste “canned” in an unpleasant way. A quick rinse takes 30 seconds and makes a real difference. Standard 15-oz cans are what you want for each variety.
2 cups chicken broth
We recommend using low sodium broth as there is already salt in the recipe and you can always add salt later on if you think you need more. Your broth can also be regular, but just be mindful to taste and see if you need to add more salt.
½ cup diced celery + ¼ cup diced green pepper
There’s no need to pre-cook these. They soften all the way during the simmer and add a mild sweetness along with a little crunch to the overall flavor. If you’re not a big celery fan, don’t omit this ingredient – the celery just disappears into the chili. It won’t taste like celery, it will just give a little more complexity to the base.
1½ tablespoons chili powder
The primary spice blend. Chili powder is a blend in the United States. Commonly in the mix are dried components such as chile peppers, cumin, garlic, and oregano. So, a lot is happening. Did we mention the work spices do? Please do not lessen this. If your chili powder has been in the cupboard for two years and has no scent, buy a new one. Stale spices are one of the most common causes of a dull-tasting chili.
1 teaspoon ground cumin (go up to 2 teaspoons for the full Wendy’s effect)
Cumin’s unique warm flavor is slightly smoked and earthy. It replicates the flavor profile of Wendy’s the closest. If you’re cautious, start with 1 teaspoon. But I always end up with almost twice that. Taste it after an hour and consider adding more.
1½ teaspoons garlic powder
Powdered garlic (as opposed to fresh garlic or garlic salt) will mix more uniformly into the base chili and will provide an even and constant background garlic flavor. Fresh garlic may be too pungent and too uneven in a dish that is going to be cooked for a long time like this.
1 teaspoon salt + ¼ teaspoon black pepper
Base amounts. Broth, canned tomatoes, and liquid reduction will all affect salt needs, so taste and adjust at the end. Always taste it hot. It’ll taste under-seasoned if you’re cold tasting it from the fridge.
½ teaspoon dried oregano
Oregano gives chili a slight herby taste. Oregano gives the chili a taste that is more than just a straight forward chili mix. It may be hard to taste the oregano, but without it, the chili will taste a little too simple.
⅛ teaspoon cayenne pepper
This is a tiny amount — just enough to provide some background warmth without crossing the line into making the chili spicy. Wendy’s chili is not spicy. For heat, check the FAQ below for ways to dial it up.
Recipe
Ingredients
- 1 lb ground beef, browned and drained
- 1 can (29 oz) tomato sauce
- 1 can (29 oz) stewed tomatoes
- 1 can (15 oz) dark kidney beans, drained and rinsed
- 1 can (15 oz) light red kidney beans, drained and rinsed
- 1 can (15 oz) pinto beans, drained and rinsed
- 1 can (15 oz) small red beans, drained and rinsed
- 2 cups chicken broth
- ½ cup diced celery
- ¼ cup diced green pepper
- 1½ tablespoons chili powder
- 1 teaspoon ground cumin (up to 2 teaspoons for more Wendy’s flavor)
- 1½ teaspoons garlic powder
- 1 teaspoon salt
- ¼ teaspoon ground black pepper
- ½ teaspoon dried oregano
- ⅛ teaspoon cayenne pepper
Instructions
- Brown the beef. In a large Dutch oven or heavy stockpot, cook the ground beef over medium-high heat, breaking it into small crumbles as it cooks. You’re looking for fully browned beef with no pink remaining — it should look like fine, dark crumbles, not chunks. This takes about 8–10 minutes. A meat chopper tool speeds this up significantly if you have one.
- Drain the fat completely. Tilt the pot and spoon out the accumulated fat, or transfer the beef to a paper-towel-lined plate and drain before returning it to the pot. Don’t skip this — undrained fat makes the finished chili greasy and heavy.
- Add everything else. Add the tomato sauce, stewed tomatoes (with all the juice), all four cans of drained and rinsed beans, chicken broth, celery, green pepper, and all the spices. Stir well to combine everything evenly.
- Bring to a boil. Increase heat to medium-high and bring the chili to a full boil, stirring occasionally. It will look very liquidy at this point — that’s normal.
- Reduce and simmer. Once boiling, reduce heat to low and let it simmer uncovered for at least 1 hour, stirring every 15–20 minutes. At the 1-hour mark the chili will have thickened noticeably and the color will have deepened from bright red to a darker, richer red-brown. At 2 hours the flavors are fully melded and the texture is thick and scoopable — closer to what you get in the drive-through. Two hours is strongly recommended if your schedule allows.
- Taste and adjust. Before serving, taste the chili and adjust salt, cumin, and cayenne. Chili always needs a final salt check after a long simmer — the flavors concentrate and sometimes need a small boost.
- Serve hot with toppings of your choice.
Toppings and Serving Ideas
At Wendy’s you can get chili in a cup or bowl, and it’s served plain, with maybe a packet of crackers. Their drive-thru service is simple, and that works, but it’s a bit different when you’re eating at home. Here is what you should put on a bowl of this chili.
Shredded cheddar cheese
This is the topping that is absolutely required. Sharp cheddar, shredded from the block if you’ve got the time, it melts better than the bagged stuff. Grab a handful whilst the chili is steaming and let it sit for 30 seconds before eating. The cheese will melt into the top layer, creating a slightly salty, creamy layer on top of the chili. This is genuinely one of the best things that comes with homemade chilli. Don’t hold back.
Sour cream
The sour cream will definitely take the heat down a notch… and the added creaminess helps balance out the acidity from the tomatoes. It’s great if you’ve made the chili especially spicy. There are lots of ways to eat chili with sour cream. Some people like to just stir itin, others like to eat it in layers. It really is a personal preference.
Oyster crackers or saltines
The best way to get an authentic Wendy’s experience while at home is to add a few oyster crackers, either on top of the chili, or add one in as you go. The crackers get a bit soggy from the chili, and bring a touch of saltiness to the dish. Saltines are just as good, and you probably already have some.
Fritos or corn chips
Corn chips add a toasted corn taste to the mix, plus they maintain their crunchiness longer than crackers. As an added bonus, they can take your snack to the next level. If you have leftover chili, you can easily make a Frito pie. Just chip the corn chips and then ladle some chili over the top. It’s perfect for the Super Bowl, too, because you can just make it and go.
Diced white or yellow onion
Raw diced onion adds a sharp bite and crunch that cuts through the richness of the beef and beans. Use it if you like that. If raw onion is too much, quick-pickle it: dice and soak in a splash of red wine vinegar for 10 minutes.
Diced jalapeño
The fresh sliced jalapeños provide a nice crunch and some heat. They are fresher than the heat from the long-simmered chili. If you want to just make the chili spicier without adjusting the entire recipe, this is your easiest option.
What to Do With Leftover Chili
The recipe is really big and the leftovers taste amazing. Rest assured, the following methods of enjoying the leftovers are way better than just reheating a bowl (but don’t get me wrong, reheating a bowl is also incredible).
Chili mac
Prepare a box of elbow macaroni, based on package instructions, then drain the noodles. Add the leftover chili to the elbow macaroni. Ensure it is an equal ratio of chili to elbow macaroni or add more chili if you want it to be extra saucy. Combine the two and warm everything back up on the stove. Add shredded cheddar on top. While this meal may sound simple, it is surprisingly tasty, especially for those weeknights you need dinner to be prepared quickly. This meal is typically a hit with youngsters, too.
Chili cheese baked potatoes
After russet potatoes are baked until soft, take a fork, fluff up the inside, and pour some hot chili over the top. Add some shredded cheese, sour cream, and green onions to transform it into a full meal. Plus, it’s one of the best ways to use leftover chili. It’s definitely a great dinner party idea if you’re aiming for something laidback and want to please a lot of people with little work.
Chili cheese dip
Add leftover chili and cream cheese and/or Velveeta into a small slow cooker or saucepan. Heat and stir until everything is melted and mixed thoroughly. Pair with tortilla chips. This makes an amazing party dip and takes less than ten minutes to prepare. The ideal ratio is approximately 1 cup chili to 4 oz cream cheese, but you can adjust to your liking.
Chili dogs
Hot dogs in buns, chili spooned on top, shredded cheese, diced onion on top. A classic for a reason. The Wendy’s-style chili works especially well here because it’s thick enough to stay on the dog, as opposed to running off the bun immediately.
Chili quesadillas
Put some leftover chili on a flour tortilla (don’t overdo it, or the quesadilla will fall apart). Add some cheese, fold it in half, and cook it on a skillet until it’s crispy and golden brown. Serve with some sour cream. Quick, easy, and sometimes, a great way to use some leftover chili.
Tips for the Best Results
- Drain the beans well. Rinsing the beans removes excess sodium and the canning liquid that can make chili taste “canned.” Takes 2 extra minutes and makes a real difference.
- Don’t rush the simmer. The one-hour simmer is where this goes from “ground beef in tomato sauce” to actual chili. Two hours is better. Low and slow.
- Fresh spices matter. If your chili powder, cumin, or garlic powder have been in the cabinet for two or three years, replace them. Old spices lose their potency and flat spices = flat chili.
- Stir it occasionally. Not constantly — every 15–20 minutes is fine. Just make sure the bottom isn’t sticking, especially if you’re using a thinner pot.
- Day 2 is peak chili. Make this on Saturday and eat it Sunday. The overnight rest in the fridge lets all the flavors fully meld and the texture gets even better.
- Crockpot version: Brown the beef, then dump everything in a slow cooker and cook on low for 6–8 hours or high for 3–4 hours. It gets even more flavorful this way.
- Taste at the end, not the beginning. The spice level changes significantly as the chili reduces and concentrates. Always do your final seasoning adjustment after the full simmer.
Storage and Make-Ahead
Refrigerator: Store in an airtight container for up to 5 days. This chili genuinely improves overnight as the flavors continue to develop. Chili on days 2 and 3 is where the magic happens.
Freezer: Freezes beautifully. portion into freezer-safe containers or zip-lock bags and freeze for up to 3 months. To reheat, thaw overnight in the fridge and reheat on the stovetop over medium-low heat, stirring occasionally. If it becomes too thick, consider adding a tiny bit of broth.
Make-ahead tip: Sunday cook, weekday eat. This meal is excellent for batch cooking. Simply make a full pot on the weekend, then portion it out into individual containers. Then, you’ve covered lunch or dinner for most of the week with almost no effort.
Frequently Asked Questions
Why does Wendy’s chili taste different from regular homemade chili?
There are a few key factors here: the use of four separate varieties of beans, the combination of stewed tomatoes with tomato sauce (instead of one or the other), and a much greater use of cumin than most home recipes. The chicken broth base adds a savory complexity that you just plain lose by using water. And honestly, the lengthy simmer time. Quick chili just doesn’t taste like Wendy’s chili.
Can I use dried beans instead of canned?
Yes, but you’ll need to prepare them first — dried beans have to be cooked before being added to the chili or they won’t soften at all during the simmer time. Soak them for a night, then get them to the point where they are just tender before adding them. There is no real difference in flavor to justify the extra work of using dried beans over using canned beans, so go with canned beans.
Can I make this in the slow cooker?
Yes, it’s actually really good in the crockpot. Before putting it in the slow cooker, pan-brown the beef (don’t skip this step, even for the slow cooker), and then add all the ingredients to the slow cooker. Cook on low for 6-8 hours or on high for 3-4 hours. It thickens up and develops a deep flavor from the long cook time. If you can manage it, the low setting is preferable.
How do I make it spicier?
If you have a high heat tolerance, try increasing the cayenne pepper measurements to ¼ or ½ teaspoons. You can also throw in a chopped up jalapeño with the celery and green pepper at the beginning. For a smokier kind of heat, add ½ teaspoon of chipotle powder with the cayenne.
Can I use ground turkey instead of ground beef?
Yes. Ground turkey is fine here. Best results come from using 85/15 or 93/7. The chili will be lighter in flavor and color. It will still be good though; the spice profile carries the dish. Drain and brown the turkey like you would the beef.
What if I can’t find one of the bean varieties?
While the four-bean mixture is great, this recipe will still work if you don’t have the exact variety. If you’re missing small red beans, just substitute them with another can of kidney or pinto beans. If possible, do not just use four cans of the same type of bean. It is better to create a mixture of different beans for a better combination of textures and sizes.
How do I know when the chili is done?
At 1 hour, the chili should have thickened to the point that it coats a spoon and holds its shape for a moment when you drag a spoon through it. The color should have deepened from bright red to a darker brick red. At 2 hours, it will be noticeably thicker, darker, and more uniform in flavor throughout. If it gets too thick before then, add a splash of broth and stir. If, after 2 hours, it is still too thin, turn the heat up slightly and let it reduce for another 15–20 minutes uncovered.
My chili tastes a little flat — what do I do?
Three things to adjust. (1) Salt – chili generally needs more salt than you think, especially after a long simmer. Add a pinch, stir again, take a taste. (2) Cumin – try another 1/2 teaspoon, and let it simmer for 10 more minutes. (3) Acid – a tiny splash (1/2 teaspoon or less) of apple cider vinegar can brighten up a flat chili. Stir it in and let it cook for 5 minutes, then taste again.
Related Recipes
Wendy’s Copycat Chili
Ingredients
- 1 pound ground beef browned and drained
- 1 can tomato sauce 29 ounces
- 1 can stewed tomatoes 29 ounces
- 1 can dark kidney beans 15 ounces, drained and rinsed
- 1 can light red kidney beans 15 ounces, drained and rinsed
- 1 can pinto beans 15 ounces, drained and rinsed
- 1 can small red beans 15 ounces, drained and rinsed
- 2 cups chicken broth
- 1/2 cup diced celery
- 1/4 cup diced green pepper
- 1 1/2 tablespoons chili powder
- 1 teaspoon ground cumin or up to 2 teaspoons for more Wendy’s flavor
- 1 1/2 teaspoons garlic powder
- 1 teaspoon salt
- 1/4 teaspoon ground black pepper
- 1/2 teaspoon dried oregano
- 1/8 teaspoon cayenne pepper
Instructions
- Brown ground beef in a large Dutch oven or heavy stockpot over medium-high heat, breaking it into small crumbles, until no pink remains.
- Drain the fat completely and return beef to the pot.
- Add tomato sauce, stewed tomatoes with juice, drained beans, chicken broth, celery, green pepper, chili powder, cumin, garlic powder, salt, black pepper, oregano, and cayenne. Stir well.
- Bring chili to a boil over medium-high heat, stirring occasionally.
- Reduce heat to Low and simmer uncovered at least 1 hour, stirring every 15 to 20 minutes. Simmer 2 hours for thicker, deeper flavor if time allows.
- Taste and adjust salt, cumin, and cayenne before serving.
- Serve hot with shredded cheddar, sour cream, crackers, Fritos, onion, or jalapeño.