
Game Day Appetizers, or as I like to think of them, football watching fuel, are a staple in our house during football season. And, living in Iowa…football season pretty much lasts all of fall.
And while we have some go-to tailgate foods, appetizers are a MUST at “homegate” parties.
The perfect Game Day Appetizer recipe list is long and varied. There’s something for everyone.
We love dips. Bacon-wrapped little smokies are a hit with my husband.
Wings are a favorite of many. And, of course, pigs in a blanket are a must-have for tailgates or anytime.
In short, there’s a lot of food and lots of choices. And while I’d love to stand at the buffet for hours, there’s a football game to be watched.
That’s where Slow Cooker Football Recipes come in. Throw together a couple of them before the game and dinner’s taken care of too.
So, with all of that said…here’s my ultimate list of 23 tried-and-true Game Day Appetizers that’ll be flying off the table.
Dips Everyone Hovers Over
Football and chips and dips go together like pigs and blankets. Here’s a collection of crowd-pleasing dips that disappear faster than a touchdown.
1) Jalapeño Popper Dip
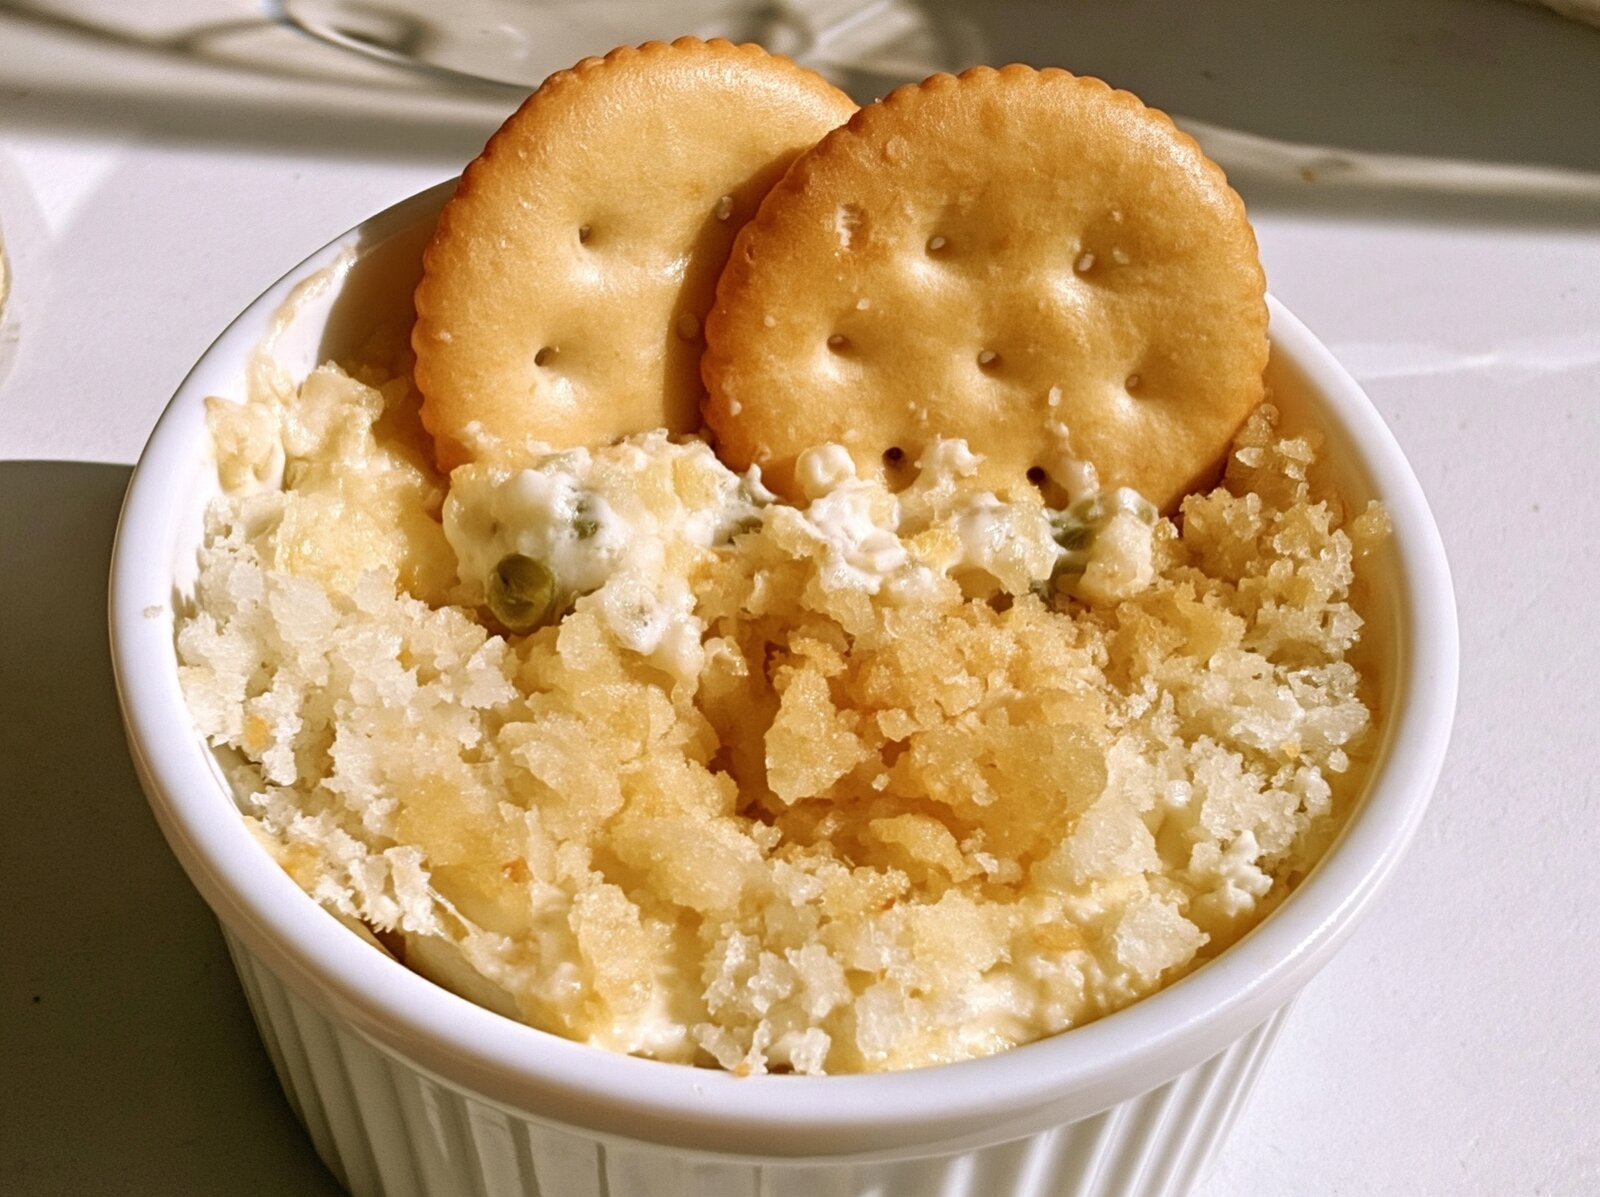
1) Jalapeño Popper Dip
Ingredients
- 2 8 oz packages cream cheese, softened
- 1 cup mayonnaise
- 1 4 oz can chopped green chilies, drained
- 1 4 oz can diced jalapeños (or ~½ cup fresh, finely chopped)
- 1 cup grated parmesan cheese
Cooking Instructions
- Preheat your oven to 400°F. Get this going first so it’s hot and ready when your dip is prepped. If your oven runs cool, bump it up to 425°F.
- Mix the cream cheese and mayo until smooth. In a bowl, combine the softened cream cheese and mayo. Use a spoon, spatula, or hand mixer to blend until creamy and lump-free. About a minute by hand, or 30 seconds with a mixer. If you see chunks of cream cheese, keep mixing.
- Stir in the green chilies and jalapeños. Drain both cans well, then add them to the bowl. Fold everything together with a spatula until the peppers are spread throughout. You want every scoop to have peppers, not random pockets of plain cream cheese.
- Spread into a baking dish. Use your spatula to scrape the dip into an 8×8 pan (or similar) and smooth the top into an even layer. This helps it bake evenly.
- Top with parmesan. Sprinkle the parmesan evenly over the whole thing. Don't be shy—you want full coverage so you get that golden, crispy top everywhere. Press it down lightly so it sticks to the dip and doesn't slide off when you scoop.
- Bake for 15 to 20 minutes. Slide it into the oven and set a timer. You're looking for the dip to bubble around the edges and the parmesan to turn golden brown. If it's bubbly but not browned after 15 minutes, give it another 3 to 5 minutes. If it's browning too fast, tent it loosely with foil. When the top is golden and you can see bubbles breaking the surface, it's done.
- Let it cool for 2 to 3 minutes, then serve. This dip is molten when it first comes out. Let it sit for just a couple minutes so it thickens slightly and people don't burn their mouths. Serve straight from the baking dish with tortilla chips, corn chips, sturdy crackers, or even sliced baguette.
Jalapeño Popper Dip has all of the flavors you love from the stuffed pepper without wrapping and stuffing forty individual peppers. Cream cheese, bacon, jalapeño’s and a crispy topping come together in one pan.
2) Seven Layer Dip

2) Seven Layer Dip
Ingredients
- 4 Roma tomatoes (seeds removed and finely chopped)
- 1 package taco seasoning
- 16 oz. sour cream
- 1 can sliced black olives (drained)
- 2 cans fat free refried beans
- 1 cup salsa of your choice
- 3 avocados
- ** splash of lime juice for avocados
- 2 cups colby jack cheese
- 5 green onions (chopped)
Cooking Instructions
- Mix sour cream and taco seasoning, set aside. Mix salsa and beans, set aside. Layer ingredients in the order listed. You’ll layer them in a 9×13 glass dish in this order: tomatoes, taco seasoning/sour cream mixture, black olives, refried beans/salsa mixture, avocado mixture, cheese and lastly green onions.
- Serve with tortilla chips or corn chips on the side – enjoy!
- ** You can make this ahead of time, just be sure to seal it really well so the avocados don’t turn brown.
Seven Layer Dip is a crowd-pleaser and super simple to make. Made in a 9×13 pan with beans, sour cream, guacamole, cheese, and more. There’s no stove or oven involved with this crowd-pleasing dip.
3) Layered Taco Dip

3) Layered Taco Dip
Ingredients
- 1 can refried beans
- 1 cup squeezable sour cream
- 1/2 packet taco seasoning
- 1/4 cup salsa
- 1 cup shredded cheddar cheese
- 1/4 cup sliced black olives
- 1/2 cup diced red bell pepper
- 2 avocados mashed
- 1/4 cup squeezable sour cream
- 1/2 tsp. lemon juice
- 1 garlic clove crushed
- 1/4 tsp. cayenne pepper
- salt to taste
Cooking Instructions
- Dip:
- Spread refried beans in bottom of an 8×8 or 9×7 small dish
- Stir 1 cup sour cream and taco seasoning together. Spread over refried beans
- Spread salsa over sour cream layer
- Top salsa layer with shredded cheese
- Sprinkle black olives and red bell pepper over cheese
- Stir mashed avocado, 1/4 cup sour cream, lemon juice, garlic, cayenne pepper and salt together to make guacamole
- Spread guacamole over the top of entire dip
- Make the yard lines with sour cream
- Goal Posts:
- Carefully use scissors or a sharp paring knife to make goal posts out of the tortillas
- Bake tortillas at 350 degrees in oven on a cookie sheet until crispy
- After cooling, and when ready to serve, stick goal posts at then ends of the dip to make your dip look like a football field – FUN!
Layered Taco Dip is a make-ahead appetizer that packs well for a tailgate. Simply throw it in a cooler and go.
4) Copycat Chili’s Skillet Queso

4) Copycat Chili’s Skillet Queso
Ingredients
- 16 oz Velveeta
- 15 oz can Hormel Chili, no beans
- 1 cup whole milk
- 4 tsp. chili powder
- 1 T. fresh lime juice
- 2 tsp. paprika
- 1/2 tsp. ground cumin
- 1/2 tsp. ground cayenne pepper (or less for less heat)
- 1 bag Tortilla chips (for serving)
Cooking Instructions
- Cut the Velveeta into 1-inch cubes.
- Add the cubed Velveeta, can of chili, milk, chili powder, lime juice, paprika, cumin, and cayenne to a medium saucepan over medium heat.
- Stir frequently until the cheese is fully melted and the mixture is smooth, about 8 to 10 minutes.
- Reduce heat to low and simmer for 20 minutes, stirring occasionally, until the dip is thickened and the spices have fully bloomed.
- Taste and adjust seasoning as needed. Transfer to a small slow cooker on “warm” for serving.
- Serve warm with sturdy tortilla chips.
Copycat Chili’s Skillet Queso takes advantage of simple, pantry staples. Ready in about 15 minutes and can sit in a small crockpot all game. Guaranteed to be good enough to scoop up during the 4th quarter.
5) Neiman Marcus Million Dollar Dip

5) Neiman Marcus Million Dollar Dip
Ingredients
- Ingredients
- 1 cup mayonnaise
- 2 cups shredded cheddar cheese (regular shred works best)
- 3 green onions (diced)
- 1 cup bacon (cooked and crumbled)
- 1/2 cup sliced almonds
- 1/2 teaspoon minced garlic
Cooking Instructions
- Instructions
- Add the mayonnaise, shredded cheddar, diced green onions, cooked bacon, sliced almonds, and minced garlic to a mixing bowl.
- Stir until everything is evenly combined and the mix looks creamy and well distributed.
- Serve immediately with crackers or vegetables, or cover and refrigerate until ready to serve.
Neiman Marcus Million Dollar Dip lives up to it’s “fancy” name. Only five ingredients including cheddar cheese, bacon, almonds, green onion, and mayonnaise.
6) Crab Dip with Cream Cheese

6) Crab Dip with Cream Cheese
Ingredients
- 2 oz. cream cheese
- dash salt
- 1 tsp Worcestershire sauce
- dash pepper
- 1/4 c. buttermilk
- 1/4 tsp garlic powder
- 1/4 tsp minced onion
- 1/3 c. mayonnaise
- 8 oz. imitation crab meat
- 1/2 small onion
Cooking Instructions
- Mix first 8 ingredients with hand mixer.
- Add in crab meat to flake with the hand mixer
- Add in onions (finely chopped)
- Let sit for 24 hours before serving
- Serve with Ritz cracker, or english muffins.
Crab Dip with Cream Cheese is a change of pace from the taco-seasoned dips. Rich, creamy, and served warm.
7) Pepperoni Pizza Dip
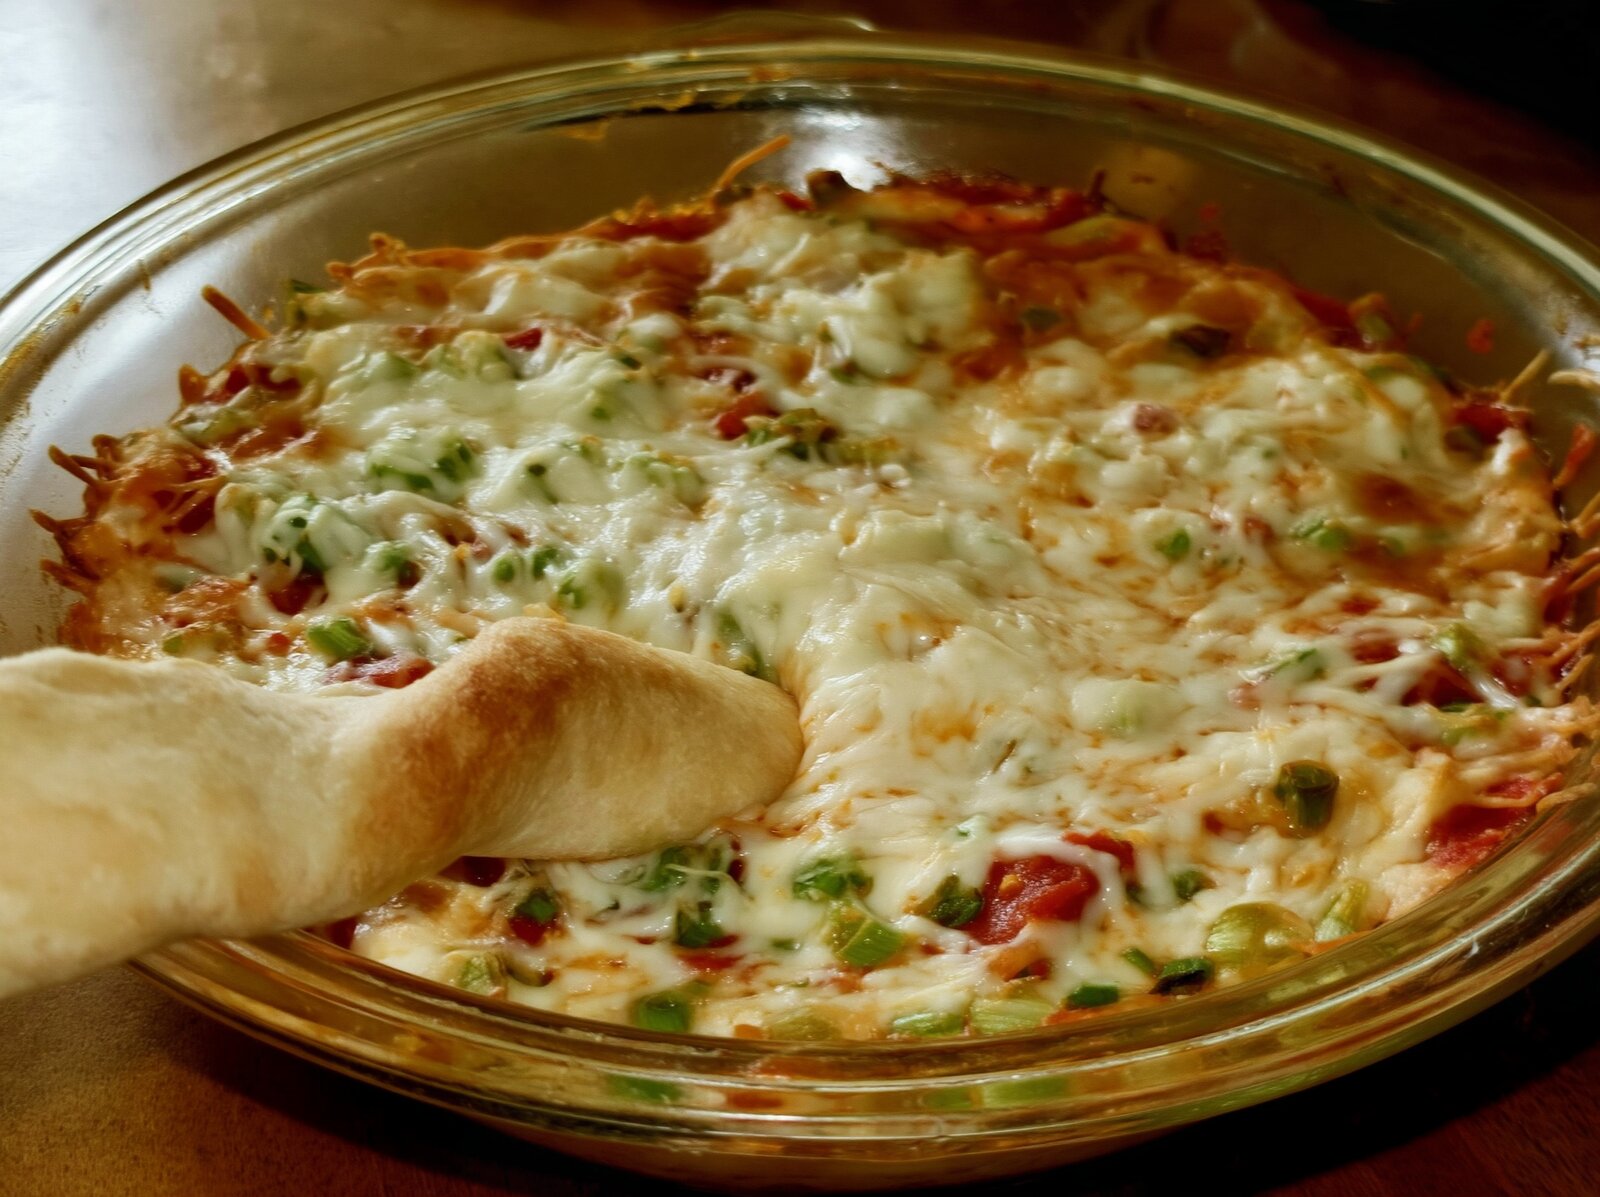
7) Pepperoni Pizza Dip
Ingredients
- 8 oz. cream cheese</li>
- 1/2 c. sour cream</li>
- 1 tsp. oregano
- 1/8 tsp. crushed red pepper
- 1/2 c. pizza sauce
- 1/2 c. chopped pepperoni
- 1/4 c. green onion
- 1/4 c. green pepper or other “pizza toppings” (optional)
- 1 c. shredded mozzarella cheese
- Breadsticks
Cooking Instructions
- Preheat oven to 350 degrees.
- In a small bowl beat together the first four ingredients.
- Spread evenly over pie plate (or another oven safe dish).
- Spread pizza sauce over the top, add the pepperonis and other pizza toppings.
- Bake in the oven until the sides are bubbling, about 20 minutes.
- Remove from oven and top with mozzarella cheese and bake until cheese is melted.
- Serve with breadsticks. Yum!
Pepperoni Pizza Dip combines mozzarella cheese, pepperoni, and marinara into an easy-to-make appetizer baked right in the dish it’s served in. I’m going to make two of these for the horde of teens and their friends that wander into our kitchen on the weekends.
8) Copycat CPK Tuscan Hummus

8) Copycat CPK Tuscan Hummus
Ingredients
- Ingredients
- 2 14.5-ounce cans cannellini beans (rinsed and drained)
- 8 cloves garlic (minced)
- 1/2 cup tahini
- 1/4 cup fresh lemon juice
- 1/4 cup olive oil
- 1 tablespoon plus 1/2 teaspoon soy sauce
- 1 1/2 teaspoons salt
- 1 1/2 teaspoons ground cumin
- 1 pinch ground coriander
- 1/2 teaspoon cayenne pepper
- 6 pita breads (for serving)
Cooking Instructions
- Instructions
- Add the rinsed cannellini beans and minced garlic to a food processor. Pulse several times, then process for about 30 seconds.
- Add the tahini and process for 30 to 45 seconds, scraping down the sides as needed.
- With the processor running, slowly pour in the lemon juice, olive oil, and soy sauce. Process until smoother and cohesive.
- Add the salt, cumin, coriander, and cayenne. Process for another 30 seconds, then taste and adjust seasoning.
- Transfer to a bowl or airtight container and refrigerate for at least 1 hour before serving.
- To serve, warm the pita breads in a 250°F oven for 8 to 10 minutes, then cut into wedges and serve with the hummus.
Copycat CPK Tuscan Hummus comes together quickly in the food processor. It’s a welcome offering for those that don’t reach for the cheese.
Salsas to Scoop With Chips
9) Homemade Salsa with Fresh Ingredients
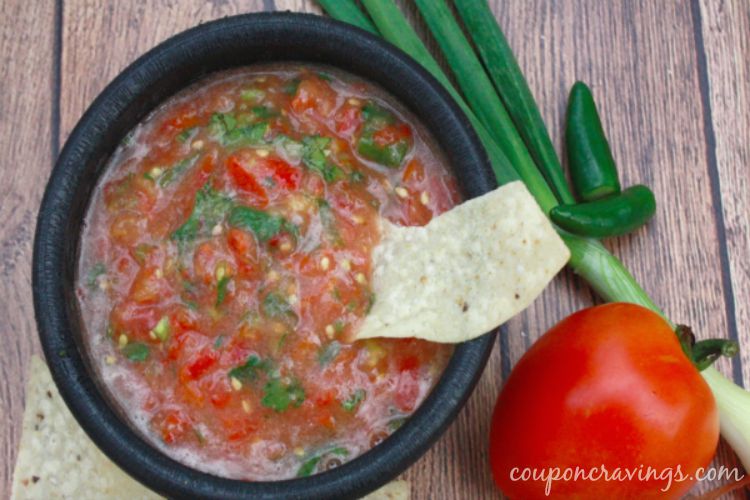
9) Homemade Salsa with Fresh Ingredients
Ingredients
- Ingredients
- 16-20 medium tomatoes (or enough to fill a blender about three-quarters full)
- 1 jalapeno (seeds removed for mild heat)
- 4 green onions (cut into 1-inch pieces)
- 1/4 to 1/2 yellow onion
- 1 handful fresh cilantro leaves
- 2-3 cloves garlic
- 1 teaspoon ground cumin
- 2 tablespoons fresh lime juice
- 1/2 teaspoon granulated sugar
- 1/2 teaspoon salt (plus more to taste)
Cooking Instructions
- Instructions
- Rinse the tomatoes and roughly chop them into halves or quarters. Add enough tomatoes to fill the blender about three-quarters full.
- Add the jalapeno, green onions, yellow onion, cilantro, garlic, cumin, lime juice, sugar, and salt.
- Blend on medium until the salsa reaches your preferred texture, about 15 to 30 seconds.
- Taste with a chip and adjust with more salt, lime juice, sugar, or jalapeno seeds as needed.
- Transfer to a covered container and refrigerate for at least 30 minutes before serving.
Homemade Salsa with Fresh Ingredients comes together quickly and uses fresh garden tomatoes. Football season starts just as tomato season ends.
10) Canned Tomato Salsa

10) Canned Tomato Salsa
Ingredients
- 28 ounce can whole peeled tomatoes
- 3/4 yellow onion
- 4 T fresh chopped cilantro
- 1 tsp garlic powder
- 1 tsp salt
- jalapeños to taste
- 2 t lime juice
Cooking Instructions
- Mix all ingredients in a blender and let sit 24 hours – that’s it! And, enjoy with tortilla chips, quesadillas, nachos or breakfast casseroles. Yum!
Canned Tomato Salsa is a favorite during those months that garden tomatoes are scarce, from November to January. Comes together quickly, tastes wonderful, and cost about a dollar.
11) Corn and Black Bean Salsa

11) Corn and Black Bean Salsa
Ingredients
- 2 cans black beans
- 1 can shoe peg corn
- 1 can original flavor Rotel
- 1 cup red onion, diced
- 4 T olive oil
- 4 T lime juice
- ¼ c fresh cilantro
- 1½ tsp cumin
- ½ t salt
- 2 avocados chopped and diced
Cooking Instructions
- Drain and rinse black beans and corn in a colander
- Pour Rotel over clean beans and corn to drain
- Transfer to a bowl and mix in remaining ingredients
- Chill for a few hours and serve with chips
- Add avocado at the last chance you’ve got
Corn and Black Bean Salsa is a step up from a classic salsa. It can sit out for hours, which is an improvement over guacamole that browns way too quickly. Also known as cowboy or Texas caviar.
Other Game Day Bites
If you’re looking for a few more recipes to fill your menu, try one of these crowd-pleasers!
Chips and Bite-Sized Meat Dishes
12) Baked wonton wrapper chips

12) Baked wonton wrapper chips
Ingredients
- Ingredients
- 1 package wonton wrappers
- butter-flavored cooking spray
Cooking Instructions
- Instructions
- Preheat the oven to 350°F and line a baking sheet with parchment paper.
- Stack about 10 wonton wrappers at a time and cut them in half with a sharp knife.
- Arrange the wonton wrapper halves in a single layer on the prepared baking sheet.
- Spray the wrappers lightly with butter-flavored cooking spray.
- Bake for 8 to 10 minutes, until crisp and lightly golden. Cool before serving.
Baked wonton wrapper chips are super inexpensive, incredibly easy and bake up crispy perfection to serve with ANY of the dips above!
13) Bacon Wrapped Little Smokies

13) Bacon Wrapped Little Smokies
Ingredients
- Ingredients
- 1 16-ounce package little smokies
- 1/2 pound regular-cut bacon (cut into thirds or quarters)
- 1 cup brown sugar
Cooking Instructions
- Instructions
- Preheat the oven to 400°F. Line a rimmed baking sheet with foil for easier cleanup.
- Stack a few bacon strips and cut them crosswise into thirds or quarters so each piece wraps around one smokie with a small overlap.
- Wrap one piece of bacon around each smokie and secure it with a toothpick. Arrange the wrapped smokies in a single layer on the prepared baking sheet.
- Sprinkle the brown sugar evenly over the wrapped smokies.
- Bake for 25 minutes, until the bacon is cooked through and the brown sugar is melted and bubbling.
- If the tops still look pale, broil for 1 to 2 minutes while watching closely.
- Let rest for a few minutes before serving, then transfer to a platter or a small slow cooker set to warm.
Bacon Wrapped Little Smokies are a family fave around here, and my husband could eat them by the dozen. These little smokies are smothered in a sweet and salty brown sugar glaze and I promise you, your husband will be helping himself to these long before you’re ready to serve them!
14) Grape Jelly Meatballs

14) Grape Jelly Meatballs
Ingredients
- 32 ounces frozen fully cooked meatballs (homestyle preferred)
- 32 ounces grape jelly
- 12 ounces chili sauce (Heinz chili sauce or similar; BBQ sauce may be substituted)
Cooking Instructions
- Pour the grape jelly and chili sauce into the slow cooker insert. Stir them together until mostly combined. The jelly will still look a little lumpy at first and will melt as it heats.
- Add the frozen fully cooked meatballs directly to the slow cooker. Stir until the meatballs are coated in the sauce.
- Cover and cook on low for 4 hours or on high for 2 hours, until the meatballs are hot all the way through and the sauce is thick and glossy.
- Stir every 45 to 60 minutes if you can. This helps the sauce coat evenly and prevents the sugary sauce from building up on the bottom of the slow cooker.
- Once the meatballs are hot, switch the slow cooker to warm for serving. Serve with toothpicks as an appetizer, or spoon over buttered egg noodles for dinner.
Grape Jelly Meatballs, because nothing screams Game Day like meatballs! These three-ingredient slow cooker meatballs are a breeze to make and come together while you’re programming the game. Simply place the frozen meatballs in the slow cooker in the morning and set on low!
15) Ham Balls with Brown Sugar Glaze

15) Ham Balls with Brown Sugar Glaze
Ingredients
- Ingredients
- 1 pound fully cooked ham (finely ground)
- 1 pound ground pork
- 1 cup crushed Corn Chex
- 1/4 cup packed light brown sugar
- 1 tablespoon ground mustard
- 1/2 teaspoon salt
- 1 cup milk
- 1 egg (lightly beaten)
- 1 cup packed light brown sugar (for glaze)
- 1/4 cup apple cider vinegar
- 1 tablespoon ground mustard (for glaze)
Cooking Instructions
- Instructions
- Preheat oven to 350°F. In a large bowl, combine ground ham, ground pork, crushed Corn Chex, brown sugar, mustard, salt, milk, and egg until just combined.
- Roll mixture into 1-inch balls and place in a single layer on a rimmed baking sheet.
- In a small saucepan over low heat, combine glaze brown sugar, apple cider vinegar, and mustard. Stir 3 to 4 minutes until smooth.
- Pour warm glaze over ham balls. Cover pan tightly with foil and bake 20 minutes.
- Remove foil and bake 20 more minutes, until glaze caramelizes and ham balls reach 160°F.
- Transfer to a serving dish and gently toss with glaze from the pan. Serve hot.
Ham Balls with Brown Sugar Glaze, which is an Iowa classic and can be found in nearly every Iowa church basement. Our out of state guests are always leery of these little gems the first time but come away wanting to take the recipe back with them! These sweet and savory bites are a MUST TRY and can be found at every Iowa potluck or funeral!
Handhelds That Feed the Whole Crew
16) Walking Tacos
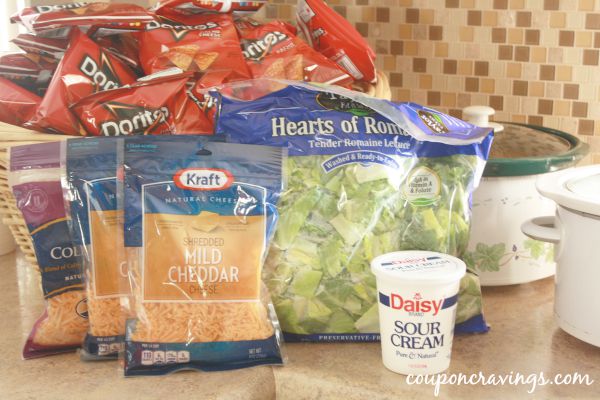
16) Walking Tacos
Ingredients
- 5 pounds ground beef
- Taco seasoning for 5 pounds ground beef
- 40 individual 1-ounce bags Doritos
- 2 small bags shredded lettuce
- 2 16- ounce containers sour cream
- 6 cups mild shredded cheddar cheese
- Salsa (for serving)
Cooking Instructions
- Brown ground beef in batches, breaking it into small crumbles.
- Drain fat well. Add taco seasoning and water according to packet directions, then simmer until liquid is absorbed.
- Transfer cooked taco meat to slow cookers set to Low or Warm.
- Set out Doritos bags, lettuce, sour cream, cheese, salsa, and any extra toppings buffet-style.
- To serve, lightly crush chips in the bag, tear open the top, and add taco meat and toppings.
- Serve immediately while the meat is warm and the chips are crunchy.
Walking Tacos, if you’re looking to feed a crowd but don’t want to make a trek these are the way to go! Seasoned taco meat makes the perfect topping for a bag of your favorite brand of chips!
17) Philly Cheese Steak Sliders
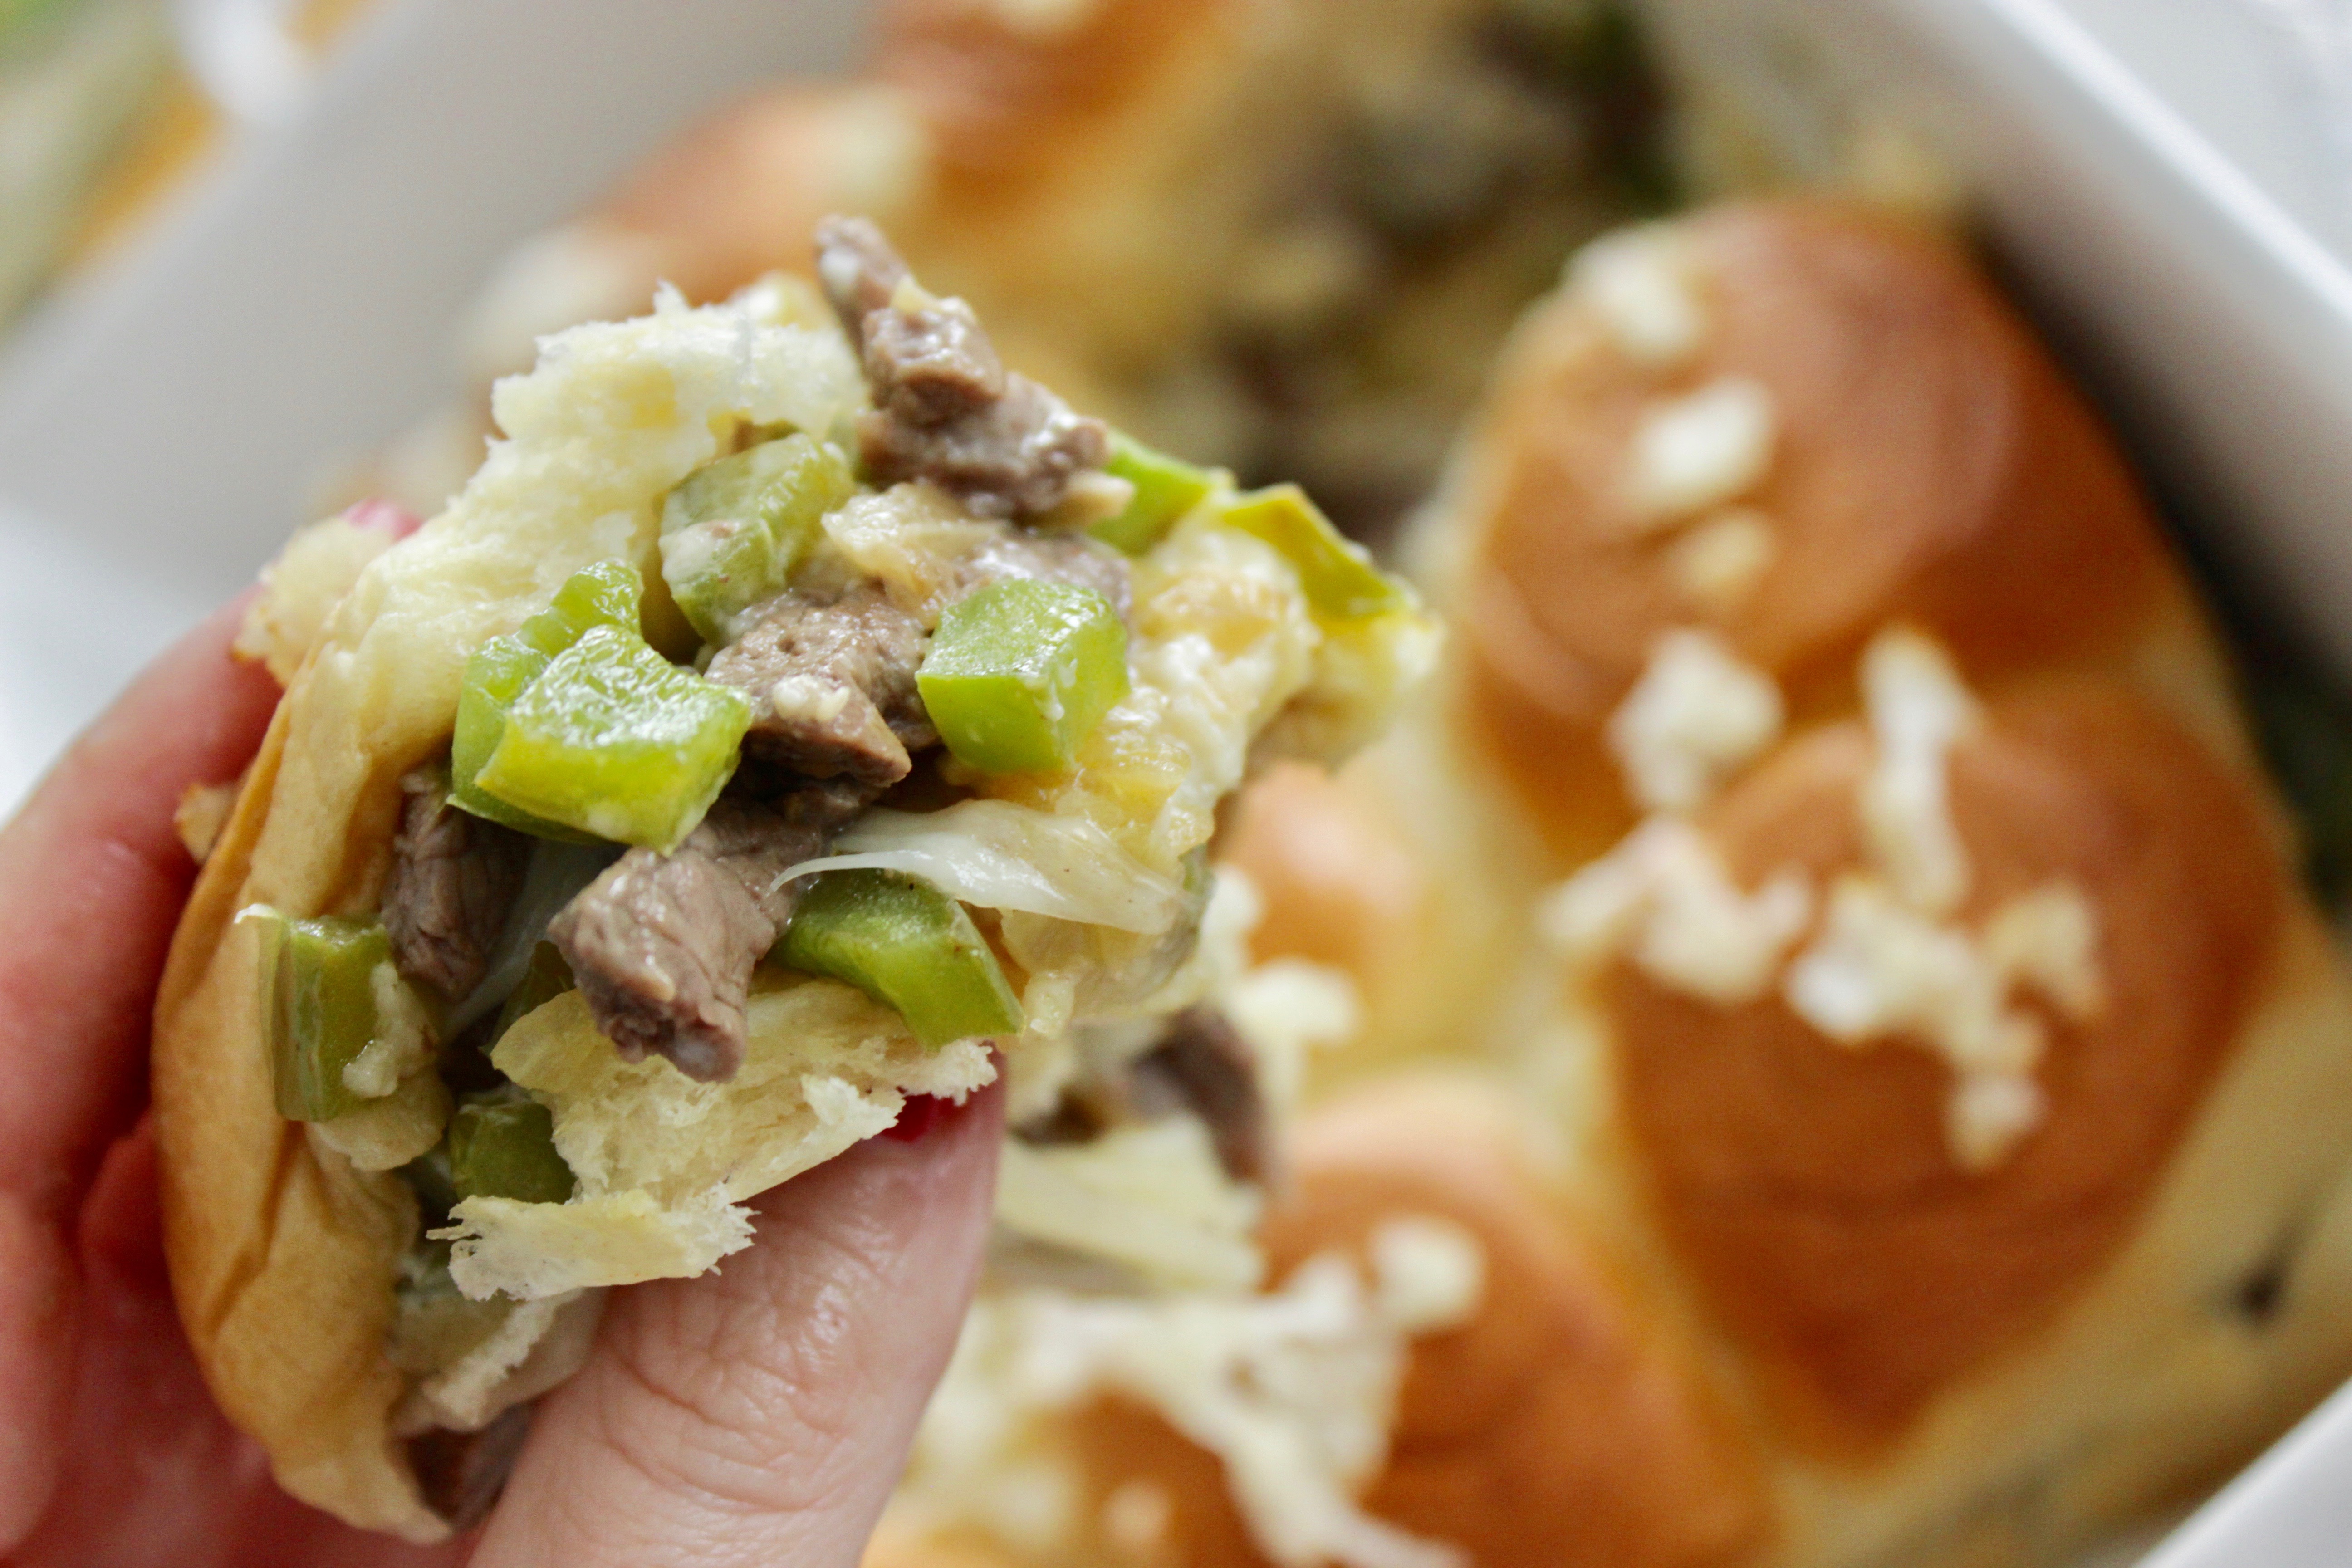
17) Philly Cheese Steak Sliders
Ingredients
- 12 King’s Hawaiian Original Dinner Rolls
- 1 pound boneless sirloin strip steak (sliced thin)
- 1 green pepper (diced)
- 1/2 onion (diced and divided)
- 1 tablespoon olive oil
- 4 slices provolone cheese
- 4 tablespoons mayonnaise
- 1 teaspoon garlic powder
- 3 tablespoons butter (melted)
Cooking Instructions
- Preheat oven to 350°F. Dice the green pepper and onion, reserving about 2 tablespoons onion for topping.
- Heat olive oil in a large skillet over medium heat. Add green pepper and most of the onion and cook 5 to 6 minutes, until softened. Remove from pan.
- Add thin-sliced sirloin to the same skillet. Cook until just browned through, then sprinkle with garlic powder and cut any large pieces into slider-sized bites.
- Slice the connected sheet of rolls horizontally and place the bottom half in a 9×13 baking dish.
- Spread mayonnaise lightly over both cut sides of the rolls.
- Layer sautéed vegetables, steak, and provolone over the bottom rolls. Add the top layer of rolls.
- Brush melted butter over the tops and scatter reserved onion over the rolls.
- Cover tightly with foil and bake at 350°F for 10 minutes.
- Remove foil and bake 10 more minutes, until tops are golden and cheese is melted.
- Rest 2 minutes, cut along the seams, and serve warm.
Philly Cheese Steak Sliders are PERFECT for a crowd and are made with Hawaiian rolls! Just ONE SHEET pan feeds an army with these scrumptious little sliders!
18) Philly Cheesesteak Sloppy Joes
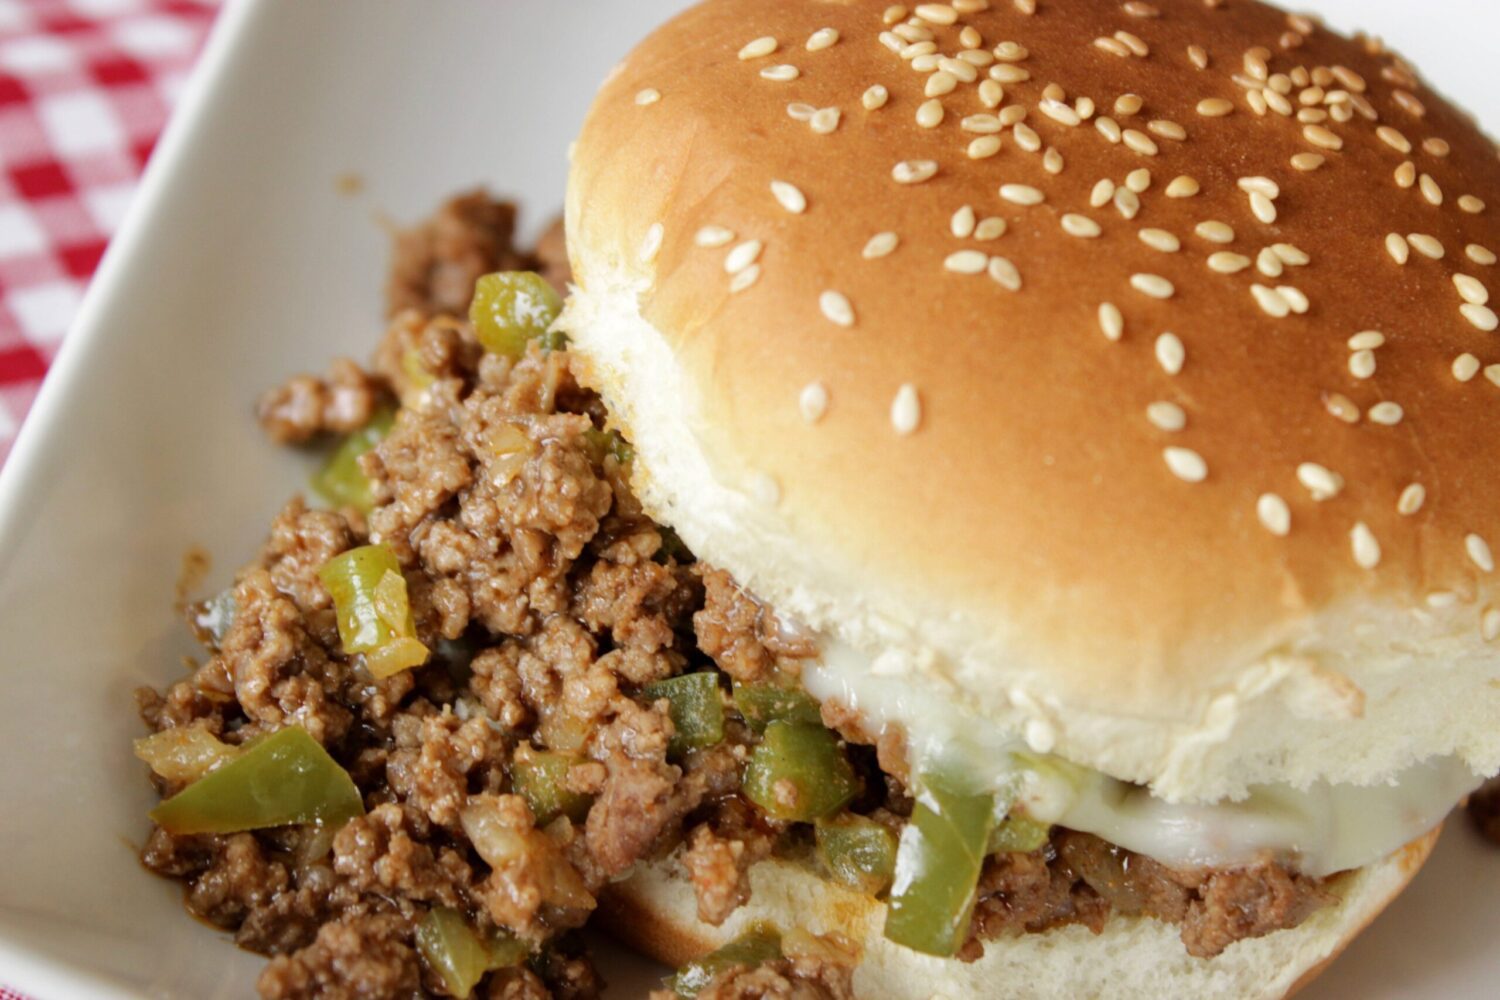
18) Philly Cheesesteak Sloppy Joes
Ingredients
- 1 teaspoon cornstarch
- 1/2 cup low-sodium chicken broth
- 2 teaspoons olive oil
- 1 small yellow onion (diced)
- 1 small green bell pepper (diced)
- 1 1/2 pounds lean ground beef
- 2 tablespoons ketchup
- 2 tablespoons Worcestershire sauce
- 2 teaspoons taco seasoning
- 6 to 8 slices provolone cheese
- 6 to 8 hamburger buns
Cooking Instructions
- Whisk cornstarch and chicken broth together in a small bowl until smooth. Set aside.
- Heat olive oil in a large nonstick skillet over medium-high heat. Add onion and bell pepper and sauté 3 to 4 minutes, until tender.
- Add ground beef and cook 3 to 5 minutes, breaking it up, until browned with no pink remaining. Drain excess fat.
- Stir in ketchup, Worcestershire sauce, and taco seasoning. Cook 1 minute.
- Pour in the cornstarch slurry, stir well, reduce heat to medium-low, and simmer 6 to 7 minutes until thickened.
- Set oven to broil. Open buns and place them cut-side-up on a sheet pan.
- Scoop meat mixture onto bottom buns and top each with provolone.
- Broil 2 to 4 minutes, watching closely, until cheese melts and buns are toasted.
- Add bun tops and serve warm.
Philly Cheesesteak Sloppy Joes have ALL the Philly cheesesteak flavor with NONE of the expense! With all of the meat and cheese goodness tucked into a soft bun you’ll wonder why you’ve been spending big bucks for thinly sliced steak! Made in ONE SKILLET these Sloppy Joes come together in about thirty minutes!
19) Hot Ham and Cheese Rolls
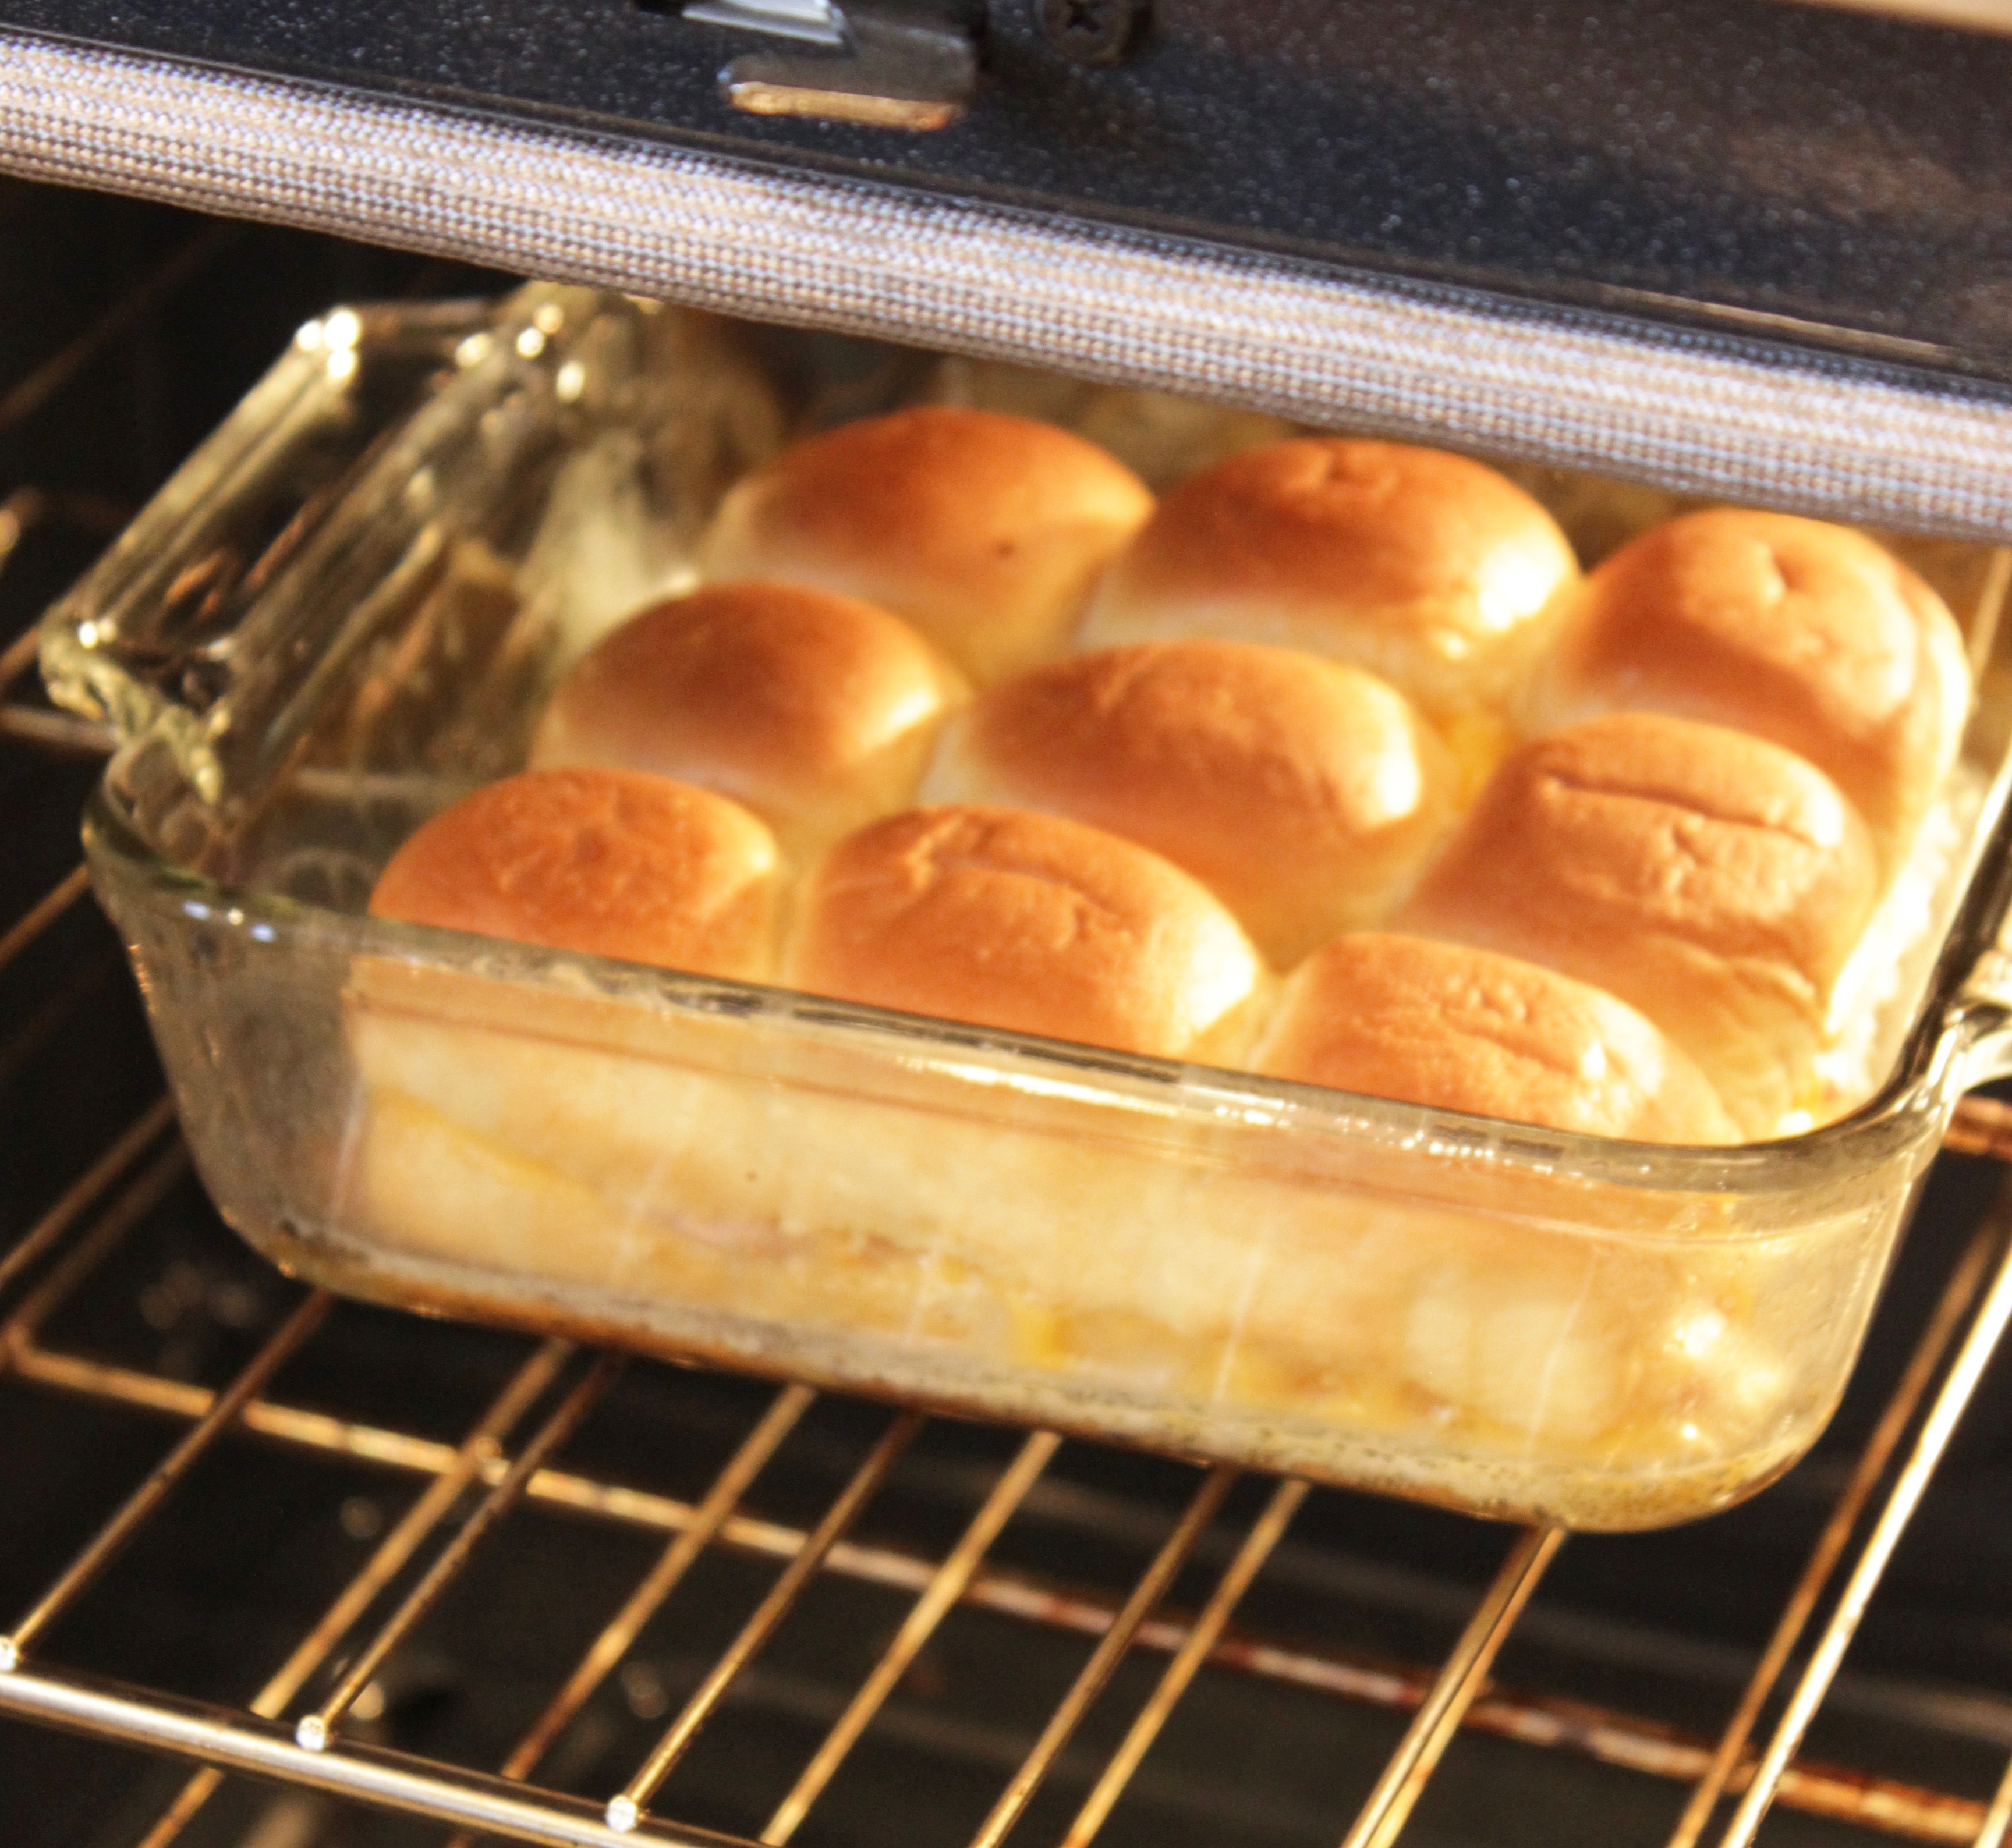
19) Hot Ham and Cheese Rolls
Ingredients
- 9 King’s Hawaiian sweet rolls (cut from a 12-count pack)
- 12 slices deli ham (thinly sliced from the deli counter)
- 4 slices American cheese (from the deli counter if possible)
- 1/4 cup butter (melted)
- 1 teaspoon Dijon mustard (optional)
Cooking Instructions
- Preheat oven to 350°F.
- Without separating the individual rolls, slice the connected block of 9 rolls in half horizontally and place the bottom half in a baking dish.
- Layer ham evenly over the bottom half, then place cheese slices over the ham.
- Place the top half of the rolls back on.
- Stir Dijon into the melted butter if using, then brush the butter evenly over the tops of the rolls.
- Bake uncovered at 350°F for 20 minutes, until the tops are golden and the cheese is melted.
- Cut into individual sandwiches and serve warm.
Hot Ham and Cheese Rolls are a favorite of the youngest kids at the party! Soft, buttery rolls with ham and melty cheese make an afternoon or evening meal they’ll ask for again and again! These little guys are SUPER easy to make and can be made ahead and re-heated with ease.
20) Buffalo Chicken Crock Pot Sandwiches
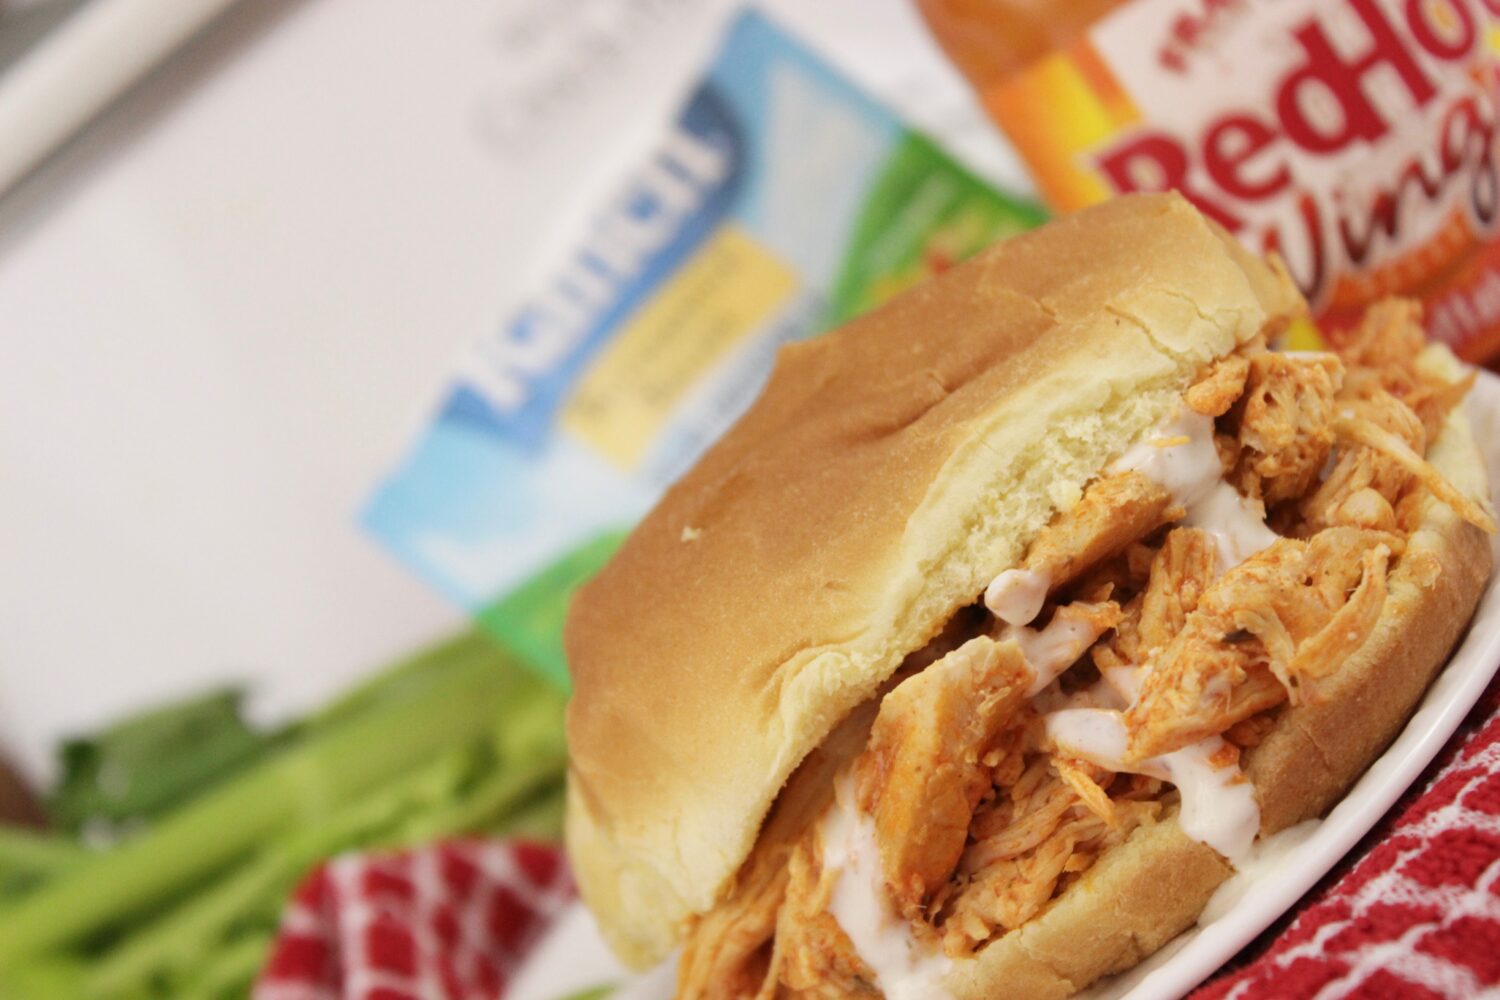
20) Buffalo Chicken Crock Pot Sandwiches
Ingredients
- Ingredients
- 4 boneless skinless chicken breasts
- 12 ounces Frank’s Buffalo Sauce
- 8 ounces cream cheese (full-fat preferred)
- 1 packet Hidden Valley Ranch Seasoning
- 6 hamburger buns (toasted if desired)
- blue cheese, ranch, celery, or red onion (optional toppings)
Cooking Instructions
- Instructions
- Lay the chicken breasts flat in the bottom of the slow cooker.
- Pour the full bottle of buffalo sauce over the chicken. Place the block of cream cheese on top and sprinkle the ranch seasoning over everything.
- Cover and cook on low for 6 to 7 hours or on high for 3 to 4 hours, until the chicken is tender.
- Shred the chicken directly in the slow cooker with two forks. Stir until the cream cheese and sauce become a uniform creamy orange coating.
- Taste and add a pinch of salt or a splash more buffalo sauce if desired.
- Toast the buns, pile the shredded buffalo chicken on top, and serve immediately with optional toppings.
Buffalo Chicken Crock Pot Sandwiches will shock you by having all of the buffalo wing taste, with no frying!!! Serve alongside celery and blue cheese dressing for a wing-inspired appetizer or serve on toasted buns or croissants! Keep the crock pot on WARM so hungry football fans can help themselves!
21) Slow Cooker Pulled Pork
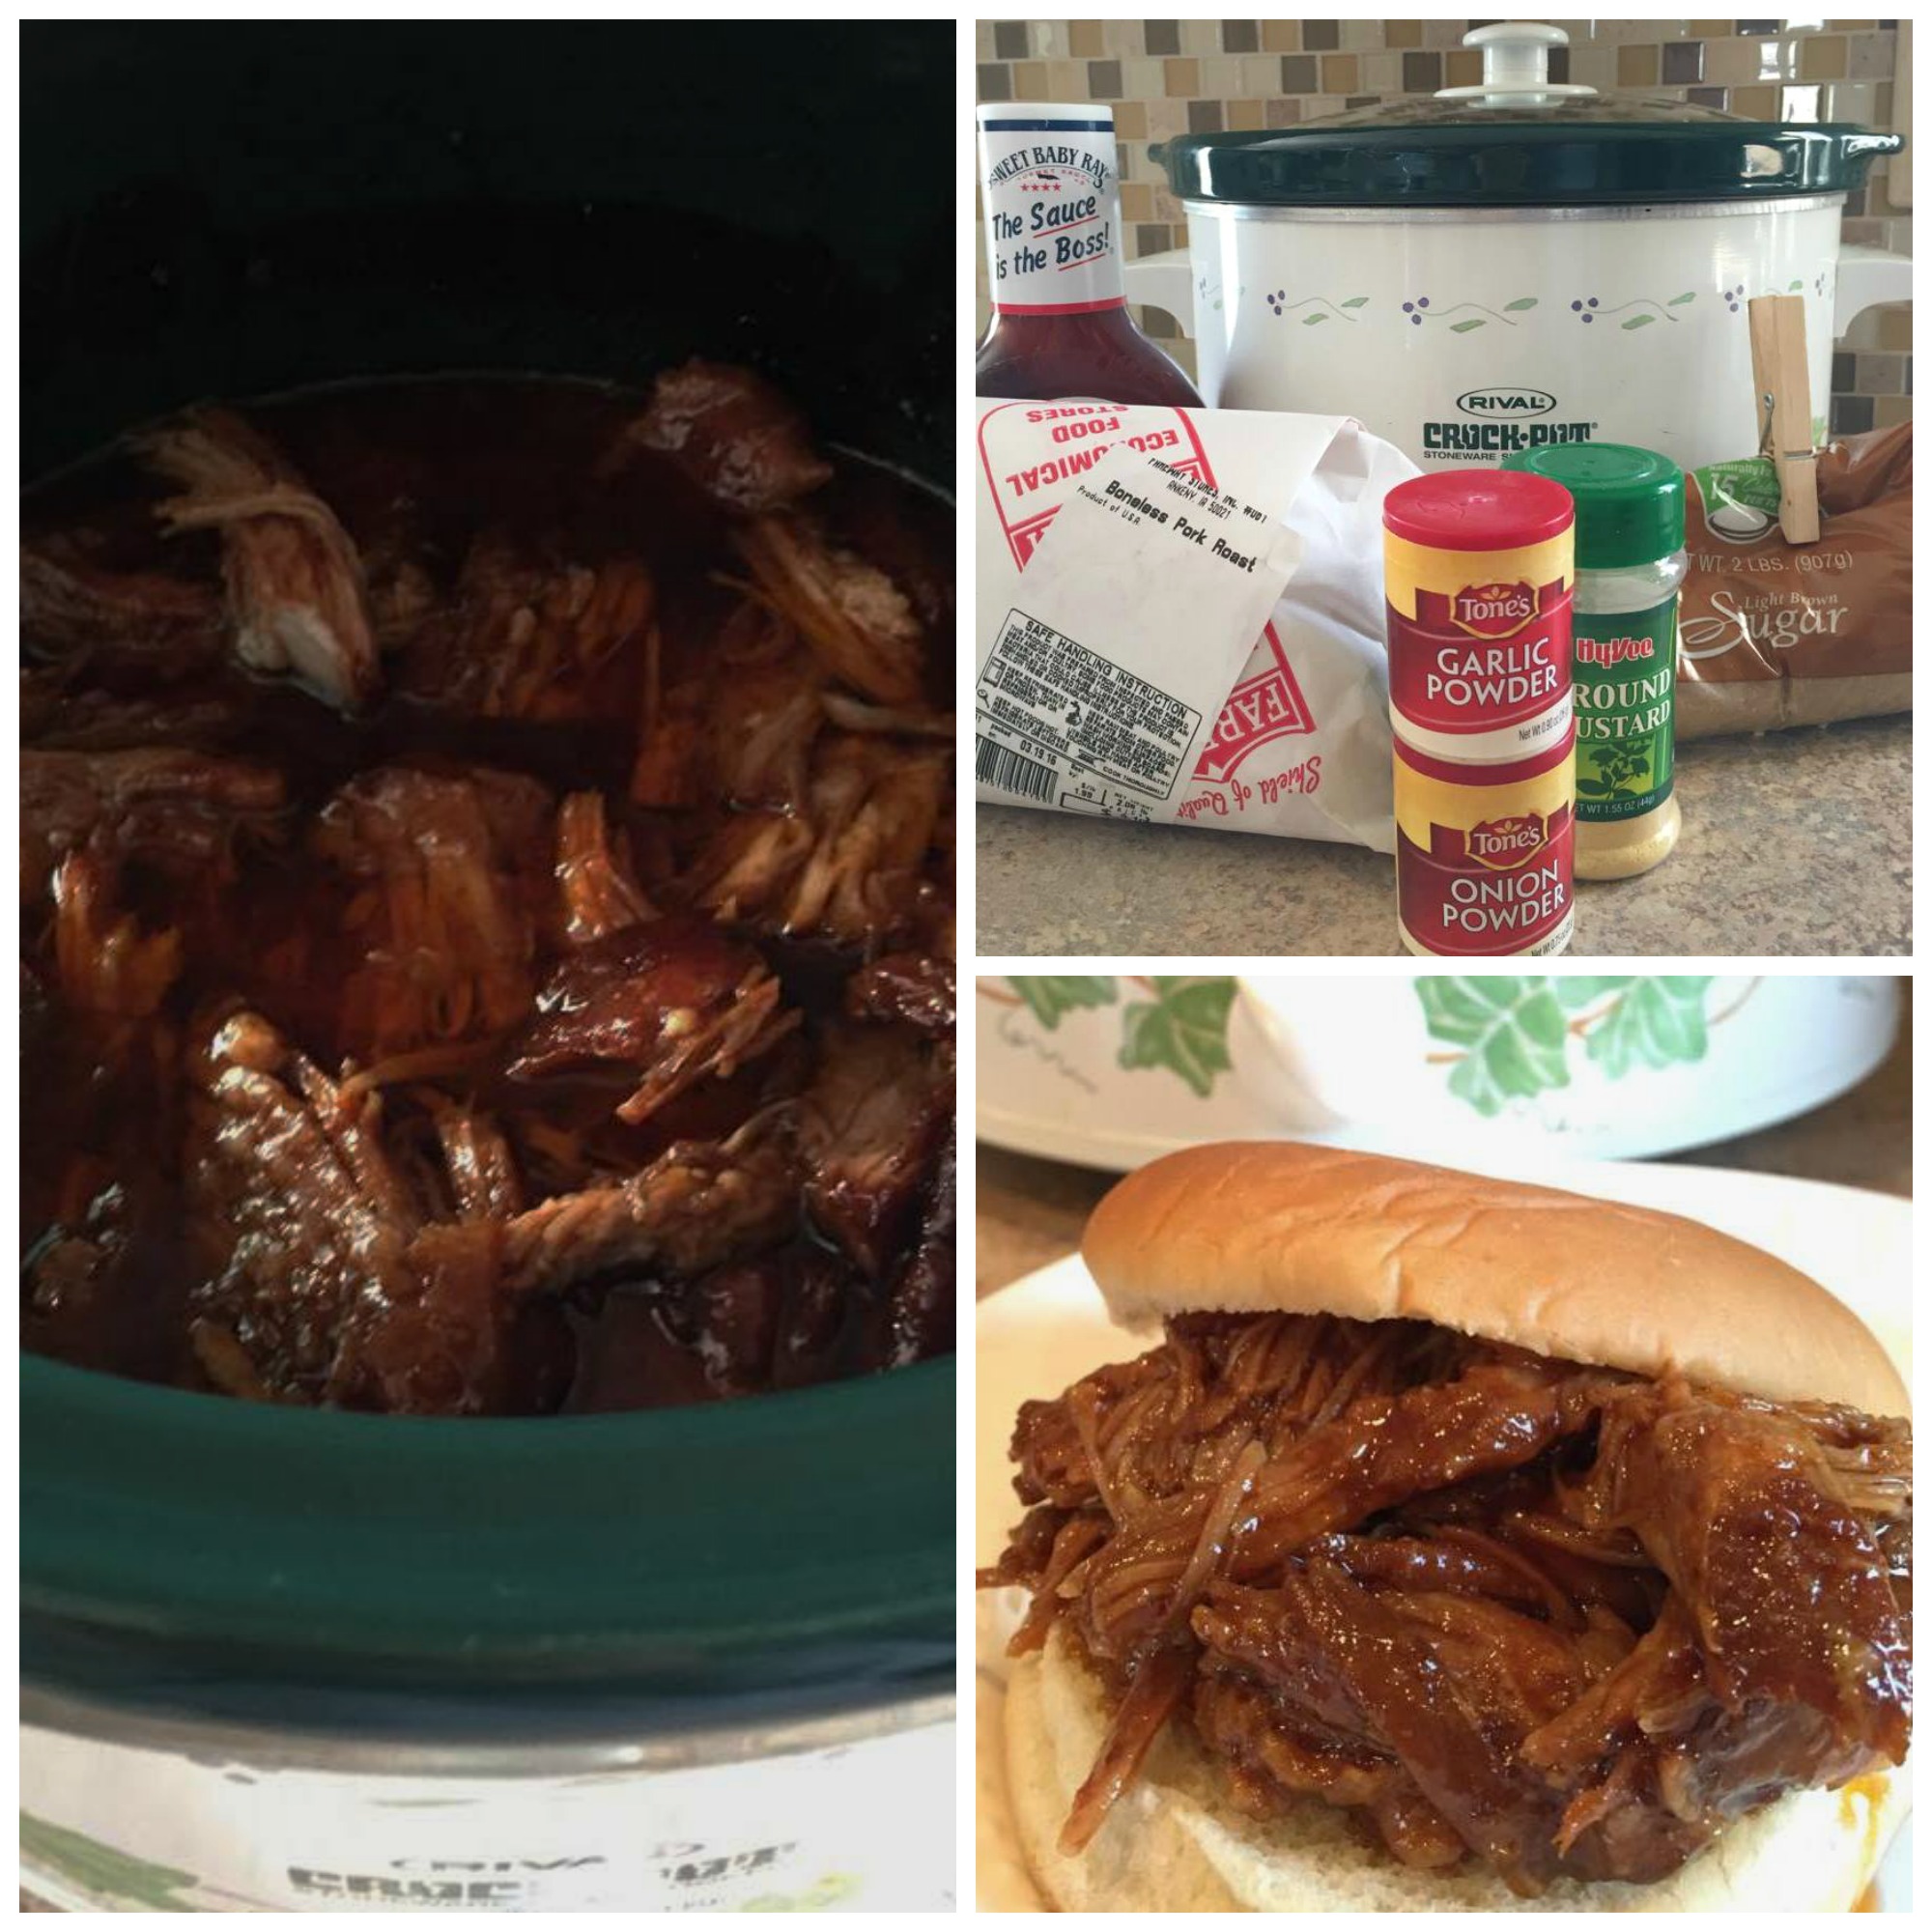
21) Slow Cooker Pulled Pork
Ingredients
- 2 pounds boneless pork roast or boneless pork riblets
- 1/2 bottle barbecue sauce (about 9 ounces)
- 1/2 teaspoon dry mustard
- 1/4 teaspoon onion powder
- 1/2 teaspoon garlic powder
- 1/4 cup packed light brown sugar (optional)
- Hamburger buns (for serving)
Cooking Instructions
- Pour about one-quarter of the barbecue sauce into the bottom of the slow cooker.
- Place pork roast on top of the sauce, fat-side-up if it has a visible fat cap.
- Pour remaining barbecue sauce over the pork. Sprinkle dry mustard, onion powder, garlic powder, and brown sugar over the top.
- Cover and cook on Low for 6 to 8 hours, until pork shreds easily with a fork.
- Shred pork with two forks and mix it back into the cooking liquid and sauce.
- Taste and adjust seasoning or add more barbecue sauce if needed.
- Serve warm on hamburger buns.
Slow Cooker Pulled Pork made with pork shoulders makes at least TWELVE sandwiches at a fraction of the cost of ordering them out! This is our favorite recipe to make when we’re trying to stretch the budget a bit.
22) Crockpot Shredded Chicken Tacos
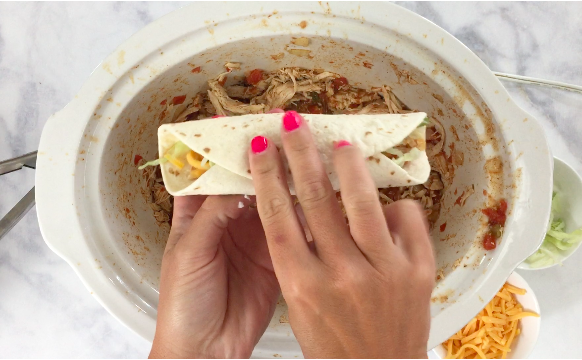
22) Crockpot Shredded Chicken Tacos
Ingredients
- 1 1/2 to 2 pounds boneless skinless chicken thighs or breasts
- 1 packet taco seasoning (about 1 ounce, or 2 tablespoons homemade taco seasoning)
- 1 jar salsa (16 ounces, medium or mild, or 1 can Rotel plus 1/2 cup chicken broth)
- Juice of 1/2 lime (optional but recommended)
- Fresh cilantro (optional)
- Flour or corn tortillas (for serving)
- Toppings of choice (such as shredded cheese, sour cream, lettuce, pico de gallo, avocado, jalapeños, and hot sauce)
Cooking Instructions
- Place chicken in the bottom of the slow cooker in as close to a single layer as possible.
- Sprinkle taco seasoning evenly over the chicken.
- Pour salsa, or Rotel plus broth, over the chicken until mostly coated.
- Cook on Low for 4 to 6 hours, until chicken pulls apart easily with a fork. Check breasts closer to 4 hours and thighs closer to 5 to 6 hours.
- Shred the chicken directly in the slow cooker with two forks.
- Replace the lid and let the shredded chicken rest in the sauce for 10 minutes so it absorbs the liquid.
- Squeeze lime juice over the chicken, stir, taste, and adjust seasoning if needed. Stir in cilantro if using.
- Serve in warm tortillas with your favorite toppings.
Crockpot Shredded Chicken Tacos, because nothing says game day like a TACO BAR! Shredded crockpot chicken takes little effort and provides a fun and interactive way to build a delicious taco. Simply lay out all of your favorite taco fixings and let your football crew build their dream tacos!
23) Funeral Potatoes

23) Funeral Potatoes
Ingredients
- 24 ounces frozen hashbrowns (thawed)
- 1 can cream of chicken soup
- 2 cups sour cream
- 1/2 cup melted butter (for filling)
- 1 teaspoon salt
- 1 teaspoon onion powder
- 2 cups shredded cheddar cheese
- 3 cups crushed cornflakes (for topping)
- 1/2 cup melted butter (for topping)
Cooking Instructions
- Thaw hashbrowns for about 1 hour in a colander.
- Move potatoes to a large bowl.
- Add sour cream, cream of chicken soup, and 1/2 cup melted butter. Mix well.
- Add salt, onion powder, and shredded cheddar cheese. Continue mixing until evenly combined.
- Spread mixture into a greased 9×13 baking dish.
- Toss crushed cornflakes with the remaining 1/2 cup melted butter.
- Sprinkle buttered cornflakes evenly over the casserole.
- Bake uncovered at 350°F for 45 to 50 minutes, until hot, bubbly, and golden on top.
Funeral Potatoes are a MUST TRY Midwestern cheesy hashbrown casserole with a crispy cornflake crust that turns golden and irresistible. This dish answers the age-old question, “is there anything not covered in cheese?”
Whew! Did you think this list was “fancy”?
We promise that most of these recipes take minimal effort and many of them are shortcuts that save you money. You’ll be able to relax during the game and enjoy yourself, and we guarantee that you’ll be up for the next homegame!
There you have it, 23 recipes to choose from for your next tailgate or homegate party. We promise they’re all winners and crowd-pleasers.
Mix and match them all year long for some seriously scrumptious football fare! Pick a couple of the dips, a handheld in the slow cooker and a meaty bite and you’re ready to rock!