Hot Ham and Cheese Rolls
It’s been a while since we’ve eaten these Hot Ham and Cheese Rolls and I’m happy to report they’re as incredible as I remember. They’re easy to make and take less than 15 minutes to assemble, ready to be placed into the oven.
We loved them alongside apple and corn and I’m sure they’d be amazing alongside lots of different sides.
We love recipes like this. The kids love them and they’re easy to make.
Nothing too plain for our plain eating family. We’ve been requesting them again and again since I made them for dinner one night.
The plates were empty.
Why These Flavors Work Together
- the melted cheese + crispy tops = perfection
- the rolls aren’t greasy at the bottom, and instead, there’s a slight crunch which pairs perfectly with the softness of the rolls and the crunch of the tops. The melted butter really shines here.
- all told, only a few ingredients including the ham and cheese.
Why King’s Hawaiian Rolls Specifically
I know these rolls have developed a bit of a following and it’s easy to see why. They’re SO good.
Now, this isn’t a post advocating for you to spend your hard earned cash on name brand rolls, but in this instance, the King’s Hawaiian Sweet Rolls take this recipe to another level. They’re a little different in texture and have just the right amount of sugar to complement the saltier elements in the recipe.
They also stand up to the addition of the melted butter better than your average dinner roll and don’t turn out quite as soggy.
I highly recommend using counter-sliced American cheese, not the individually wrapped kind, because I find they melt better. Use whatever cheese your family enjoys though.
Deli ham that’s been thinly sliced works best because it’s easier to get the slices of ham to lay evenly.
To make sure there’s an abundance of melted butter in these rolls I brush the rolls with some melted butter before assembling. Be sure to spread some under the rolls as well.
Placing the rolls close together in the pan allows them to steam ever so slightly as they cook. It’s part of what makes them turn out perfectly crispy on the outside but still soft and pillowy on the inside.
The texture of Hawaiian Rolls also lends itself well to making baked sliders. They come connected, which makes them easy to cut in half horizontally.
Then, you can add your fillings all at once. And when you bake them in butter, the connected crumb allows the rolls to absorb the butter really well while getting slightly crispy.
They come out of the oven perfectly steamed/crispy. Trust me.
Try to make ham sliders with other kinds of rolls and compare. You’ll be surprised how much more delicious King’s Hawaiian Rolls make them.
What to Know Before You Start
Hawaiian Rolls usually come in packs of 12. Remove three rolls or cut out a quarter of the connected rolls to have just enough to fit in a baking dish.
If you have a larger baking dish and use more fillings, you can easily use all of them.
I used a glass baking dish, which made it easy to see the butter pooling in the bottom. If you’re using a dark-colored, metal baking dish, it’s helpful to remove it from the oven and give it a shake/tilt to make sure the butter gets into all of the corners.
You can easily use a 9×13 pan.
Bake until golden-brown and gooey.
The Ham: Deli Counter vs. Packaged
While packaged will be okay if you go with a higher-quality name-brand for best results, I highly recommend going to your deli counter and getting it sliced fresh. Moisture and flavor will be much better than anything packaged and sitting around in that plastic.
Ask them to slice it THIN, setting 1-2 on the machine depending on the brand, so it will be more bendable. You can’t see it well in my photos, but if it’s too thick it will try to clump up in the rolls.
For these 9, I used 12 slices. They are bendable enough to fold, but substantial enough to cover all the way to the edges with no gaps showing through.
Same deal with the American cheese. Again, you CAN use the packaged squares, just cut each one in half.
But if you have a deli counter, ask them to slice that for you as well.
How to Make It
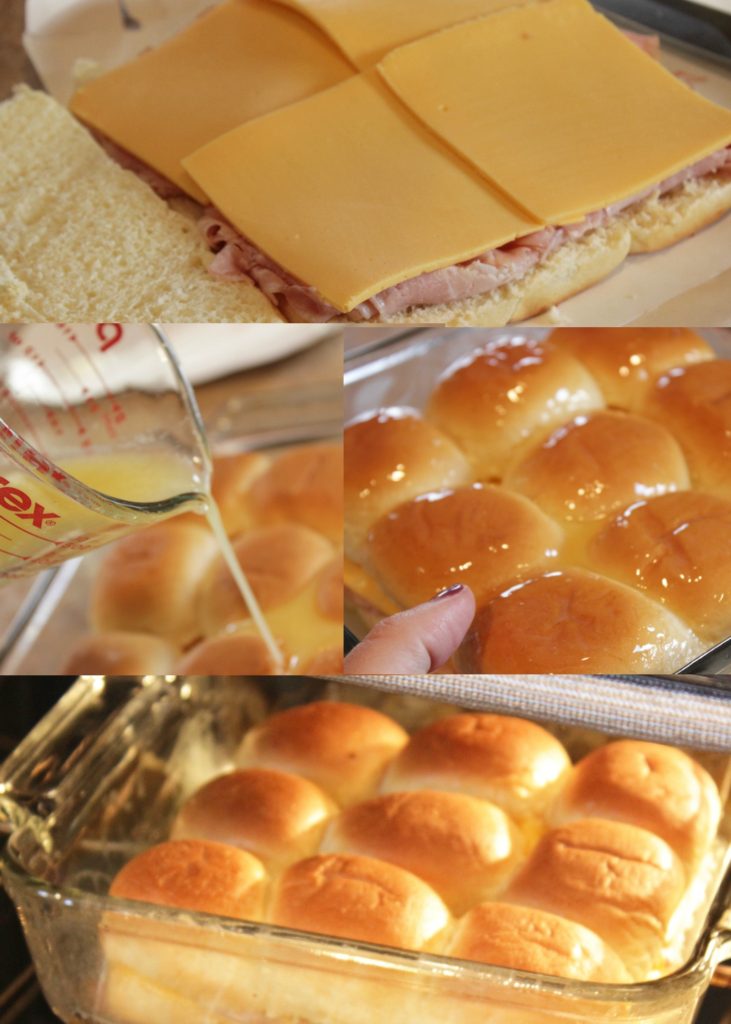
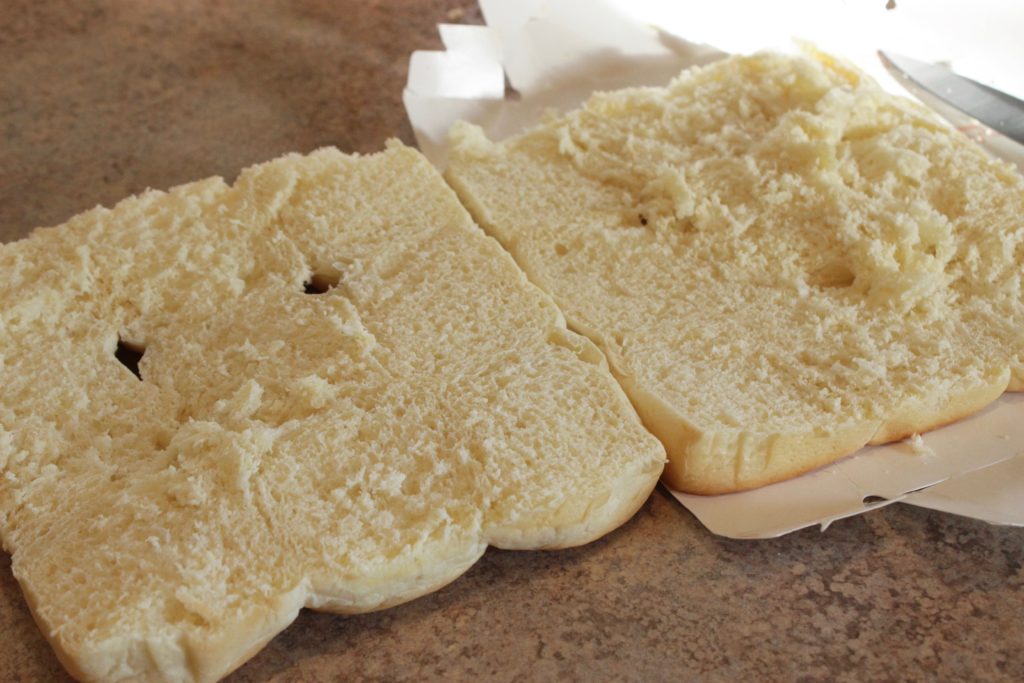
Remove 9 King’s Hawaiian rolls from their packaging, which come in 12-count packages. Separate them apart, but not completely, so that you have 1 solid piece of 9 connected rolls.
Cut them in half horizontally, being careful not to separate the 9. Set aside.
In a microwave-safe bowl, add butter. Microwave, stopping and stirring, until melted.
Set aside.
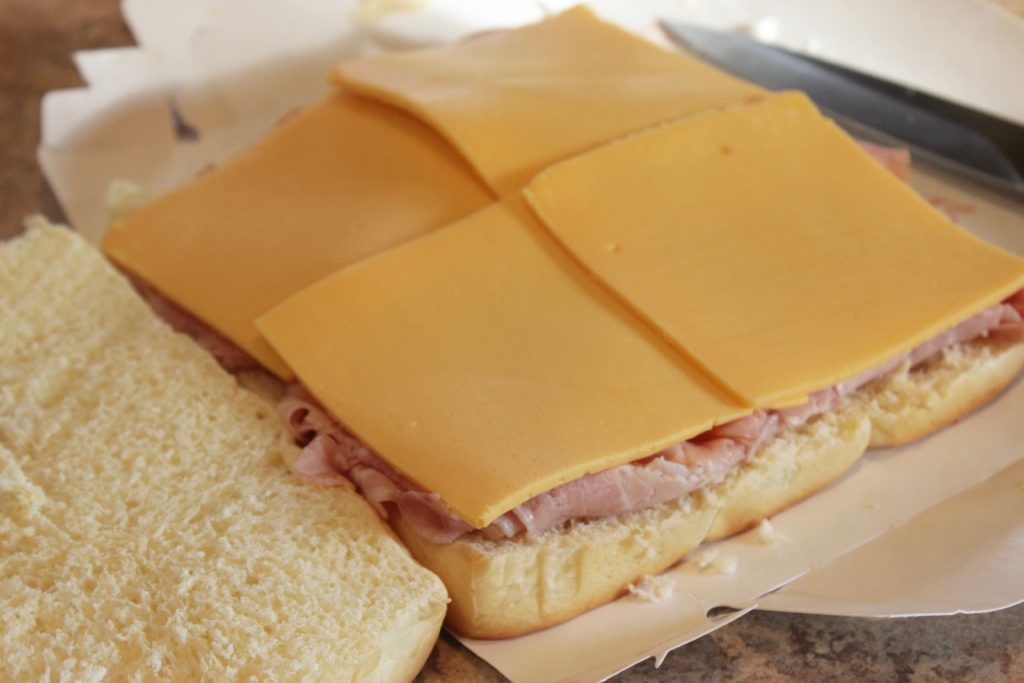
Preheat the oven to 350°F. Line a smallish baking dish just big enough to hold the rolls with parchment or foil.
Spray lightly with nonstick cooking spray. Place the bottom halves of the rolls in the pan.
Add ham, lining them all the way to the edges. Add cheese.
Add tops of rolls.
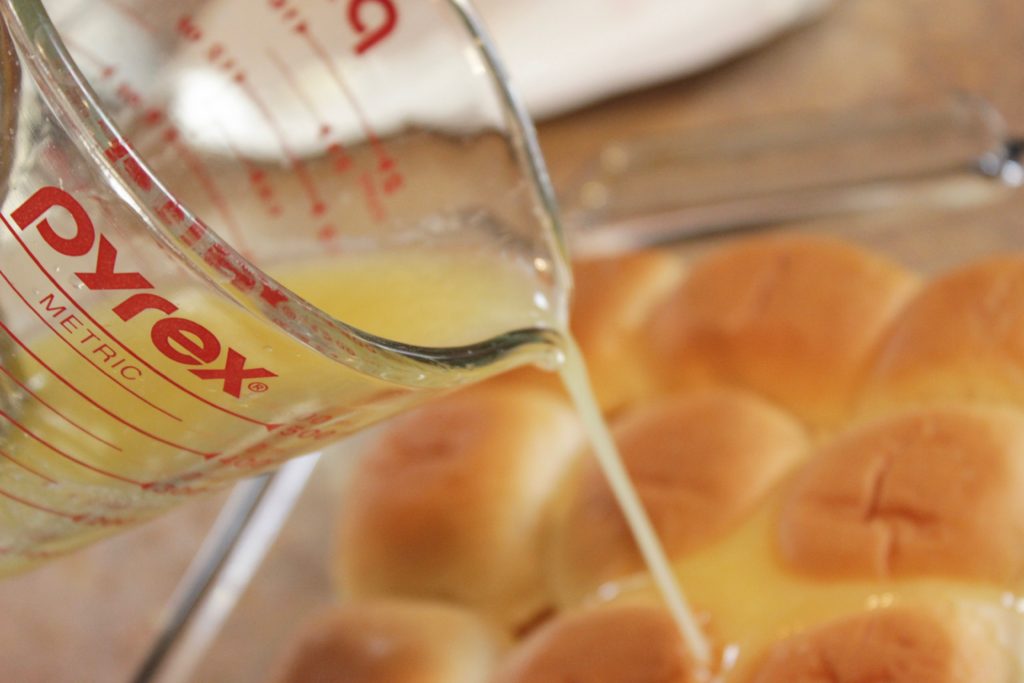
In the bowl with melted butter, add Dijon, if using, and stir to combine. Using a SILICONE BRUSH, brush melted butter all over tops of rolls, spreading it starting at the center and working to edges.
Try to get it evenly spread, allowing the ends of the brush to go over the edges of the pan (see photo below). You WANT the ends to drip down.
Bake, uncovered, for 20 minutes. Serve immediately.
How to Know When They’re Done
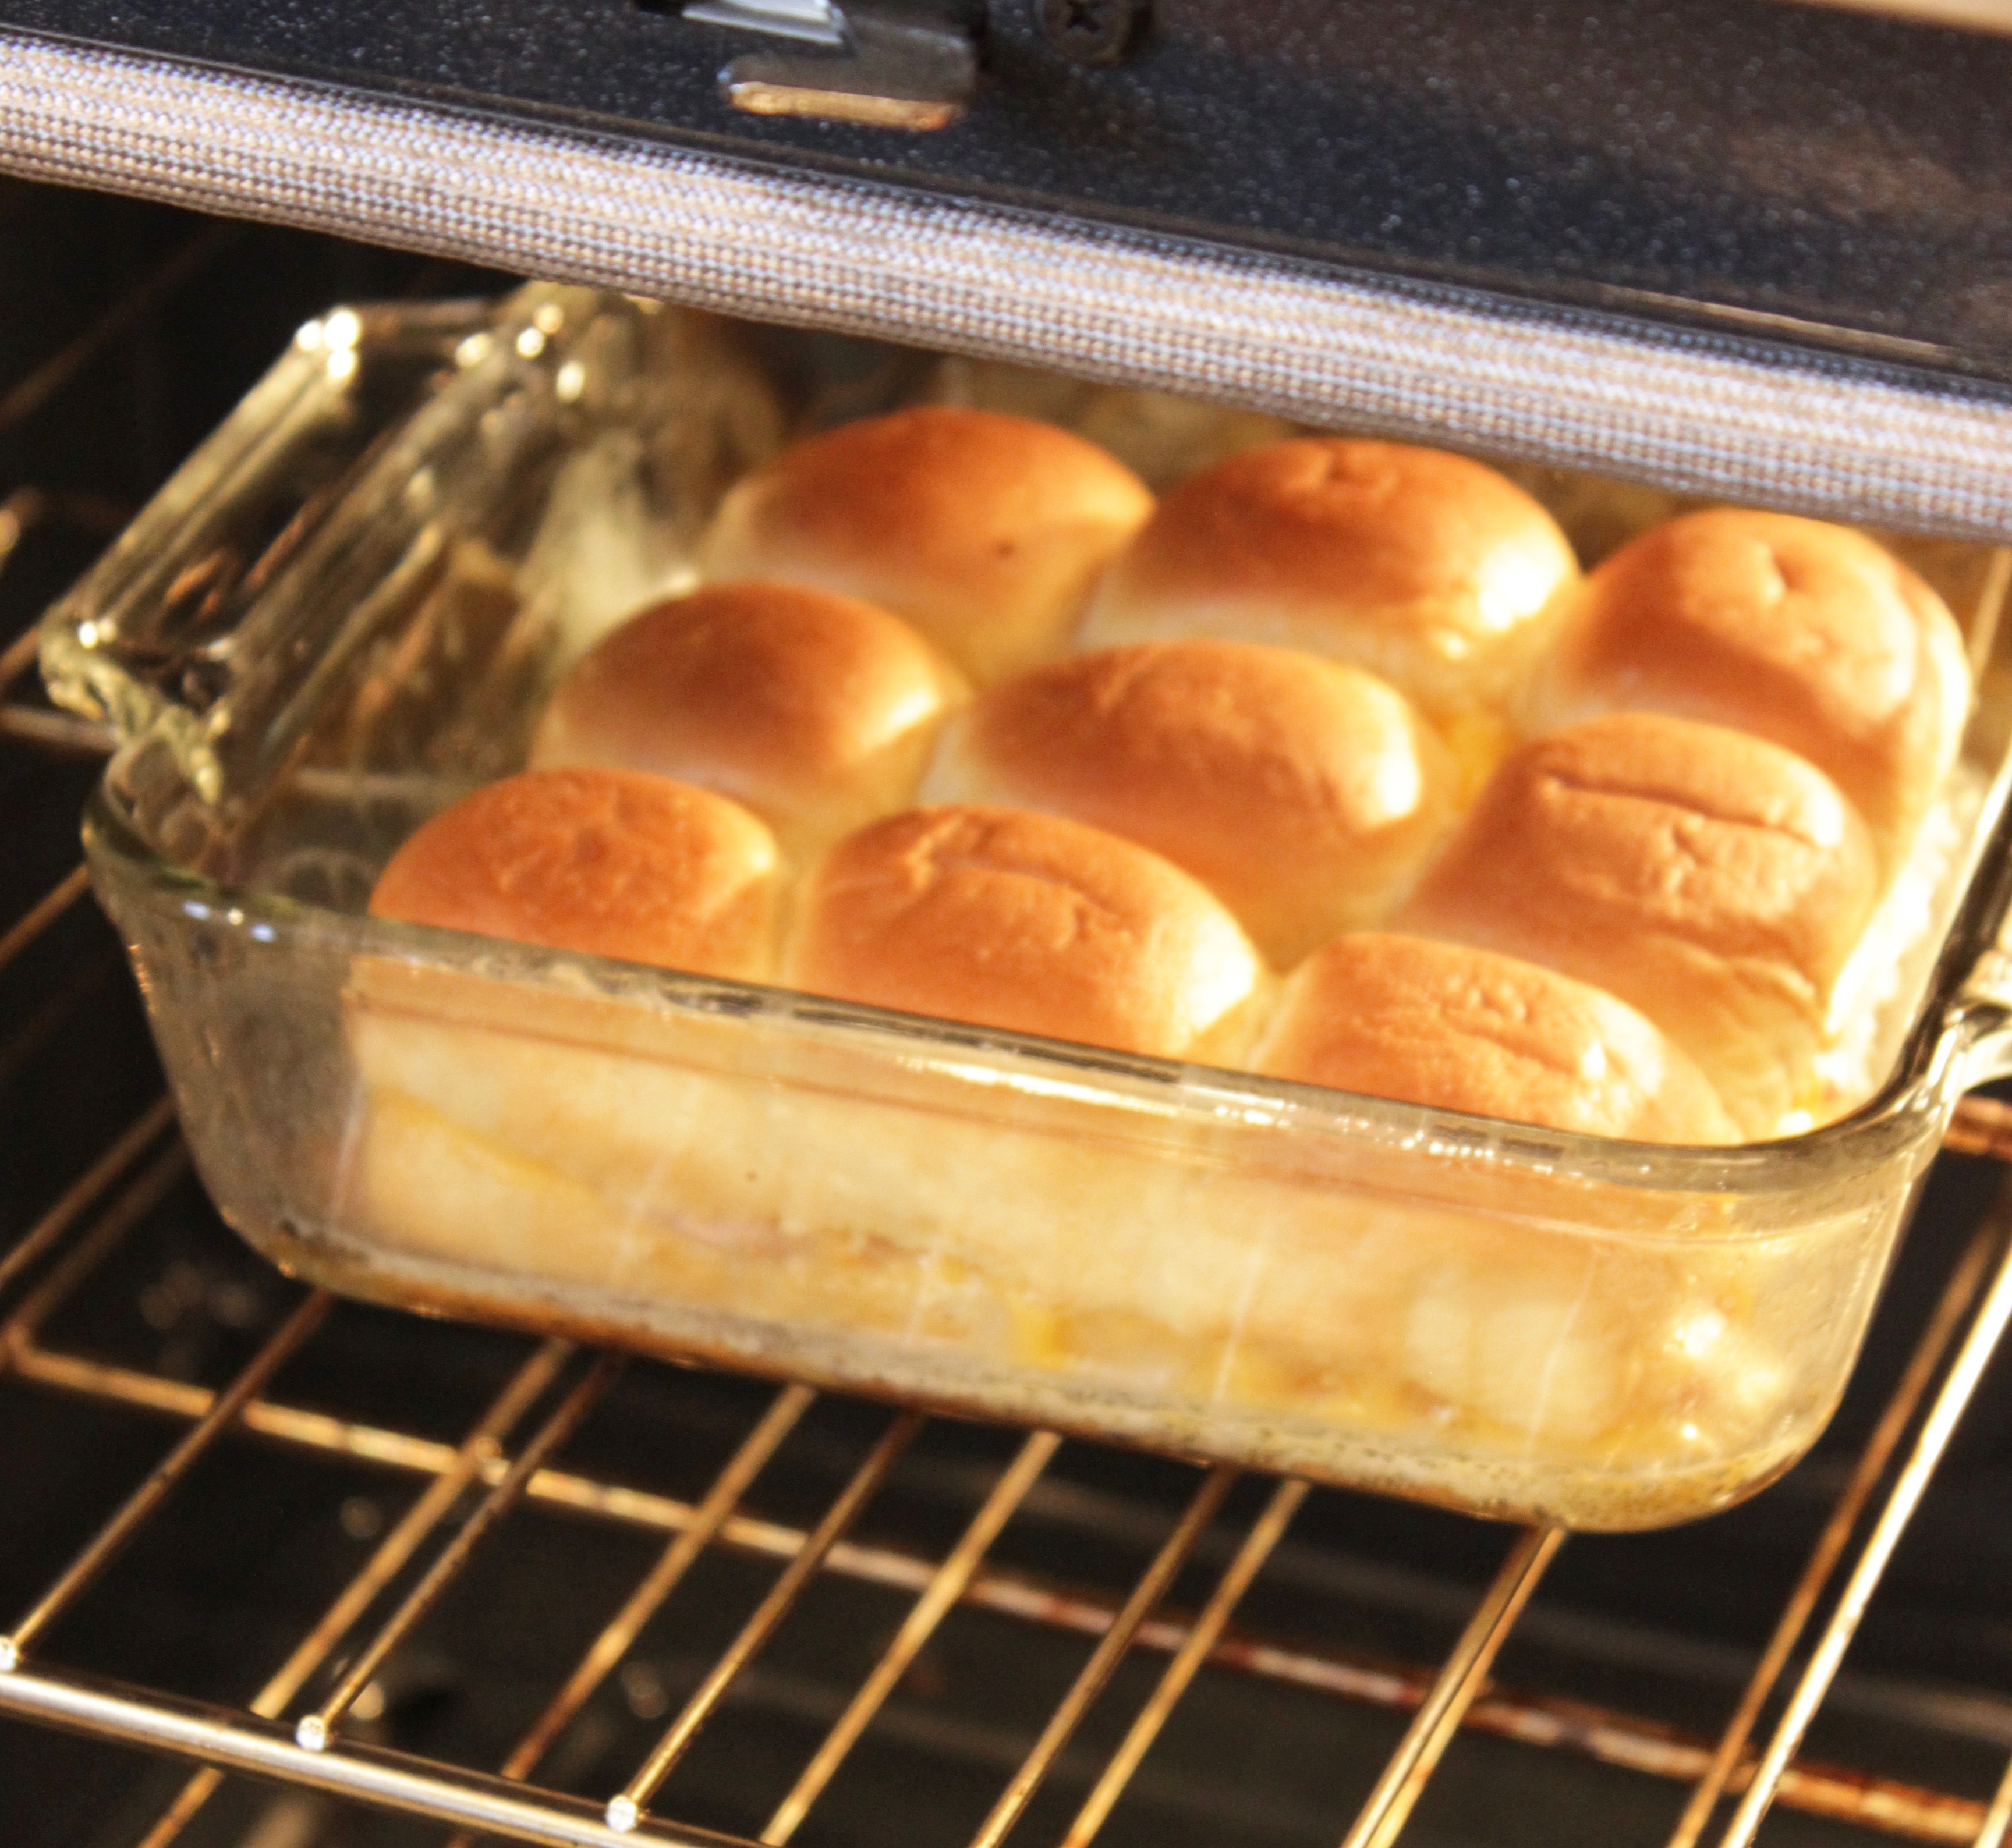
Once they reach the golden-brown stage (see photo above), about 20 minutes in, they’re done. If the tops of the rolls are soft and pale and the butter hasn’t browned, give them a few more minutes to bake.
Also, melted cheese should be oozing and/or visible between rolls at the end.
Note that if you’ve been keeping these rolls in the refrigerator until just before baking them, you may need to increase the total baking time by 3-5 minutes. Also, if your oven runs a little cool, you may need to add a few more minutes as well.
How will you know when roll sandwiches are done? They’ll smell incredible.
At around 15 minutes, they’ll smell like butter and bread. Around 20 minutes, they’ll smell like buttery, toasty grilled cheese heaven.
Another great doneness indicator: Give the dish a little jiggle to hear if the rolls sound hollow on the bottom, similar to testing on a loaf of homemade bread for doneness. Also, if you can tilt the baking dish to get a peek at the bottoms of the rolls, the butter will be bubbling away and should be golden browned as well.
Helpful Tips
You can absolutely add a variety of seasonings to the butter. One teaspoon of Dijon mustard stirred into the butter also adds a subtle tang that even picky eaters don’t pick up on.
Instead of pouring the butter over the rolls, I highly recommend using a basting brush to apply the butter, as it will coat them more evenly (see photo above). This way, you’ll get perfectly browned and crispy tops all over, preventing soggily buttery spots where the butter pools.
Leave the dish uncovered while baking, in order for those beautiful browned tops to happen. Covering the dish will cause the rolls to steam, ruining the crispy factor.
If time permits, let the rolls sit after brushing with butter for 5 minutes before baking. Allowing them to soak up some of that melted butter before going into the oven will help them brown more evenly.
Serving Ideas
Simply separate rolls with a knife to make sandwiches. These rolls are best enjoyed straight out of the oven, while the cheese is extra melty and gooey and the buttery tops are super crispy, though they do soften as they sit.
Enjoy!
For a Weeknight Dinner
Hot ham and cheese rolls are super filling – think of them as the slider version of grilled cheese – and pretty rich and buttery, so keep sides simple. Some options:
- Fruit – grapes or sliced apples echo the sweetness of the Hawaiian roll
- Sweet corn – either canned or fresh corn on the cob if it’s in season – heated up, it’s a super-easy side.
- Salad – something green and fresh will balance out all of that buttery goodness – choose a dressing on the acidic side – think vinaigrette – to balance out the rolls’ sweetness.
- Soup – these rolls and tomato soup is a classic combo for a reason. Grab a few cans for a Tuesday night and have a super-easy and delicious combo for dipping.
- Pickles – a platter of dill spears or pickles of your choosing are great with ham and cheese, and will be appreciated by adults.
Dipping Sauces That Work
- Tomato soup
- Honey mustard
- Mustard – especially on the sharper side like Dijon, spicy brown, or whole grain
- Ranch
My favorite dipping sauce to serve alongside hot ham and cheese rolls is honey mustard – it’s a classic for a reason. Honey mustard goes perfectly with ham and has a sweetness and a mildness to it that kids love.
For those that like a little kick, offer a spicier mustard. Ranch is another winner with ham and cheese, as the buttery-ness of these rolls begs for ranch, and ranch is another sauce kids love.
Make-Ahead and Party Tips
These rolls make an easy party or potluck food. Double the recipe to feed about 8-10 people and quadruple the recipe for bigger crowds.
They travel well, still nestled into the foil-covered baking pan. For parties, you can make the hot ham and cheese rolls a day ahead and warm in a 300 degree oven, covered, for 10-12 minutes, just until heated through.
Making Them Ahead
You can assemble the rolls with the cheese and ham up to a day ahead, cover with plastic wrap and refrigerate. Just leave off the butter until ready to bake.
When the oven is preheated, brush the rolls with butter. Let stand at room temperature about 10 minutes or an additional 5 minutes if the rolls have been in the fridge.
Then bake rolls for 25 minutes. Check the color of the rolls.
They may be ready before the timer goes off.
Portions: If you’re using these rolls as a main dish, count on 2-3 per adult and 1 per child. If using as a party item or as part of a slider or sandwich spread, count on 1-2 per person.
That would make 1 pan (9-12 rolls) enough for 4 for dinner; 2 pans of 12 for 6-8 for dinner; and 3-4 pans made in batches for an appetizer/spread for 20 people.
Keeping Them Warm
You can bake these ahead of time and keep them in the oven at 200°F covered loosely with foil, not sealed or they’ll get steamed and soggy on top, for about 45 minutes. That’s what I do when making them as an appetizer at parties.
You can also bake these ahead of time, cover with foil and take them with you to a party. They’ll be a bit less crunchy, but should be plenty tasty and still be warm after 30-40 minutes in transit to a potluck party.
Variations Worth Trying
Try these variations on the basic recipe:
- For an upscale version: Use thinly-sliced turkey from the deli rather than processed lunch meat, some good swiss cheese and add some dijon mustard to the butter you use to top the rolls before baking. The turkey and swiss combination is much nuttier than ham and american, and the dijon gives it some kick. This one is a keeper.
Ham and Pepper Jack
- For a spicy version: Use pepper jack cheese in place of the american. It is not super-spicy and pairs well with the sweet rolls.
- Spicy version: If you’re serving these to adults and want them spicy, mix in some hot sauce to the butter mixture.
Honey Mustard Inside
I love the idea of adding some sweet and tangy honey mustard between the roll and the ham. I’d spread about a tablespoon over 9 of the bottom rolls, then top with ham.
It would seep into the bread and caramelize on the edges just a tad and add another level of flavor without being too much.
Provolone and Italian Ham
For a fancier and pricier appetizer, sub out the deli meats and cheese for something more upscale. Try prosciutto and/or capicola, jarred roasted red pepper slices and provolone.
This would be a party favorite.
Double Cheese
For the ultimate in cheesy, use 2 types of cheeses. My kids LOVE the combination of American and Swiss in this recipe.
It has a deeper flavor and melts more evenly with a more interesting cheese pull.
Storage and Make-Ahead
- These can be made ahead of time, assembled with meat and cheese, and refrigerated (covered) for up to 24 hours. Add the melted butter and pop into the oven just before you’re ready. If going into the oven from refrigerated add 5 minutes to cook time.
- Any leftovers will keep up to 3 days in a covered container in the refrigerator. You can reheat in a 350* oven for 8-10 minutes, which is the best way as it helps crisp the tops back up. They can be reheated in the microwave, but won’t have the crispy tops.