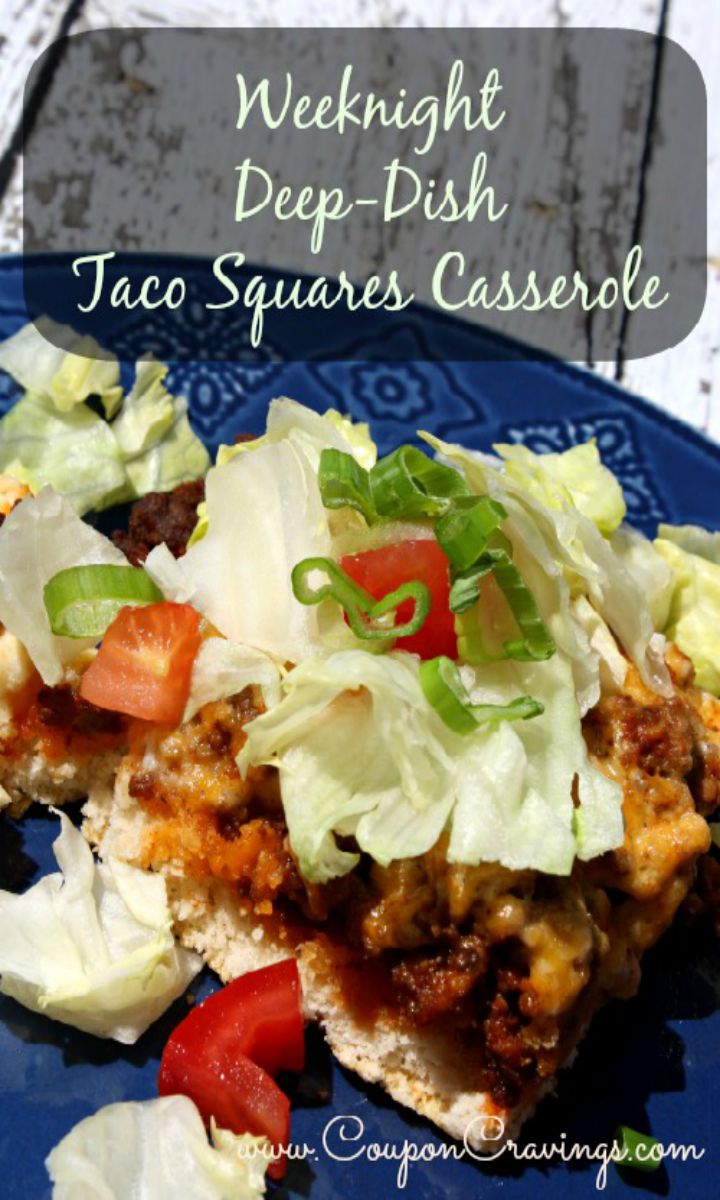
Weeknight Deep Dish Taco Squares
My kids are notorious for picking at their food. When presented with something new, they are guaranteed to raise their upper lip in utter disgust and scream “what is this?” So, when my kids ate ALL of their Taco Squares and my oldest asked for leftovers, I knew that I found a winner.
Easy and delicious Taco Squares are a weeknight favorite.
This recipe takes about 40 minutes to make with items that are typically already in your kitchen. Deep Dish Taco Squares have three sections.
There’s a biscuit crust on the bottom, seasoned taco meat in the middle, and a layer of cheese and sour cream on top. I think that the cheese and sour cream part is the BEST!
It’s like all of the best parts of a taco night, minus all of the mess. It’s a bit like a casserole and a taco had a baby.
The biscuit bottom doesn’t get soggy and the cheese and sour cream mixture sets up a bit and reminds us of dipping into warm cheese. My kids LOVE dips.
I typically use a mixture of ground beef and black beans. Feel free to mix it up.
The sky is the limit.
On the first Tuesday night we made these, my kids gobbled them right up. No complaints from picky eaters here.
Leftovers reheat great and will be highly requested tomorrow night. I love easy weeknight recipes like these and know that you will too.
How to Make It
Note about baking dish: For this recipe, I recommend using a 9×13 baking dish. Using a 9×13 Pyrex or other glass baking dish makes it easy to check for browning since you can view the bottom of the crust without having to lift it out of the pan.
Glass pans are also nice in that they absorb and hold heat very evenly, making for an evenly-baked dish with fewer hot spots. If you only have a 9×13 metal pan available, it’s OK to use that instead but keep an eye on the crust’s browning as it tends to brown more quickly on the bottom.
Also, it’s best to avoid using a darker colored pan as they may brown the bottom of the crust too much before the dish is cooked through in the center.
- In a medium-sized bowl, stir together the biscuit mix and water. It should form a soft, doughy consistency. Try not to work the dough too much or your crust will be a bit on the tougher side when baked.
- Spoon the crust into the prepared baking dish, spreading it to the corners. If it’s a little on the sticky side, it can help to dampen your fingers and spread it out that way. You’re looking for it to be pressed down pretty well with a thickness of approximately 1/4-inch.
It’s important to get the crust into an even layer so the dish will bake up more evenly. It’s OK if the edges stick up a tad, as they’ll puff up a bit in the oven, but avoid any major peaks and valleys.
- Bake for 9-minutes, or until crust is just set and has begun to puff ever-so-slightly. It shouldn’t be very browned at this point. Remove from oven and allow to sit for a few minutes as it will continue cooking on the bottom due to heat from the pan.
- Meanwhile, cook the beef. Heat a large skillet over medium-high heat. Add the ground beef and cook, breaking up with a silicone spatula until browned and smooth.
Next up is the beef. You can totally season it before cooking, but I find that I like to drain the beef, THEN add the seasonings so that the spices cling to the beef.
If you season it before cooking, some of the seasonings may burn. Either way works.
Brown beef over medium-high heat for about 7-8 minutes, making sure there is no pink left and breaking up any large clumps so that it’s more of an even consistency. Drain the beef to remove as much of the grease as you can.
This is actually one of the most important parts of this recipe. Either tilt the pan to one side to get the grease to the lowest part of the pan and then carefully spoon the grease out OR transfer the meat to a colander set over a bowl to catch any grease to drain.
Return the meat to the pan and add taco seasoning, tomato sauce and garlic powder and stir well to incorporate. Simmer for 2-3 minutes or until slightly thickened and saucy but not soupy, glossy, and beautiful.
Remove from heat. Spread beef mixture over par-baked crust being sure to get it evenly spread to the edges and corners.
It’s extra work to spread it evenly but it’s worth it. Some areas will be soggier in spots if the meat is thicker.
Likewise, other areas will be dryer where there is less meat. In a medium sized bowl combine sour cream, shredded cheddar, and mayo.
Mix well until creamy and almost a bit more dippy in texture. Spoonfuls of sour cream mixture are added gently to the meat mixture so you don’t disturb the meat too much, spreading out as you go with a spoon or small spatula.
Again, getting this creamy mixture evenly spread to the edges and corners is ideal. Sprinkle paprika evenly over the top.
This is purely decorative but does add a slightly smoky flavor to the final product. Bake for 25 minutes uncovered, preferably on top of a baking sheet.
At about the 20 minute mark it will start to bubble and will be turning golden. It’s taco night.
At about 25 minutes, shake the pan. If the toppings have set and do not jiggle, it is done, with the edges faintly golden-brown and the top nicely browned in spots.
Depending on how hot your oven runs, you may need to begin checking as soon as 22 minutes.
Broil an additional minute or two for more browning. But do keep an eye on it – the topping can go from golden-brown to burnt very quickly.
Remove from oven. Resist the urge to dive in right away – allow to sit for 5 minutes before slicing.
I get it. However, this ensures clean, easily removed slices instead of a pile of gooey goodness.
Use a knife and slice in a grid pattern into squares – I would suggest 3 squares horizontally and 4 squares lengthwise for 12 large servings (shown above). For smaller squares which are great with a side of salad, or if there’s a buffet going on, cut in a 4 by 4 grid for 16 servings.
Bring the additional toppings to the table and allow your guests to dress their own squares. Enjoy!
Helpful Tips
Ground beef will release quite a bit of fat while it’s cooking. Especially if you’re using the 80/20 ratio.
Before adding the seasoning, drain as much of the fat as you can, either by tilting the skillet or spooning it out. Too much fat will collect in the dish while it’s cooking and result in a greasy and somewhat soggy topping.
The mixture is quite sticky. Using either the backs of spoons or slightly moistened fingers will make the task of spreading it over the meat easier.
Try to get it as even and thin as possible. It’s pretty noticeable when there’s thicker parts that are a little doughy.
If it’s being stubborn and contracting, let it sit for a couple of minutes and try again. I know it’s tempting to scoop it right out of the oven, but give it a break for 5 minutes to make slicing easier.
If you try to cut it as it comes out of the oven, the squares will likely fall apart and will look more like a pile than squares.
Add-ins and substitutions
- I’ve added jalapeños (diced) or a drained can of diced green chiles over the meat. Both are delicious and add some kick.
- You could stir a drained can of black beans in with the meat. That would help it stretch a little and add some nice texture.
- If you have it on hand, I bet a Mexican blend cheese would be good too.
- For added texture, you could crush some tortilla chips and sprinkle them on top of the meat.
- It’s optional, but a little paprika sprinkled on top adds a nice color, especially when using white cheese, and a subtle flavor. Regular or smoked paprika both work.
- I prefer using a glass dish since it’s more apt to be hot when it’s being served, as glass is slow to get up to temp, but also slow to lose its heat, and seems to result in a more tender crust. Metal pans conduct heat faster, which would probably lead to a crisper crust.
Storage and Make-Ahead
Leftovers keep well in an airtight container in the refrigerator for 4 days. To reheat in the oven, bake for 10 to 12 minutes at 350 degrees.
You can also nuke individual servings in the microwave for 1 to 2 minutes. Although the crispness of the crust will soften as it sits, the casserole actually tastes even better the next day as the taco seasoning has time to mingle with the other flavors.
To freeze, cut the casserole into individual squares. Wrap squares in plastic wrap, then in foil.
Frozen casserole will keep for up to 2 months. Defrost casserole squares overnight in the fridge, then reheat as directed.
Freezing will make the casserole topping just a tad denser, but it’s still yummy. I’ve never frozen an entire pan of casserole as it takes forever to defrost and doesn’t reheat quite as well as individual portions.
Make Ahead
You can make the sour cream topping and meat layer up to 1 day ahead and store them in individual, tightly-covered containers. Assemble the casserole and bake when ready.
Keep in mind that if you use these shortcuts, the crust needs to be blind-baked before assembling and will require an extra 5 to 7 minutes in the oven when assembled. Using a warm crust and cold toppings means the final product will be extra tasty and maintain its own, distinct layers when cut into neat little squares.
POTLUCK TIP:
Bake the casserole, allow to cool for 15 minutes, cover with foil, and take along. At the potluck, pop into a 325°F oven for about 15 minutes to re-heat.
Pack the toppings in small containers and arrange on the buffet table for a painless transport. I’ve taken this casserole to church potlucks time and time again.
Never a square left over.
Frequently Asked Questions
Can you make this casserole with Crescent Rolls?
Absolutely. Simply replace the biscuit mix with 1 tube (8 oz.) of crescent roll dough.
Unroll the crescent rolls and press them into the bottom of the baking dish. Pinch the seams together really well so they’ll bake into one cohesive crust.
Follow the recipe’s directions for blind-baking the crust, checking it at 8 minutes. It should be set, but not completely browned.
Using crescent rolls results in a slightly richer, flakier crust.
Can I use ground turkey?
Yes! Use the same amount of ground turkey that the recipe calls for ground beef.
Keep in mind that ground turkey will be a little harder to get browned like beef, as it will cook to a lighter color, and will give off liquid, especially if you’re using an 85/15 mix, so be sure to drain it well. The leaner the better because less grease means less draining.
However, once that ground turkey is mixed with taco seasoning + tomato sauce there’s virtually NO taste difference. Trust me on this one…my kids don’t even realize I’ve done it.
Can I sub something else besides tomato sauce?
In a pinch you can sub 1/2 cup of salsa. It will give it an additional flavor but still works.
You can also sub a Tbsp tomato paste mixed with about 1/3 c. of water to create a similar consistency as tomato sauce. In a REAL pinch, you could sub canned diced tomatoes (drained well) but it won’t be QUITE the same because of the texture.
You could try to mash them but…not worth it. You can technically leave the tomato sauce out but you’ll be missing out on moisture and will have a very dry meat layer.
You’ll find the meat will be very crumbly and won’t hold together as it’s getting broiled during the second bake.
Can I leave out the mayo?
You can but the topping will be a little thicker and will probably need another minute or two of bake time. You’ll also most likely see more liquid seep to the edges as it bakes.
The mayonnaise acts as an emulsifier and helps hold everything together so it doesn’t weep as much. That said…I’ve made it without mayo and it’s still delicious.
Can I sub something else besides mayo?
You can sub full-fat plain greek yogurt for the mayo and no one will be the wiser as it doesn’t change the taste at all.
Can I use Miracle Whip/light mayo?
No. Miracle Whip and other “light” mayonnaises have too much sugar, which could affect the taste of the topping.
Can I make this casserole vegetarian?
You can easily swap out the ground beef in this casserole with 2 cans of black beans (drained), pinto beans (drained), one can of black beans (drained) and one of pinto beans (drained) or plant-based ground beef crumbles. You won’t “cook” the beans as you would the ground beef but I would warm them in a skillet with the taco seasoning and tomato sauce until the beans are hot and the tomato sauce has been absorbed.
Keep in mind that using any of these ingredients in place of ground beef would change the texture of this recipe as there wouldn’t be any crumbles but the taste is excellent and they do well in this recipe since they are covered with the casserole topping before it goes into the oven. You may want to use a little more garlic powder and a little cumin with the vegetarian options.
How will I know it’s done?
You’ll want to check on the casserole about five minutes before it’s supposed to be done. If the topping still jiggles it needs a few more minutes in the oven.
It will be done when the edges have turned a nice golden color and are pulling away from the sides of the pan and there is an occasional browned spot on top. If it is still wet/jiggly in the center give it another 3-5 minutes and recheck.
All ovens are different and cooking times vary. The suggested cooking time (25 minutes) is just that…suggested.
Check at about 22 minutes and use your best judgement from there. Don’t be afraid to pull the pan out of the oven when it looks like it’s done.
I promise the clock will not know what to do with itself 😉
Can I add more cheese?
The topping does have a full cup of shredded, mixed cheeses already in it so you’ll be adding some if you’d like. If you choose to add more I would limit it to a handful and add it during the last five minutes of baking so it will not burn and will help the topping hold its consistency when sliced.
Related Recipes