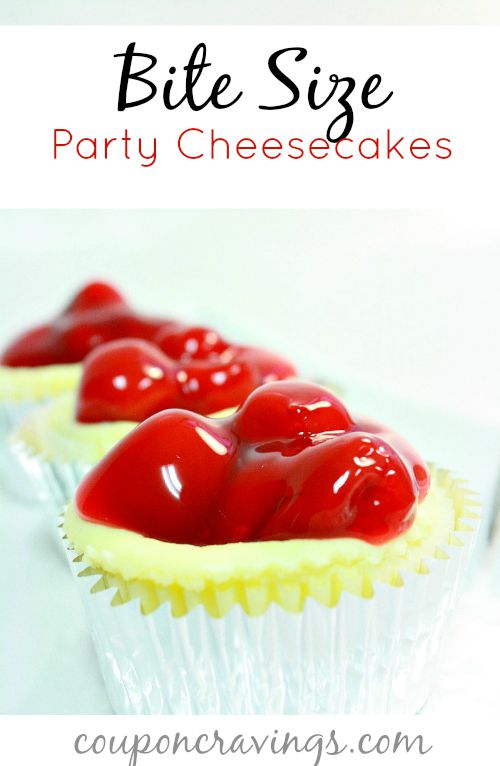
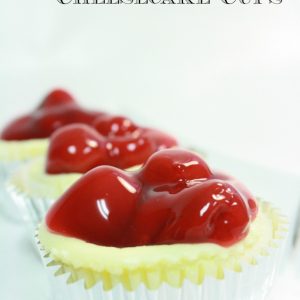
Party Cheesecakes
I make these little cheesecakes for every event I go to. I don’t have to stress about them because I can make them a day in advance. It just takes about 30 minutes (really less than that) and six ingredients. In return, I get 12 cheesecakes that look great and are ready to eat. They’re the first thing to go from the dessert table because they are so easy to travel with!
People always ask about the little vanilla wafer at the bottom. It’ll surprise you how that cooks into a nice firm cookie crust in the cup. No need to use melt some butter, press graham cracker crumbs, or use a springform pan. That little wafer does all the work. You can put cherry pie filling, fresh berries, or nothing at all, and have a nice dessert that looks like you put a ton of effort into making it.
What Makes This Treat So Good
- No water bath, no cracking anxiety. Baking in individual muffin cups means the cheesecake cooks fast and evenly. A small crack or two is completely fine — the topping covers it.
- The vanilla wafer crust requires zero prep. You drop one wafer in each cup, flat side down, and the oven does the rest. It firms up into a solid base that holds together when you pick the cheesecake up.
- They’re genuinely make-ahead friendly. These actually taste better after a night in the refrigerator. The texture sets up and the flavor deepens.
- One batch, 12 servings. Each cheesecake is its own portion — no slicing, no serving mess, no one getting a bigger piece than someone else.
- The topping is entirely optional. They’re good plain, good with fruit, good with chocolate sauce. You have flexibility without the recipe falling apart.
What to Know Before You Start
Before you begin, make sure the cream cheese is real soft, not just soft from sitting on the counter for a few minutes. It is best to leave the cream cheese out on the counter for 1-2 hours before starting. If the cream cheese is still cold, your hand mixer is not going to be able to break up cream cheese clumps, and that is the most common issue with this recipe.
Don’t rush on this step. You’ll be adding the eggs one at a time after you’ve made the cream cheese and sugar smooth. The finished batter should look thick and creamy. If it looks thin then it means something probably got added too fast. Each batter should be thick and creamy so always make sure to fully beat the egg in before adding the next one. It keeps the batter from becoming loose and watery.
When taken out of the oven, the middle of the dish may appear slightly undercooked and still jiggly. This is the right sign for you to pull them. They completely firm up as they cool down. If you continue to bake them and they look set, they will be overcooked once they cool down.
Cupcake liners are important for these cheesecakes. If you don’t use them, the cheesecakes will stick to the pan & won’t come out clean. The liners come off easily after you chill the cheesecakes, so don’t think of them as an optional step!

Ingredients
Here is an explanation of each element and its importance:
- 2 packages (8 oz. each) cream cheese, softened — Full-fat, block-style cream cheese. The kind in the foil wrapper, not the spreadable kind in the tub. Spreadable has added ingredients that change the texture and the cheesecakes won’t set up the same way.
- 1 cup granulated sugar — Standard white sugar. Don’t swap in powdered sugar here; the texture will be off.
- 1 teaspoon vanilla extract — Pure vanilla if you have it. Imitation works but tastes noticeably thinner.
- 2 large eggs — Room temperature eggs incorporate more smoothly than cold ones. If you forgot to take them out early, set them in a bowl of warm (not hot) water for 5 minutes.
- 12 Vanilla Wafers — One per cup. These are the crust. Nilla Wafers are the standard, but any vanilla sandwich cookie wafer works. Keep them whole — you’re not crushing them.
- Fruit filling or toppings, for serving — Cherry pie filling is the classic. Fresh strawberries, blueberries, or raspberries work well too. Or skip the topping entirely — these are good on their own.
How to Make Party Cheesecakes
Step 1: Preheat the oven and prepare your muffin pan. Set the oven to 350°F. Get a standard 12-cup muffin pan and place paper cupcake liners in each cup. For each liner, place a vanilla wafer in the bottom, with the flat side facing down. Now, set the pan aside.
Step 2: Cream the Cheese. Place both packs of softened cream cheese into a large bowl. With a hand mixer, beat the cream cheese at medium speed for about 2 minutes until the cream cheese is smooth and fluffy — make sure there are NO lumps. The cream cheese should look fluffy before the rest of the ingredients are added.
Step 3: Mix in the sugar and vanilla. Pour in the cup of sugar along with the teaspoon of vanilla. Beat on medium until everything is fully combined and smooth. Take a spatula and scrape down the sides of the bowl, then beat for another 30 seconds. At this point, the batter should smell like vanilla-heavy cheesecake.
Step 4: It is time to add the eggs. Crack an egg into the bowl and mix for about 30 seconds so that it is fully incorporated. Once that is done add the second egg and mix again. This time do not overmix. With the eggs in the batter, you want to mix just enough to be combined. If you overmix the batter after adding the eggs, it may create cracks.
Step 5: Fill the cups. Spoon the cream cheese mixture evenly over the vanilla wafers in each cup. Each cup should be filled about three-quarters of the way, as the filling puffs up slightly in the oven, and settles back down as it cools. A cookie scoop or large spoon makes this easier to keep even.
Step 6: Bake. Bake for 20 to 22 minutes at 350°F. The tops should look set and just be starting to golden around the edges. The centers will still be jiggly — that’s right. They’re not undercooked. If the centers look firm when they’re done, leave them be. They’ll dry out once cooled.
Step 7: Let it cool completely. Take the pan out of the oven and let it cool on the rack at room temperature for about 30 minutes. After that, put the cheesecakes on a plate or in an airtight container and refrigerate them for at least 2 hours, or overnight. They need to be completely cooled before you add any toppings or serve them.
Step 8: Finish and serve. After the dessert has been chilled, before you serve, add a spoonful of cherry pie filling, a couple of fresh berries, or whatever other toppings you may be using. As a tip, if you are moving these desserts, keep the toppings separate so you can add them once you have arrived, or they may cause a mess.

Helpful Tips
- Use a cookie scoop to fill the cups. A standard cookie scoop (about 1.5 tablespoons) makes it fast and keeps the portions even so they all finish baking at the same time.
- Don’t overfill. Three-quarters full is the right mark. If you overfill, the batter puffs over the edge during baking and the cups get misshapen.
- Small cracks are fine. The filling covers them. If you’re not using a topping, slight cracks on the surface are just cosmetic — they don’t affect taste or texture.
- Room temperature ingredients matter more than you think. Both the cream cheese and the eggs should be at room temp. This is the single most important prep step for a smooth, lump-free batter.
- Make a double batch if you’re feeding a crowd. This recipe makes exactly 12, which goes fast. A double batch fits in two muffin pans and uses the same baking time.
- The wafer gets soft overnight. After the first night in the fridge, the vanilla wafer bottom softens slightly and becomes more of a cake-textured base than a crisp cookie. Most people prefer it this way, but if you want a crispier bottom, serve them the same day they’re made.
- A hand mixer is genuinely better here than a stand mixer — you have more control over scraping the sides and you can feel when the batter has come together. I’ve made these both ways and the hand mixer wins for a batch this size.
Variations and Topping Ideas
The main recipe is meant to be neutral so the topping can be whatever you need for the event. Below are some instructions that work best:
- Cherry pie filling — The classic. One 21 oz. can covers a full batch with some left over. Spoon it on cold right before serving.
- Fresh strawberries — Slice them and toss with a teaspoon of sugar. Let them sit for 10 minutes and they’ll release some juice, which makes a natural sauce.
- Blueberry or raspberry — Fresh or pie filling both work. Blueberry lemon is a particularly good combination — add a little lemon zest to the batter and top with blueberries.
- Chocolate ganache drizzle — Heat equal parts heavy cream and chocolate chips, stir until smooth, and drizzle over the tops once they’re cold. Looks dramatic, takes about 5 minutes.
- Plain with powdered sugar — Dust lightly before serving. Good for when you want something that doesn’t compete with the rest of the meal.
- Lemon curd — Add the zest of one lemon to the batter and top with store-bought lemon curd. One of the best versions of this recipe.
- Peach pie filling — Underrated. Works especially well in summer.
Storage and Make-Ahead
Refrigerator: Store in an airtight container in the refrigerator for up to 5 days. If you can keep toppings separate, do so — fruit fillings may become watery when they sit on the cheesecake for several days. They remain safe to eat, but the quality diminishes.
Freezer: They freeze really well. First, freeze (without toppings) on baking sheet until solid, about 2 hours. Then, you can move them to a zip-top freezer bag. They will stay good for 2 months. Defrost in the fridge overnight, then add toppings before serving.
Make-ahead timing: These are best after spending 8 to 24 hours in the fridge. The day before is really the best option. When refrigerated, the texture becomes firmer, the vanilla flavor becomes more rich, and they become more manageable. I have made these the morning of an event and they were fine, but I would recommend the overnight option.
TRANSPORTING: Leave them in the cupcake liners. To keep them fresh, store them in a single layer in a container that has a lid. Add toppings upon arrival to the destination. They are great for travelling as long as they are chilled.

Recommended Tools
You don’t need special equipment, however a few things can speed this up:
- Hand mixer — A basic hand mixer is all you need. No need for a stand mixer for a single batch. Look for one with at least 5 speeds — you’ll use low to start and medium once things come together.
- Standard 12-cup muffin pan — A nonstick muffin pan helps, though the liners do most of the work. A darker pan tends to bake the bottoms a little more, which is fine here.
- Cookie scoop — A medium cookie scoop makes filling the cups fast and keeps each one consistent so they bake evenly.
Frequently Asked Questions
Why did my cheesecakes crack on top?
Some spine cracks are okay, and if the oven runs hot or the batter was beaten a lot after adding the eggs, they’re even expected. Cracks are the result of air getting into the batter, causing expansion and a collapse as it cools. While cracks may look a bit rough, they do not impact the taste of the cake. The topping will cover them. If you are repeatedly experiencing large cracks, try reducing your mixing time after eggs are added and also verify that your oven temperature is correct.
Can I use low-fat cream cheese?
You can use those, but the consistency will be softer, and the cheesecakes will not hold their shape as well. To get that sink-your-teeth-into-it texture, and make them easy to pick up and eat without a fork, you need full-fat block cream cheese. Because low-fat cream cheese has more moisture, the filling will be a lot looser. If that’s all you have on hand, they’ll still taste good, but just expect a softer version and be careful when handling them.
Can I substitute the vanilla wafers?
Indeed. Graham crackers are perfect; simply trim a regular cracker to size to place it at the bottom of the liner. You can also use shortbread cookies. With the filling scooped out, Oreos offer a chocolate crust alternative that pairs well with the same filling. The wafers should be sturdy and also even enough to remain in place at the base of the liner.
How do I know when they’re done baking?
The edges will be golden brown and ready to go while the center will be jiggly still. This is what you want to see. The center will continue to cook some more from the heat of the pan. If the center is completely set, the cookies will overbake and be dry. They should be left in the oven for 20-22 minutes at 350°F, start checking at 20.
Can I make these without a mixer?
You can try this if the cream cheese is almost at room temp (it’s that soft) and has been at room temp for more than 2 hours — you will have to use a lot of arm strength to do this, and it is pretty likely to have small lumps, but it was work in a pinch. Do not attempt this with cream cheese that is not fully softened, because it can cause you to have chunks in the batter that will not bake out.
Can I add flavorings to the batter?
Yes, this base batter is mild enough to pair with quite a few additives. Lemon zest is a great addition. Simply add the zest of one lemon with the vanilla. If you’re topping with cherry, almond extract (use half the amount because it can be strong) goes well with it too. For a chocolate cheesecake version, add a tablespoon of cocoa powder with the sugar. Just be careful about adding too much liquid; things like citrus juice can cause the filling to be too loose to set up properly.

More Dessert Recipes You’ll Want
- No-Bake Cheesecake — When you want cheesecake without turning on the oven
- Easy Dessert Recipes — A roundup of quick desserts worth bookmarking
- Cherry Delight — A layered no-bake dessert with a cream cheese filling and cherry topping
- Strawberry Cheesecake Dip — All the cheesecake flavor with graham crackers for dipping
Party Cheesecakes
Ingredients
- 2 packages cream cheese 8 ounces each, softened
- 1 cup granulated sugar
- 1 teaspoon vanilla extract
- 2 eggs
- Vanilla wafers
- Pie filling or fruit topping optional
Instructions
- Preheat oven to 350°F and line muffin tins with paper liners.
- Place one vanilla wafer flat-side down in each liner.
- Beat softened cream cheese until smooth and fluffy.
- Add sugar and vanilla and beat until combined.
- Add eggs one at a time, mixing just until incorporated.
- Spoon filling over vanilla wafers, filling cups about three-quarters full.
- Bake until set, about 15 to 20 minutes.
- Cool completely, then refrigerate until chilled.
- Top with pie filling or fruit before serving if desired.