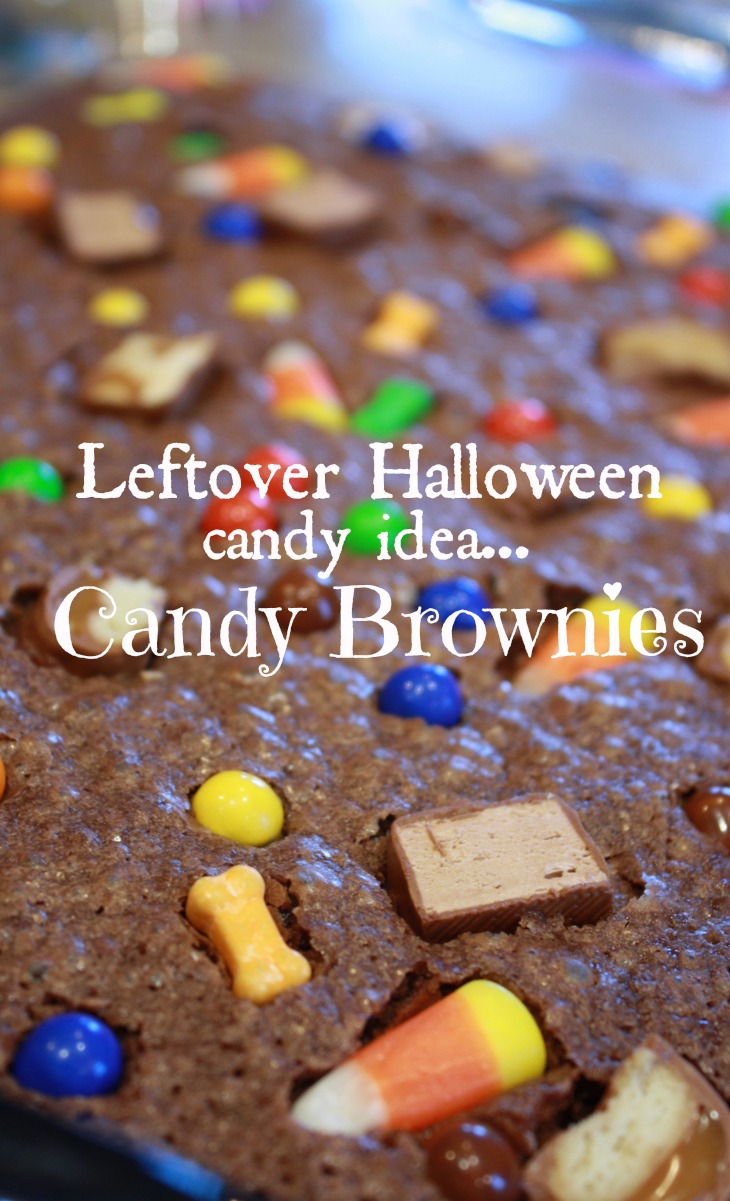
Leftover Halloween Candy Recipes: Candy Brownie Dessert
Every year, the candy bowl has the same problem, way too many leftover candies, and no one ends up eating them one by one in November. It gets ignored until someone throws it away. This candy brownie recipe is the answer. You chop it up, fold it into simple fudgy brownie batter, and bake it into something that will disappear even faster than the candy would have on its own.
These brownies are not fancy. They are the type to make on a weeknight when you want something quick and easy. They take a bowl and a wooden spoon. They are better than any brownies from a mix. You can mix up the candy to add caramel, peanut butter, crispy wafers, or chocolate —depending on what you have. Each batch will be a little different. That’s the point.
Why This Sweet Recipe Works
Many brownie recipes request certain mix-ins like chocolate chips, nuts, or special types of candy. This recipe is designed to be versatile. With a rich and fudgy base batter, the candy additions can be just about anything. Chopped Snickers, broken Kit Kats, M&Ms, Reese’s Cups, Milky Ways, you name it! The batter will hold it all together, baking up into a dense, chewy bar.
The fat to flour ratio is higher than a cakey brownie and keeps the crumb fudgy and tight with the additional candy. Using candy bars that have caramel, like Snickers, Milky Way, or Twix, will create strands of caramel oozing throughout the bars. If you use Reese’s you will have creamy layers of peanut butter. Kit Kats will provide some added crunch to the otherwise soft texture. Any combination works.
Here’s a tip: when adding candy to your brownies, keep in mind that some may have a lot of caramel and cause the brownies to stick even more, making them difficult to cut. If you want this to be easy, do not cut the brownies until they have cooled completely (this will take a minimum of 2 hours). Cutting brownies when they are warm will make them messy, but they will still be just as tasty. Depending on your goal, either way is completely fine!
What You Need to Know Before You Start
You don’t need a mixer for this recipe! All that is needed is a big mixing bowl, a whisk or a wooden spoon, and a 9 by 13 inch baking pan. To have thicker brownies, use an 8 by 8 inch or 9 by 9 inch baking pan and increase bake time by about 10 minutes.
The candy should be chopped into rough pieces — it shouldn’t be powdered, but shouldn’t be huge chunks either. Aim for pieces about the size of a chocolate chip, or a little bigger. If you leave the candy too large, it can create uneven spots in the brownies that don’t get baked all the way through.
Stop mixing as soon as you see the flour is incorporated. If you mix too long you will develop gluten which will make the brownies cakey and tough instead of fudgy.
If you want to lift the brownies out of the pan for cutting, then you can use parchment paper and grease the pan on top of that. Using parchment paper is the easiest option. Pre-cut parchment sheets are one of those kitchen items that are worth having – they save you a lot of hassle.
Ingredients
For the Brownie Batter
- 1 cup (2 sticks) unsalted butter
- 2 cups granulated sugar
- 4 large eggs
- 2 teaspoons vanilla extract
- 1 cup all-purpose flour
- ¾ cup unsweetened cocoa powder
- ½ teaspoon salt
- ½ teaspoon baking powder
For the Mix-Ins
- 2 to 2½ cups chopped Halloween candy (any combination — see notes below)
- Optional: ½ cup semi-sweet chocolate chips (adds extra chocolate depth)
Candy Combination Ideas
Utilize anything at your disposal. Below are some combinations that are particularly effective:
- All chocolate bars: Snickers + Milky Way + 3 Musketeers — rich, caramelly, very fudgy
- Peanut butter heavy: Reese’s Cups + Reese’s Pieces + Butterfingers — nutty and dense
- Crunchy mix: Kit Kats + Butterfingers + M&Ms — some texture contrast in an otherwise soft brownie
- Everything bowl: Whatever is left — mixed candy works just as well as a curated combination
Look out for: gummy candy, hard candy, strong mint (York Peppermint Patties make the entire batch minty), and candy that still has the wrappers on. Inspect your candy before chopping.
How to Make Halloween Candy Brownies
Step 1: Prep Your Pan and Oven
Set your oven to 350 degrees. With pieces of parchment paper that will hang over the edges of the baking pan, line a 9×13 inch baking pan. This will help you to lift the brownies out of the pan when you’re done baking them. As an alternative, you can also just butter the baking pan, or use a non-stick spray, as a way of lining the pan. You can put this aside for now.
Step 2: Melt the Butter
Using a large bowl that is safe for the microwave, melt the butter. Do this by microwaving the butter in 30-second increments and stirring between each increment. Alternatively, this can be done in a saucepan over low heat on the stovove. Cooling the melted butter is critical, as vhe butter needs to he allow to cool for about 5 minutes so that it does not scramble the eggs when they are added.
Step 3: Mix Wet Ingredients
Add the sugar to the melted butter. Then, whisk until it’s mixed together. It may look slightly grainy; that is ok. Add the eggs, one by one, whisking after each. Then, add the vanilla and whisk again until smooth and a little glossy. If you have a good-quality balloon whisk, this step will be a lot easier and quicker than using a fork.
Step 4: Add Dry Ingredients
To prevent lumps, sift the bowl’s contents with the cocoa powder, flour, salt, and baking powder. Mix with a wooden spoon or rubber spatula until the mixture is combined. Stop mixing as soon as the dry streaks of flour are gone. Do not overmix.
Step 5: Fold In the Candy
Set aside about 1/4 cup of chopped candy to put on top later. Gently fold the rest of the candy into the batter. It is supposed to be thick.
Step 6: Bake
Pour the batter into the pan you have prepared. It may be thick and will likely need some extra encouragement to reach the edges and corners, and this can be done using an offset spatula, or you can use the back of any spoon. Stick the candy pieces you saved to the top of the batter, and bake in the oven at 350 degrees Fahrenheit for 28 to 34 minutes. When baking, do the toothpick test. Stick a toothpick in the middle, and if it comes out with a few crumbs, that means it is done baking and if it comes out with wet batter, that means it still needs more time. When done baking, the edges will be set, and the middle may look underdone because the middle will firm up while it is cooling.
Step 7: Cool and Cut
Before you take the brownies out of the pan, allow them some time to rest. At least 30 minutes. For even better cuts, stay patient and let them cool for an additional 1 to 2 hours before cutting. For the cleanest edges, make sure to use a nice, sharp knife and clean it between cuts.
Tips for Better Results
Use Room-Temperature Eggs
Cold eggs can make the melted butter seize, and cause the batter to look lumpy or broken. Before baking, let your eggs sit out for 20-30 minutes, or if you want to do a quick warm up, place the eggs (in the shell) in a bowl of warm water for 5 minutes.
Don’t Skip the Cooling Time
Brownies contain fudgy goodness that need some time to set after they’ve been baked. If you cut into them early, you’ll get a gooey mess that will collapse every time you grab a piece. If you’re planning to have these at a party, make sure to bake these the night before, and put them in the fridge. They will slice perfectly, and will be even better tasting as well!
Make Brownie Bites Instead
To make it more party-ready, consider using a mini muffin tin instead of a baking pan. Grease the tin well, fill it about ⅔ full with batter, and press a small candy into each one before baking them at 350°F for 12–15 minutes. You get easy to grab individual brownie bites and it’s a great choice for kids’ parties, where everyone wants their own piece without sharing a cut pan.
Check Candy for Wrappers
It may sound obvious but with Halloween candy wrappers everywhere it may just slip your mind. It is best to go through candy before you chop it up. Finding rogue wrappers in batter is definitely not fun.
Adjust Sweetness Based on Candy Type
If the candy you are mixing in is very sweet (mostly milk chocolate or bars that are heavy in caramel), you can decrease the sugar in the batter by ¼ cup without affecting the texture noticeably. If you are using darker chocolate candy or more bittersweet mix-ins, then you should keep the full amount of sugar.
The Right Pan Makes a Difference
Baking pans made of light-colored aluminum bake brownies more evenly than dark-colored ones, which can lead to over-browning on the edges before the middle is finished. If you only have a dark panel, check them 5 minutes before the time suggested in the recipe. A quality 9×13 aluminum baking pan is a great investment to have in your kitchen; most professional bakers use it to bake brownies.
How to Store Halloween Candy Brownies
Room Temperature
Store in an airtight container at room temperature for 4 days. If stacking, separate with parchment paper so the tops do not stick together. A quality airtight storage container prevents them from drying out too quickly.
Refrigerator
Brownies can be eaten for up to a week while refrigerated. In fact, some may choose to love the cold, denser, and firmer texture of the brownies. If you wish to enjoy the brownies on a closer to room temperature texture, you will need to allow the brownies to sit for 10 to 15 minutes at room temperature before you start eating them.
Freezer
Brownies can be frozen! For best results, cut them into single size portions, wrap each one in plastic, and put them in a bag or container for the freezer. These brownies are good for up to three months. To defrost, leave at room temp for 30-60 minutes, or you can microwave for 20-30 seconds if you like them warm.
Frequently Asked Questions
Can I use any type of Halloween candy in this recipe?
Candy featuring chocolate is ideal — Twix, Reese’s, Snickers, Kit Kats, Milky Way, Butterfingers, 3 Musketeers, Baby Ruth, and, of course, M&Ms. Please steer clear of using hard candy, gummy candy, mint candy, and fruit-based candies like Skittles and Starburst, which also do not work very well when baked. If you are ever unsure about a candy, just remember: if it’s chocolate, it’s fine.
How much candy should I use?
For a 9×13 pan, the ideal range is 2 to 2 ½ cups of chopped candy bars. If you go any less, you won’t have the candy impact, and if you go any more, the batter will have trouble holding together. If you have a lot of candy, you can go even up to 3 cups, but keep in mind that the brownies will be stickier, and it will be harder to cut them cleanly.
Can I make these from a boxed brownie mix?
Of course. To save time on the brownie batter, you can simply use any boxed brownie mix. Just prepare the brownie mix according to the directions on the box, and fold in the chopped candy before baking. The scratch batter in this recipe thickens the brownies, which is a good thing. The mix just doesn’t take as much time.
My brownies came out cakey instead of fudgy. What went wrong?
Brownie batter can get cakey for a few reasons. Too much flour (when measuring: spoon and level, don’t scoop), mixing too much after adding flour, or baking for too long. Fudgy brownies should look a little underdone in the center. As they cool they will get firmer. If a toothpick comes out with a few moist crumbs then you should pull them out — don’t wait for the toothpick to come out clean.
Can I make these gluten-free?
You can use a 1:1 gluten-free flour blend instead of all-purpose flour. The texture may be a little different, slightly more dense or crumbly depending on the blend, but it still works. Check your candy, as some candy bars have gluten in the cookie or wafer layers. For example, Kit Kats are not gluten-free. If you need to avoid gluten, read labels.
Can I double the recipe?
Absolutely. Just double the ingredients and bake the cake in two 9×13 pans. Do not bake double amounts in one pan. It will be too thick and won’t cook through without overbaking the edges. The baking time will stay the same with two pans.
How do I know when they are done?
Stick a toothpick in the middle. For fudgy brownies, it should come out with wet fudgy crumbs, not clean AND not batter. You want the edges set and the center soft. For now, just let the heat do its thing.
Recipe Card
Related Recipes
If you enjoyed these Halloween candy brownies, here are a few other ideas to use up extra candy or curb a craving for chocolate:
- Halloween Candy Cookies — same concept, cookie format, great for bake sales
- Chocolate Fudge — a no-bake option when you want something fast
- Peanut Butter Bars — if you have a lot of Reese’s to use up, these are the move
- Chocolate Bark — the fastest leftover candy recipe, no baking required
Halloween Candy Brownies
Ingredients
- 1 cup unsalted butter melted
- 2 cups granulated sugar
- 4 large eggs room temperature
- 2 teaspoons vanilla extract
- 1 cup all-purpose flour
- 3/4 cup unsweetened cocoa powder
- 1/2 teaspoon salt
- 1/2 teaspoon baking powder
- 2 to 2 1/2 cups chopped chocolate-based Halloween candy
Instructions
- Preheat oven to 350°F. Line a 9×13 pan with parchment or grease well.
- Melt butter and let cool 5 minutes.
- Whisk sugar into melted butter until combined.
- Add eggs one at a time, whisking after each. Add vanilla and whisk until smooth and glossy.
- Sift in flour, cocoa powder, salt, and baking powder. Stir just until combined.
- Reserve 1/4 cup chopped candy for the top and fold remaining candy into the batter.
- Spread batter into prepared pan and sprinkle reserved candy over the top.
- Bake about 30 minutes, until edges are set and center is just done.
- Cool completely before cutting for clean bars.