
Hot Fudge and Caramel Ice Cream Cake Recipe
I’ve had this ice cream sandwich cake recipe for years and every time I pull it out, people act like I spent so much time in the kitchen. I didn’t. You layered ice cream sandwiches in a dish, drizzled hot fudge and caramel, some Cool Whip, and stuck it in the freezer. That’s it. It looks like it came from a restaurant, it tastes incredible, and it takes less than 15 minutes. It really doesn’t get any better than that.
What we really love is the variety of textures here. Between the chewy chocolate cookie from the sandwiches, sticky-rich hot fudge, gooey caramel, fluffy Cool Whip, and crunchy toffee bits on top, it all comes together. Each layer freezes into something that is clean sliced and keeps its shape. You can even make this the night before and forget about it. That is, until people start asking who brought the cake.
Why This Dessert Works
- No baking, no equipment, no stress. You need a dish, a spoon, and a microwave for 20 seconds. That’s the entire equipment list.
- The hot fudge acts as glue. Once it cools back down in the freezer, it firms up and holds the layers together — which is why the slices come out clean instead of falling apart.
- Ice cream sandwiches are a cheat code. They already have built-in ice cream and cookie layers, so you’re essentially building a multi-component dessert without any of the actual ice cream work.
- Toffee pieces make a real difference. They add a buttery crunch that cuts through all the sweetness. Don’t skip them — they’re what makes people ask “wait, what’s in this?”
- It’s genuinely flexible. Eight-inch square dish, 9×13, whatever you have — the recipe scales without any math beyond “more sandwiches, more toppings.”
- Make-ahead friendly. This actually gets better after sitting overnight. The layers meld, the fudge sets up, and it’s easier to cut than something that just came out of the freezer an hour ago.
What to Know Before You Start
The size of the dish you choose impacts the layers of ice cream sandwiches you’ll need. For an 8-inch square dish like this one, you’ll need 11-12 ice cream sandwiches (this will make 2 layers). For a 9×13 dish, you’ll need around 18-20 ice cream sandwiches, and will need to increase the toppings accordingly. If you are feeding a crowd, go with a bigger dish! For just a family weeknight treat, the 8-inch square dish should be more than enough.
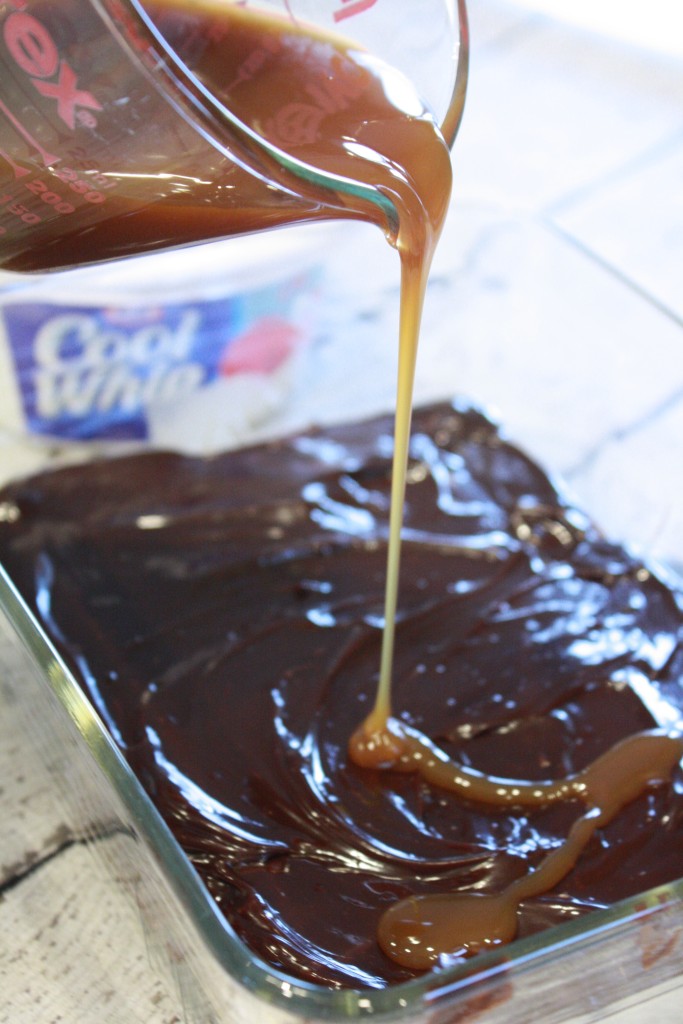
One thing to know as you start: hot fudge from the jar is thick. If you spread it frozen, it will drag the chocolate coating right off the top of the ice cream sandwiches and create a big mess. Microwave fudge for 20 seconds — no more — and it will be loose enough to drizzle. It spreads smoothly and you’ll have no trouble with it.
Before serving, plan for at least one hour in the freezer. Two hours would be better. The longer the layers have time to set, the cleaner your slices will be. For this reason, overnight is the best option. If you’re cutting it straight after an hour, let it sit on the counter for 3–4 minutes first so the sandwiches soften just slightly – a slightly warm knife helps too.
While standard packaging for ice cream sandwiches has 12, you might wind up cutting one so it fits your container. The other one is cook’s tax. You’re welcome.
Ingredients
For 9×13, just double the values. These are for an 8 inch square dish.
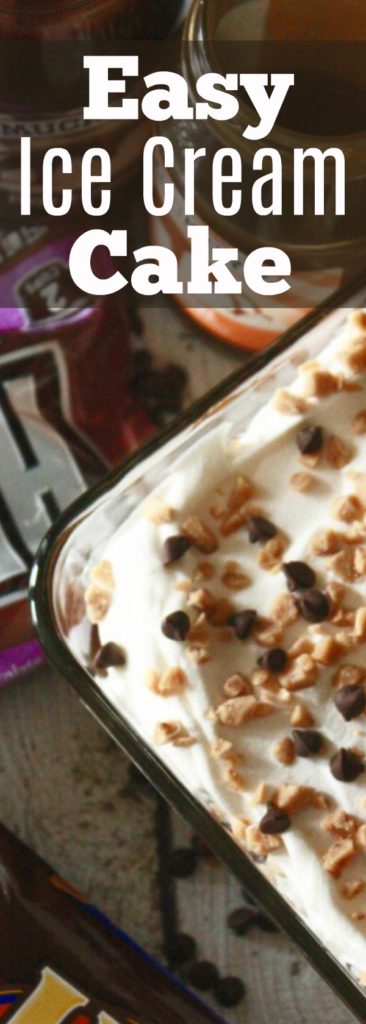
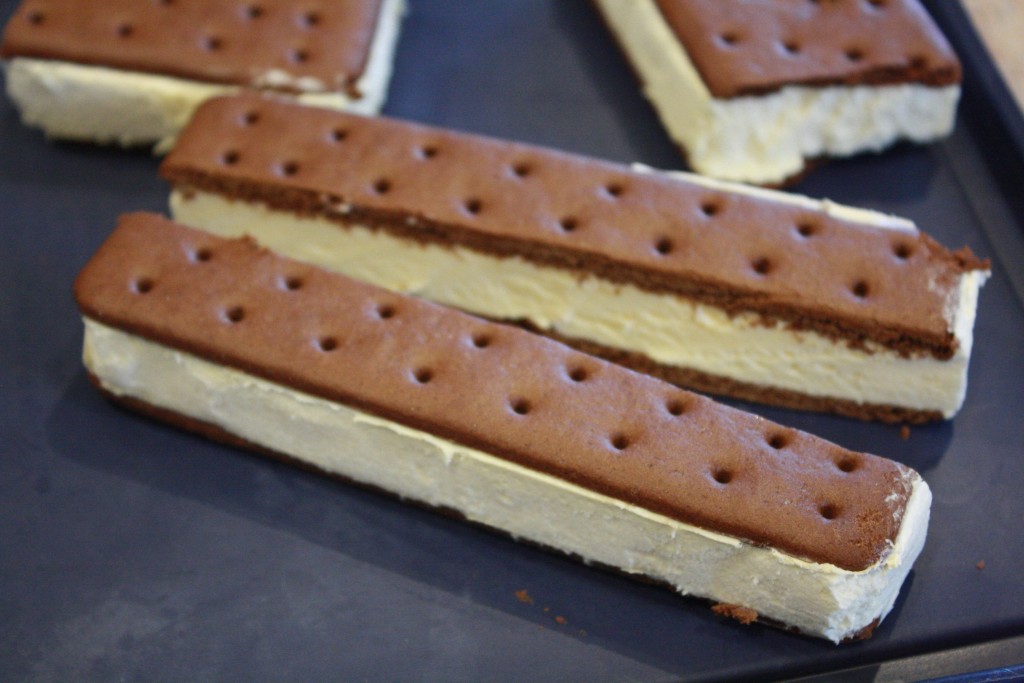
- 11–12 ice cream sandwiches — Standard rectangular ones. They come in a box of 12, which is almost exactly right. You’ll trim a few to fill the gaps at the edges.
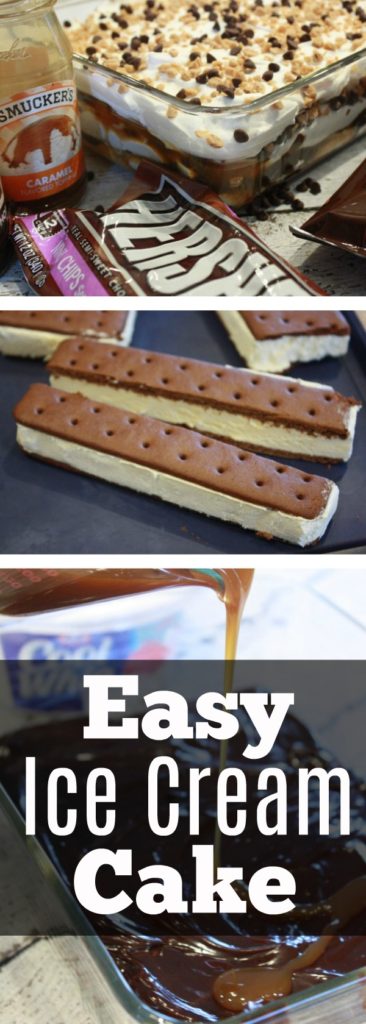
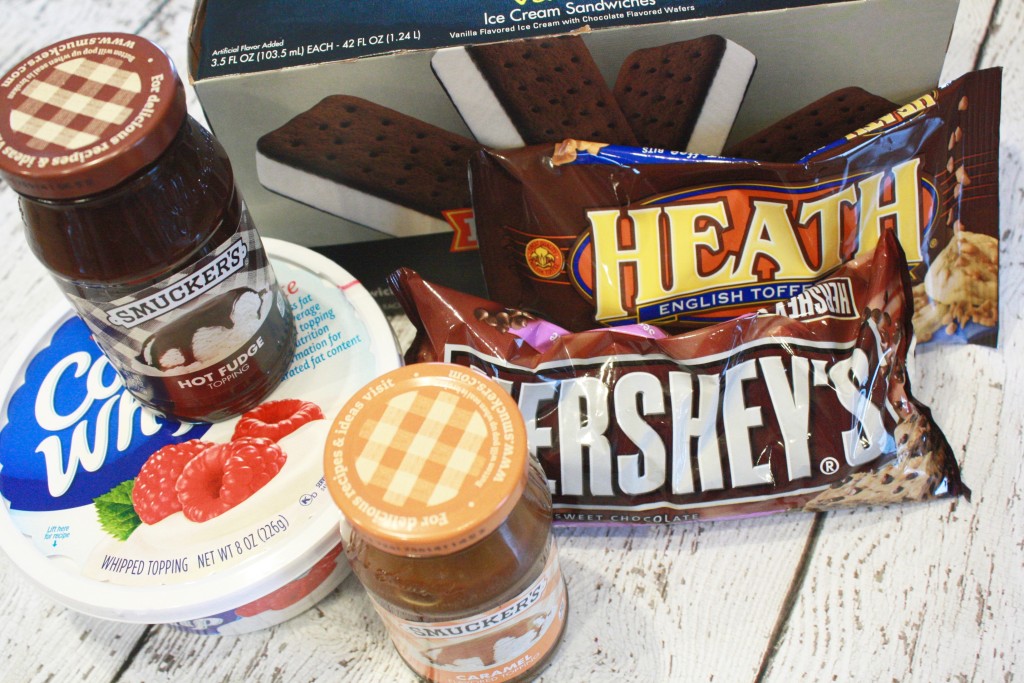
- 1 jar (12.25 oz.) hot fudge topping — Store-brand is fine. You’ll use all of it across two layers. Smuckers, Hershey’s, whatever’s in your pantry.
- ¾ of a 12.25 oz. jar of caramel topping — Same deal. Jarred caramel sauce, not caramel candies. The squeeze-bottle kind works too — just easier to pour.
- 1 container (8 oz.) Cool Whip, thawed — Pull it out of the freezer the morning you’re making this. It needs to be soft enough to spread without tearing the layer underneath.
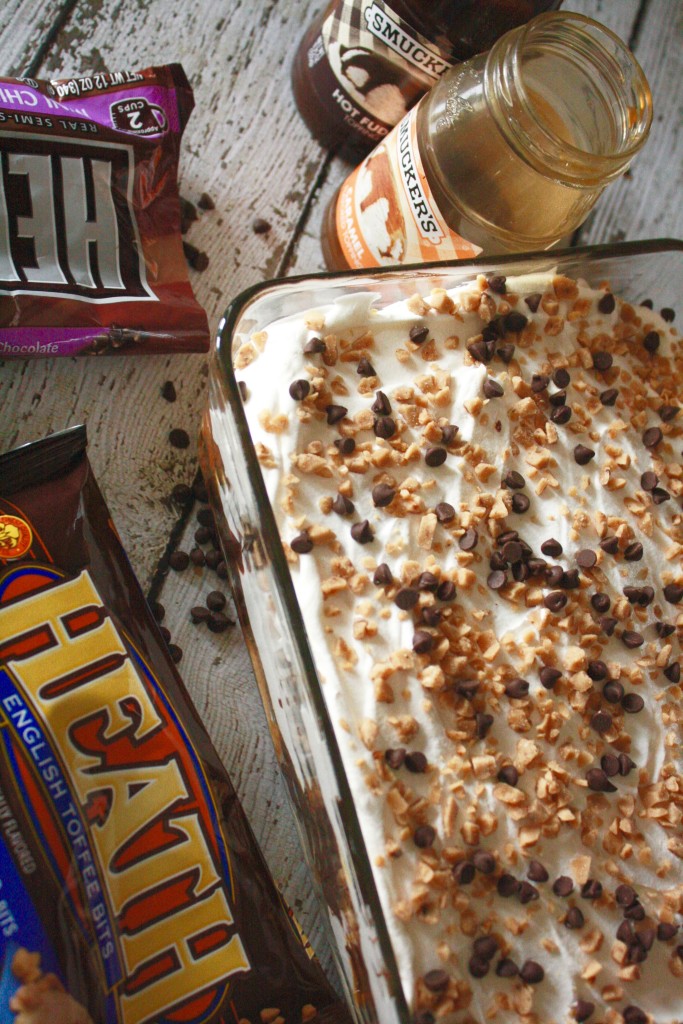
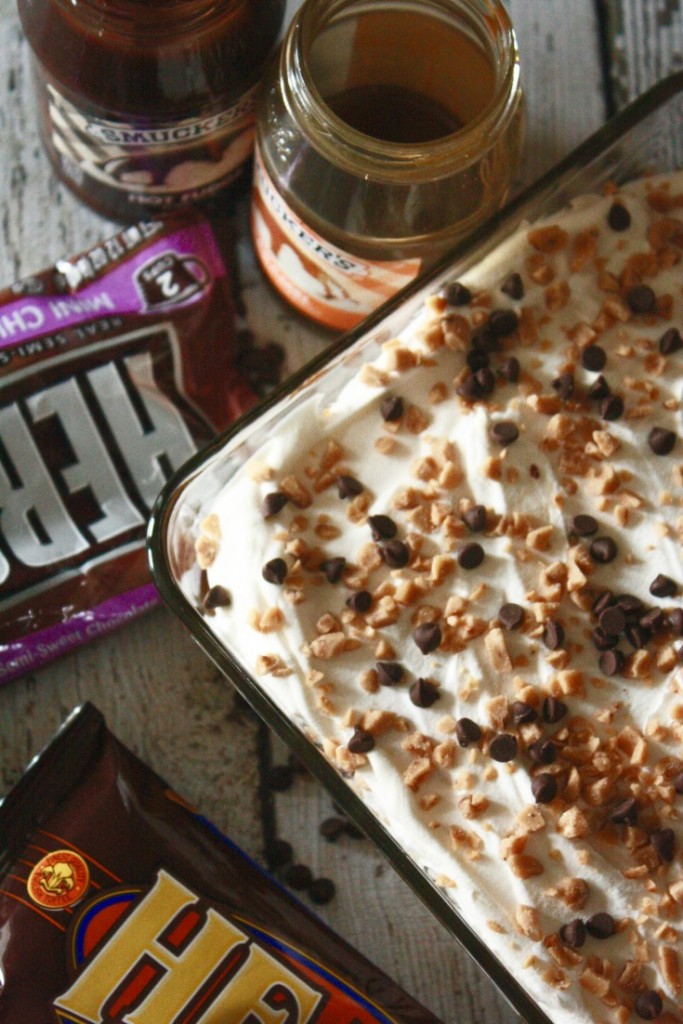
- ¾ cup mini chocolate chips — Mini chips distribute better than regular chips and don’t sink as far into the Cool Whip. Either works, but mini is easier.
- ½ cup toffee pieces — Heath Bits O’ Brickle, or the toffee pieces in the baking aisle near the chocolate chips. These add crunch and a faint butterscotch flavor that ties everything together.
Recommended Equipment
You don’t need much, but a nice dish makes this easier to serve. I used a Pyrex 8-inch square dish, which is 8-inch. What I really like about glass is that you can see the layers from the side. Also, you can put it in the freezer and then take it straight to the table. To cut nice clean slices when it is frozen, a serrated knife works well.
How to Make It
Step 1: Line the dish with ice cream sandwiches
To begin, lay the ice cream sandwiches on the bottom of your dish in one layer. You are likely going to have to cut some sandwiches to fill in the gaps on the edges. Use a sharp knife to cut them to the appropriate shape. At this point, you don’t have to worry about it looking neat. No one is going to look at the bottom layer after all of the layers are added on top.
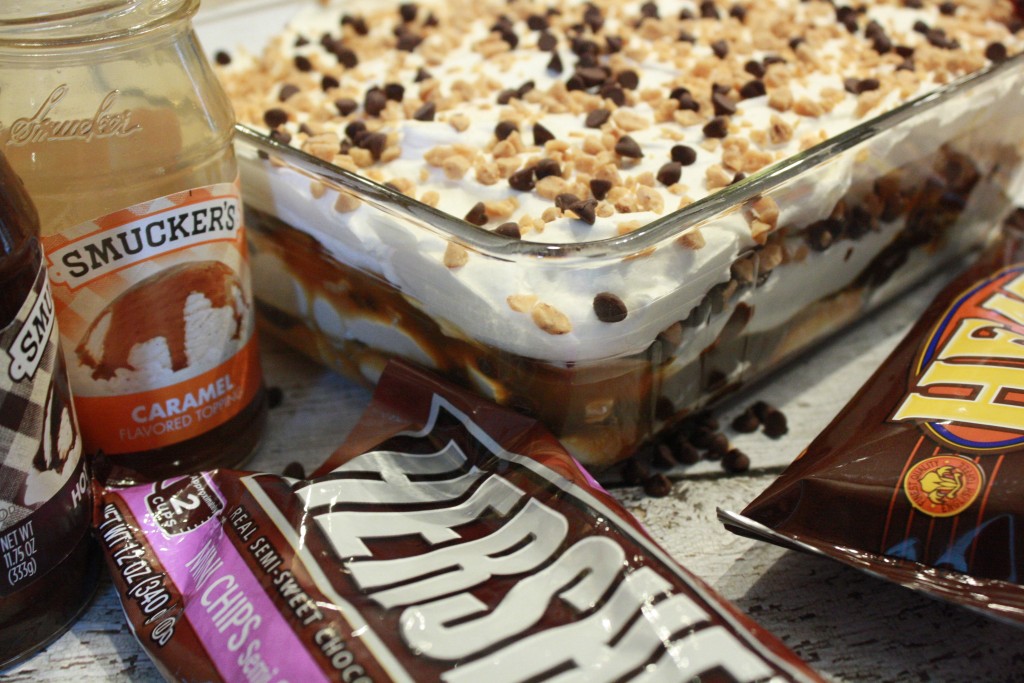
Step 2: Warm the hot fudge
Remove the lid from the hot fudge jar and microwave it for approximately 20 seconds. You want it to be fluid enough to drizzle, so ensure it is not hot enough to bubble. Stir it. If it is still too stiff, try again for another 10 seconds. This is the only step where timing is critical. If it is too cold, it will tear up the sandwiches. If it is too hot, it will melt everything too fast.
Step 3: Layer 1 — hot fudge, caramel, Cool Whip, toppings
Spread half of the hot fudge on the ice cream sandwich layer. Use a spoon or an offset spatula and work quickly — you’re not trying to be perfect, just trying to get some coverage. Then drizzle half of the caramel on the hot fudge. After that, use some of the Cool Whip and spread it out — go slow here so you don’t get the sauces underneath. Sprinkle the rest of the toffee bits and mini chocolate chips on top.
Step 4: Layer 2 — repeat everything
Place another complete layer of ice cream sandwiches directly on top of the toppings. Press down very gently — just enough to settle them. Then do the entire sequence again: hot fudge (warmed again if stiffened), caramel, Cool Whip, chocolate chips, toffee. The top layer of Cool Whip is your final layer — smooth it out so it looks like frosting.
Step 5: Freeze and serve
Wrap the cover tightly in plastic or foil and freeze them for at least 1 hour. If you want cleaner slices, two hours is best. If you are making it in advance, overnight is best. When it is time to serve, let it sit on the counter for 3–4 minutes, and then cut it with a sharp knife. The sandwiches will soften just enough to cut through without the whole thing sliding around.
Helpful Tips
- Warm your knife before cutting. Run it under hot water for a few seconds and wipe dry. It cuts through the frozen layers without cracking them apart.
- Don’t skip the toffee. I know it seems like a finishing touch, but the texture it adds to the top is genuinely the thing people notice. It keeps the Cool Whip from being one-note sweet.
- Let the Cool Whip thaw fully before using. If it’s still partially frozen, it won’t spread — it’ll tear and drag everything underneath it. Give it a few hours on the counter or overnight in the fridge.
- Use the whole jar of hot fudge. It sounds like a lot, but it distributes across two layers and gets absorbed into the sandwiches as it freezes. Don’t hold back.
- If you’re using a 9×13 dish, double all the quantities. You’ll need about 18–20 sandwiches and two full jars of each sauce.
- Don’t rush the freeze. An hour is the minimum, but if your freezer runs warm or you’re cutting it right at the hour mark, the layers will slide when you slice. Give it more time if you can.
- Plastic wrap pressed directly against the surface prevents ice crystals from forming on the Cool Whip if you’re storing it more than a few hours. Just press it flat and then add foil on top.
Variations
Swap the toppings
The hot fudge and caramel are backbone, but the top mix-ins are completely up to you. If you want to swap out the chocolate chips, crushed Oreos work great. If you want to add a peanut butter flavor, use Butterfingers or Reese’s Pieces. For a birthday version, sprinkles will do. If you want to add a bit of color to your dish without a lot of extra work, you can put Maraschino cherries on each slice before serving.
Use specialty ice cream sandwiches
While most people go for the classic chocolate cookie sandwiches, Neapolitan, mint chip, and strawberry are other options that work too. Be sure to think about the flavor you like best, because the flavor of the sandwich is in every bite. If you like it, mint chip + hot fudge is actually good.
One layer instead of two
If it’s the case that you are using a shallow dish, or if you just want a thinner dessert, one layer is perfectly acceptable. Use the full amounts of toppings for a single layer of sandwiches, freeze, and serve. Although it may look slightly less dramatic, it’s still the same dessert.
Storage, Make-Ahead, and Leftovers
Make-Ahead
One of the best desserts you can make in advance is this one! You can put it together 3 days before you want to serve it. The taste is best after the layers have had time to mix. Wrap it well in plastic and then foil and it will be protected from ice crystals on the Cool Whip.
Storage
Keep covered in the freezer. It stays good for up to five days. After that, the cool whip will start to get freezer burnt and the ice cream sandwiches will start to get icy too. You can still eat them, it just won’t be as good.
Leftovers
You can wrap each slice in plastic wrap and put them in the freezer. Take one out for about 5 minutes before you want to eat it for a better experience than eating it while it’s rock solid! Do not refreeze slices that have completely thawed.
Frequently Asked Questions
Can I use homemade whipped cream instead of Cool Whip?
It is possible to freeze it, but it is not the best option. Whipped cream made ice grainy and break down after a few hours in the freezer. Cool Whip is made to stay fluffy and sliceable even if frozen. If you prefer frozen cream, plan to serve it within 2 hours and understand that it’ll be a little less neat.
Why does the hot fudge need to be warmed?
Hot fudge from the jar is thick, almost like a paste. It is difficult to spread fudge that is cold, and it often takes the chocolate coating off the ice cream sandwiches. Instead of a flat, smooth layer of fudge, you have a big mess. Just 20 seconds in the microwave is enough time to make the fudge fluid enough that it can be easily drizzled and spread.
How do I get clean slices?
Two things help: time and a warm knife. The longer it freezes, the more cohesive the layers become. Let it sit at least 2 hours, overnight if possible. When ready to cut, run your knife under hot water, dry it, and cut in one firm downward motion without sawing. If the Cool Whip sticks to the blade, wipe the blade between cuts.
Can I use a different dish size?
Absolutely! This recipe is meant for an 8 inch square dish, but for a crowd, a 9×13 works great — just double all the ingredients. You can also use a 9-inch round dish. You will have to trim the sandwiches to fit the rounded edges, but it can be nice for a birthday cake substitute. Just be sure the sandwich layer completely covers the bottom without big gaps.
Can I make this without caramel?
Of course. Hot fudge is a perfectly viable option for an ice cream sandwich cake — it’s richer and more chocolate-y. You can also go for a lighter option and skip the hot fudge with a caramel-only version. The ratio of sauce to cool whip changes a little so feel free to add a little more of whatever sauce you’re using.
Does this work with sugar-free or light toppings?
This recipe works as is with sugar-free hot fudge and sugar-free caramel sauces. Also, Light Cool Whip freezes just as well. There are some changes in flavor and texture. Sugar-free sauces are liquid-y. The structure holds, though. If that’s what you need, sugar-free or light ice cream sandwiches can be used, but the sandwich layer is probably gonna be a little icier after your ice cream sandwiches freeze.
Related Recipes
- No Bake Oreo Dessert
- Easy Ice Cream Cake
- Browse All Dessert Recipes
- No Bake Desserts
Adapted from Belly Full
Hot Fudge and Caramel Ice Cream Cake
Ingredients
- 11 to 12 ice cream sandwiches
- 1 jar hot fudge topping 12.25 ounces
- 3/4 jar caramel topping about 12.25 ounces
- 1 container Cool Whip thawed
- Toffee bits or crushed candy bars for topping
Instructions
- Arrange a layer of ice cream sandwiches in an 8-inch square dish, trimming as needed to fit.
- Warm hot fudge briefly so it spreads easily, then spread part of it over the sandwich layer.
- Drizzle caramel topping over the fudge.
- Add another layer of ice cream sandwiches.
- Spread remaining hot fudge and caramel over the top.
- Cover with thawed Cool Whip.
- Sprinkle with toffee bits.
- Cover and freeze until firm, at least 4 hours.
- Slice with a warm knife and serve frozen.