Chocolate Scotcheroos Dessert Recipe
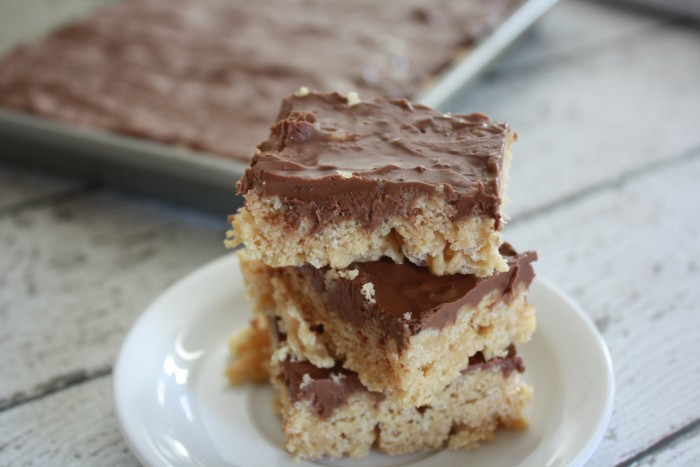
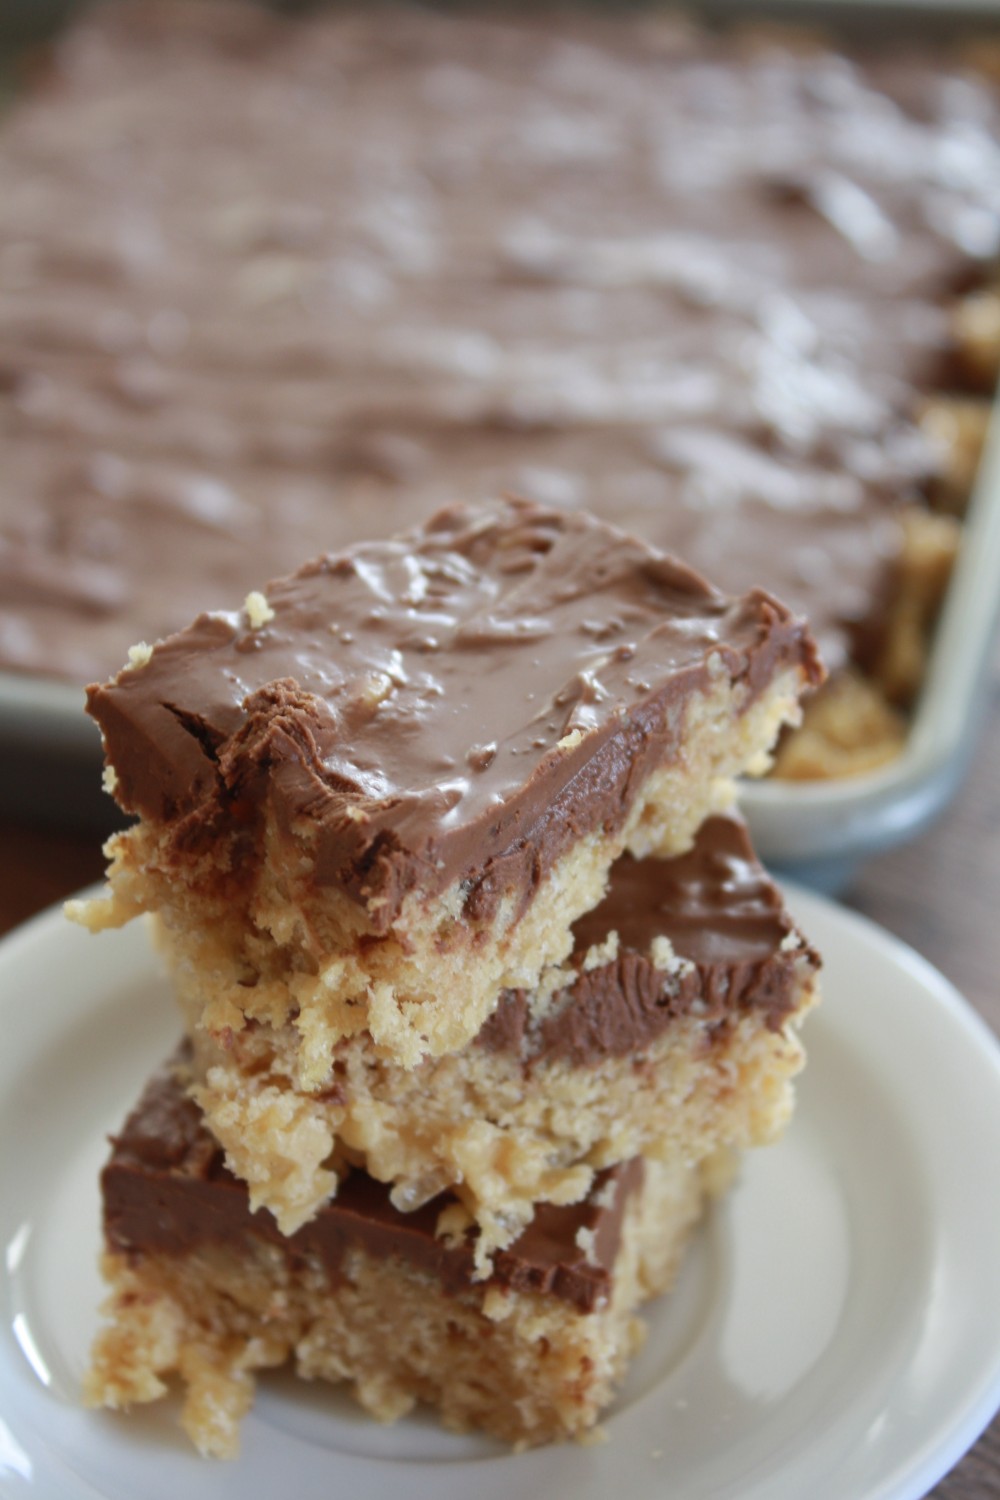
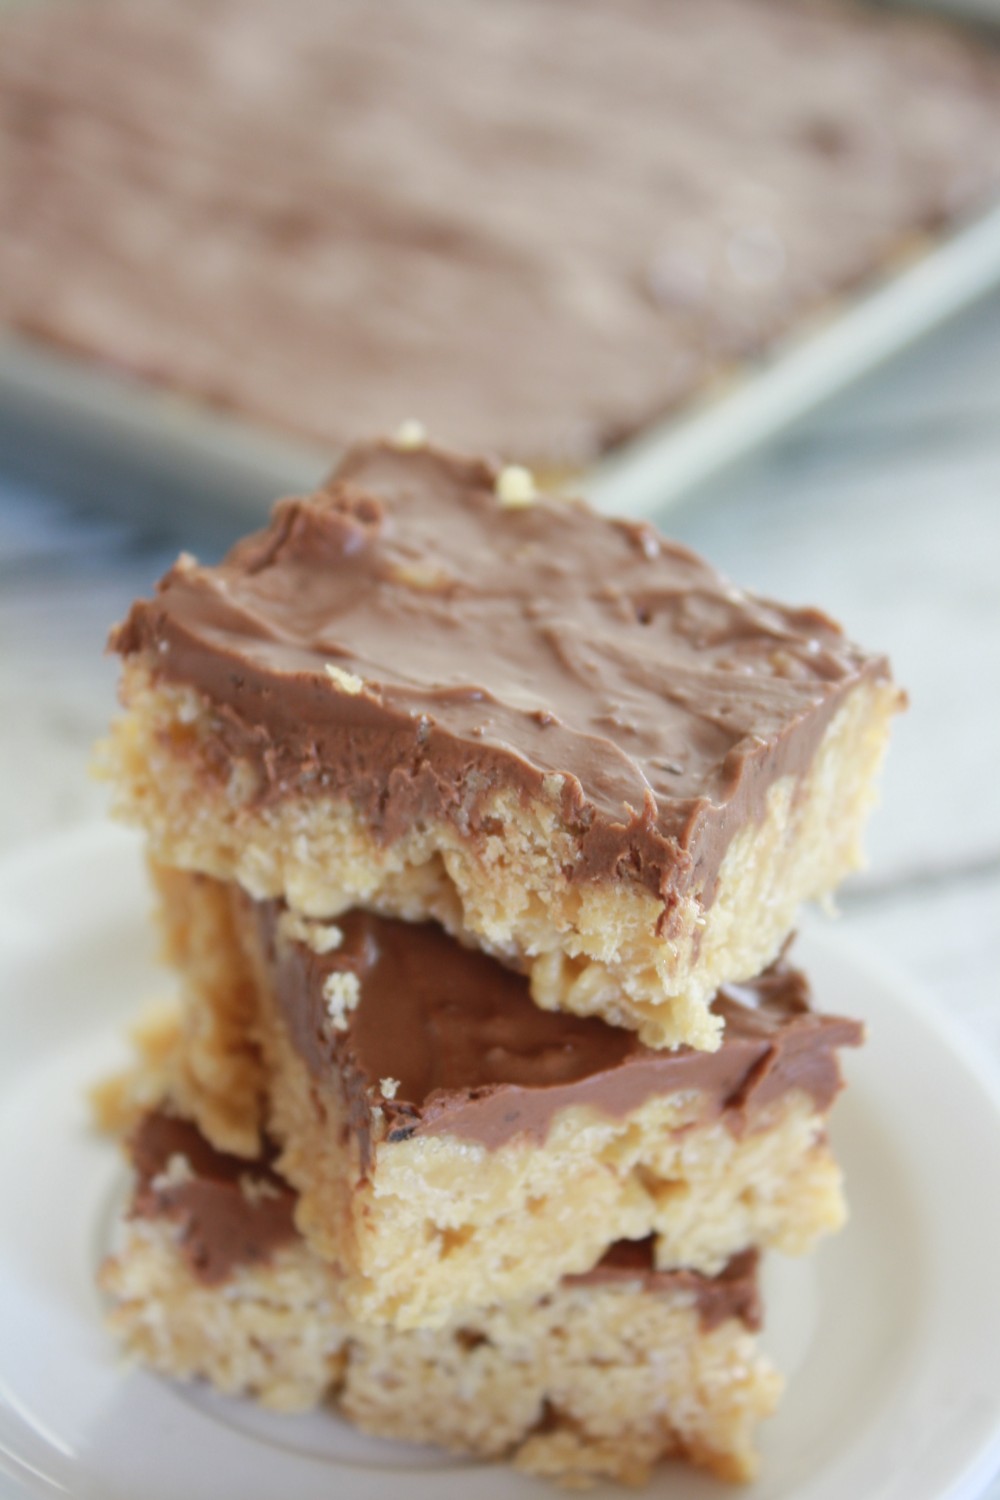
Before the pan even touches the table, chocolate scotcheroo bars disappear! A soft base of Rice Krispies and peanut butter, a thick chocolate and butterscotch topping, no baking required, under 30 minutes to make, and are great to pack for lunch, and to sell at bake sales. They practically disappear off the counter. This is the recipe to start making scotcheroo bars. If you’re coming back, you probably remember the reasons.
This is a bar recipe that just oozes the Midwest, with such nostalgia that you can picture the index cards on which it’s been documented, being distributed at church suppers and potlucks for the past fifty years. Unfortunately, without the middle layer of peanut butter providing a real presence, it would just be another chocolate bar. The bottom and top layers are perfectly balanced, and these bars are sturdy enough to be cut clean. This is the version that gets requested at my home more than any other, and when you try it, I think you will understand.
Why This Sweet Recipe Works
- No oven required. The base comes together on the stovetop and the topping melts in a saucepan. Start to finish, you’re not turning on the oven once.
- The texture is genuinely good. The corn syrup and sugar base gets cooked just to the boil — not beyond — which gives the bars a chewy, slightly sticky bite rather than rock-hard or soggy.
- Peanut butter does real work here. It’s a full cup, so you actually taste it. It also acts as a binder that keeps the cereal together without being greasy.
- The chocolate topping sets firm. Using both chocolate chips and butterscotch chips gives the topping a little more complexity and helps it set to a solid layer rather than staying soft and smearing when you cut.
- They make a full 9×13 pan. This recipe goes a long way — you’ll get 24 to 36 bars depending on how you cut them, which makes them worth making when you need to feed a crowd.
- They travel well. Once fully set, you can stack them with parchment between layers and transport them without a mess.
What to Know Before You Start
Scotcheroos are pretty forgiving, but there are some tricks that will improve (or ruin) the texture, and they have to do with heat.
Do not overcook the Sugar Base. You want to bring the corn syrup and sugar to just a boil and take it off heat. If you let it go too long, the bars will be hard and difficult to bite through once cooled. Watch it closely, once you see the bubbles forming around the edges and the mixture starts to come up, take it off the burner.
Be careful not to burn the chocolate topping. When melting the chocolate chips, use a low temperature and make sure to stir the chips continuously. It’s really easy to scorch chocolate. Once the chocolate topping is burned, you can’t fix it once it goes onto the bars. If you’re feeling unsure, consider using a double boiler instead. You could also use the microwave, but make sure to do it in 30-second intervals and stir in between.
Firmly press the cereal base. As soon as you add the cereal to the peanut butter mixture, act fast. It begins to stiffen as it cools. To smooth it out so it’s an even layer in the pan before it sets, use a greased spatula or use the back of a greased spoon. If some areas are too thick, the bars will be uneven.
Let them cool completely before you start to cut them. This is by far the toughest step. Before cutting, the chocolate topping must be completely set. This could take an hour at room temp, or 20-30 minutes in the fridge. If you cut them too quickly, the topping gets smudged and the bars will lose their shape.
Before measuring the corn syrup, spray your measuring cup so that the syrup slides out easily without getting stuck to the cup. The same applies to the pan- spray the pan before you press in the cereal base.
Ingredients
Here is what each one is about and what each one will provide you:
For the Base
- 1 cup light corn syrup — This is the binder that holds everything together and gives the bars their chewy texture. Don’t substitute honey or maple syrup here; the texture won’t be the same.
- 1 cup granulated sugar — Combined with the corn syrup and cooked briefly, this creates a candy-like base. Regular white sugar, nothing fancy needed.
- 1 cup peanut butter — Use creamy, not chunky. Natural peanut butter (the kind where the oil separates) can make the bars greasy and may not bind properly. Stick with Jif, Skippy, or a similar commercial brand for the best texture.
- 6 cups Rice Krispies cereal — The original recipe and the best version. You can use Cocoa Krispies if you want more chocolate flavor in the base, but regular Rice Krispies let the peanut butter flavor come through more clearly. Either works.
For the Topping
- 1 package (14 oz.) semi-sweet chocolate chips — Semi-sweet is the right call. Milk chocolate gets too sweet against the already-sweet base. Dark chocolate works if you want a little more contrast.
- 1 cup butterscotch chips — This is what makes scotcheroos distinct from a regular Rice Krispies treat. The butterscotch adds a warm, slightly caramel-y note that plays well with the peanut butter. If you can’t find butterscotch chips or don’t love the flavor, just use an extra cup of semi-sweet chocolate chips instead.
How to Make Chocolate Scotcheroos
This recipe can be broken down into two steps: making the base and making the topping. Read each step before beginning. Once the base is made and the cereal is added, the process moves quickly, so line your pan first.
Step 1: Prepare Your Pan
Take a moment to spray some cookings spray into your 9×13 inch baking pan. This is going to be set aside for a moment. This is the most important step! You have to have it ready the instant your cereal mixture is finished! It is very important to move fast.
Step 2: Cook the Sugar Base
Pour the corn syrup and sugar into a medium-to-large saucepan. Use medium heat and cook while stirring often until the sugar dissolves and a rolling boil starts to form. As soon as it starts to boil, remove the pan from the heat. Do not let it continue to cook.
It will look thin at first, but that’s normal. The mixture will be very hot.
Step 3: Add the Peanut Butter
Remove the pan from the heat, and immediately add the peanut butter. Stir until everything is fully combined. The peanut butter will melt into the sugar mixture and it will become thick and smooth. Be sure to stir well enough so that there are no remaining streaks of peanut butter.
Step 4: Add the Cereal
Add all six cups of Rice Krispies to the peanut butter mixture, and stir so every cereal piece is coated. Be quick because the mixture will stiffen as it cools. Ideally, you’d have an even coating throughout the mixture with no dry pockets of cereal at the bottom.
Step 5: Press Into the Pan
Using a greased spoon or spatula, press the mixture evenly into your prepared pan. The firmer the base is compacted, the better the bars will hold together. Try to make it as level as possible across the entire pan. Set the pan aside.
Step 6: Make the Chocolate Topping
In another saucepan, add the chocolate chips and the butterscotch chips. Heat them together, on low, and stir constantly. Just like it says, low heat is important, don’t rush it as this will affect the outcome, just keep stirring until the mixture is completely smooth and contains no lumps. This will take about 3 – 5 minutes.
For microwave users, put the chips in a safe bowl, heat for 30 seconds, stir, and repeat until melted and smooth.
Step 7: Top and Let Set
Evenly pour the melted chocolate topping over the cereal base and use a spatula to reach the edges. Let the bars sit at room temperature until the topping has completely firmed up. This will take at least an hour. If you’re in a rush, you can speed things up by refrigerating them for 20 to 30 minutes.
After the topping has completely set, slice into bars. For the sharpest cuts, use a hot knife, and rinse and dry it between cuts.
Helpful Tips
The Most Common Mistakes
- Overcooked base = hard bars. If your bars are so firm they’re difficult to bite into, the sugar base cooked too long or got too hot. Next time, pull it off the heat the moment you see a boil starting — don’t wait for a full rolling boil.
- Burned chocolate topping. If your topping has a grainy texture or smells slightly off, the chocolate scorched. This is unfixable once it happens, so start the topping over with fresh chips. Always use low heat and constant stirring.
- Bars fall apart when cutting. This usually means the base wasn’t pressed firmly enough, or the bars were cut before the topping was fully set. Press harder next time, and wait longer before cutting.
- Topping is too thick or too thin. This recipe uses a full 14-oz bag of chocolate chips plus a cup of butterscotch chips, which makes a substantial topping layer. If you want it thinner, use less. The bars work either way — the thick topping is just part of what makes them so good.
Easy Upgrades
- Add a pinch of salt to the topping. A tiny bit of flaky salt sprinkled over the top right after you spread the chocolate makes a real difference. It cuts through the sweetness and makes the chocolate flavor more pronounced.
- Double the recipe. Use a full box of Rice Krispies (12 cups), double all the other ingredients, and spread it into a jelly roll pan. This is the move when you need to feed a big group — same effort, twice the bars.
- Use Cocoa Krispies for a double-chocolate version. Swap regular Rice Krispies for Cocoa Krispies and you get chocolate flavor in the base too. The bars end up richer and more intensely chocolate throughout.
- Peanut butter drizzle on top. Melt a few tablespoons of peanut butter and drizzle it over the set chocolate topping before cutting. It looks good and adds one more peanut butter hit.
One Thing I Always Do
Every time, I spray the inside of my measuring cup with cooking spray before measuring the corn syrup. It just slides out, and I don’t spend two minutes trying to coax the last of it out of the cup. It is a small thing, but it makes a real difference.
Variations
All-Chocolate Topping
Don’t love butterscotch? Skip the butterscotch chips and use 2 cups of semi-sweet chocolate chips instead. While the topping won’t be as complex in flavor, it still tastes great and will set firm. This will also work if your grocer is out of butterscotch chips.
Dark Chocolate Version
Substitute the semi-sweet chips for dark chocolate chips (60% or higher). The topping will be less sweet and will offer a more noticeable contrast with the sweet base. If you are normally doubtful of how sweet scotcheroos are, this version is worth trying.
Almond Butter Swap
If you’re trying to avoid peanut butter due to allergies, an almond butter can be used instead. Commercial almond butter will give the best texture (rather than a natural/separated kind). Almond butter will give the bars a different flavor, but they will still work.
Serving Ideas
You don’t have to do much to showcase how delicious scotcheroos are, as they are pretty much their own dessert. But here’s how I most often see them at my house.
- Cut into small squares for a dessert tray. They’re rich, so smaller pieces are fine. Cut the pan into 36 pieces instead of 24 if you’re serving alongside other desserts.
- Pack into lunch boxes. Once set, they’re not sticky or messy. Wrap individual bars in plastic wrap or tuck them into a small bag and they’re easy to pack.
- Bake sale staple. These hold up well at room temperature for hours and look appealing stacked on a plate. They’re also easy to cut into uniform pieces when the pan is cold.
- Potluck or church supper bring-along. Make in the pan, cover with foil, transport as-is, cut at the destination. No serving dish needed.
What to Use to Make Them
While you won’t require any specialty gear, having a covered pan can make storing it a lot easier. This is the one I use and recommend:
Wilton Recipe Right 9×13 Pan with Cover – With this pan, you can make the bars straight in the pan, then close the lid to store it. No need for any transfers. It’s a standard 9×13 that manages the volume nicely.
Storage, Make-Ahead, and Leftovers
Room Temperature
Store cut bars in an air-tight container at room temperature for 5 days, layering parchment or wax paper between bars so they don’t stick. They hold up well and don’t get significantly softer over time.
Refrigerator
While scotcheroos can be stored in the fridge, be aware the base can firm up even more when cold, making them less chewy. If you do refrigerate, be sure to let them sit at room temperature for 10 to 15 minutes before serving to allow them to soften back to a more chewy state. Scotcheroos will stay good in the fridge for up to one week.
Freezer
Plastic wrap the bars individually and then put them in a bag or a container that’s safe for the freezer. They can be stored frozen for as long as two months. To thaw, wait thirty minutes at room temperature. The texture after freezing is very close to the original.
Make-Ahead
These are a great option for making things in advance. You can prepare the whole tray a day or two in advance because they taste a little better on day 2 after all the ingredients have settled. You can also prepare the tray the night prior and then cut it in the morning.
Frequently Asked Questions
Why are my scotcheroos too hard?
If your sugar base is cooked too long or got too hot, you should take the corn syrup and sugar mixture off the heat as soon as it comes to a boil. If you let it boil for too long, the sugar mixture will harden as it cools and create rigid bars that will be hard to bite and soften your bars. A candy thermometer will help with this — aim for a mixture temperature of 235 to 240°F (soft ball stage) and no higher.
Can I use natural peanut butter?
I would suggest you try something else. Natural peanut butter with only peanuts and salt tends to separate and could make the bars greasy or not hold together as well. Natural peanut butter would mean you are missing out on the advantages to commercial peanut butter (Jif, Skippy, Peter Pan) where added emulsifiers are able to incorporate the sugars more evenly. You could also have to go to the trouble of stirring the peanut butter before you start making the bars and making sure the peanut butter is at room temperature.
Can I skip the butterscotch chips?
Of course. Just put in the same amount of semi-sweet chocolate chips. The topping will be all chocolate and will also set up nice and firm. Butterscotch chips give the flavor of traditional scotcheroos its distinctiveness, but the bars are still good without them. Some people even like the simpler chocolate flavor better.
Do I need to refrigerate scotcheroos?
They are perfectly fine to keep at room temperature for five days and as long as they are sealed in an airtight container. You can refrigerate them if you want, just keep in mind that it will make the base a little firmer. For the best texture, the ideal serving temperature is at room temperature.
Can I double the recipe?
Sure! Just double the quantity of the ingredients and replace the 9×13 pan with a jelly roll pan (10×15 inches). Some people prefer having a slightly thinner bottom layer so that there’s more topping than base in each bar. This is the version to make when you need to feed a lot of people.
Why does the chocolate topping look dull after setting?
If your chocolate is slightly gray, it’s likely due to overheating and, instead, cooling chocolate quickly. This is actually called blooming. The good news is, it won’t affect the taste, and they’ll taste exactly the same. If you want a shinier finish, melt your chocolate more slowly and over even lower heat, then let the bars cool down to room temperature instead of putting them in the fridge.
Related Recipes
These are worth bookmarking if you enjoy no bake bars and treats:
Chocolate Scotcheroos
Ingredients
- 1 cup light corn syrup
- 1 cup sugar
- 1 cup peanut butter
- 6 cups Rice Krispies cereal
- 1 cup semi-sweet chocolate chips
- 1 cup butterscotch chips
Instructions
- Grease a 9×13 pan and set it aside.
- Combine corn syrup and sugar in a large saucepan over medium heat. Stir until sugar dissolves and mixture just comes to a boil.
- Remove from heat and stir in peanut butter until smooth.
- Fold in Rice Krispies cereal until evenly coated.
- Press mixture into the prepared pan.
- Melt chocolate chips and butterscotch chips together over low heat, stirring until smooth.
- Spread melted topping over the cereal base.
- Let set completely, then cut into bars.