
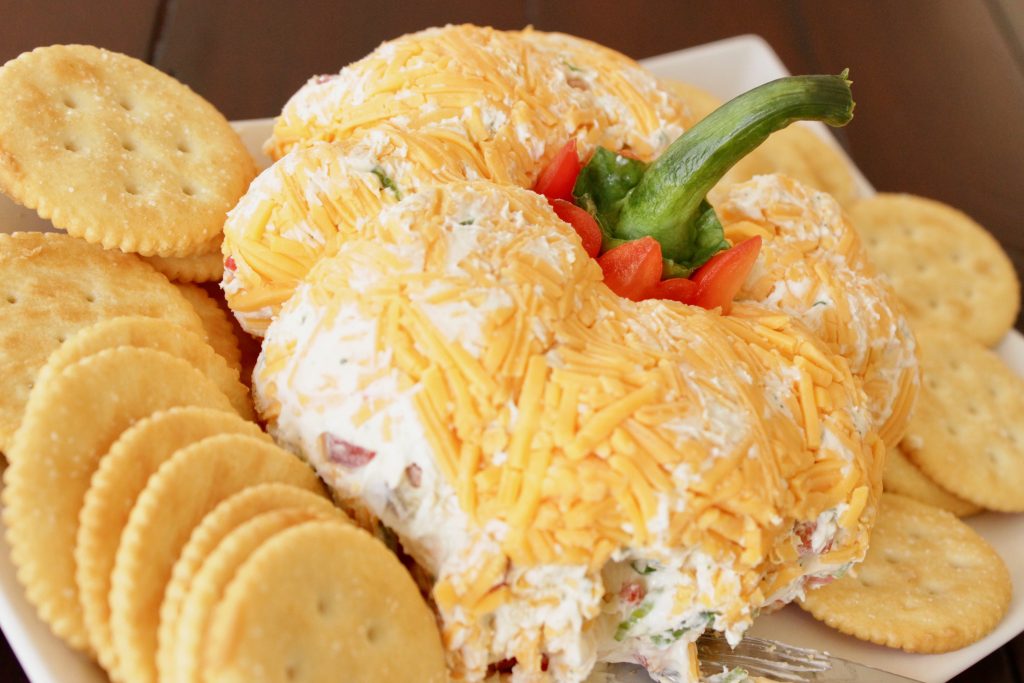
Easy Pumpkin Shaped Cheese Ball Appetizer Recipe
Fall parties call for fun fall appetizers like this Pumpkin Shaped Cheese Ball recipe. Six ingredients plus crackers to serve with make this easy to prepare and guaranteed to be a hit with friends and family.
My teens will deny this but they’ve been dragged kicking and screaming along on this journey with me…I’m famous within our small circle for my cheese ball recipes. This Pumpkin Shaped Cheese Ball recipe is another addition to the group and a sure bet for your Fall get-togethers.
The Rubber Band Trick — How the Shape Actually Works
- No molds or shaping required. Rubber bands create the pumpkin lines for a convincing look.
- No fussing with food dye. Just mix and serve.
- Impressive appetizer with big impact.
I’ve been making this cheese ball appetizer for years. It’s the easiest way to make a pumpkin shaped cheese ball and always gets compliments when we’re visiting or hosting.
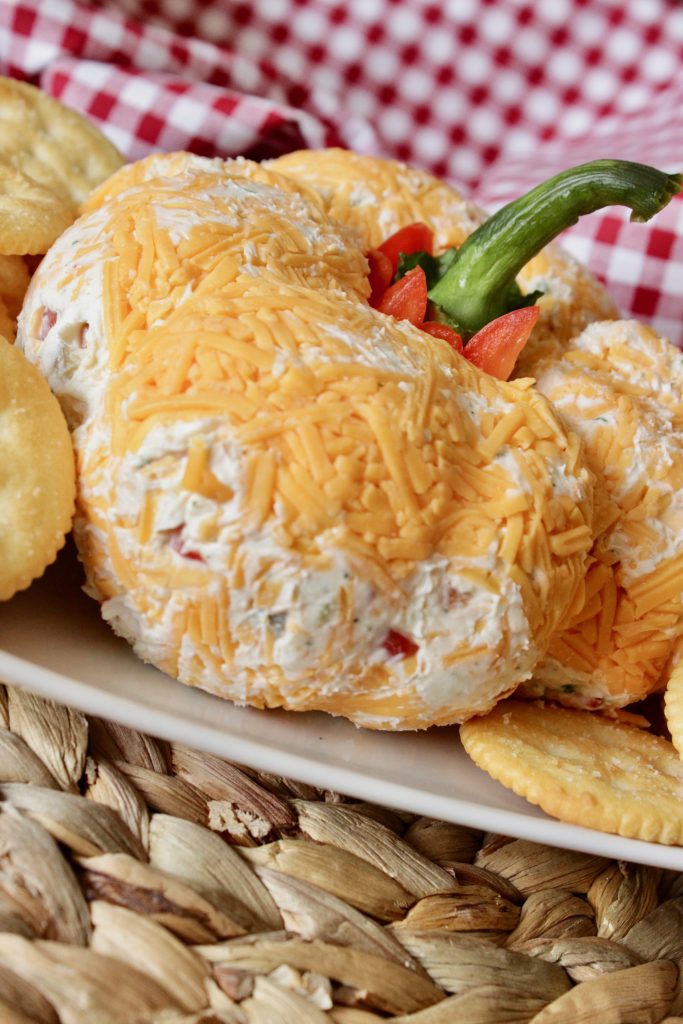
The secret to the pumpkin lines on the outside of the cheese ball is simply wrapping the ball with a few rubber bands and then chilling. The rubber bands leave a line as the cheese firms up and once removed reveal perfect pumpkin lines.
The stem of a red pepper completes the look.
Tips for success:
- Soften cream cheese before mixing.
- Evenly space the rubber bands or you’ll end up with an acorn squash, which is fine if that’s what you’re going for, but won’t resemble a pumpkin as pictured.
- Use larger, thicker rubber bands, like you’d use to hold a bunch of broccoli together, as these are less likely to tear the plastic wrap. Thinner bands can be harder to remove without taking the outside cheddar layer with them.
What Goes Into This Pumpkin Shaped Cheese Ball
The combination of zesty jalapeno ranch and sharp cheddar filling in this cheese ball recipe is fantastic. Start with softened cream cheese (8 oz) then mix in:
- 2 cups shredded sharp cheddar cheese, used both here and below
- Full-fat block cream cheese, softened
- 8 oz jalapeño cream cheese, preferably the kind that comes in a tub, softened
- 1 packet Hidden Valley Buttermilk Ranch dry mix, though other dry mixes will be ok
- 1 red bell pepper, stem intact, finely diced, saving the stem to use on top of the cheese ball
- 3 green onions, finely diced including some of the green part
The trick to having a successful cheeseball that can hold its pumpkin shape is using full-fat CREAM CHEESE, not whipped, as it has too much air and will never really firm up. You can find it in block form in your dairy aisle.
I’m using jalapeño cream cheese, which happens to be super mild, Kraft brand, and my crowd that doesn’t care for spicy fare will eat this stuff up. It comes in an 8 oz tub and will blend into the recipe better than a block of cream cheese.
You’ll also add another block of cream cheese. If you’re cooking for a crowd that is heat-sensitive, you can use all regular cream cheese and add some cayenne to taste.
I prefer Hidden Valley brand of Buttermilk Ranch mix, though you can use a generic one. Make sure you’re getting the DRY MIX – ranch dressing will make it way too loose.
The ranch adds tons of flavor, and the dry mix keeps the cheeseball more concentrated and able to hold together.
You can substitute the jalapeño cream cheese if you’d like, but I find the flavor is evenly distributed when I use this method.
Finely dice your green onions. Try to be as uniform as possible so they’re evenly distributed.
Same goes for the red pepper. Cut into very small pieces, as larger pieces may release more liquid and will make your cheeseball bumpy.
Save that pepper stem, and we’ll use that as the pumpkin’s stem when it’s all said and done. Just leave it on the counter.
How to Make a Pumpkin Shaped Cheese Ball
Step 1: Mix the Cheese
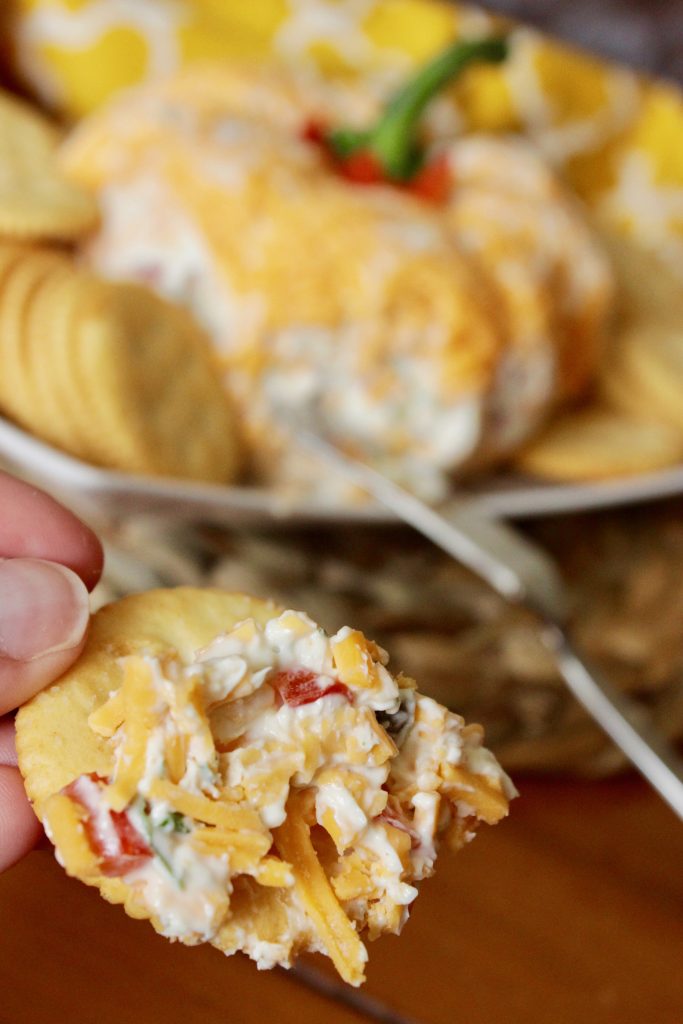
Using a hand mixer or a wooden spoon, though that’s harder, mix together the cream cheeses until smooth, which should take about a minute if they’ve been sitting out to soften. Add 1 cup of cheddar, ranch, red pepper, green onion and mix well.
It will still be pretty thick and sticky.
Step 2: Set Up the Cling Wrap
Lay a large piece of plastic wrap/cling wrap/plastic bag horizontally on your counter. Sprinkle a cup of shredded cheddar in the middle.
The cheddar is to prevent the plastic wrap from sticking to the cheese; it’ll make it easier to unwrap the cheese. It also serves as a textural layer that makes it look and taste like a pumpkin.
Step 3: Add the Rubber Bands
Add the cheese mixture to the plastic wrap on top of the shredded cheese, and shape it with your hands into a ball. Then tightly wrap the cheese with the plastic, twisting the top to close it up.
The shredded cheese should be pressed against the ball, giving it a lightly-orange hue. Take four large rubber bands and wrap them evenly spaced around the ball.
At this point, it’ll look like a disaster. Don’t worry about it.
It’ll come together soon enough. At this point, you’ve done about 15 minutes of active work!
Step 4: Refrigerate
Pop the cheese ball in the fridge to let the shape set. Once in the fridge, the lines between the rubber bands will be much clearer.
Check to make sure it’s nice and firm. To test it out, press on the cheese through the plastic.
If it’s still soft, give it another hour.
Step 5: Unwrap and Serve
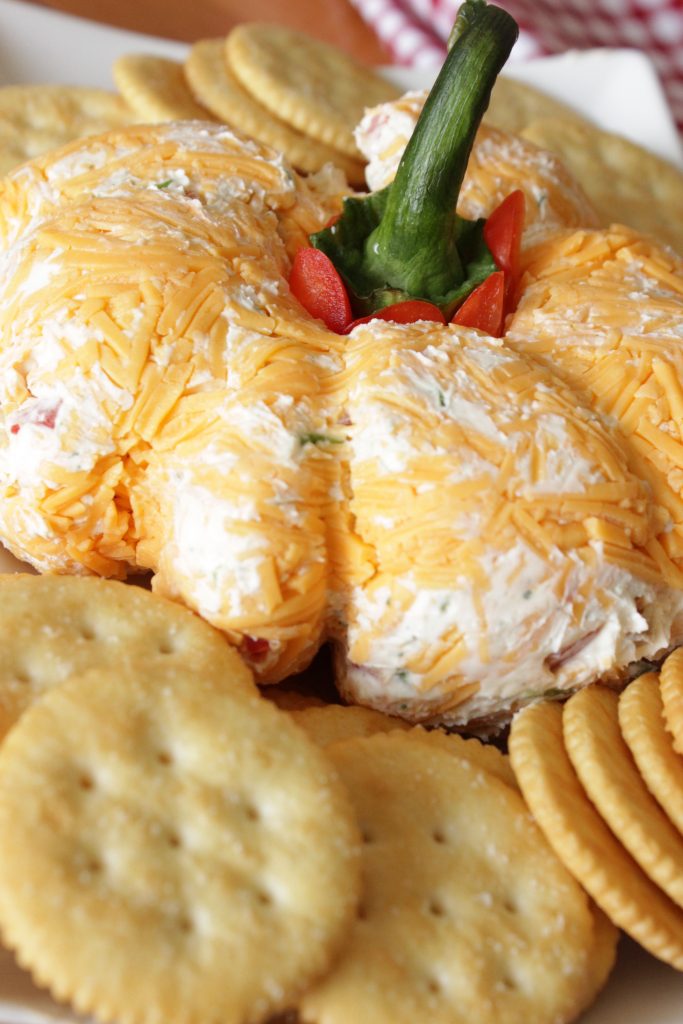
Cut the rubber bands off with scissors. You may have to slowly remove the cling wrap, as cheddar loves to stick, and place onto a serving platter/board.
Arrange crackers around cheese ball.
Remove the plastic from the cheese. It should be pretty easy to take it off.
If it’s not, make sure you used enough shredded cheese as a barrier between the ball and the plastic. Once it’s out of the plastic, arrange on a plate and add a stem.
It’s ready to be eaten and admired.
I like to serve with a butter knife, but crackers are an obvious choice for scooping cheese. This is where you’ll use that stem from the red pepper that was reserved.
Stick it in the top of your cheese ball to give it the perfect pumpkin effect. Add this part right before serving so it doesn’t have time to dry out.
The Overnight Rule: Why Day-Two Flavor Is Better
Technically you can refrigerate for 2 hours for a perfectly edible cheese ball if you are making it for the same day, but it’s always soooo much better the next day. The shape is much more defined and holds together better.
The flavors meld and balance beautifully, as the heat from the jalapeno cream cheese is tempered by the ranch and the sharpness of the cheddar is balanced by the sweetness of cream cheese. It’s a perfectly balanced bite that begs for one more and one more.
This is an appetizer you can make up to 3 days ahead, rubber bands and all, and pull out of refrigerator when needed.
Ways to Change It Up
No heat version: Omit jalapeno cream cheese and use 16 oz. cream cheese. Sprinkle a dash of cayenne pepper if you like a little kick without the heat.
More heat: Fresh jalapenos have a much more pronounced heat than the jalapeno cream cheese alone, but you can add about a tablespoon of minced jalapeno to the mixture for a kick.
Smoky version: Use smoked cheddar in place of sharp cheddar and add 1/2 tsp. smoked paprika to the mixture. The paprika is to enhance the color (very fall-like!) and adds another level to the smoky flavor.
Add bacon. Bacon always sounds like a good idea.
For a heartier appetizer that’s perfect when you’re entertaining, stir in ⅓ cup cooked and crumbled bacon.
Skip the pumpkin shape
Want an easier way to form the cheese mixture? Simply shape it into a log.
Then skip the rubber bands. It’ll taste just as good.
Bonus: you’ll be able to cut into this version with a knife instead of scooping it out. Which may be a plus on a casual weeknight.
Pumpkin Shaped Cheese Ball FAQ
Can I use all plain cream cheese?
Absolutely, since there is plenty of flavor from the ranch and the sharp cheddar. If you like a little heat in your food, which is missing if you do not use the zippy cream cheese, add a touch of cayenne or hot sauce.
What size rubber bands work best?
I prefer to use the wider, longer ones. They can be purchased at an office supply store.
You may already have them on hand since I use them frequently to wrap up broccoli crowns from the grocery store. You can use a regular-sized rubber band but they’re a bit thin and dig into the cheese ball.
Be careful not to slice through the plastic wrap.
My cheese ball didn’t hold its shape — what went wrong?
Two possible reasons: it wasn’t cold enough OR it’s too wet. Make sure the cream cheese is very soft but not melted when working together all of the ingredients.
Finely dice the pepper. Chill for at least 2 hours and press the cheese ball through the plastic to determine if it’s sufficiently firm before removing the rubber bands.
How far in advance can I make this?
You can make this pumpkin-shaped cheese ball up to 3 days ahead. Store in refrigerator, still wrapped up with rubber bands.
Attach stem right before serving.
How long do leftovers keep?
For up to 5 days in the refrigerator when tightly wrapped. Trust me, it’ll be eaten long before it could go bad.
It makes for a perfectly acceptable lunchtime sandwich or casual breakfast.
Can I freeze it?
Yes but know that cream cheese can be somewhat grainy after thawing. Freeze before adding the grated cheddar.
Remove from freezer and allow to thaw in refrigerator overnight. Then add grated cheddar to the outside.
What to Set Out With It
Serve this cheese ball on a beautiful serving plate surrounded by Ritz crackers, a crowd pleaser. Club crackers are nice too because they’re crispy and hold up well because they’re thinner.
Triscuits are another cracker option; they’re sturdy and thick, making it easy to scoop up a hefty amount of cheese. Consider offering a butter knife.
Veggies are a good choice too, because they give the cheeseball a bit more crunch. For example, cucumber slices (cut into rounds) have a flavor profile that complements the jalapeños in the cheeseball.
Celery also works because its crunchy texture wouldn’t overpower the cheese. Or if you wanted to really get into the fall spirit, apple slices have a natural sweetness that would be a nice contrast to the spicy cheddar cheeseball.
Tips for Serving This Cheese Ball
I highly recommend taking cheese balls out of the fridge about 10 – 15 minutes before you plan to serve them. The reason being that it can be difficult to spread cold (and firm) cheese on crackers – and can lead to cracked and broken crackers in some instances.
You’ll find that your cheese ball will be much more spreadable as it comes closer to room temperature. I also like to serve a small knife with the cheese ball in case folks would like to spread some onto crackers.
Other Appetizers Worth Making
- I love Canned Tomato Salsa, a great make-ahead dip that works really well alongside this cheese ball on a platter.
- Quick Bruschetta Appetizer, light and refreshing, a nice counterpoint to the indulgence of the cheese ball.
- Spicy Pretzel Snack Mix. If you like spice on your table, then this is a must for you!
The Pumpkin Shaped Cheese Ball is a fun and tasty way to start off any appetizer course at your next party. This creamy and flavorful ball is made with just the right amount of kick from a little cream cheese and jalapeño mix.
Pumpkin Shaped Cheese Ball
Equipment
- Large mixing bowl
- Plastic wrap
- Rubber bands
Ingredients
Ingredients
- 8 ounces plain cream cheese softened
- 8 ounces jalapeno cream cheese tub style, softened
- 1 packet Hidden Valley Ranch Buttermilk Dry Ranch Mix
- 3 green onions sliced
- 1 red bell pepper finely diced, stem reserved
- 2 cups shredded sharp cheddar cheese divided
- crackers for serving
Instructions
Instructions
- In a large bowl, combine the plain cream cheese and jalapeno cream cheese until smooth.
- Add the dry ranch mix, diced red bell pepper, sliced green onions, and 1 cup shredded cheddar. Mix until evenly combined.
- Lay a large piece of plastic wrap on the counter and sprinkle the remaining 1 cup shredded cheddar in the center.
- Scoop the cheese mixture onto the cheddar and shape it roughly into a ball.
- Wrap the plastic wrap around the cheese ball and twist to seal.
- Stretch 4 large rubber bands around the wrapped cheese ball, spacing them evenly to create pumpkin ridges.
- Refrigerate for at least 2 hours, or overnight for the best shape and flavor.
- When ready to serve, snip off the rubber bands and remove the plastic wrap carefully.
- Transfer to a serving plate, press the reserved red bell pepper stem into the top, and serve with crackers.