Hot Ham and Cheese Rolls
I love this recipe because of the quick prep time and the sweet satisfaction my family gets from the meal. I can put this together and have it in the oven in under 15 minutes. Just a layer of ham and cheese in some King’s Hawaiian Sweet Rolls and a generous drizzle of melted butter. Once the rolls are done baking, the tops are crispy, the cheese is melted, and the bottoms have a buttery crunch. It’s great to see simple food done right.
My family is pretty plain, so simple five-ingredient recipes are always a hit! We get requests to make this again and again. I served it for the first time with an apple and corn and everyone cleaned their plates. That’s the win!
Why These Flavors Work Together
- King’s Hawaiian rolls are the right base. The slight sweetness plays well against the salty ham and cheese in a way plain dinner rolls don’t. The soft texture holds up to the butter without getting soggy. More on this below — it really does matter which rolls you use.
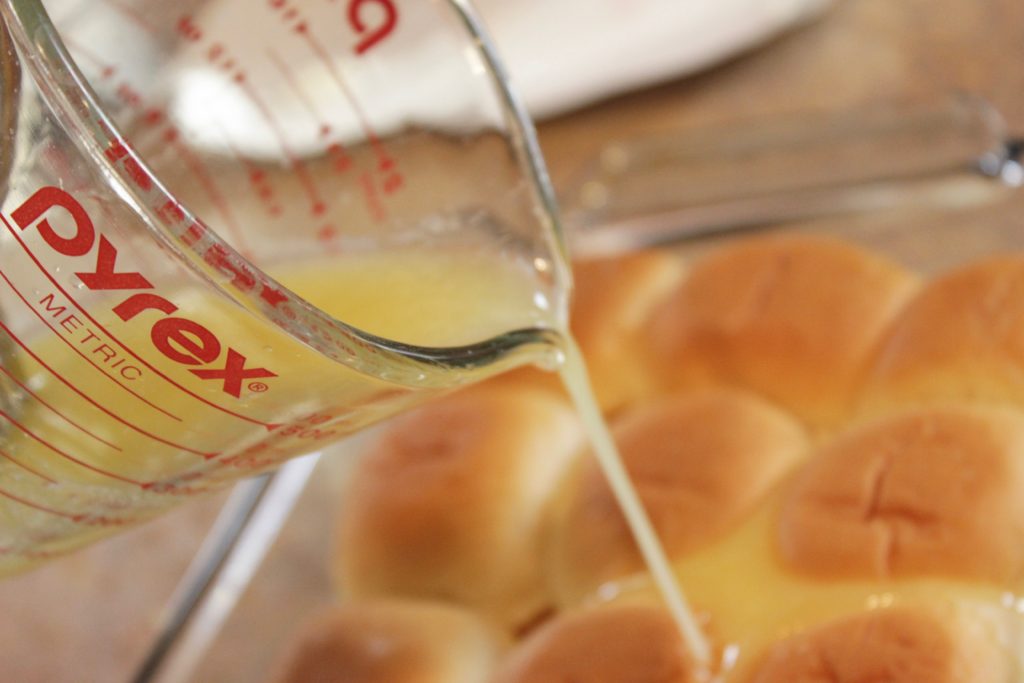
- Butter on the top AND the bottom. Pouring melted butter over the tops of the assembled rolls is the step that gives you that golden, slightly crispy exterior on both sides. Just drizzling on the bottom would give you a greasy base without the crust.
- Baking them together in one dish. The rolls steam slightly against each other while baking, which keeps the interior soft while the outer surfaces get crispy. Separating them before baking would dry them out.
- Deli ham and American cheese from the counter. Deli-sliced American cheese melts better than the individually wrapped singles. Thin-sliced deli ham layers more evenly. Small upgrades that make a real difference.
Why King’s Hawaiian Rolls Specifically
I want to take a minute on this since it’s more than just brand loyalty — it’s about roll construction. The King’s Hawaiian rolls have a particular texture and sugar content that makes them behave differently than other soft dinner rolls.
The sweetness is mild — it’s not like you’re going to bite into a dessert — but it’s just enough to counterbalance the ham’s saltiness to create that quintessential sweet and savory combo that makes sliders so irresistibly good. This is what makes a honey-glazed ham so good: salt and sweet together is a combination your brain just loves.
More practically: King’s Hawaiian rolls are sturdy. Though soft enough to eat easily, they also hold up to soaking in butter and baking without turned mushy. Regular white dinner rolls, though, often lack that same structure. If you have made this recipe using store-brand rolls and wondered why yours came out more soggy than golden, that’s likely the answer.
The rolls are also connected in a block, making the cut and fill method for this recipe simple. You cut the entire block in half, add your fillings, and place the lid back on. No messing around with single rolls. The block’s baked connective tissue also helps them absorb the butter and bring about a texture that is both steamed and crispy.
You can find King’s Hawaiian rolls at pretty much any grocery store in the bread aisle. The standard package is 12-count. For the purposes of this recipe, you’ll use 9 of them to fit a standard baking dish, although if your dish is big enough, you can use all 12.
What to Know Before You Start
Hawaiian rolls are packaged in quantities of 12. You will be removing one segment of the pack which contains 3 rolls, meaning you will be left with 9 rolls. This is done so that the rolls fit nicely in a regular baking pan. If your pan is big enough to hold all 12 and you have enough ham and cheese, feel free to use all 12.
A glass 9×13 baking dish is great because you can see where the butter is pooling at the bottom and you can tell it is coating the dish evenly. If your dish is a darker metal, you won’t have this visual cue of butter pooling and so just tilt it to ensure butter is coating all four corners.
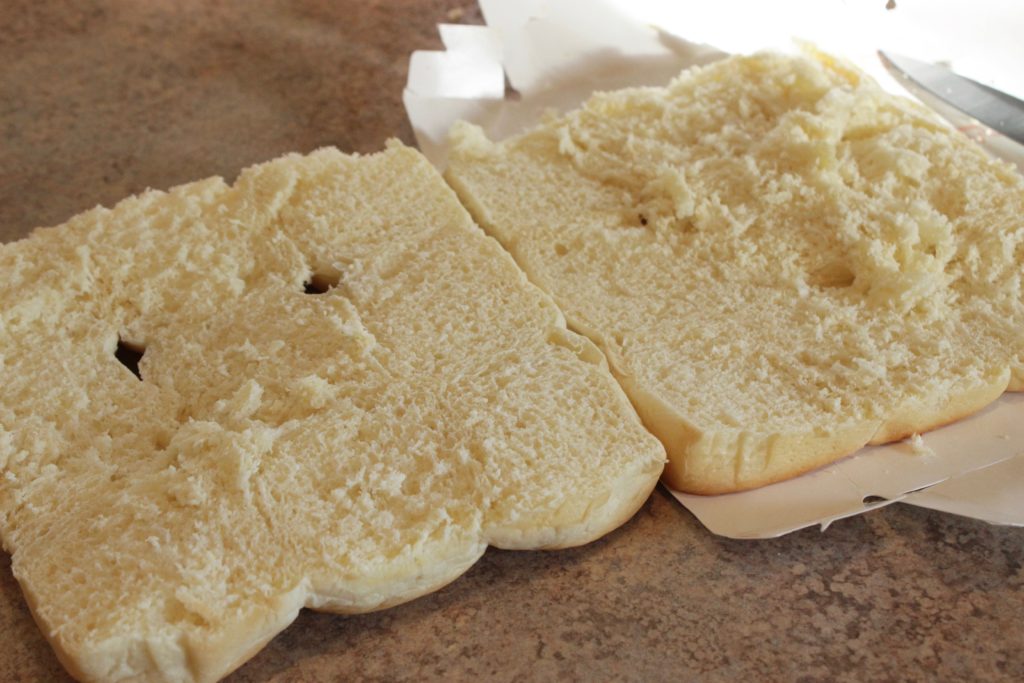
Instead of cutting each roll separately, cut the block of rolls in half horizontally. This way, both layers are even and you can fill everything in one go before putting the block back together. This will save you a lot of time!
Use a silicone brush to apply the butter. A spoon will just leave blobs of butter on the tops of the pastries which will not get evenly coated. Even butter coverage will allow the pastries to bake to a nice uniform golden color.
The Ham: Deli Counter vs. Packaged
Here’s a small-tip that leads to a huge-difference. When possible, grab your ham for sandwiches from the deli counter and ask them to slice it for you. This is much better than grabbing a pack of pre sliced lunch meat.
Fresh-sliced deli ham is cut thinner so it layers more evenly in the rolls without clumping. It’s not packaged in plastic the week before purchase so it has a more moisture and flavor.
At the deli counter, try to get them to slice it on a machine setting of 1-2. You want it flexible, not the thick cut. Usually for 9 rolls, 12 slices is about right. Spread out the slices so that each roll gets full coverage.
If all you have is packaged, that’s all right — this recipe can still work. Just choose a better quality brand and get the thinner-cut variety if there’s an option.
Ingredients
- 9 King’s Hawaiian sweet rolls (cut from a 12-count pack)
- 12 slices deli ham, sliced thin from the deli counter
- 4 slices American cheese (from the deli counter if possible)
- ¼ cup (half a stick) butter, melted
- 1 tsp Dijon mustard — optional but recommended
How to Make It
Preheat your oven to 350°F.
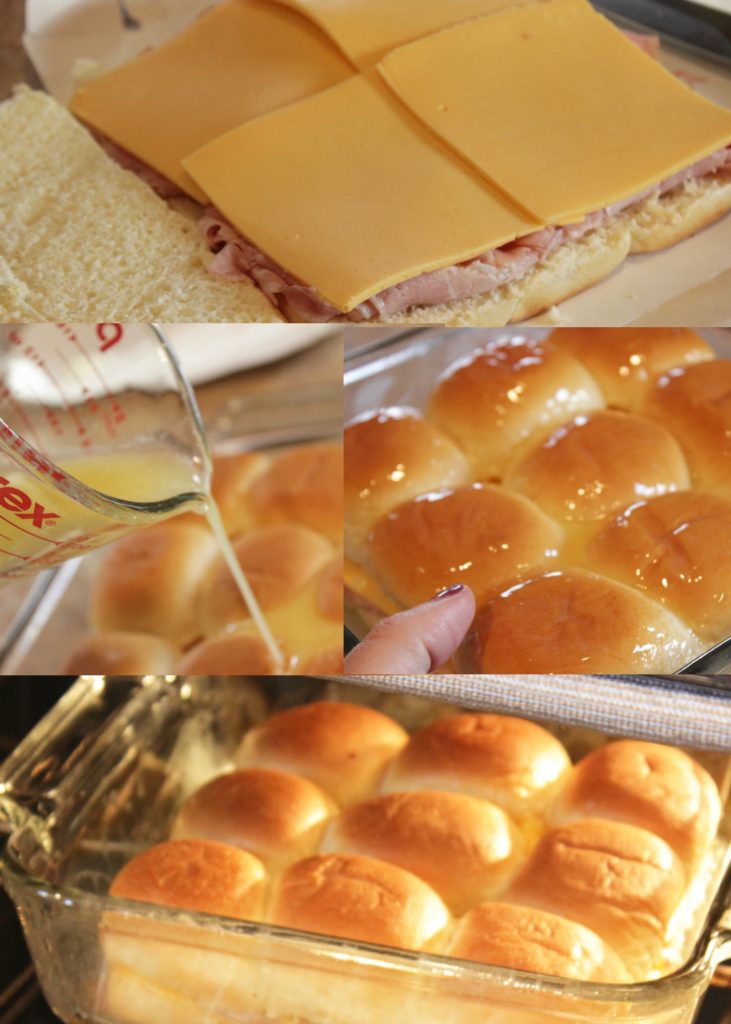
Slice the rolls: In your packaging, keep the rolls together. With the entire connected block of rolls, cut the 9 rolls horizontally in half. Put the bottom half in a baking dish.
Evenly spread the ham slices across the bottom half, corner to corner. Top the ham with the cheese slices.

Assemble. The connected block should sit in the dish as the upside down top half of the rolls.
Add the butter: If you’re incorporating Dijon mustard, combine it with the melted butter first. Using a pastry brush, paint the tops of the rolls starting from the center to the edges. All the rolls should be painted with the mix. It’s good if butter spills over the sides and collects in the pan.
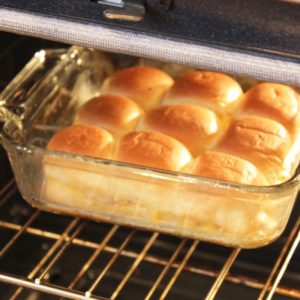
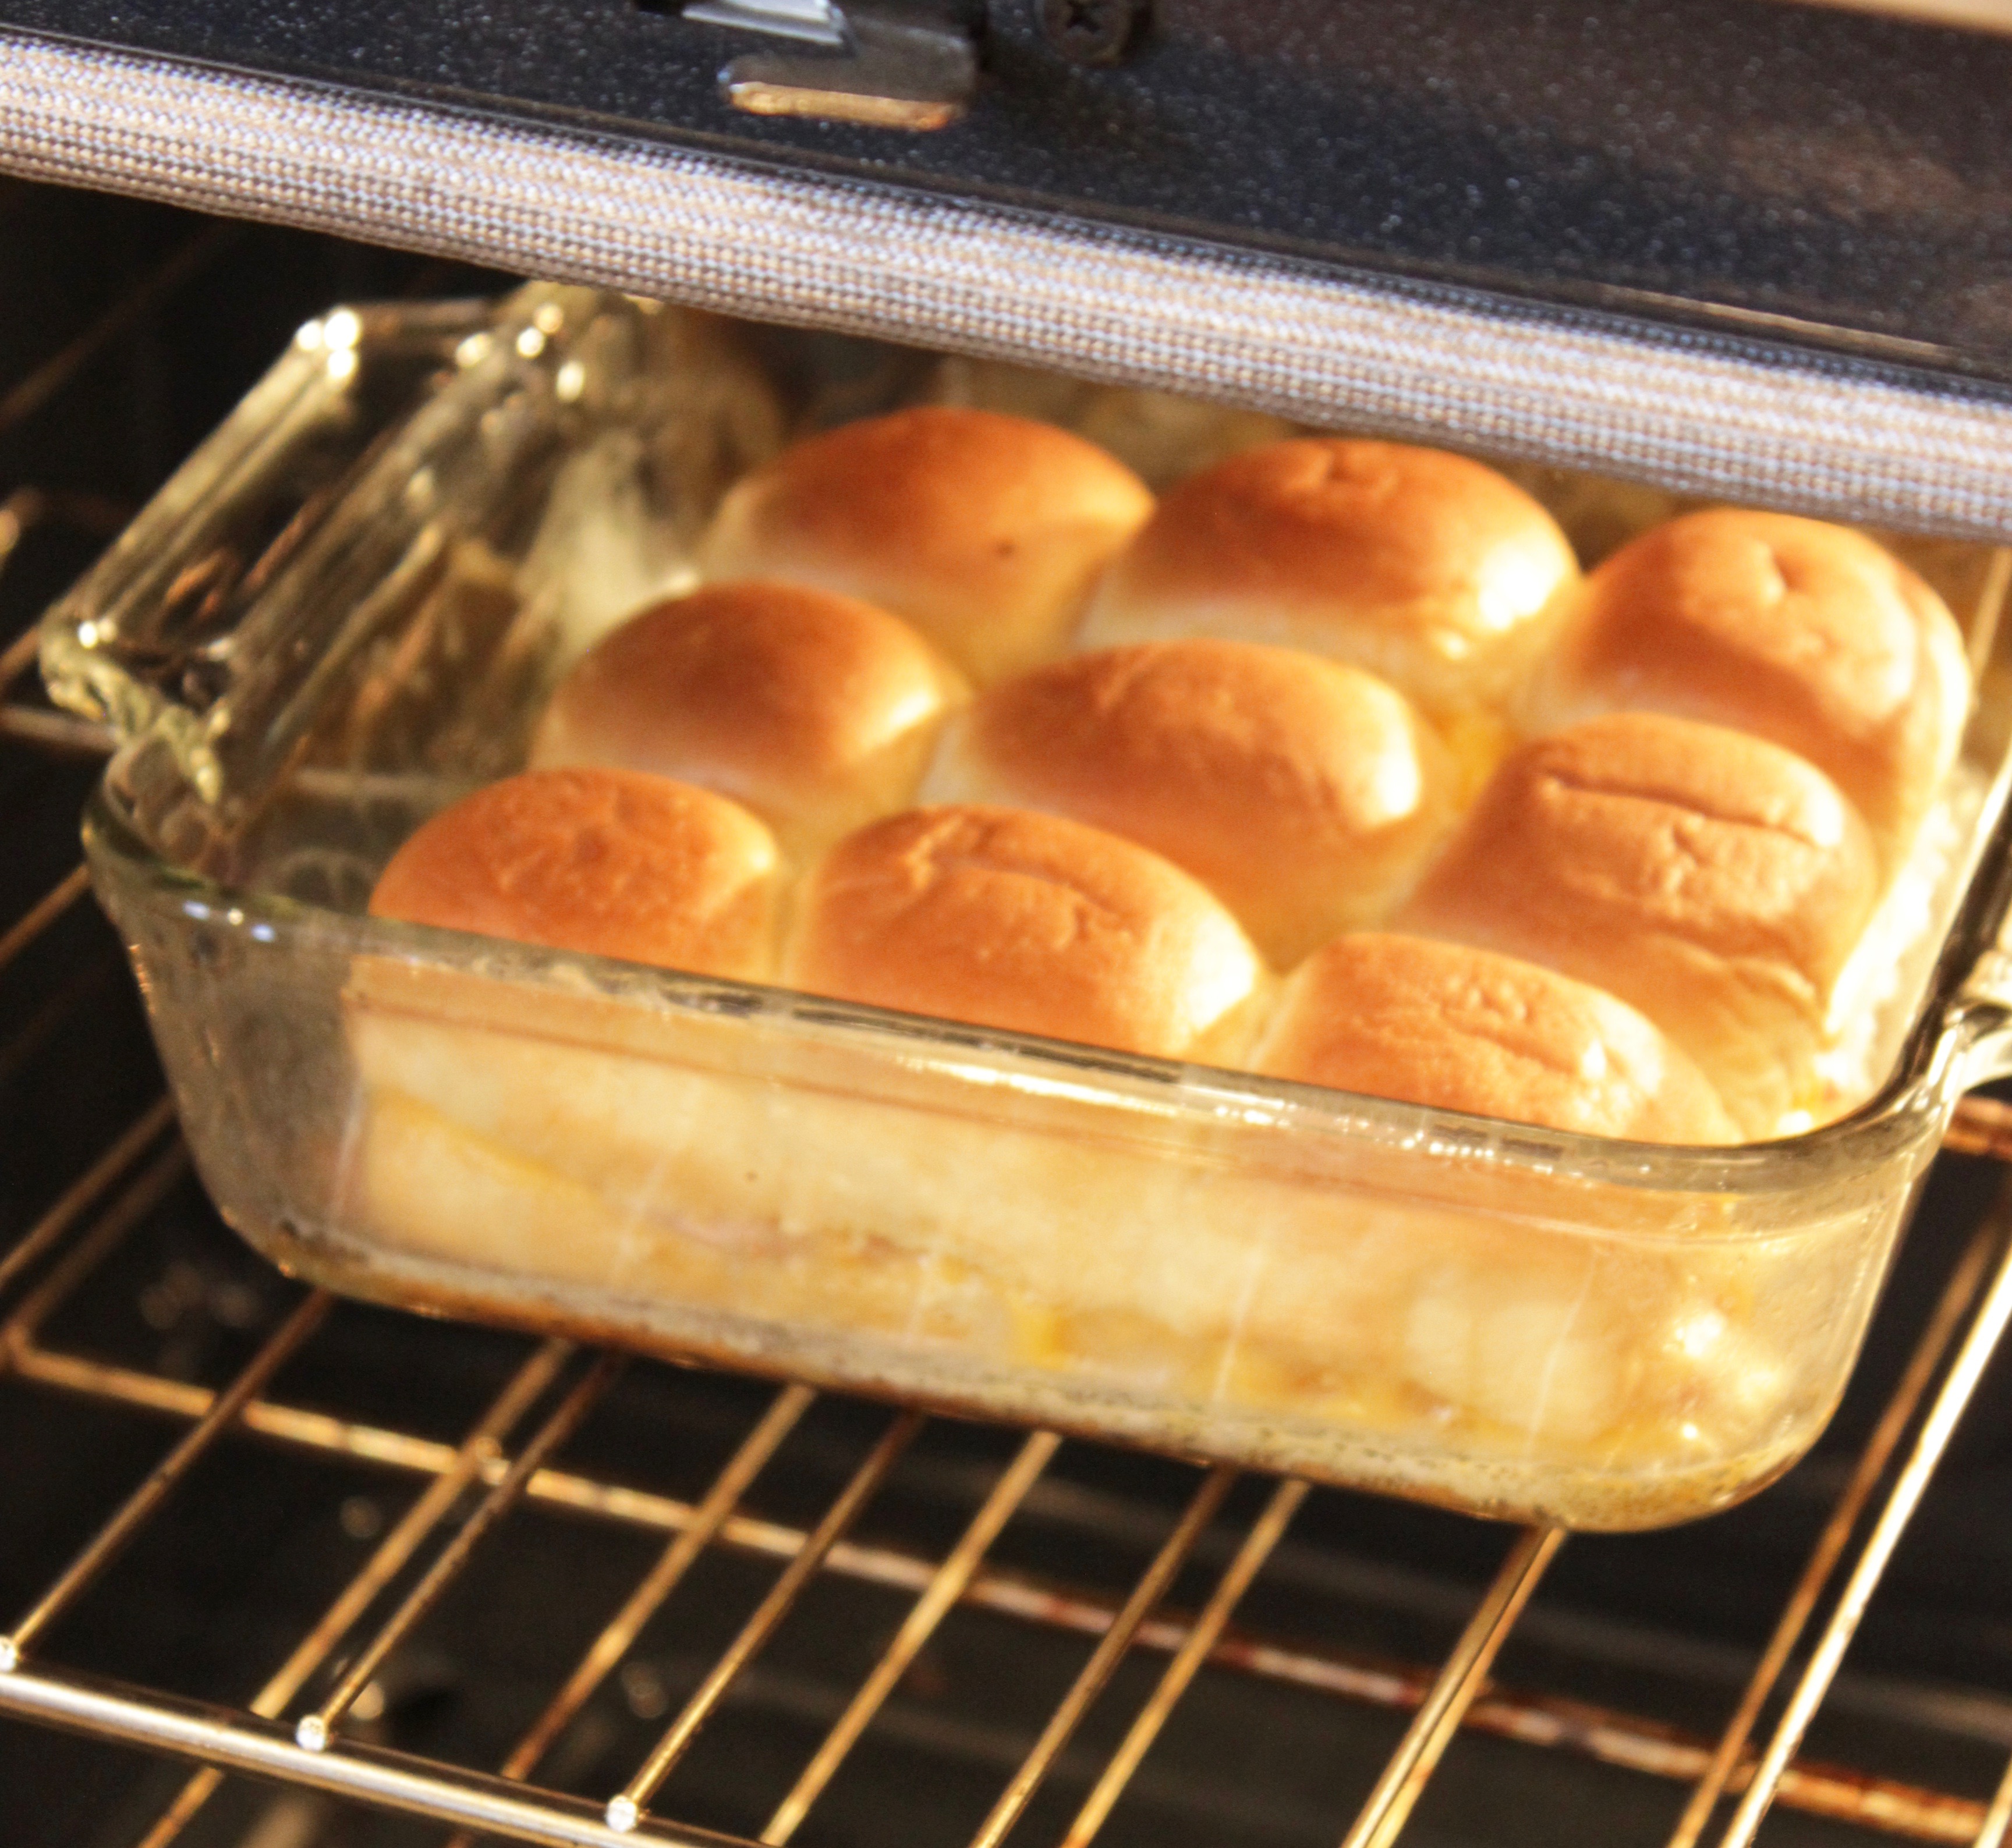
Bake at 350°F for 20 minutes uncovered.
Serve: Use a knife to separate the rolls from each other as individual sandwiches. They are best served warm.
How to Know When They’re Done
At 20 minutes, you should be looking for:
- The tops are golden brown, not pale and soft. They should look like a baked roll — some visible browning on the crown of each roll, a little sheen from the butter.
- The edges of the cheese are visible and melted, starting to peek out from between the rolls where they meet. If you can see a little cheese oozing, you’re there.
- The bottoms sound slightly hollow when you tap the pan. You can also tilt the dish slightly — if the butter that dripped down looks golden and slightly bubbly at the edges rather than pale and still, the bottoms have set.
- The smell shifts. At 15 minutes it smells like butter and bread. At 20 minutes it smells toasty, like a grilled cheese. That’s the signal you’re done.
If your oven runs cool, or the rolls are cold from the fridge, add 3-5 minutes to your baking time. The tops still should not be pale. If they are, give them more time.
Helpful Tips
- Brush, don’t just pour. Using a basting brush to spread the melted butter evenly over the tops ensures every roll gets the same coverage and crisps up uniformly. A spoon tends to pool in one spot.
- Don’t cover the dish. Baking uncovered is what lets the tops brown. Covering them would steam the rolls and you’d lose that crispy top layer.
- Add the Dijon. The teaspoon of Dijon in the butter is mild enough that even picky eaters won’t notice it specifically — it just adds a subtle tangy depth to the butter that makes these taste a little more intentional. Optional but worth trying.
- Serve immediately. These are best right out of the oven while the cheese is still gooey and the rolls are crispy. They’ll soften as they sit.
- Let the butter soak in. If you have a few extra minutes before baking, let the assembled buttered rolls sit for 5 minutes before they go in the oven. The butter soaks into the top slightly and you get more even browning.
Serving Ideas
Hot ham and cheese rolls are one of those recipes that can work for dinner on a Tuesday, but also work for a game day spread. Here is how to look at them in both situations.
For a Weeknight Dinner
Pair these with something uncomplicated on the side. The rolls are rich and filling, so you will want something more light and simple along.
- Sliced apples or a handful of grapes — the fruit sweetness works with the Hawaiian roll sweetness
- Corn on the cob or canned sweet corn, heated up
- A green salad with a light vinaigrette — something with acidity to cut through the butter
- Tomato soup — this is the grilled cheese of slider recipes, and tomato soup is the obvious companion
- Dill pickle spears on the side for the adults who want them
For a Party or Potluck
This recipe is easy to scale up. For 8 to 10 people, make two 12-pan recipes, and for a bigger crowd, make four. They can be transported in the foil-covered baking dish. If you need to make and transport them in advance, they can be reheated in a warm oven (300°F, covered) for 10-12 minutes.
Serving ideas for parties:
- Put out a small bowl of honey mustard for dipping — it’s natural with ham and the Hawaiian roll sweetness
- Spicy brown mustard for the adults who want more kick
- Ranch dressing if you’re feeding kids — they’ll dip anything in ranch
- A pickle platter alongside is always a good call at a slider spread
Dipping Sauces That Work
- Honey mustard — classic pairing, mild enough for kids
- Dijon or whole grain mustard — a little sharper, better for adults
- Ranch — kid-approved, works surprisingly well with the butter and ham
- Tomato soup — not a traditional dip, but serving these alongside a bowl of tomato soup and dunking them in works great on cold nights
Make-Ahead and Party Tips
Making Them Ahead
You can prepare these up to a day in advance. Place the ham and cheese inside, put the tops back on, cover the dish with plastic wrap, and store it in the fridge. Wait to add the butter until just before you’re ready to bake.
When your oven is preheated, brush the rolls with butter and let them sit at room temperature for about 10 minutes. If the rolls are cold from the fridge, let them sit to warm up for an additional 5 minutes. You will need to bake them for 25 minutes and check the tops.
How Many to Make for a Crowd
If you plan on serving rolls as the main dish for the meal, you will want to have 2-3 rolls per adult guest. For children, you will want to plan for 1 roll per kid. For party appetizers or slider spreads, where rolls will be served alongside other foods, a good estimate is 1-2 rolls per person.
- Dinner for 4: one pan of 9–12 rolls
- Dinner for 6–8: two pans of 12
- Party appetizer for 20: three to four pans — make in batches, keep warm in a 200°F oven covered loosely with foil
Keeping Them Warm
When baking the food for a party, and after baking, cover the food with foil and looses the top so that it doesn’t touch the food, so that it doesn’t created unwanted steam and ruin the crust, and hold for a heat o’r 200 degree. It will hold up for about three quarters of the hour before the crust starts to soften.
For potlucks, you can bake them, cover them with foil, and they should be fine for about 30-40 minutes in transit. The tops won’t be as crispy as when they were fresh out of the oven, but they will still taste warm and yummy.
Variations Worth Trying
Once you have created the original, this recipe is great for you to experiment with. Same technique, different stuffings.
Turkey and Swiss
Replace the ham with thin-sliced deli turkey and swap the American cheese for Swiss. Swiss cheese melts so nicely and has a nice buttery with a slight nuttiness flavor that compliments turkey perfectly. You can also put the Dijon in the butter, it pairs especially well with this combo. This is the variation I would make for adults if I wanted something to feel a little more upscale.
Ham and Pepper Jack
You can keep the ham, but instead of American cheese, use pepper jack. It gives a nice little kick, but it’s not too much because it blends with the sweetness of the Hawaiian rolls. It’s still great for adults, just not for younger kids because it’s too spicy. If you want to make the spice level higher, feel free to add a bit of hot sauce to the butter mixture.
Honey Mustard Inside
Before you put the ham on the rolls, spread some honey mustard on the bottom roll. This makes a nice addition, as it allows the mustard to soak into the bread and caramelize a bit on the edges. Don’t go overboard here, as it could overpower the dish. About a tablespoon is enough for 9 rolls.
Provolone and Italian Ham
Instead of regular deli ham, go for sliced prosciutto, capicola, and swap American for provolone. It’s pricier, but it has more sophisticated flavors. For color and slight sweetness, add a few thin slices of roasted red pepper from a jar. This option is great as a party appetizer for a more mature audience.
Double Cheese
Layer on both American and Swiss. American melts first and helps Swiss melt more evenly. You get a richer flavor and a more complex cheese pull. This was noticed and approved by my kids.
Storage and Make-Ahead
You can prepare steps ahead of time to save yourself some work later. Place the ham and cheese in the rolls and assemble them up to a day before and keep them covered in the fridge. Pour the melted butter right before putting them in the oven. If the baking dish is cold when you place it in the oven, increase the baking time by 5 minutes.
Leftovers: Keep in an airtight container in the fridge for 3 days max. To reheat it, place it in a 350°F oven for 8-10 minutes so it can be crispy again on top. You can use the microwave to reheat it but it will be soft instead of crispy.
Freezing: I haven’t had much luck freezing these fully assembled and baked — the rolls get a little spongy after thawing. If you want to freeze them, assemble without the butter, wrap tightly, and freeze. To thaw, place in refrigerator overnight. After thawing, add butter and bake from cold at 350°F for 25–28 minutes.
Frequently Asked Questions
Can I use a different cheese?
Of course, Swiss cheese is the original choice for sliders and it melts wonderfully. Provolone is also a good option. From the deli, American cheese is the easiest to melt and gives the most traditional American cheeseburger effect. Pre shredded cheese is a poor option because it does not melt well and instead of creating a cohesive cheese layer it creates dry pockets.
Can I use a different roll brand?
Sure, but King’s Hawaiian sets the standard for a reason; the sweetness and texture are specific. If you use another soft dinner roll, ensure it comes in a connected block that you can slice horizontally. Martin’s potato rolls are an okay alternative. Do not use too soft, low-structure rolls that will butter collapse.
Can I add anything else to the filling?
That’s sounds great! Just make sure you keep the audience in mind. If your family will eat thinned-sliced pickles, use a smear of brown mustard on the bottom roll, or a layer of thinned-sliced onion, those are good additions. If there are people that prefer plainer food, you can skip extras and let the ham, cheese and butter sing.
Can I make these with turkey instead of ham?
Certainly, it can be done with turkey as well. Here, turkey and swiss are especially great together— check the variations section above.
What do I serve with these?
They complement nearly every dish. Pair them with fruit, corn, a green salad, chips, or even tomato soup, and you’ve got a complete meal. I’ve even used them as a party appetizer with honey mustard dipping sauce and nothing else — and they disappears quickly.
My rolls came out soft on top instead of crispy — what happened?
Several things could have gone wrong, for example: if you covered the dish when baking (don’t do that, you should leave it uncovered); if you didn’t put enough butter on the tops; or if your oven runs cold, it may need more time. Also, do not pull them out if the tops are only warm and pale; they should be visibly golden.
Can I bake these in a slow cooker?
Sure, that’s a possibility, but you won’t get the delicious crunchy top that makes this particular recipe worth doing. What you get from the slow cooker are just warm soft rolls. And while that’s fine, it’s not the same. However, if you’re looking for a more hands-off approach, and you need something for a party, you can definitely bake these, and then for the duration of the party, set the slow cooker to ‘keep warm’ and it will hold them for you.
How do I know the cheese is melted all the way through?
You will likely melt American cheese in around 20 minutes, and that’s only if your oven is set to 350° F. That kind of cheese is known to melt rather quickly. If you’re aiming to melt Swiss or provolone cheese, which are known to melt a bit slower, you may want to adjust your time to about 22 to 24 minutes instead. A good way to determine if cheese has melted is to press your finger on the top roll in the center. If the roll feels firm and does not adjust, it’s likely that the cheese is unmelted and you may want to add time. If the roll gives, the cheese has likely melted.
Related Recipes