Leftover Halloween Candy Recipes: Candy Brownie Dessert
Every year, the candy bowl ends up with the same problem: too much left over, and nobody actually wants to eat it piece by piece once November hits. It sits in a bowl on the counter, getting ignored until someone finally throws it away.
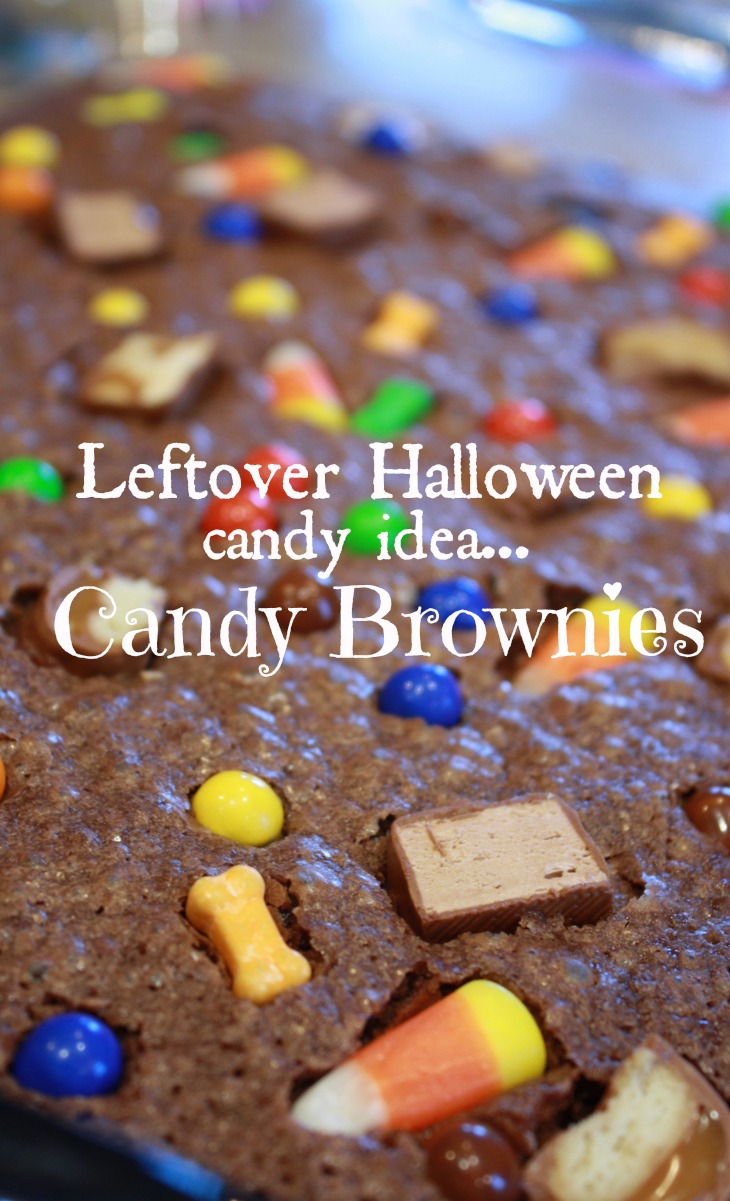
This candy brownie recipe is the answer. You chop it up, fold it into a simple fudgy brownie batter, and bake it into something that disappears faster than the candy ever would have on its own.
These are not fancy brownies. They are the kind you make on a weeknight with a bowl and a wooden spoon, and they turn out better than anything from a mix.
The candy adds pockets of caramel, peanut butter, crispy wafer, or chocolate depending on what you have — and every pan comes out a little different. That is the point.
Why This Sweet Recipe Works
Most brownie recipes call for specific mix-ins — chocolate chips, nuts, a certain kind of candy. This one is built to be flexible.
The base batter is rich and fudgy on its own, which means it can handle a wide variety of candy additions without the texture falling apart. Whether you throw in chopped Snickers, broken Kit Kats, M&Ms, Reese’s Cups, Milky Ways, or a combination of all of them, the batter holds everything together and bakes into a dense, chewy bar.
The fat-to-flour ratio here leans higher than a cakey brownie, which keeps the crumb tight and fudgy even with all the extra candy mixed in. If you use candy bars with caramel (Snickers, Milky Way, Twix), you’ll get ribbons of gooey caramel running through the bars.
If you use Reese’s, you get soft pockets of peanut butter. Kit Kats add a little crunch to an otherwise soft texture.
There is no wrong combination.
One honest note: candy with a lot of caramel can make the brownies stickier and harder to cut cleanly. If you want neat bars, let them cool completely — at least two hours — before cutting.
If you cut them warm, they will be delicious and messy. Both are fine depending on what you’re going for.
What You Need to Know Before You Start
This recipe does not require a mixer. A large bowl, a whisk or wooden spoon, and a standard 9×13 baking pan are all you need.
If you want thicker brownies, use an 8×8 or 9×9 pan and add about 10 minutes to the bake time.
The candy should be chopped into rough pieces — not powder, not huge chunks. Aim for pieces about the size of a chocolate chip or slightly larger.
If you leave candy too large, it can create uneven spots in the brownie that don’t bake through properly.
Do not overmix once you add the flour. Overmixing develops gluten and makes brownies cakey and tough instead of fudgy.
Stir until the flour is just incorporated and stop there.
Use parchment paper in your pan if you want to lift the brownies out cleanly for cutting. A well-greased pan works too, but parchment makes everything easier.
Precut parchment sheets are genuinely one of those kitchen products worth keeping on hand — they fit standard pans and save a lot of fussing.
Ingredients
For the Brownie Batter
- 1 cup (2 sticks) unsalted butter
- 2 cups granulated sugar
- 4 large eggs
- 2 teaspoons vanilla extract
- 1 cup all-purpose flour
- ¾ cup unsweetened cocoa powder
- ½ teaspoon salt
- ½ teaspoon baking powder
For the Mix-Ins
- 2 to 2½ cups chopped Halloween candy (any combination — see notes below)
- Optional: ½ cup semi-sweet chocolate chips (adds extra chocolate depth)
Candy Combination Ideas
Use whatever you have. Here are combinations that work especially well:
- All chocolate bars: Snickers + Milky Way + 3 Musketeers — rich, caramelly, very fudgy
- Peanut butter heavy: Reese’s Cups + Reese’s Pieces + Butterfingers — nutty and dense
- Crunchy mix: Kit Kats + Butterfingers + M&Ms — some texture contrast in an otherwise soft brownie
- Everything bowl: Whatever is left — mixed candy works just as well as a curated combination
Avoid: gummy candy, hard candy, anything with a strong mint flavor (York Peppermint Patties will make the whole batch taste like mint), and candy with wrappers still on. Check your pieces before chopping.
How to Make Halloween Candy Brownies
Step 1: Prep Your Pan and Oven
Preheat your oven to 350°F. Line a 9×13 inch baking pan with parchment paper, leaving enough overhang on the sides to lift the brownies out after baking.
Alternatively, grease the pan generously with butter or non-stick spray. Set aside.
Step 2: Melt the Butter
In a large microwave-safe bowl, melt the butter in 30-second increments, stirring between each, until fully melted. You can also do this in a saucepan on the stovetop over low heat.
Let the melted butter cool for about 5 minutes — you don’t want it hot enough to scramble the eggs when you add them.
Step 3: Mix Wet Ingredients
Add the sugar to the melted butter and whisk until combined. The mixture will look grainy — that is normal.
Add the eggs one at a time, whisking after each addition. Add the vanilla and whisk until the batter is smooth and slightly glossy.
A good-quality balloon whisk makes this step faster and easier than a fork.
Step 4: Add Dry Ingredients
Sift the cocoa powder, flour, salt, and baking powder directly into the bowl. Stir with a wooden spoon or rubber spatula until just combined — stop as soon as you no longer see dry streaks of flour.
Do not overmix.
Step 5: Fold In the Candy
Reserve about ¼ cup of the chopped candy to press onto the top. Fold the remaining candy into the batter with a few gentle strokes.
The batter will be thick — that is correct.
Step 6: Bake
Spread the batter into the prepared pan. It will be thick and may need some coaxing to reach the corners — use an offset spatula or the back of a spoon.
Press the reserved candy pieces onto the top of the batter. Bake at 350°F for 28 to 34 minutes, until a toothpick inserted in the center comes out with moist crumbs (not wet batter).
The edges will look set; the center may look slightly underdone — it firms up as it cools.
Step 7: Cool and Cut
Let the brownies cool in the pan for at least 30 minutes before attempting to lift them out. For clean cuts, cool completely (1–2 hours) before slicing.
Use a sharp knife and wipe it between cuts for the neatest edges.
Tips for Better Results
Use Room-Temperature Eggs
Cold eggs can cause the melted butter to seize slightly, making the batter look broken or lumpy. Set your eggs out for 20–30 minutes before baking, or do a quick warm-up by placing them (in the shell) in a bowl of warm water for 5 minutes.
Don’t Skip the Cooling Time
Fudgy brownies need time to set after baking. Cutting into them too early gives you a gooey mess that falls apart.
If you are making these to serve at a party or bring somewhere, bake them the night before and refrigerate overnight — they cut cleanly and the texture is even better cold.
Make Brownie Bites Instead
For a party-friendly presentation, use a mini muffin tin instead of a baking pan. Grease the tin well, fill each cup about ⅔ full, press a small piece of candy on top, and bake at 350°F for 12–15 minutes.
You get individual brownie bites that are easy to pick up and serve. This is also a great option for kids’ parties where everyone wants their own piece without sharing a cut pan.
Check Candy for Wrappers
It sounds obvious, but when you are working fast and chopping through a pile of Halloween candy, it is easy to miss a wrapper. Go through your candy before you chop it.
Stray wrappers in the batter are not fun to find.
Adjust Sweetness Based on Candy Type
If your candy is very sweet (mostly milk chocolate, caramel-heavy bars), you can reduce the sugar in the batter by ¼ cup without affecting the texture noticeably. If you are using darker chocolate candy or more bittersweet mix-ins, keep the full amount of sugar.
The Right Pan Makes a Difference
Light-colored aluminum pans bake brownies more evenly than dark pans, which can cause over-browning on the edges before the center is done. If you only have a dark pan, check them 5 minutes earlier than the recipe suggests.
A good 9×13 aluminum baking pan is one of those workhorses worth having in your kitchen — it is what most professional bakers use for brownies.
How to Store Halloween Candy Brownies
Room Temperature
Store in an airtight container at room temperature for up to 4 days. Layer them with parchment paper if stacking so the tops don’t stick together.
A good airtight storage container keeps them from drying out faster than they should.
Refrigerator
Refrigerated brownies last up to a week. The texture gets firmer and denser when cold — some people prefer this.
Let them sit at room temperature for 10–15 minutes before eating if you want them closer to room-temperature texture.
Freezer
Brownies freeze well. Cut into individual bars, wrap each one in plastic wrap, and place in a freezer bag or container.
Freeze for up to 3 months. Thaw at room temperature for 30–60 minutes, or microwave for 20–30 seconds if you want them warm.
Frequently Asked Questions
Can I use any type of Halloween candy in this recipe?
Chocolate-based candy works best — Snickers, Reese’s, Kit Kats, M&Ms, Milky Way, 3 Musketeers, Butterfingers, Twix, Baby Ruth. Avoid gummy candy, hard candy, anything with a strong mint flavor, and candy like Skittles or Starburst, which are fruit-based and don’t bake well in brownies.
When in doubt, if it is chocolate, it works.
How much candy should I use?
2 to 2½ cups of chopped candy is the right range for a 9×13 pan. Less than that and you lose the candy impact; more than that and the batter has trouble holding together.
If you have a lot of candy to use up, you can push it to 3 cups, but the brownies will be stickier and harder to cut cleanly.
Can I make these from a boxed brownie mix?
Yes. If you want to shortcut the batter, use your favorite boxed brownie mix prepared according to package directions, then fold in the chopped candy before baking.
The from-scratch batter in this recipe produces a denser, richer result, but a boxed mix works in a pinch and comes together faster.
My brownies came out cakey instead of fudgy. What went wrong?
A few things cause cakey brownies: too much flour (measure by spooning into the measuring cup and leveling, not scooping), overmixing after adding the flour, or baking too long. Fudgy brownies should come out of the oven looking slightly underdone in the very center.
They firm up as they cool. Trust the toothpick with moist crumbs — not clean, moist crumbs — and pull them at that point.
Can I make these gluten-free?
You can substitute a 1:1 gluten-free flour blend for the all-purpose flour. The texture may be slightly different — a little more dense or crumbly depending on the blend — but it works.
Also check your candy: some candy bars contain gluten in the cookie or wafer layers (Kit Kats are not gluten-free, for example). Read labels if gluten-free is a requirement.
Can I double the recipe?
Yes. Double everything and bake in two 9×13 pans.
Do not try to bake a doubled batch in one pan — it will be too thick to cook through without overbaking the edges. Bake time stays the same when using two separate pans.
How do I know when they are done?
Insert a toothpick into the center of the pan. For fudgy brownies, it should come out with moist, fudgy crumbs clinging to it — not wet batter, but not clean either.
The edges will look set and the center will look slightly soft. That is exactly where you want them.
Pull them out and let the carryover heat finish the job while they cool in the pan.
Recipe Card
Related Recipes
If you liked these Halloween candy brownies, here are a few more ways to use up extra candy or satisfy a chocolate craving:
- Halloween Candy Cookies — same concept, cookie format, great for bake sales
- Chocolate Fudge — a no-bake option when you want something fast
- Peanut Butter Bars — if you have a lot of Reese’s to use up, these are the move
- Chocolate Bark — the fastest leftover candy recipe, no baking required
Halloween Candy Brownies
Ingredients
- 1 cup unsalted butter melted
- 2 cups granulated sugar
- 4 large eggs room temperature
- 2 teaspoons vanilla extract
- 1 cup all-purpose flour
- 3/4 cup unsweetened cocoa powder
- 1/2 teaspoon salt
- 1/2 teaspoon baking powder
- 2 to 2 1/2 cups chopped chocolate-based Halloween candy
Instructions
- Preheat oven to 350°F. Line a 9×13 pan with parchment or grease well.
- Melt butter and let cool 5 minutes.
- Whisk sugar into melted butter until combined.
- Add eggs one at a time, whisking after each. Add vanilla and whisk until smooth and glossy.
- Sift in flour, cocoa powder, salt, and baking powder. Stir just until combined.
- Reserve 1/4 cup chopped candy for the top and fold remaining candy into the batter.
- Spread batter into prepared pan and sprinkle reserved candy over the top.
- Bake about 30 minutes, until edges are set and center is just done.
- Cool completely before cutting for clean bars.