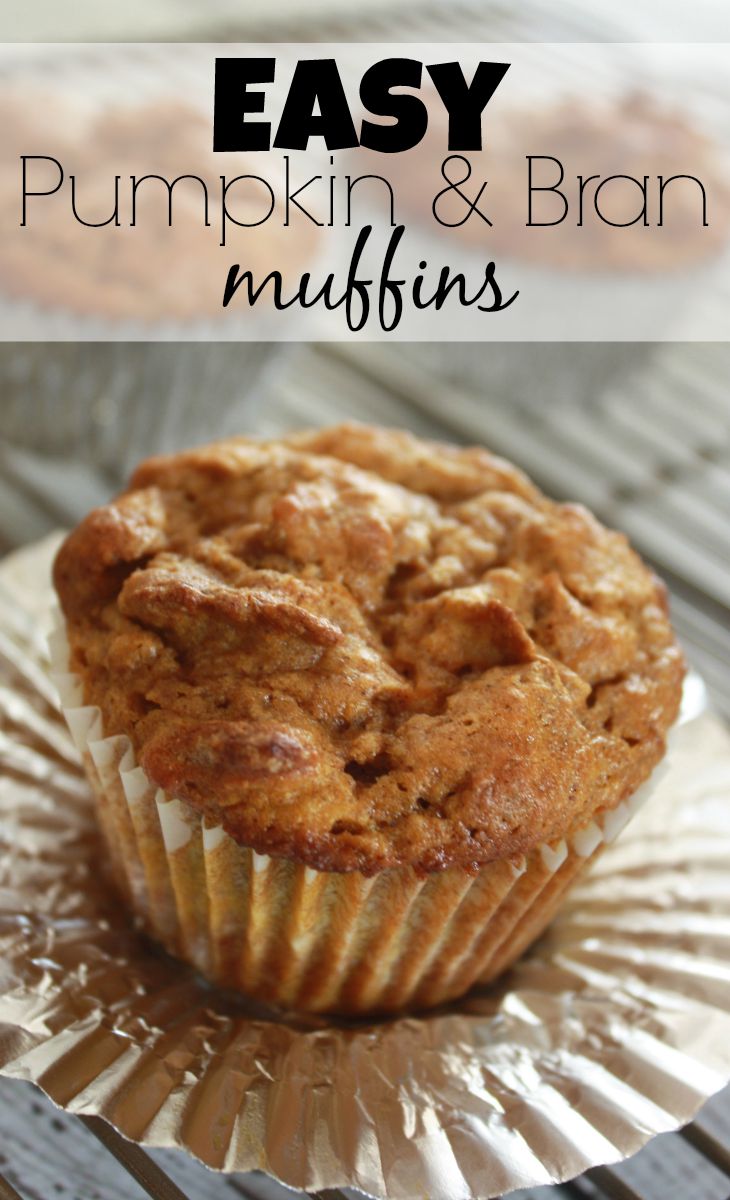
Pumpkin Bran Muffins
These muffins are so easy to make! They are made in one bowl and no mixer is needed, just dump all the ingredients in, stir, and then bake! The Raisin Bran adds fiber, sweetness, and structure to the muffins so you don’t have to stress about adding a lot of other ingredients. The pumpkin in the muffins provides moisture but won’t make them dense. The yogurt adds a nice tang flavor which helps gives the muffins a nice texture. You get a muffins that hold together, tastes amazing, and won’t make you feel like you are eating a lot of heavy ingredients.
I’ve prepared these in the morning on days where I’m super busy and tossed them into the lunch box. They held up for both purposes. If you’re living with someone who doesn’t like bran, make sure you don’t tell them what’s in the cookies. That’s what I did on my experiment and it paid off.
What Makes This One Worth Making
- One bowl, no mixer. Everything goes in together — dry ingredients first, then wet. You stir until just combined and that’s genuinely all it takes.
- Raisin Bran is doing real work here. It adds fiber, natural sweetness from the raisins already in the cereal, and absorbs moisture so the muffins don’t get gummy.
- Canned pumpkin keeps them moist for days. Unlike muffins made with only oil or butter, the pumpkin puree holds moisture through day two and three without turning gluey.
- Whole wheat flour adds substance without heaviness. These muffins have a hearty texture that holds up as an actual breakfast rather than dissolving the way lighter muffins do.
- Plain yogurt adds lift and tang. The acidity reacts with the baking soda and helps the muffins rise without the need for buttermilk or sour cream.
- The raisins in the cereal mean you don’t need to measure separately. The Raisin Bran already comes with raisins throughout — plus you add a full cup more, so every bite has fruit.
What to Know Before You Start
This is a simple recipe, but a couple of things can mean the difference between muffins you’ll want to make again and muffins that are just okay.
Don’t stir too much. That’s the main advice here. Once the wet ingredients are added to the dry ones, mix it until you can’t see dry flour anymore, and stop. If you mix too much, gluten is developed and the muffins will be tough. It’s okay for the batter to have a few lumps.
When buying canned pumpkin, make sure to get plain pumpkin, not pumpkin pie filling. Pumpkin pie filling has added sugar and spices which will disrupt the flavor and sweetness of these muffins. Instead it should say 100% pure pumpkin and only have one ingredient listed.
Your yogurt should be a plain variety. Vanilla yogurt can be used if you have it on hand, but plain yogurt is better as it provides moisture and a slight tang which can lower your sweetness level. Greek yogurt is okay too, it just makes your batter a little thicker.
Either put paper liners in the muffin tins or grease them. Muffin batters with whole wheat tend to stick to the tins and paper liners more than those made with all-purpose flour.
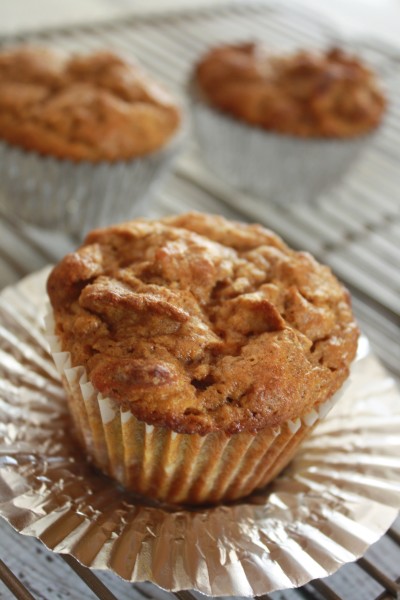
Check at 20 minutes. Every oven is different. The goal is to bake them for 25 minutes at 400°F, but check them at 20. A muffin is ready when the top is firm (you can gently touch the top to check) or when the toothpick comes out clean after inserting it into the middle.
Ingredients
Each ingredient is important, and here is what goes into the muffins:
- 1½ cups Raisin Bran cereal — The base of the muffin. The bran flakes soften in the batter and the raisins throughout add natural sweetness. Don’t substitute plain bran cereal without also adding raisins and a touch more sugar.
- ¾ cup whole wheat flour — Gives the muffins a hearty bite. You can use all-purpose flour if that’s what you have, but you’ll lose some of the nutty depth and fiber.
- ¾ cup sugar — The Raisin Bran adds some sweetness on its own, so this amount hits a balance that isn’t dessert-sweet but still satisfying.
- 1½ tsp cinnamon — Pairs with pumpkin the way you’d expect. Don’t skip it or reduce it; it’s doing flavor work.
- 1 tsp baking powder + 1 tsp baking soda — Both are needed. The baking soda reacts with the yogurt and pumpkin (both slightly acidic); the baking powder provides extra lift.
- ½ tsp salt — Rounds out the flavor. Don’t omit it.
- 1 cup raisins — Beyond what’s already in the cereal, this ensures raisins in every muffin. If you’re not a raisin person, you can swap in dried cranberries or just leave them out entirely.
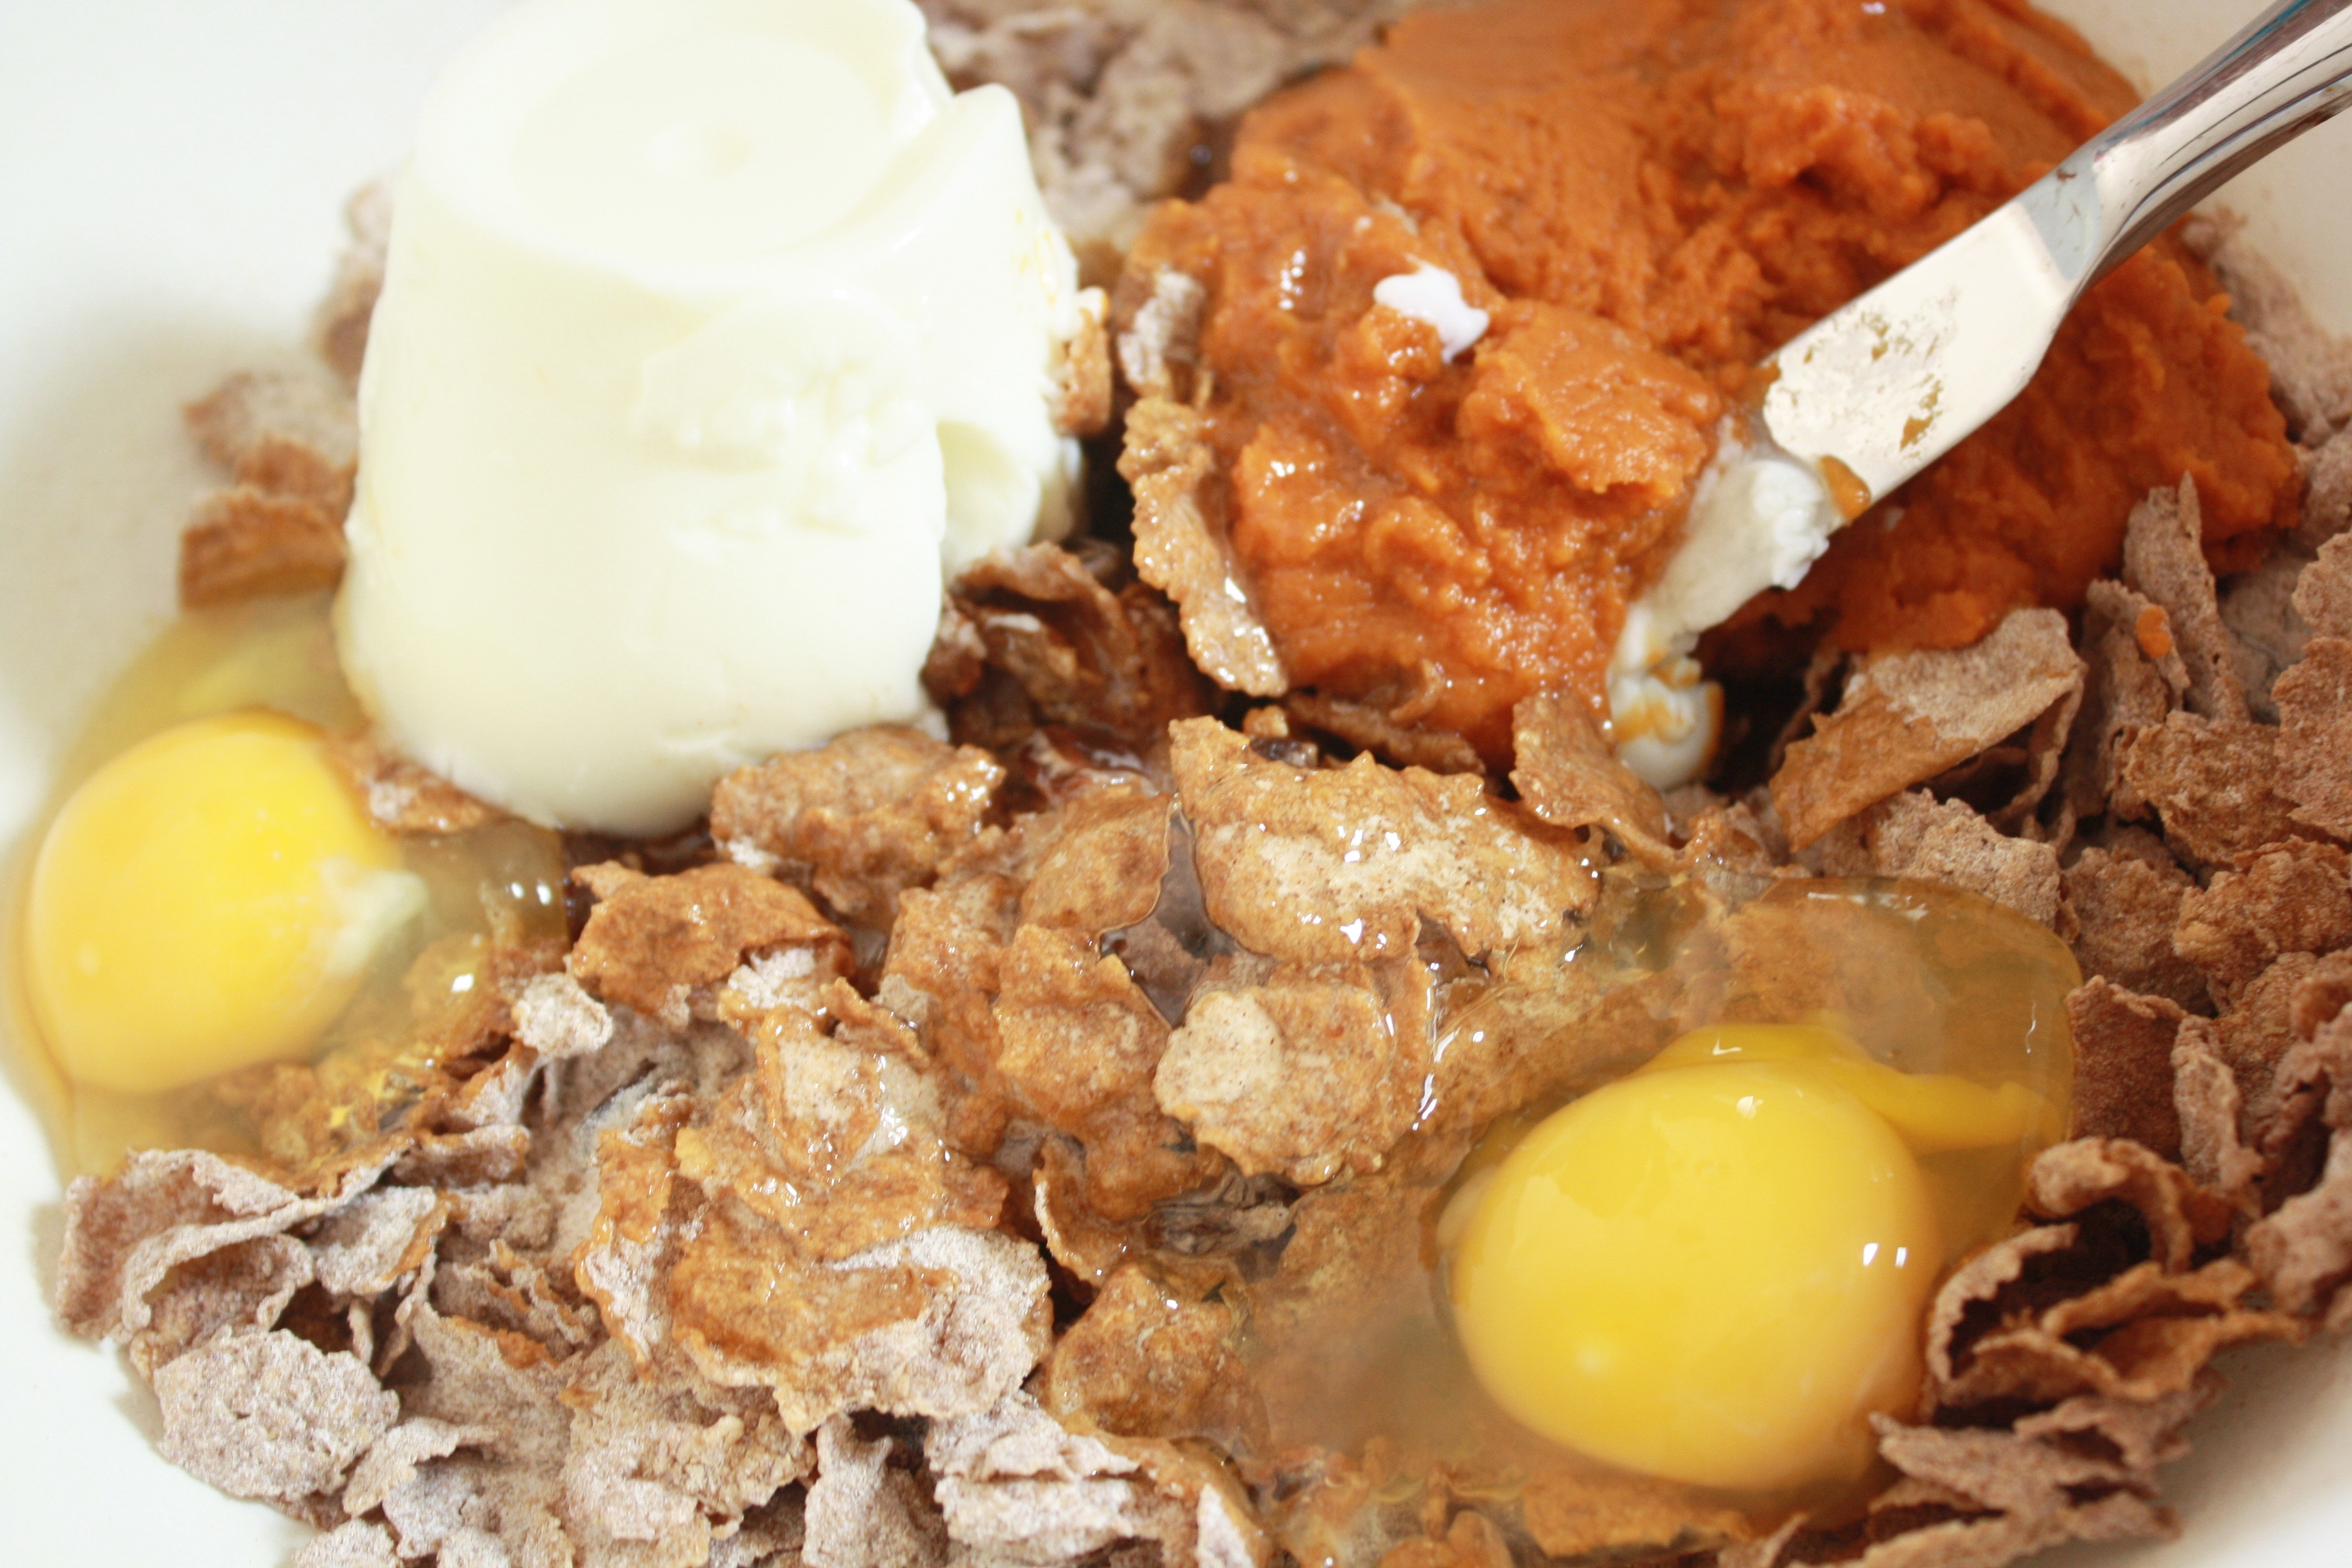
- 1 cup canned pumpkin — Not the whole 15 oz. can. Measure it out. What you don’t use keeps in the fridge for about a week in a covered container.
- 2 eggs — Bind the batter and help the muffins set up with structure.
- ¼ cup vegetable oil — Keeps the muffins tender. You could substitute melted coconut oil if you want a faint coconut flavor, but neutral vegetable oil is the right call here.
- ⅔ cup plain yogurt — The moisture and lift ingredient. Full-fat or low-fat both work. Avoid non-fat if you can — it can make the texture a bit rubbery.
How to Make Pumpkin Bran Muffins
Step 1: Preheat your oven to 400°F and prepare your pan. While your oven heats, get prep your muffin pan by either lining it with muffin liners or greasing each cup with cooking spray.
Step 2: Mix the dry ingredients. In a big bowl, put in the Raisin Bran, whole wheat flour, sugar, cinnamon, baking powder, baking soda, salt, and raisins. Blend all of these things together until the cereal is covered and the spices are well mixed. At this stage, the bowl should smell like fall — cinnamon in dry ingredients smells better than when it’s mixed into a wet batter.
Step 3: Mix the wet ingredients. Put the canned pumpkin, eggs, vegetable oil, and plain yogurt directly into the bowl with the dry ingredients. You do not need to wash another bowl for the wet ingredients — just throw them in here.
Step 4: Mix until combined. Use a spatula or a large spoon to fold everything together. Mix until there are no more dry pockets of flour or yogurt, and then stop. The batter will appear thick and a bit coarse. That’s right, it won’t be smooth and silky, and it shouldn’t be.
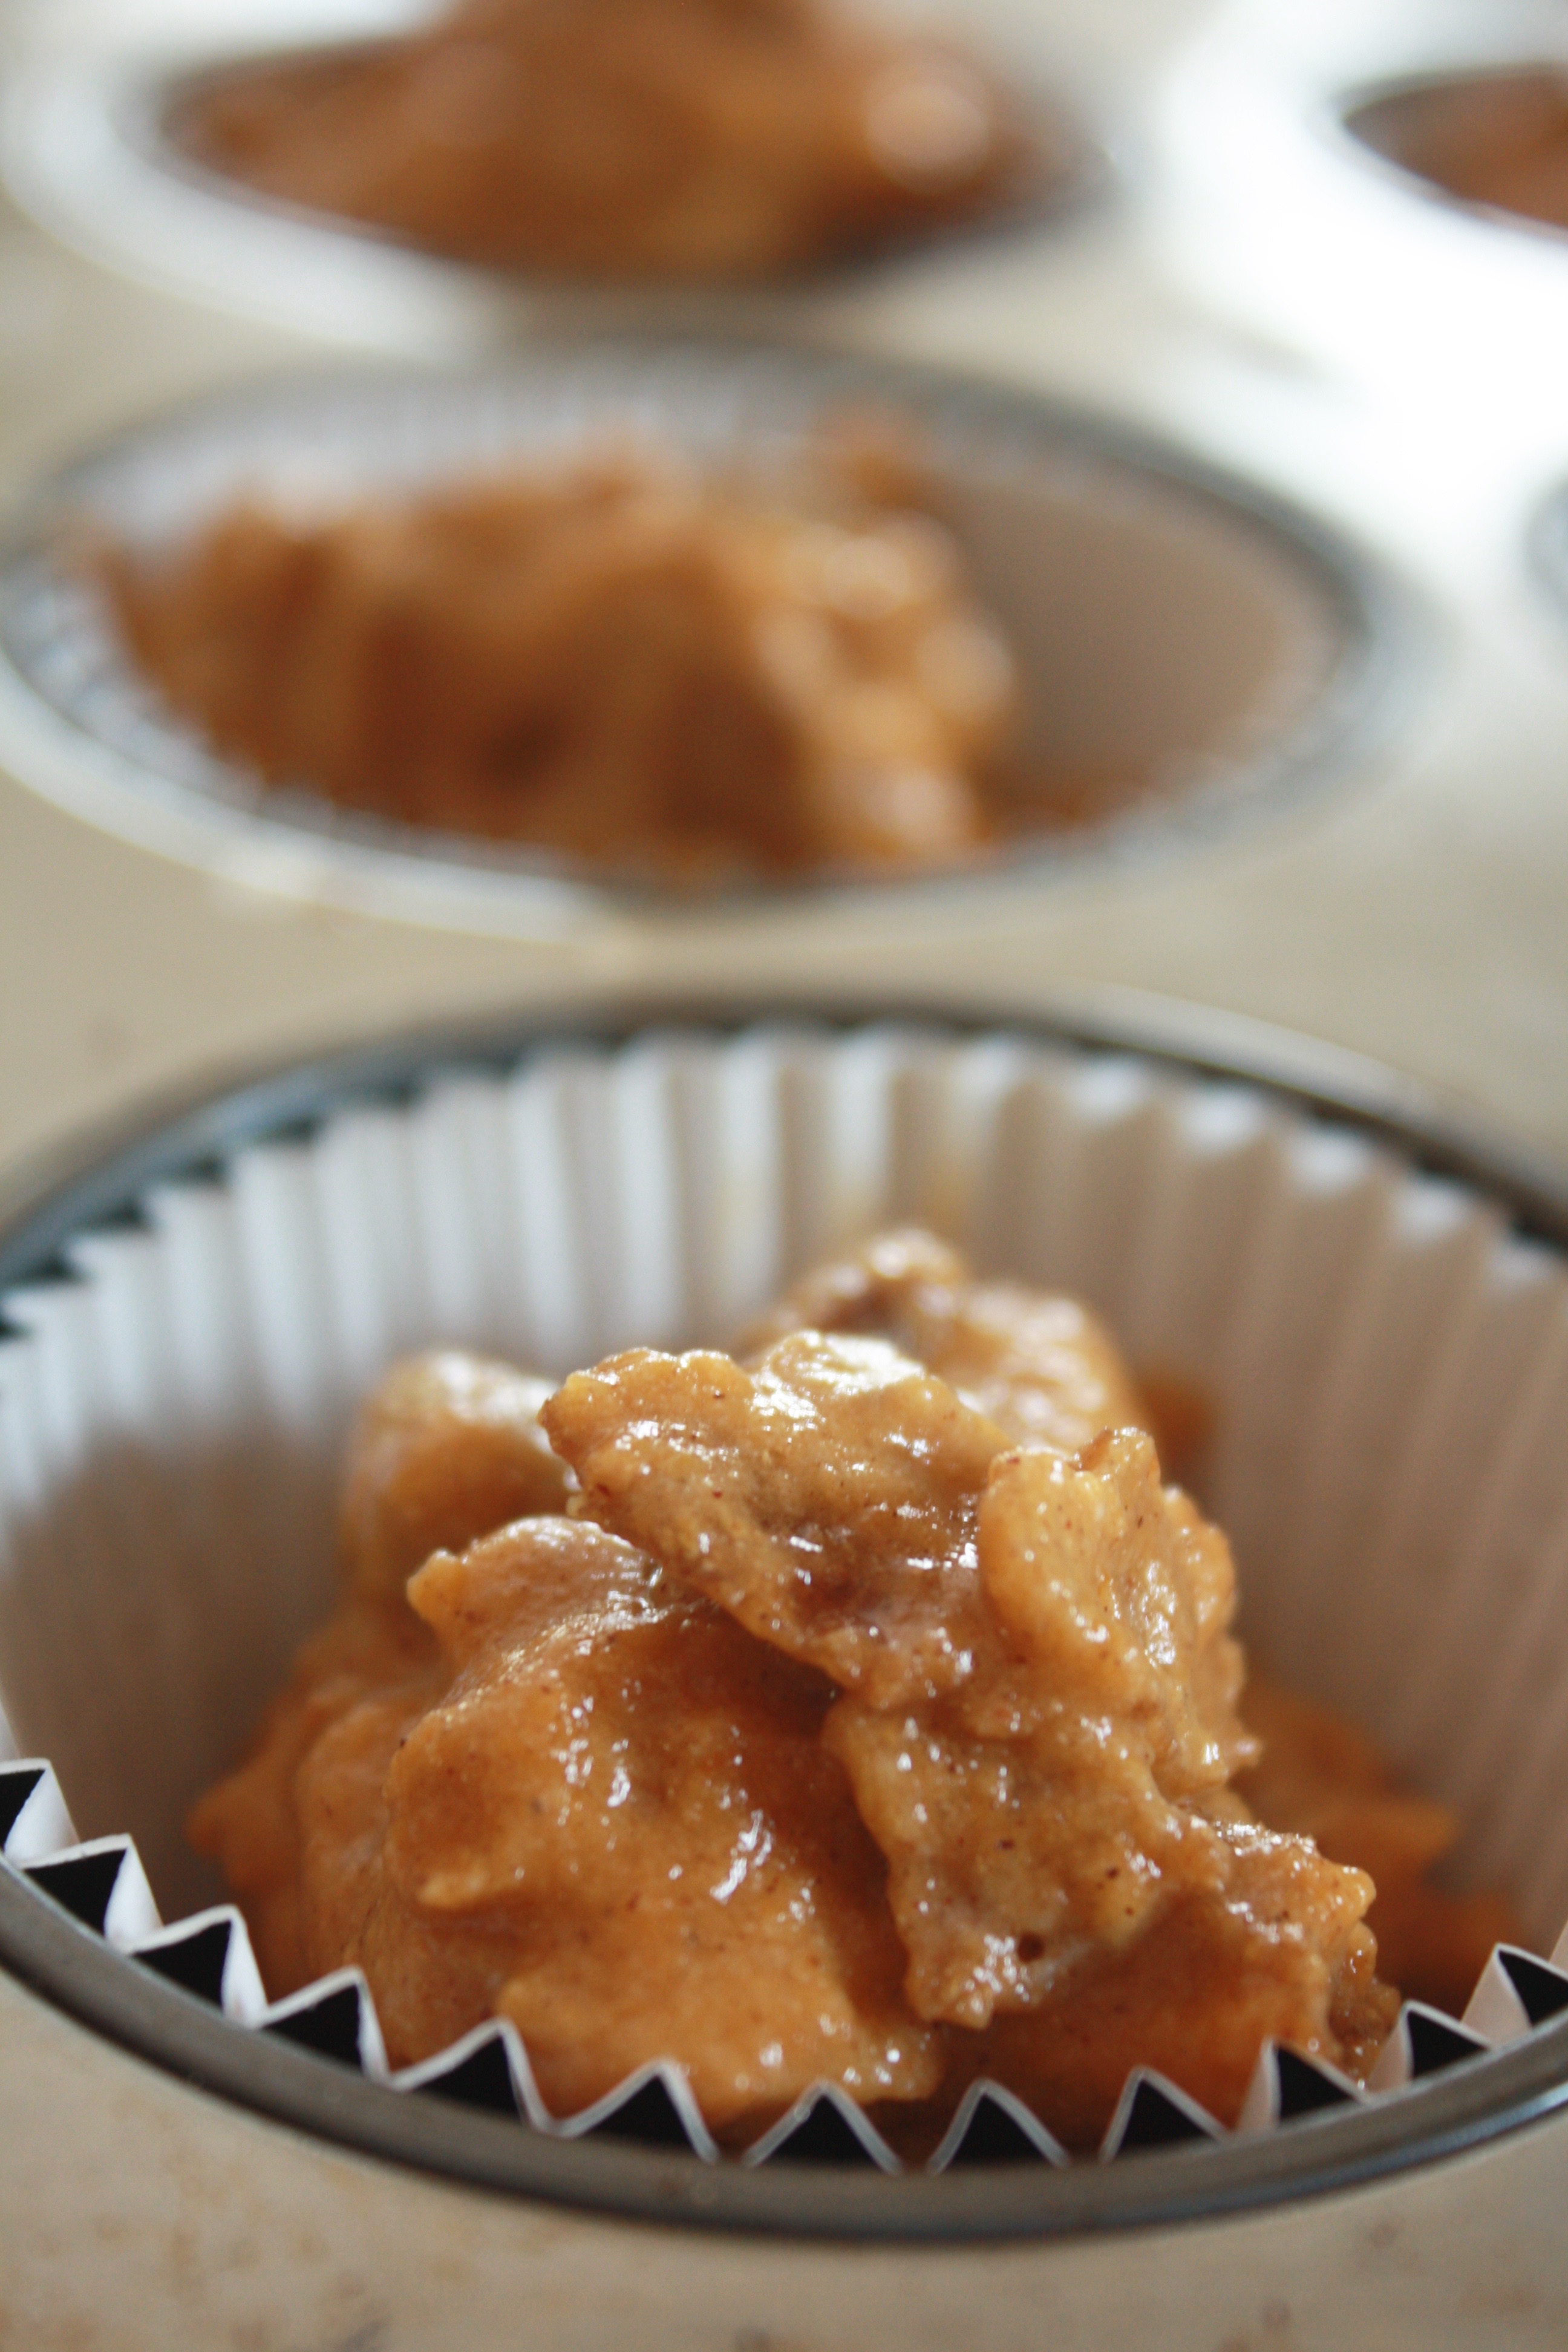
Step 5: Fill the muffin cups. Spoon the batter into the prepared muffin tin. Each muffin cup should be filled to about ¾ full. If you have one, a cookie scoop would work well here since the batter is thick, and it would keep the portions even and cut down on mess.
Step 6: Bake. Put your tray in the oven, and bake your brownies for 20-25 minutes. You should start checking them at the 20-minute mark, and the tops should look muted instead of shiny or wet, and should feel firm when pressed in the center. If you use a toothpick, there should be no wet batter. Your brownie should come out clean or with a few wet crumbs.
Allow to cool before eating. The muffins need to sit in the pan for 5 minutes, and then you can transfer them to a wire rack. They will become more solid as they cool. If you eat them right out of the oven they may be a bit delicate; if you let them sit for 10 minutes on the rack, they will become more solid and hold themselves together.
Helpful Tips
- Use a cookie scoop to fill the cups. A standard 3-tablespoon scoop fills each cup evenly without making a mess. It also means your muffins bake more evenly because they’re the same size.
- Don’t flatten the tops before baking. The batter is thick and won’t spread much on its own. What you see in the cup is roughly what you’ll get — so mound it slightly if you want a domed top.
- If the tops are browning before the centers are set, tent loosely with foil. This is more common in darker pans or if your oven runs hot. A piece of foil laid over the pan (not pressed down) slows the browning without trapping steam.
- You can add mix-ins. Chopped walnuts or pecans work well if you want some crunch. Chocolate chips are not out of place here either, though it takes these muffins in a different direction. Stick to about ½ cup total of any add-ins so the batter doesn’t get overloaded.
- Adjust the spice if you want more warmth. The 1½ tsp cinnamon is a starting point. If you want a fuller pumpkin spice profile, add ¼ tsp nutmeg and a pinch of ground cloves. It’s a nice variation in fall.
- Mini muffins work. Fill a mini muffin tin about ¾ full and reduce the bake time to 12–15 minutes. Same doneness test applies — firm top, clean toothpick.
Storage, Make-Ahead, and Leftovers
Room temperature: Cooled muffins can be stored for 3 days in an airtight container at room temperature. To keep the bottoms from getting soggy you can place a paper towel in the bottom of the container to absorb moisture.
Refrigerator: They’ll stay good in the fridge for 5 days. Muffins that have been cooled are denser than ones that are warm. You’ll want to let them sit on the counter for 20-30 minutes or 15 seconds in the microwave.
Freezer: These freeze well. Let them cool completely, then wrap individually in plastic wrap and store in a zip-top bag or airtight container for up to 3 months. To defrost, keep in the fridge overnight or at room temperature for a few hours. You can also defrost in the microwave – about 45 seconds to 1 minute on 50% power. It works without drying them out.
Make-ahead: You can combine the dry ingredients the night before and keep them in a covered container on the counter. In the morning, add the wet ingredients, stir, and bake. That way, you only spend 10 minutes in the morning.
Double Batch: This recipe is easily doubled. Use two muffin tins on separate racks and if your oven has hot spots, rotate racks mid bake.
Variations
No raisins: For people who don’t like raisins, you can leave out the extra cup of raisins the recipe calls for. Don’t worry, there will still be raisins in the Raisin Bran cereal. You can also use dried cranberries.
Nut topping: Prior to baking, place a few chopped walnuts or pecans on top of each of the muffins. While the muffins bake, they will toast and provide a slight crunch in each bite.
Reduced sugar: Dropping sugar to ½ cup will still leave you with muffins that taste like muffins and not health food bricks. Raisin Bran has sugar already, plus the raisins add sweetness. Going under ½ cup will start to negatively affect the texture and flavor too.
Dairy-free: You can use a dairy-free plain yogurt (coconut or oat-based) in the same amount. Their texture is almost the same. Use a yogurt that is unsweetened and does not have vanilla flavor.
Pumpkin pie spice instead of cinnamon: You can go ahead and make a straight 1:1 swap here — it’s 1½ tsp pumpkin pie spice for the cinnamon. You get the full warm spice blend (cinnamon, ginger, nutmeg, clove) without measuring each one yourself.
FAQ
Can I use fresh pumpkin instead of canned?
Yes, the moisture content of fresh pumpkin puree will vary based on how drained the puree is. That is why baked recipes recommend using canned pumpkin. If using fresh pumpkin, ensure you have cooked it down and drained it well. Watery fresh pumpkin will throw off the batter and lead to muffins not setting correctly.
Why did my muffins come out gummy in the middle?
Two probable reasons could be, underbaking, or overmixing. Most likely, it’s underbaking: the tops may appear done but the centers are still gooey. The best way to check done-ness is the toothpick test, or press the center and it should bounce back firm. Overmixing can also create a dense, gummy texture because it develops the gluten in the flour and prevents the muffins from setting up to have an open crumb.
Can I substitute the whole wheat flour with all-purpose?
Yes, 1:1 substitution is fine, but the muffins will be slightly lighter in texture and heave a less nutty flavor profile. However, they will bake teh same. If you want to compromise, use half whole wheat with half all-purpose. You get a lot of the flavor and fiber without the dense texture that some people consider too hearty.
Do these actually taste like Raisin Bran?
You probably wouldn’t expect this from a bowl of cereal. But as the muffin bakes, the cereal completely softens and integrates into the muffin’s texture. Most toned down flavor in the final muffin is the whole grain one and the raisins are pommel throughout. The most dominating flavor is the pumpkin and the cinnamon. Most of the critics of bran going in are usually pretty surprised coming out.
Can I make these without eggs?
You could try using a flax egg (1 tablespoon grounded flaxseeds + 3 tablespoons of water per egg; let sit for 5 min before using). The pumpkin adds moisture and some binding, so the flax eggs work fairly well in this recipe. The texture will be a little bit denser, and the muffins may need an extra 1-2 minutes in the oven.
What if I only have flavored yogurt?
Vanilla yogurt is the best option because vanilla goes best with pumpkin and cinnamon. Don’t use a yogurt with fruit at the bottom. The yogurt may compete in a way we can’t anticipate. If you don’t have yogurt at all, you may use sour cream in the same amount as a direct substitute.

Pumpkin Bran Muffins
Ingredients
- 1 1/2 cups Raisin Bran cereal
- 3/4 cup whole wheat flour
- 3/4 cup sugar
- 1 1/2 teaspoons cinnamon
- 1 teaspoon baking powder
- 1 teaspoon baking soda
- 1/2 teaspoon salt
- 1 cup raisins
- 1 cup canned pumpkin plain pumpkin puree, not pumpkin pie filling
- 2 eggs
- 1/4 cup vegetable oil
- 2/3 cup plain yogurt
Instructions
- Heat the oven to 400°F. Line a standard 12-cup muffin tin with paper liners, or grease each cup well with cooking spray. Set the pan aside.
- In a large bowl, add the Raisin Bran, whole wheat flour, sugar, cinnamon, baking powder, baking soda, salt, and raisins. Toss until the cereal is coated and the spices are evenly distributed.
- Add the canned pumpkin, eggs, vegetable oil, and plain yogurt directly to the bowl with the dry ingredients. A separate wet-ingredient bowl is not needed.
- Use a spatula or large spoon to fold the batter together until no dry flour or pockets of yogurt remain. Stop as soon as it is combined. The batter should look thick and a little rough.
- Spoon the batter into the prepared muffin tin, filling each cup about three-quarters full. A cookie scoop works well for even portions.
- Bake for 20 to 25 minutes. Start checking at 20 minutes. The tops should look matte and feel firm when lightly pressed, and a toothpick inserted in the center should come out clean or with a few moist crumbs.
- Let the muffins cool in the pan for about 5 minutes, then move them to a wire rack. Let them cool another 10 minutes if you want them to hold together cleanly.