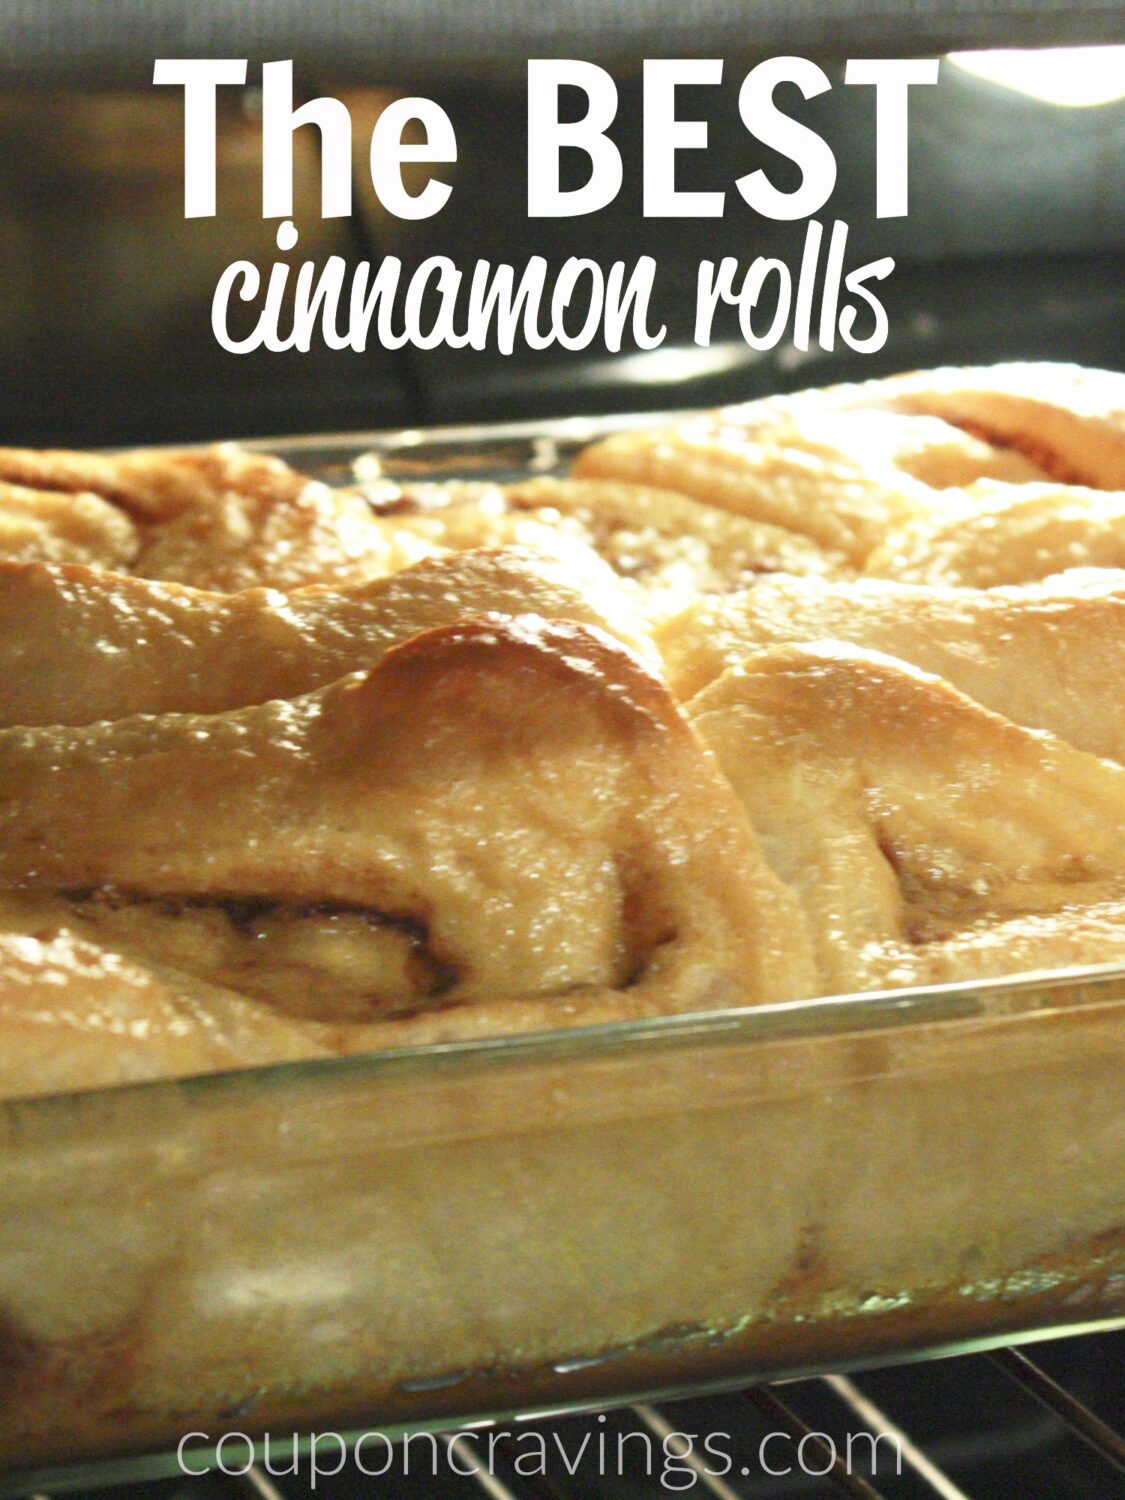
My son Drew has been requesting these cinnamon rolls since he was in kindergarten. I made them the morning I sent him off for his first day of school, and somewhere between then and now they became the official special-occasion breakfast in our house. First day of school, Christmas morning, a random Saturday when someone just needs something warm to look forward to — these are the rolls. Twelve years of the same recipe, not a single tweak, because nothing about it needed to change.
Here’s the method: you start the night before. Make a quick caramel sauce on the stove, pour it over frozen Rhodes cinnamon rolls arranged in a baking dish, then slide the whole thing into the oven — completely off — and go to bed. The rolls thaw and rise slowly while you sleep. In the morning, you don’t even take them out. Just turn the oven on to 350°F and let them bake from cold. About 25 minutes later, you have a pan of deep golden, caramel-soaked cinnamon rolls that look like you were up before dawn doing something complicated. You weren’t. Five ingredients. Zero morning stress. One genuinely great breakfast.
The caramel sauce is what separates this from every other frozen-roll hack on the internet. It’s made with butter, two kinds of sugar, and vanilla ice cream — and it’s the reason these rolls taste like something from an actual bakery instead of something from the freezer section. The ice cream sounds unusual. It’s not. It melts into the butter and sugar and creates a silky, slightly vanilla-forward caramel that soaks into the rolls overnight. Every bite is gooey from the inside, not just sticky on top.
Why This Recipe Works
I’ve been making this recipe for over a decade, and I’ve thought a lot about why it works so consistently. It’s not magic — it’s a few smart techniques stacked on top of each other, and once you understand why each step matters, you’ll never second-guess it again.
The caramel isn’t optional — it’s the whole point
Vanilla ice cream melted into butter and sugar makes a caramel that behaves differently than one made with cream. The ice cream adds both fat and a light vanilla undertone, and the result is a sauce that thickens beautifully when cold without going rock-hard. When you pour it over frozen rolls and let them sit overnight, the caramel slowly seeps into every layer of the spiral. By morning, it’s not sitting on top of the roll — it’s woven through it. That’s the difference between a roll that tastes caramel-coated and one that tastes caramel-infused all the way to the center.
The overnight cold oven rise is deliberate
Putting frozen yeast rolls in a cold, enclosed oven overnight gives them a slow, protected environment to thaw and rise. The oven walls keep the temperature stable and shield the dough from drafts or sudden temperature swings that can cause uneven rising. No alarm at 5 a.m. No guessing when they’ve risen enough. You set it up before bed and they do the work on their own timeline. Eight to ten hours is the window, and it works reliably as long as your kitchen isn’t below about 65°F.
The cold-start bake is counterintuitive but correct
The instruction that trips people up the most is this one: do not take the rolls out before you turn the oven on. Leave them in the cold oven, set the temperature, and let everything heat up together. I know that goes against every baking instinct. It works because the gradual temperature increase from cold to 350°F gives the rolls a final burst of oven spring — that last bit of rise that happens in the first minutes of baking — before the crust sets. Taking them out, letting them sit on the counter, then putting them into a hot oven is actually more disruptive to the process. The cold-start method is less handling, less risk of deflating the rise, and it works every single time.
Rhodes frozen cinnamon rolls are the specific product for this method
Not all frozen cinnamon rolls work for an overnight rise. Rhodes Frozen Cinnamon Rolls — found in the freezer section in a bag, not a tube — are raw, unbaked yeast rolls that need to thaw and proof before baking. That’s exactly what this method provides. The rolls come 12 to a bag with a separate icing packet, and they’re consistent batch to batch. I’ve tried other brands over the years. Rhodes is the one I keep coming back to, not because I have a stake in saying so, but because the results are reliably good and the rolls are available at most major grocery stores.
Five ingredients, almost no active time
The caramel takes about 10 minutes to make. Cooling time is hands-off. Assembly takes maybe five minutes. Total active work the night before: fifteen minutes, at most. The morning requires you to turn a dial on your oven and set a timer. That’s it. I’ve made this on busy weeknights before big mornings. I’ve made it when I was exhausted and operating at half capacity. It has never failed me.
What to Know Before You Start
This recipe has a few specific requirements that are easy to overlook the first time. Read through these before you start — they’ll save you from the most common pitfalls.
You need a couple of hours of evening lead time
The caramel has to cool completely before you pour it over the frozen rolls — we’re talking properly cold, not just room temperature. That means at least an hour in the refrigerator. My routine: make the caramel after dinner, cool it on the counter for 15 minutes, transfer it to the fridge, and then assemble everything before bed. The whole process requires about 15 minutes of actual effort spread across the evening. If you’re making these for a 7 a.m. breakfast, you can have everything in the oven by 10 p.m. and be in bed on time.
Pan choice matters more than you’d think
I use a Pyrex 9×13 glass baking dish for this recipe, and I genuinely recommend it over a metal pan for a couple of reasons. Glass distributes heat more evenly during a cold-start bake — metal pans heat unevenly and can create hot spots on the bottom that over-brown the caramel before the centers are cooked through. Glass also lets you see the caramel bubbling through the sides of the pan, which is the most reliable visual cue that the rolls are actually done. Metal pans work, but if you have the choice, use glass.
Space the rolls properly
Each frozen roll needs at least two inches of space on all sides. They will roughly double in size overnight, and if they’re crowded from the start, they’ll press against each other unevenly and rise in awkward shapes. A 9×13 dish holds 12 rolls in a 3×4 grid with adequate spacing. What looks like too much space when you’re arranging them frozen is exactly the right amount of space by morning.
The frosting packet goes in the fridge
Put the icing packet that comes with the Rhodes rolls in the refrigerator overnight along with the caramel. You’ll use it the second the rolls come out of the oven. Cold frosting applied to very hot rolls melts into a thin, glossy drizzle that coats every surface. If you wait even five minutes, the rolls cool just enough that the frosting goes on thick and paste-like instead of melting beautifully. This is a small detail that makes a visible difference in the final result.
Cold kitchens slow the rise
If your kitchen runs below 65°F overnight — common in winter when the thermostat drops — the rolls will rise more slowly. They’ll still work, they’ll just need closer to 10 hours instead of 8, or may need an extra hour on the counter in the morning before they’re ready to bake. I live in Iowa. Cold kitchens in January are a real consideration here. I’ve never had a batch completely fail to rise, but I have had batches that needed more time on cold nights. Don’t panic if they look underpuffed in the morning — give them time before you commit to baking.
Nonstick spray is non-negotiable
The caramel will bubble up and cook onto the sides and bottom of the pan. An ungreased pan means you’ll be scraping caramel off the dish for twenty minutes after breakfast. Spray the dish generously — sides included — before you arrange the rolls. This takes three seconds and saves a significant amount of cleanup frustration.
Ingredients
Five ingredients. That’s the whole list. The caramel sauce uses four pantry staples you probably already have, and the rolls are a single freezer-section product.
- 1 stick (8 tablespoons) unsalted butter
- ½ cup granulated white sugar
- ½ cup brown sugar, packed
- 1 cup vanilla ice cream
- 1 bag (12-count) frozen Rhodes Cinnamon Rolls, with icing packet included
Notes on ingredients
Butter: I use unsalted because the rolls themselves have salt in the dough and the caramel doesn’t need an additional salt hit. If you only have salted butter, use it — the rolls will still be good, just slightly more complex in flavor. Some people love that. It’s not a deal-breaker.
Vanilla ice cream: Standard full-fat vanilla ice cream works best here. French vanilla is even better — the egg yolks in French vanilla add richness that makes the caramel extra smooth. Low-fat or non-dairy ice cream substitutes will change the texture of the caramel and may not thicken as reliably. This is not the recipe to experiment with ice cream substitutions on the first try.
Both sugars: The combination of white and brown sugar is intentional. White sugar provides the clean sweetness and helps the caramel set. Brown sugar adds depth and a slight molasses flavor that rounds out what would otherwise be a very flat sweetness. Don’t substitute all-brown or all-white — use both.
Rhodes Cinnamon Rolls: Look for these in the freezer section near the dinner roll dough, not near the refrigerated Pillsbury products. The bag contains 12 raw frozen rolls with cinnamon filling already spiraled in, plus a separate icing packet. They need to thaw and rise before baking — that’s the entire premise of this recipe. If you can’t find Rhodes, look for any brand of raw frozen yeast cinnamon rolls (not pre-baked, not pre-proofed).
Equipment You’ll Want
Nothing specialized required, but a few items make this easier:
- 9×13 glass baking dish — glass over metal for even heat distribution and visible caramel cues
- Medium saucepan — needs to be big enough to hold the caramel without boiling over; a 3-quart pan works well
- Whisk — essential for keeping the caramel smooth while it boils
- Silicone pastry brush — useful for coating the tops of the rolls evenly with caramel after pouring
- Kitchen timer — set it when you turn the oven on; caramel-bottom rolls can go from golden to over-browned quickly in the last five minutes
How to Make Overnight Cinnamon Rolls with Caramel Sauce
The Night Before — Step 1: Make the Caramel Sauce
Combine the butter and vanilla ice cream in a medium saucepan over medium-high heat. As the butter melts into the ice cream, stir steadily — the mixture will look pale, creamy, and slightly separated at first, almost like a thin béchamel sauce. That’s normal. Keep stirring as it heats.
Add both sugars and increase the heat slightly if needed to bring the mixture to a full rolling boil. A full rolling boil means the entire surface of the liquid is churning and boiling hard — not just bubbles skittering around the edges, but real, vigorous, can’t-stir-it-down boiling. This is the moment that matters most in the whole recipe. If you only get a gentle simmer, the caramel won’t set up correctly and will stay thin and runny overnight instead of thickening into something the rolls can really absorb.
Hold that full rolling boil for 2 to 3 minutes, whisking constantly. Watch the color: it should deepen from pale ivory to a warm amber-tan, the color of strong iced tea or a light caramel candy. Watch the texture: it should visibly thicken on the back of your spoon, leaving a thin coating that doesn’t immediately drip off when you hold the spoon up. Watch the smell: unmistakably caramel — sweet, slightly toasty, with that warm vanilla undertone from the ice cream. When all three of those things are happening at once, pull it off the heat.
Don’t walk away during the boil. Caramel moves quickly from perfect to scorched, and scorched caramel tastes bitter in a way that no amount of frosting will fix. Two to three minutes is a short window — stay at the stove and keep whisking.
The Night Before — Step 2: Cool the Caramel
Remove the pan from heat and let the caramel cool on the counter for about 15 minutes. It will still be quite liquid at this stage — caramel thickens as it cools, and this is just the beginning. After 15 minutes on the counter, transfer it to the refrigerator for at least one hour.
When it comes out of the fridge, the caramel should be thick, pourable, and completely cool — somewhere between warm honey and soft pudding in consistency. This texture is what you want. Warm caramel poured over frozen rolls starts melting the outer layer of the dough unevenly, which throws off the overnight rise. Cold caramel poured over frozen rolls stays put, chills the dish evenly, and gives everything a clean, even start.
If you’re short on time, you can speed this up: pour the caramel into a metal bowl set inside a larger bowl filled with ice water. Stir it for 8 to 10 minutes and it’ll cool down significantly faster than in the fridge. Still transfer it to the fridge after, but you can cut the refrigerator time to 30 minutes with this method.
The Night Before — Step 3: Prep the Pan and Arrange the Rolls
Spray a 9×13 baking dish generously with nonstick cooking spray. Get the sides and corners — the caramel will bubble up during baking and cook onto any unsprayed surface. Put the frosting packet from the Rhodes bag in the refrigerator.
Remove the 12 frozen cinnamon rolls from the bag and arrange them in the prepared dish in a 3×4 grid. Each roll needs about 2 inches of clear space around it. They look small and far apart right now. By morning, they’ll be pressing against each other — that spacing is correct and intentional. Don’t be tempted to crowd them.
The Night Before — Step 4: Pour and Rest
Pour the cooled caramel sauce evenly over the frozen rolls. Use a silicone pastry brush to spread the caramel over the top of each roll so they’re all coated. The caramel will pool in the dish around the rolls — this is fine, and it’s actually desirable. That pooled caramel creates the sticky layer on the bottom of each roll that is genuinely the best bite of the whole pan.
Slide the dish into the oven. Turn the oven off if it was on — and make sure the oven light is off too. You want the inside of the oven as dark and stable as possible. Close the oven door and walk away. Leave everything there for 8 to 10 hours overnight.
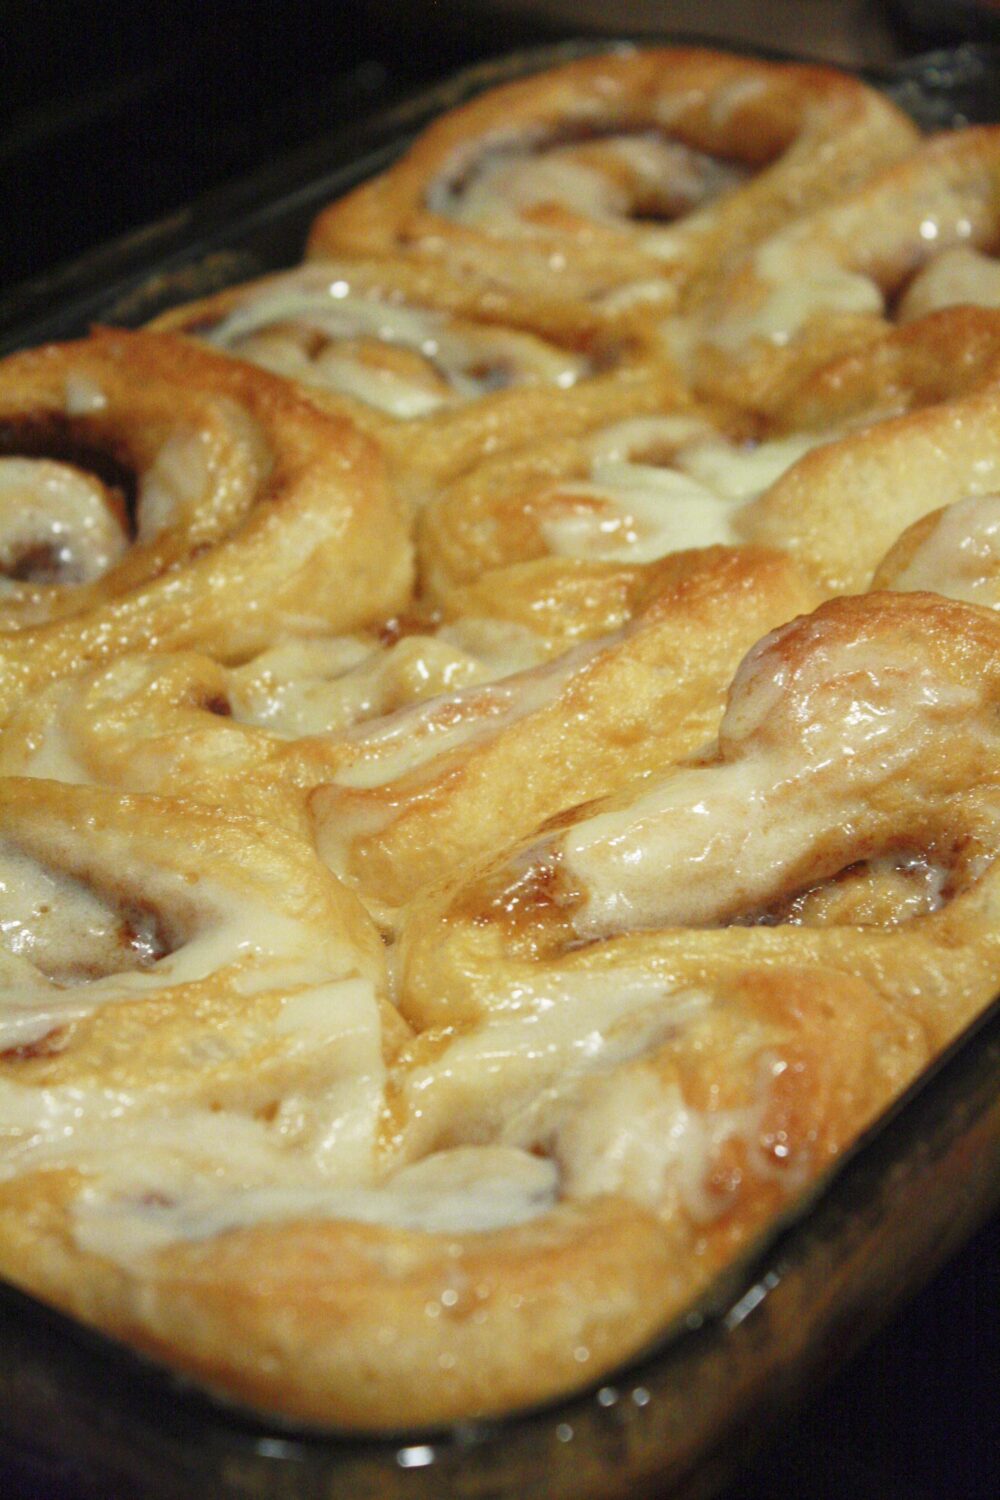
By morning, the rolls should be visibly puffed and tall — bakery-style fullness, not the flat frozen discs you started with. They’ll likely be touching or nearly touching each other. The caramel may have a slightly set, pudding-like skin on top where it dried overnight. That’s all correct. If they look like they’ve barely moved, see the FAQ section below before you panic.
Morning — Step 5: Bake from Cold
Do not remove the pan from the oven. Open the oven door, confirm the rolls look properly risen, close the oven door, and turn the oven on to 350°F. That’s it. The rolls stay in the oven as it heats up from cold.
Set a timer for 20 minutes and start checking. What you’re looking for: deep golden brown tops — not pale golden, not honey-colored, but a real, rich brown that looks properly baked. You should also see caramel actively bubbling around the edges of the pan, and the kitchen should smell unmistakably like a bakery. For a full pan of 12 rolls, the sweet spot is usually 22 to 27 minutes total from when you turned the oven on. Individual ovens vary, so use color and smell as your primary cues, not just the clock.
If you’re baking a half batch (6 rolls in a smaller dish), start checking at 20 minutes. The smaller volume heats through faster.
Genuine caution: pulling the rolls too early is the most common mistake. The caramel on the bottom insulates the rolls and makes them harder to judge from the top surface alone. The tops can look done while the centers are still doughy. Wait for deep brown, not just golden. If you’re unsure, an instant-read thermometer inserted into the thickest roll should read 190°F when fully baked through.
Morning — Step 6: Rest, Frost, and Serve
Pull the pan from the oven and let it sit for 3 to 5 minutes before frosting. This brief rest lets the caramel on the bottom thicken slightly so it doesn’t all pour off when you plate the rolls.
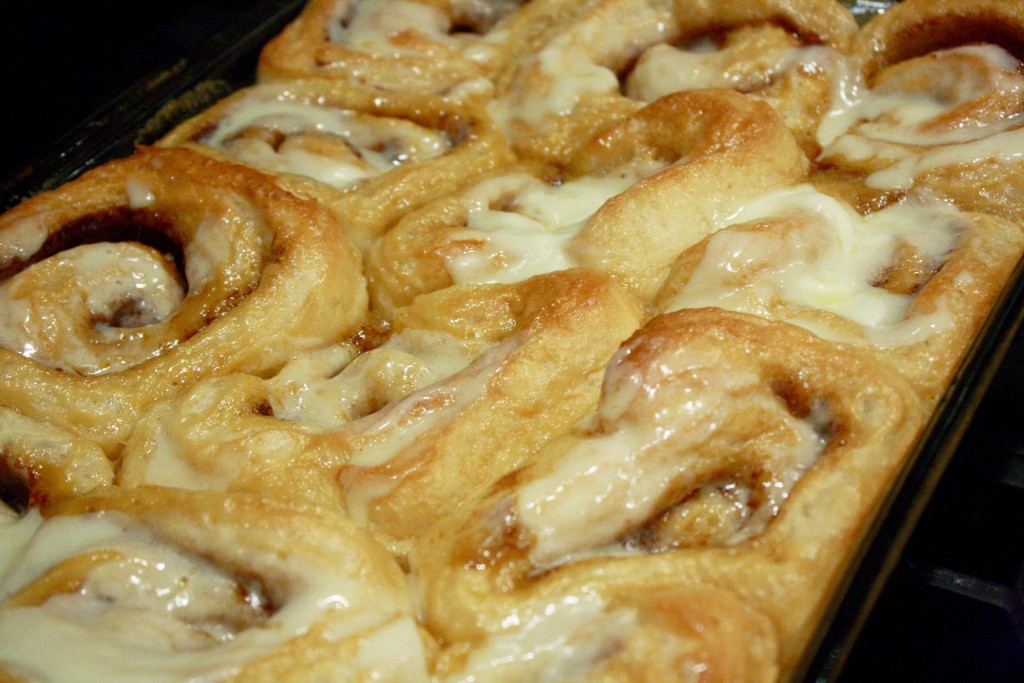
Take the frosting packet from the fridge and drizzle it over the rolls immediately — while they’re still hot from the oven. The heat transforms the cold frosting from a thick paste into a thin, flowing drizzle that melts into every crevice and down the sides of each roll. If you wait too long, you lose that effect. Hot rolls, cold frosting, immediate application — that’s the sequence.
Serve directly from the pan while warm. These are best eaten the day they’re made, though they hold up remarkably well for leftovers — more on that in the storage section below.
What “Done” Looks Like — Visual Cues at Every Stage
One thing I’ve learned from making this recipe repeatedly is that being able to recognize each stage by sight and smell is more reliable than watching the clock. Ovens vary, pan materials vary, kitchen temperatures vary. These visual descriptions are what I actually look for.
Caramel while cooking
Starting color: pale, creamy ivory. Once the sugars go in and it comes to a boil, the mixture will foam up and look almost frothy. Keep whisking — the foam settles into a smoother rolling boil after about 30 to 45 seconds. After 2 full minutes at a real rolling boil, the color should have shifted to warm amber-tan. It should coat the back of a spoon in a thin layer that holds for a few seconds before dripping off. Pull it at this point. If it still looks pale and watery, give it another 30 seconds and check again. If it’s already darker than caramel candy and starting to smell a little burnt, pull it immediately and transfer it to a cool bowl.
Rolls in the morning before baking
A properly risen batch looks impressive. The rolls should be puffed and tall — significantly larger than when you put them in. They’ll be touching or very close to it. The caramel may have a slightly set skin on the surface and will look almost pudding-like in texture. The rolls themselves should have a slight sheen and look clearly alive, with good volume and structure. Under-risen rolls look flat, dense, and small — if that’s what you’re seeing, add more time before baking (see FAQ).
Rolls while baking
Around 15 minutes in, the tops will start to take on color. At 20 minutes they should be golden. At 22 to 25 minutes they should be deep golden brown — the color of a properly baked dinner roll, or slightly darker. The caramel around the edges of the pan will be actively bubbling, not just set. The kitchen will smell like a professional bakery. These are your cues. Pull when the tops look deeply browned and the caramel is bubbling — not before.
Caramel after baking
The caramel on the bottom of the pan will be dark, sticky, and slightly set — almost like a toffee layer. When you lift a roll from the pan, it should have a glossy caramel coating on the bottom. This is the best part. The caramel on the bottom of the pan is more concentrated and slightly deeper in flavor than what soaked into the rolls, and it’s worth scraping out of the pan with a spatula to drizzle over the top.
Tips for the Best Results
- Don’t skip the full rolling boil. This is the step that determines whether your caramel thickens properly overnight. A gentle simmer is not sufficient. You need the entire surface of the liquid churning hard for at least 2 full minutes. Set a timer once it hits that full boil and don’t pull it early.
- Glass dish over metal. A 9×13 Pyrex dish distributes heat more evenly in a cold-start bake and gives you visibility into the bottom of the pan. You can see the caramel bubbling through the glass, which tells you the bottom is actually cooking — not just the tops.
- Use a real whisk. A spoon will work in a pinch, but a whisk keeps the caramel moving through all parts of the pan and prevents sugar from settling and scorching on the bottom. Don’t skip this tool.
- Halving the recipe works well. Use 6 rolls, half the caramel quantities, and a 9×7 or 8×8 dish. Same method, same oven temperature, bake time is roughly 22 to 25 minutes from cold start.
- If the rolls barely moved overnight, don’t bake them yet. Take the pan out and let it sit on the counter for 1 to 2 hours at room temperature. Yeast needs warmth to work, and a cold kitchen slows everything down. They’ll puff up given time.
- The frosting goes on immediately. Cold frosting from the fridge onto hot rolls just out of the oven — that’s the sequence. The heat melts it from a thick paste into a silky, flowing drizzle. Waiting even five minutes loses most of that effect.
- Nonstick spray the sides of the pan too. The caramel bubbles up during baking. Any unsprayed surface becomes a caramel-cleanup project. Generous spray on the bottom and sides takes three seconds and saves real frustration later.
- Don’t use a convection setting. If your oven has convection, turn it off for this recipe. Convection circulates air and can create uneven browning on rolls that are already in a delicate spot with the cold-start method. Standard bake, 350°F, no fan.
Storage and Make-Ahead Notes
The make-ahead component is built in
The overnight prep is the recipe — it’s not a shortcut or an adaptation. The method is designed to be started the night before and finished in the morning. There’s no same-day version that produces equivalent results, and you wouldn’t want one. The long, slow overnight rise in the caramel is what creates the texture and flavor that makes these rolls different from every other cinnamon roll recipe.
Leftovers
Cover and store at room temperature for up to 2 days. Refrigerate for up to 4 days. Reheat individual rolls in the microwave for 30 to 45 seconds — the caramel re-softens and the roll steams back to its original texture remarkably well. My kids have eaten these cold, straight from the fridge, and somehow claimed to prefer them that way. I don’t understand it, but I can’t argue with enthusiasm.
Freezing after baking
These freeze well after baking. Let them cool completely, wrap each roll individually in plastic wrap, then place them in a zip-top freezer bag for up to 2 months. To reheat from frozen: thaw at room temperature for 1 to 2 hours, then microwave for 30 to 45 seconds. The caramel comes back nicely. The frosting on top becomes a little absorbed into the roll during freezing, which actually makes the roll taste richer after reheating.
Make-ahead tip for the caramel specifically
The caramel sauce can be made up to 5 days in advance and stored in the refrigerator in a sealed container. When you’re ready to use it, let it sit on the counter for 10 to 15 minutes to take the chill off slightly — you want it thick and pourable, not so cold it’s stiff. This is genuinely useful if you’re making these for a holiday morning and want to distribute the prep across a couple of evenings.
Frequently Asked Questions
Do I have to use Rhodes rolls, or can I use a different brand?
Rhodes Frozen Cinnamon Rolls are what I recommend — find the bag in your grocery freezer section, not a refrigerated tube of dough. They’re raw, unbaked yeast rolls with the cinnamon filling already in them, and they’re designed to be thawed and proofed before baking. That’s exactly what this overnight method provides. Other brands of raw frozen yeast cinnamon rolls should work with the same method, but Rhodes is consistent and widely available at most major grocery stores, so it’s what I use.
What won’t work: Pillsbury tube rolls (pre-proofed, different method entirely), any fully-baked frozen rolls that just need to be reheated, or homemade yeast dough that hasn’t been frozen. The specific magic of this recipe is the slow thaw-and-rise of raw frozen dough in caramel sauce. That only happens with the right product.
What if I forget to cool the caramel before pouring it?
If you pour hot or warm caramel over the frozen rolls, a few things can go wrong: the heat will start thawing the outer layer of the dough unevenly, which can cause the rolls to rise in odd shapes. The caramel may also stay too liquid overnight and mostly pool at the bottom without soaking into the rolls properly.
If this happens, let the assembled dish sit on the counter for 30 minutes before putting it in the oven — don’t rush it in while it’s still warm. The rolls will likely still bake up fine, just possibly with less of that caramel-infused interior that makes them so good. Going forward, cold caramel is the standard. Even 30 minutes in the fridge is meaningfully better than room temperature.
Can I skip the caramel and just use melted butter?
Technically yes, but you’d be making a completely different recipe — and honestly, a much less interesting one. The caramel sauce soaks into the rolls during the overnight rise and creates the gooey, rich interior that defines these. Plain melted butter doesn’t do the same thing: it separates, mostly pools at the bottom, and doesn’t absorb into the dough the way the caramel does.
The ice cream in the caramel sounds odd until you understand what it does: it provides fat and vanilla flavor that makes the caramel silky and smooth rather than grainy or hard. It’s a 10-minute sauce that’s genuinely worth making. That said — if you’re completely out of ice cream and need a substitute, use ½ cup heavy cream in place of the 1 cup ice cream. The caramel will be slightly less rich and less vanilla-forward, but it’ll work.
My rolls barely rose overnight. What do I do?
Don’t bake them yet — that’s the first and most important instruction. Under-risen rolls baked before they’re ready come out dense and doughy in the center, and no amount of caramel will fix the texture of underbaked bread.
Take the pan out of the oven, set it on the counter in the warmest spot in your kitchen (not directly near a cold window), and give the rolls 1 to 2 more hours at room temperature. Check them every 30 minutes. They should visibly puff as they warm up. Yeast is temperature-sensitive — if your kitchen was below 65°F overnight, the rolls may have thawed fully but not risen much. Room temperature time is the fix.
If after 2 additional hours the rolls still look flat and show no signs of rising, the most likely culprit is expired or freezer-burned dough. Old yeast dough that’s been in the freezer too long won’t rise reliably. Check the bag for the expiration date. A roll that never rises will bake up heavy and raw-tasting in the center regardless of how long you bake it — it’s worth waiting them out and diagnosing before committing.
My caramel turned grainy or seized up. What happened?
Grainy caramel means the sugar crystallized — this usually happens when the heat was too low and the caramel never reached a real boil, or when undissolved sugar crystals from the sides of the pan fell back into the mixture and triggered a chain reaction of crystallization.
Fix for grainy-but-still-liquid caramel: return it to medium heat and whisk vigorously for another minute or two. Often the grains will dissolve back in with enough heat and agitation. Fix for seized-up caramel that went hard: add 2 to 3 tablespoons of cream or whole milk and heat gently, stirring constantly, until it loosens. It won’t be perfectly smooth, but it’ll work for this recipe — the rolls are forgiving enough to absorb an imperfect caramel.
Prevention: keep a clean pan (no sugar crystals on the sides), maintain medium-high heat to achieve a real rolling boil, and whisk constantly once the sugars go in. A pastry brush dipped in water, used to brush down the inside walls of the pan, can knock down any sugar crystals before they fall in — this is standard practice in professional caramel-making.
The rolls came out doughy in the middle. What went wrong?
Almost always, this means they needed more time. The caramel layer on the bottom insulates the rolls and makes the interior temperature harder to gauge from the top surface alone. The tops can look deep golden brown while the centers are still not fully baked through.
If you pull them and discover doughy centers: tent the pan loosely with aluminum foil (to prevent further browning on top) and return it to the oven for another 5 to 8 minutes. Check again. An instant-read thermometer inserted into the thickest roll in the center of the pan should read 190°F when they’re fully baked through. Going forward, wait for truly deep brown tops and actively bubbling caramel at the edges before calling them done.
Can I prep these two nights ahead instead of one?
No — and this is a case where the recipe has a hard limit. Two nights in a cold oven means 16 to 20 hours of rise time, which will over-proof the rolls significantly. Over-proofed yeast dough rises too far, loses its structure, and collapses during baking. The finished rolls will be flat, dense, and may have a yeasty or slightly sour flavor from the extended fermentation.
If you need to spread the prep across more than one evening, make just the caramel sauce ahead of time — it keeps in the refrigerator for up to 5 days. Then do the roll assembly and overnight rise the night before you want to bake. That’s the right way to prep further in advance without compromising the rolls.
Can I double the recipe?
Yes. Use two 9×13 pans and double all caramel ingredients. Make the caramel in a larger pot (at least 4 quarts) to give the mixture room to boil without foaming over. Both pans go in the oven overnight. In the morning, if both pans fit side by side on the same rack, great. If not, place them on two different racks and rotate them halfway through baking so both get even heat. Baking time stays the same — 22 to 27 minutes from cold start. You’ll have 24 rolls, which is the right amount for a crowd.
The caramel all sank to the bottom of the pan overnight. Is that a problem?
Not at all — that’s expected and it’s actually the best possible outcome. The caramel migrates downward as the rolls rise, creating a sticky, concentrated layer on the bottom of the pan that becomes the most flavorful part of the whole recipe. When you lift a roll out of the pan, the caramel-coated bottom is what you want. Think of it like a sticky bun — the bottom is where the good stuff lives. Scrape any remaining caramel from the pan with a spatula and drizzle it over the tops when serving. Don’t leave it in the dish.
What to Serve With These Rolls
These rolls are rich enough to anchor an entire breakfast on their own. If you’re building a full spread around them, here’s what works:
- Scrambled eggs — salty and savory against the sweet caramel; the contrast is exactly right and keeps the meal from feeling like dessert
- Bacon or breakfast sausage — same principle; the salt and fat balance the sweetness of the caramel
- Fresh fruit — sliced strawberries, orange segments, or a simple fruit salad; the acidity cuts through the richness
- Strong coffee or cold brew — non-negotiable in our house; the bitterness is the perfect foil for sweet caramel
- Fresh-squeezed orange juice — classic pairing, works especially well for holiday breakfasts when you want the full spread
One lived-in observation from years of making this for company: these rolls stay soft and gooey for a good hour after baking, so you don’t need to time breakfast around pulling them from the oven. Set them on the table when they’re done, put everything else out, and let people serve themselves without the pressure of a hot-food countdown. They hold up well.
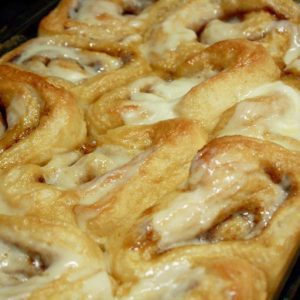
The BEST Easy Cinnamon Roll Recipe
Ingredients
- Ingredients:
- 1 stick butter
- 1/2 cup sugar
- 1/2 cup brown sugar
- 1 cup frozen vanilla ice cream
- 1 12-count Bag Frozen Rhodes Cinnamon Rolls
Instructions
- Combine butter and vanilla ice cream in a saucepan and melt.
- Add sugars and heat to boiling, over medium high heat constantly stirring with a whisk.
- Bring to a rolling boil while whisking the entire time for two or three minutes.
- Remove saucepan from burner and let sit for 15 minutes or so to cool down.
- Once cooled put this mixture in to the refrigerator for an hour or so.
- Spray glass baking dish with nonstick spray and arrange the frozen cinnamon rolls evenly in the dish.
- Give the frozen rolls atleast 2 inches on each side for room to expand or as much room as your dish will allow.
- Pour cold caramel mixture over the rolls and set in the oven overnight.
- Store the packet of icing that comes with the rolls in the fridge overnight. You'll use that on top of the rolls once they're cooked in the morning.
- In the morning do not take the rolls out of the oven.
- They will remain in the oven while preheating.
- Bake for 20-30 minutes at 350 degrees until browned on top.
- ** I generally halve this recipe and make six cinnamon rolls at a time. When I do that, for example, I cook them for 25 minutes total from the time I turn on the oven.
- Frost those puppies right when you take them out of the oven. Yum!