Easy Pumpkin Shaped Cheese Ball Appetizer Recipe
Every fall, I create a cheeseball shaped like a pumpkin and it has a zesty jalapeno ranch flavor and a filling of sharp cheddar cheese.
I have brought this to fall gatherings so many times that it’s pretty much mandatory for me to bring it. My teens are embarrassed that I have a reputation for making a cheese ball. I think it’s a compliment.
The cheese ball is wrapped in plastic wrap with some rubber bands. There are no molds, no sculpting, and no food dye involved. You simply mix the cheese, wrap it up, place some elastic bands around it, and refrigerate. The end result looks like it took much more work than it actually did.
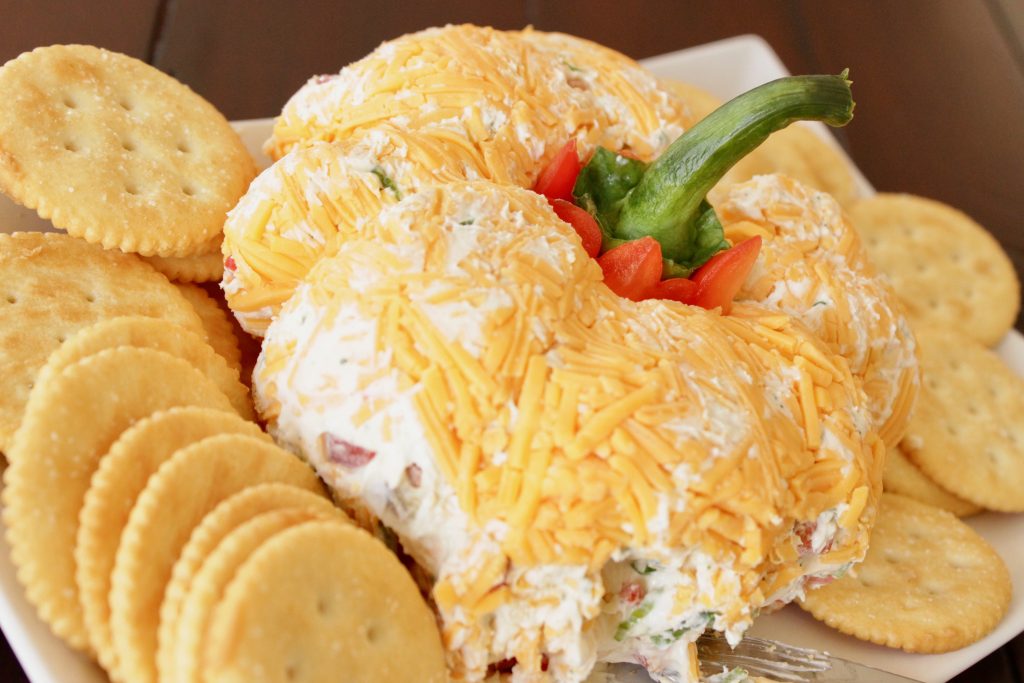
The specific detail that causes double takes is that the red pepper stem is put into the end.
The Rubber Band Trick — How the Shape Actually Works
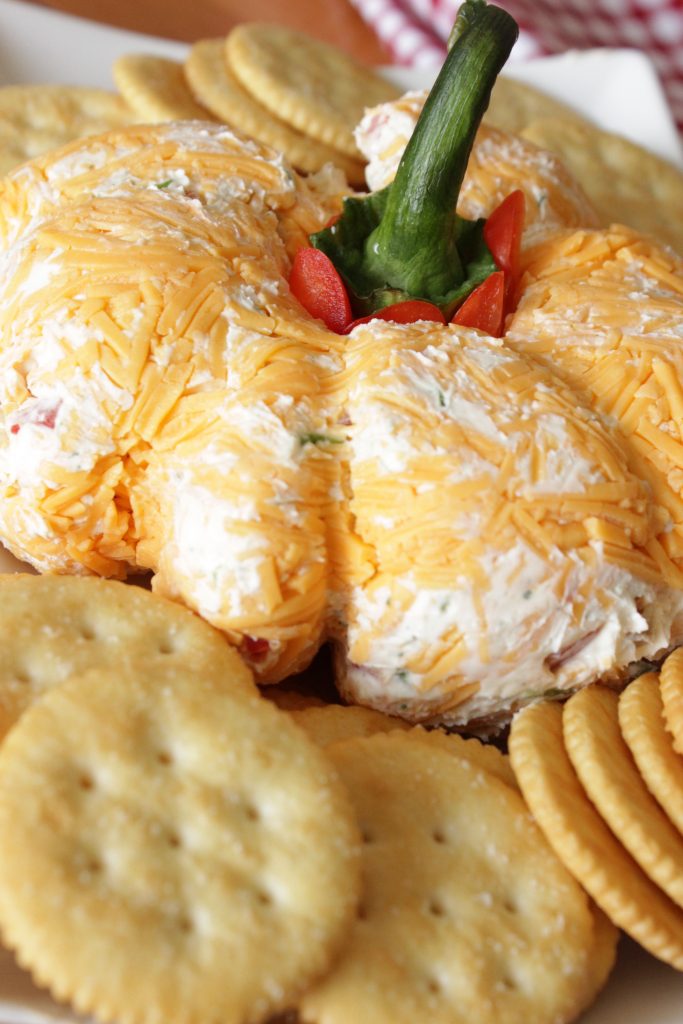
Let’s skip the preview and get into the good stuff. Pumpkin ridges are created by placing four enormous rubber bands around the wrapped cheese ball before refrigerating it.
When cheese in the fridge firms up around the grooves of the rubber band. When you take the bands off after a while, the imprints remain.
The key is to keep rubber bands spaced evenly. If they are all bunched up at one end, the bands will be lopsided and your creation will end up looking more like an acorn squash than a pumpkin. Take a little time to evenly space the bands before the ball goes in the fridge.
The size of the rubber bands also matters. Using thin rubber bands can cause tears to the cling wrap. Thick rubber bands like those that are used to bundle broccoli at the grocery store, provide a cleaner edge and are less likely to pull the outer layer of cheddar cheese off when they are removed.
What Goes Into This Pumpkin Shaped Cheese Ball
In this recipe there are six base ingredients and then crackers used for serving. Each base ingredient does the following:
Plain Cream Cheese (8 oz, softened)
Full-fat block cream cheese is the main ingredient here. It holds it shape after being in the refrigerator, staying true to the shape of a pumpkin. On the contrary, whipped cream cheese will not set like block cream cheese due to the the added air, so don’t use it for this recipe.
Jalapeño Cream Cheese (8 oz, tub style, softened)
Cream cheese in a tub is easier to mix than a block and ensures an even distribution of heat in the mixture. You can find it at most grocery stores, right next to cream cheese block.
The heat levels of different brands vary more than you would think. Kraft’s version is actually really mild. Even people that say they don’t like spicy food can eat this. If you are serving a crowd that is sensitive to heat, just replace both portions with plain cream cheese, and stir in cayenne to your taste.
Dry Ranch Mix (1 packet)
The product this was built with is Hidden Valley Buttermilk Ranch, and I would recommend that. Generic dry ranch packets are acceptable. Liquid ranch dressing does not work, as the dry mix helps keep the consistency firm and concentrated. Something liquid will loosen the whole thing.
Green Onions (3, sliced thin)
When slicing the onions, try to cut them into even pieces. The goal with mixing the onions is to have an even distribution. Instead of having clumps of onions, practice slicing them evenly.
Red Bell Pepper (1, finely diced — stem reserved)
To add some more color and crunch to the cheeseball, add some sliced peppers to the mix. The stem will be set aside and pushed into the top of the cheeseball to help finish the pumpkin look. When you’re prepping the peppers, don’t throw the stem away. Make sure to set it out on the counter where you can see it.
Chop the pepper into small pieces. If there are large pieces, they create an uneven and bumpy texture. Plus, if the pieces are cut too large, they may release moisture into the mixture. Aim for a fine dice.
Sharp Cheddar (2 cups shredded, divided)
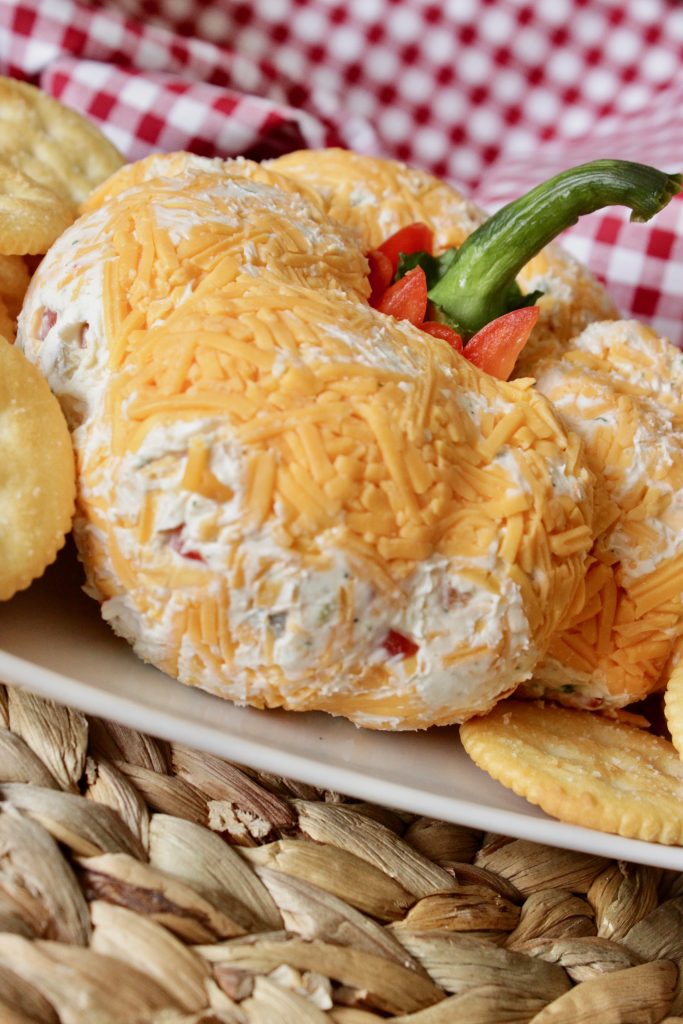
One cup will be used in the mixture for flavor. The other cup will get spread on the cling wrap before the cheese ball goes down; it will coat the outside as you wrap it up. This will give the completed pumpkin its textured orange-tinted exterior. It also prevents the cling wrap from sticking to the cheese ball, making unwrapping it much cleaner.
How to Make a Pumpkin Shaped Cheese Ball
Following around 15 minutes of active work there’s nothing left to do besides wait for the fridge to finish.
Step 1: Mix the Cheese
In a large bowl, mix both cream cheeses. If they are softened, it should only take about a minute to complete this step using a hand mixer. If you plan to use a wooden spoon to do this, it will take substantially more effort to fully smooth cream cheeses.
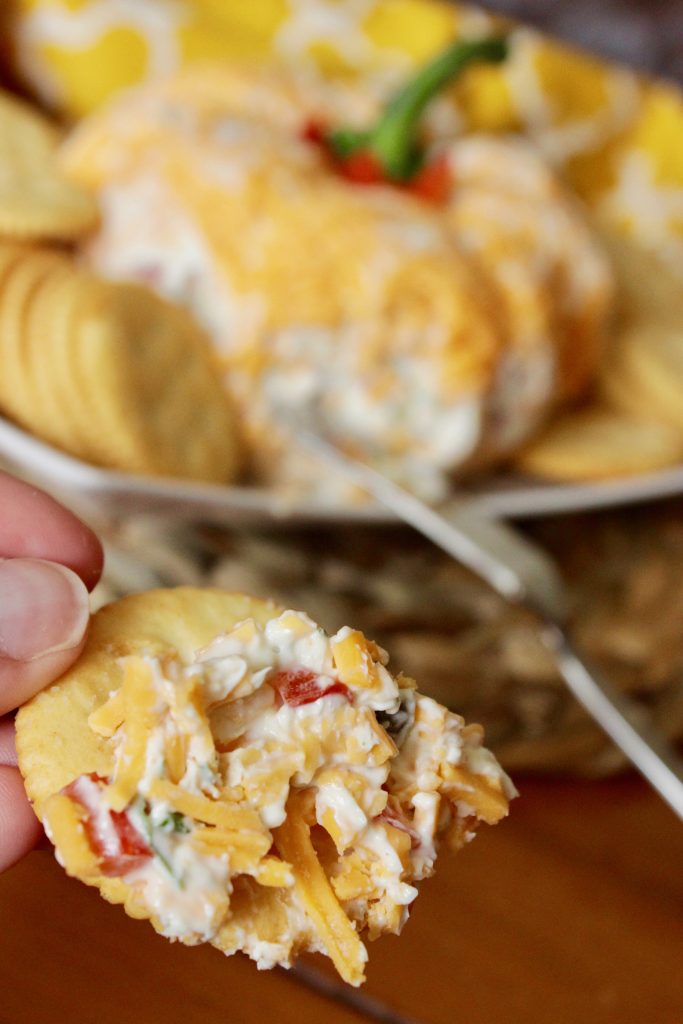
Once the cream cheeses are thoroughly mixed, add in the dry ranch packet, diced red pepper, green onion slices, and one cup of shredded cheddar. Stir to combine. It will be thick and sticky – that’s normal.
Step 2: Set Up the Cling Wrap
Take a long piece of plastic wrap and put it on the counter horizontally. In the center of the plastic wrap and where you are going to put the cheese ball, sprinkle the remaining cup of shredded cheddar cheese.
Remove the cheese mixture from the bowl and place it on the cheddar layer. Using your hands, Shape it into a ball. Then, grab a piece of cling wrap and wrap it tightly around the ball. Twist the top to seal it. The cheddar on the outside will push against the inside of the wrap as you do this, coating the outside.
Step 3: Add the Rubber Bands
Evenly distribute four large rubber bands around the cheeseball wrapping. The bands will leave indentations that form the cheeseball’s ridges. It may look a little messy before it goes into the fridge, but don’t worry! The chilling process will define it better!
Step 4: Refrigerate
Before unwrapping the cheeseball, press on the wrapper. It should feel firm. If it is still soft, put it in the refrigerator for another hour.
The overnight version really is more superior. It tastes better, and it’s shape is more defined. I have tried the 2-hour version as well as the overnight version, and overnight was clearly better. If the timing permits, do it the night before.
Step 5: Unwrap and Serve
Use the scissors to cut and remove the rubber bands. Unwrapping cling wrap is sticky and can take some time and patience. The cheddar cheese covering might stick a bit so pull carefully, don’t rush.
Position the cheese ball on your serving plate or board and insert the reserved red pepper stem on top, which will provide the finishing touch that will make it unforgettably a pumpkin. Place some crackers around it, set out a butter knife and you are all set.
The Overnight Rule — Why Day-Two Flavor Is Better
That’s one little detail I always share about a recipe. You sure can make this cheese ball the same day you’re serving it. Just give it a couple hours and it will be fine.
If you make this the night before, the jalapeño, ranch, and cheddar flavors come together better. The spiciness and ranch flavor will balance out to make it taste professionally made.
You can make it up to three days in advance. Just store it in the fridge with the rubber bands on until you’re ready to serve. Be sure to add the stem right before serving because if it sits overnight, it will dry out.
Ways to Change It Up
The main recipe is wonderful as is, however, here are some tweaks that all work:
No heat version
Instead of using jalapeno cream cheese, you can use 16 ounces of plain cream cheese. The ranch and sharp cheddar bring in lots of flavor already, so feel free to omit the cream cheese. If you want some heat without the full jalapeno burn, sprinkle in some cayenne.
More heat
Add a tablespoon of minced fresh jalapeno to your jalapeno cream cheese. If your audience prefers more heat, this is a good option, as fresh jalapeno will provide sharper heat than cream cheese alone.
Smoky version
If you switch your sharp cheddar for smoked cheddar and incorporate half a teaspoon of smoked paprika, you will deepen the color and shift it in a slightly different direction, but it will still be very much a fall flavor profile.
Add bacon
Mix in about ⅓ cup of bacon that has been cooked and crumbled. This is an obvious addition, and it works as well as you would expect. Great for a crowd that wants something a little more substantial.
Skip the pumpkin shape
Make it a log and ignore the rubber band part. The taste will be the same. Log shape will be easier to cut and serve in a smaller group as people can just take a slice instead of having to scoop. That could be a good option to consider for a weeknight appetizer as opposed to a party presentation.
Pumpkin Shaped Cheese Ball FAQ
Can I use all plain cream cheese?
Yes, use 16 ounces of plain cream cheese. The ranch and sharp cheddar will add plenty of flavor. If you’d like to add some warmth back in, toss in a little cayenne, or a small amount of hot sauce.
What size rubber bands work best?
Wide rubber bands are better than thin ones. The Produce bands from a bunch of broccoli or the regular wide office rubber bands are good. Thin rubber bands are deep and can tear the cling wrap.
My cheese ball didn’t hold its shape — what went wrong?
There are two possible conclusions: the combination may have needed more chill time, or the red pepper may have contributed excess moisture. When mixing, be sure the cream cheese is fully softened (not melted) and the pepper is diced small. Give it a minimum of 2 hours. Before taking off the rubber bands, press through the wrap and examine how firm it is.
How far in advance can I make this?
You can make it 3 days in advance. It can be kept wrapped in the refrigerator and chilled with the rubber bands still attached. Just add the red pepper stem before serving.
How long do leftovers keep?
If the cheese ball is wrapped in fresh cling wrap, it can last in the fridge for up to 5 days. Plus, spreading cheese ball on toast for breakfast the next day is no big deal. Just saying.
Can I freeze it?
Yes, but after thawing, the texture will be different. The cream cheese can become somewhat grainy. If you’re freezing it, do that prior to putting on the cheddar outer coating. Put on the coating after it has thawed in the fridge overnight.
What to Set Out With It
The main attraction of the spread and the thing in the middle is the cheeseball. The few things around it show that the entire spread is designed intentionally:
- Ritz crackers — the crowd-pleaser, and the right call
- Club crackers — thinner and crispier, hold up well
- Triscuits — more substantial, good for people who want a sturdier cracker
- Sliced cucumber rounds — lighter and works surprisingly well with jalapeño flavor
- Celery sticks — crunch without competing with the cheese
- Apple slices — the sweetness against spicy cheddar is a good combination at a fall party
A butter knife should always be included. People tend to scoop out and break the crackers with the ball. With a butter knife, people may choose to spread a dip on the crackers. This may seem obvious, but it is the most helpful thing you can do for the presentation.
About ten to fifteen minutes before serving, take the cheese ball out of the fridge. It will be easier to spread at room temperature. It will not be as easy to spread if you take it out just before serving.
Other Appetizers Worth Making
If these are the appetizers you are putting on the fall table, here are some good pairings:
- Canned Tomato Salsa — A great make-ahead dip that holds up well next to this cheese ball on a spread.
- Easy Bruschetta Appetizer — Light and fresh, a good contrast to the richness of the cheese ball.
- Spicy Pretzel Snack Mix — If your crowd likes heat, this belongs on the same table.
If you try making this pumpkin shaped cheese ball, leave a comment and let me know how it went! Also, I’m always interested to know if anyone has found a better brand of rubber bands.
Pumpkin Shaped Cheese Ball
Equipment
- Large mixing bowl
- Plastic wrap
- Rubber bands
Ingredients
Ingredients
- 8 ounces plain cream cheese softened
- 8 ounces jalapeno cream cheese tub style, softened
- 1 packet Hidden Valley Ranch Buttermilk Dry Ranch Mix
- 3 green onions sliced
- 1 red bell pepper finely diced, stem reserved
- 2 cups shredded sharp cheddar cheese divided
- crackers for serving
Instructions
Instructions
- In a large bowl, combine the plain cream cheese and jalapeno cream cheese until smooth.
- Add the dry ranch mix, diced red bell pepper, sliced green onions, and 1 cup shredded cheddar. Mix until evenly combined.
- Lay a large piece of plastic wrap on the counter and sprinkle the remaining 1 cup shredded cheddar in the center.
- Scoop the cheese mixture onto the cheddar and shape it roughly into a ball.
- Wrap the plastic wrap around the cheese ball and twist to seal.
- Stretch 4 large rubber bands around the wrapped cheese ball, spacing them evenly to create pumpkin ridges.
- Refrigerate for at least 2 hours, or overnight for the best shape and flavor.
- When ready to serve, snip off the rubber bands and remove the plastic wrap carefully.
- Transfer to a serving plate, press the reserved red bell pepper stem into the top, and serve with crackers.