
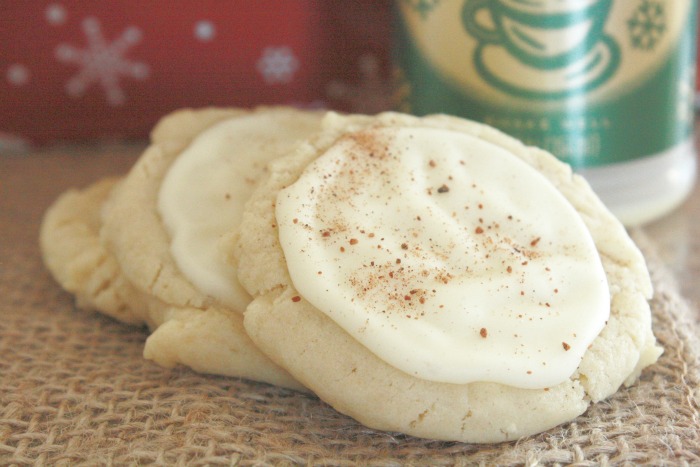
EGGNOG COOKIES WITH EGGNOG FROSTING
Want to channel some of your favorite holiday flavors into a deliciously tasty treat? Try out this recipe for Eggnog Cookies with Eggnog Frosting.
If you love holiday flavors, this is a must-bake.
I made these in November, and they’re going into one of my holiday cookie exchange bags. But I ate FOUR for breakfast with my coffee.
They were SO GOOD.
WHY THIS SWEET RECIPE WORKS
- Easier to make. Dropping cookies means you don’t have to roll the cookie dough, chill it, though you still have to chill the cookie dough, more on this below, cut them into shapes, transfer them onto cookie sheets, etc. It’s easier.
- Glazed cookies don’t need to be cut into shapes to look cute. These are quick, easy, adorable, and absolutely delicious.
WHAT TO KNOW BEFORE YOU START
- Do not skip chilling the cookie dough. This will make your life easier, I promise. When you take it out of the fridge, the dough will be super easy to drop into balls onto cookie sheets. If you try to do this BEFORE chilling, it’ll be a little more difficult because the dough is stickier at that point. More importantly, though, if you skip this step, your cookies are going to turn out more like cookie puddles. Trust me on this. Chill that dough.
- These cookies must be flattened with the bottom of a flat-sided glass immediately after taking them out of the oven, while they are piping hot. It only takes about 30 seconds, so be prepared. Lightly oil your glass with cooking spray to keep from sticking. If you don’t flatten these cookies while they are hot, they’ll crack. Trust me.
- The glaze on these takes AT LEAST an hour to dry. If the weather is more humid, it’ll take longer. Don’t stack them before they’re completely dry. I made this mistake once upon a time and it’s no fun to peel frosting off the bottom of your cookies. Trust me on this.
- Using a touch of Karo syrup in your glaze helps it to dry more firm so they’ll be easier to stack.
- To really nail the eggnog flavor in these cookies, eggnog is added to the glaze, and nutmeg is added to the cookie dough as well as on top. Without these additions, you’d pretty much be making vanilla glazed sugar cookies, and nobody wants that. These need to be TRUE to the real deal.
- Chill the cookie dough for at least one hour, preferably two, and let the glaze dry for at least 1 hour.
FOR THE COOKIES:
- 1 cup butter (real butter only!), softened
- 1 cup granulated sugar
- 1 cup eggnog, 1 egg, beaten
- 3 3/4 cups all-purpose flour
- 1 tsp baking powder
- 1 tsp baking soda
- 1/2 tsp salt
- 1 tsp nutmeg, grated if possible
- 1 tsp vanilla extract
FOR THE EGGNOG FROSTING:
- 1 1/2 cups powdered sugar
- 1/4-1/2 cup eggnog, homemade or store-bought
- 1 tsp light Karo syrup, found in the syrup aisle
- 1 tsp vanilla extract
- Nutmeg, grated, for garnish
HOW TO MAKE EGGNOG COOKIES
This recipe is pretty straightforward and doesn’t require any special ingredients. That said, I’ve included a couple of my own suggestions below.
- Softened butter means it should give and retain an indent when pressed with your finger. Not cold and crumbly and definitely not melted.
- Store-bought eggnog works fine here, but make sure you’re grabbing the full-fat kind for best results.
- When measuring the flour, it’s important that you do NOT dig your measuring cup into the bag. Instead, spoon it into the cup and scrape across the top. If you pack too much flour into the dough, your cookies will be dense.
- The better the quality of your baking ingredients, the better your cookies will be. It’s hard to find a spice as hard to fake as nutmeg. Pre-ground nutmeg is fine but freshly grated is infinitely better.
- Don’t omit the salt! It cuts through the sweetness.
STEP 1: CREAM THE BUTTER AND SUGAR
Beat the butter and sugar for 2-3 minutes with a hand-held mixer, or slightly less time with a stand-up mixer, until fluffy. You want to make sure the mixture is nice and light and airy.
If your mixture still appears dense, oily, chunky or even remotely melted, continue to beat until light and fluffy.
STEP 2: ADD EGGNOG AND EGG
Beat in eggnog and beaten egg. The mixture may look a little curdled.
Don’t worry, this is normal.
STEP 3: ADD THE DRY INGREDIENTS
Add the remaining ingredients to the bowl, including the flour, baking powder, baking soda, salt, and nutmeg, or whisk them together in a separate bowl and add all at once. Mix until combined.
Add the vanilla and stir until incorporated. The dough is going to be very soft and slightly sticky.
That’s ok.
STEP 4: CHILL THE DOUGH
Transfer the cookie dough to a large, lidded bowl. Let it chill for at least 1 hour or even overnight to make scooping easier.
Chilling the dough helps prevent the cookies from spreading in the oven.
STEP 5: SCOOP AND BAKE
When the dough is ready to be shaped, preheat the oven to 350°F. Scoop heaping teaspoons of cookie dough or roll them between your palms into balls and place them on a lightly-greased baking sheet.
Be sure to leave at least 2” between each ball. Bake for 8-10 minutes, until the cookies are just barely set.
The centers should still look a tad underdone, as they will continue cooking while they cool. Remove from oven.
STEP 6: FLATTEN WHILE HOT
Within 60 seconds of removing cookies from the oven, flatten each cookie with the bottom of a lightly-greased drinking or other flat-bottomed glass. Timing is important, because if they cool down a bit, you’ll end up with Eggnog Balls instead of cookies.
Remove from oven and transfer to a wire rack to cool completely for at least an hour.
STEP 7: MAKE THE EGGNOG FROSTING
Add the powdered sugar, 1/4 cup of the eggnog, Karo syrup, and vanilla to a large bowl and stir to combine. Add more eggnog 1 Tbsp at a time until desired consistency is reached, and it should hold its shape when scooped with a spoon but also be easily spreadable with a knife.
If it’s too runny add a little more powdered sugar, if it’s too stiff, add another splash of eggnog. Set aside until cookies are fully-cooled.
STEP 8: FROST AND FINISH
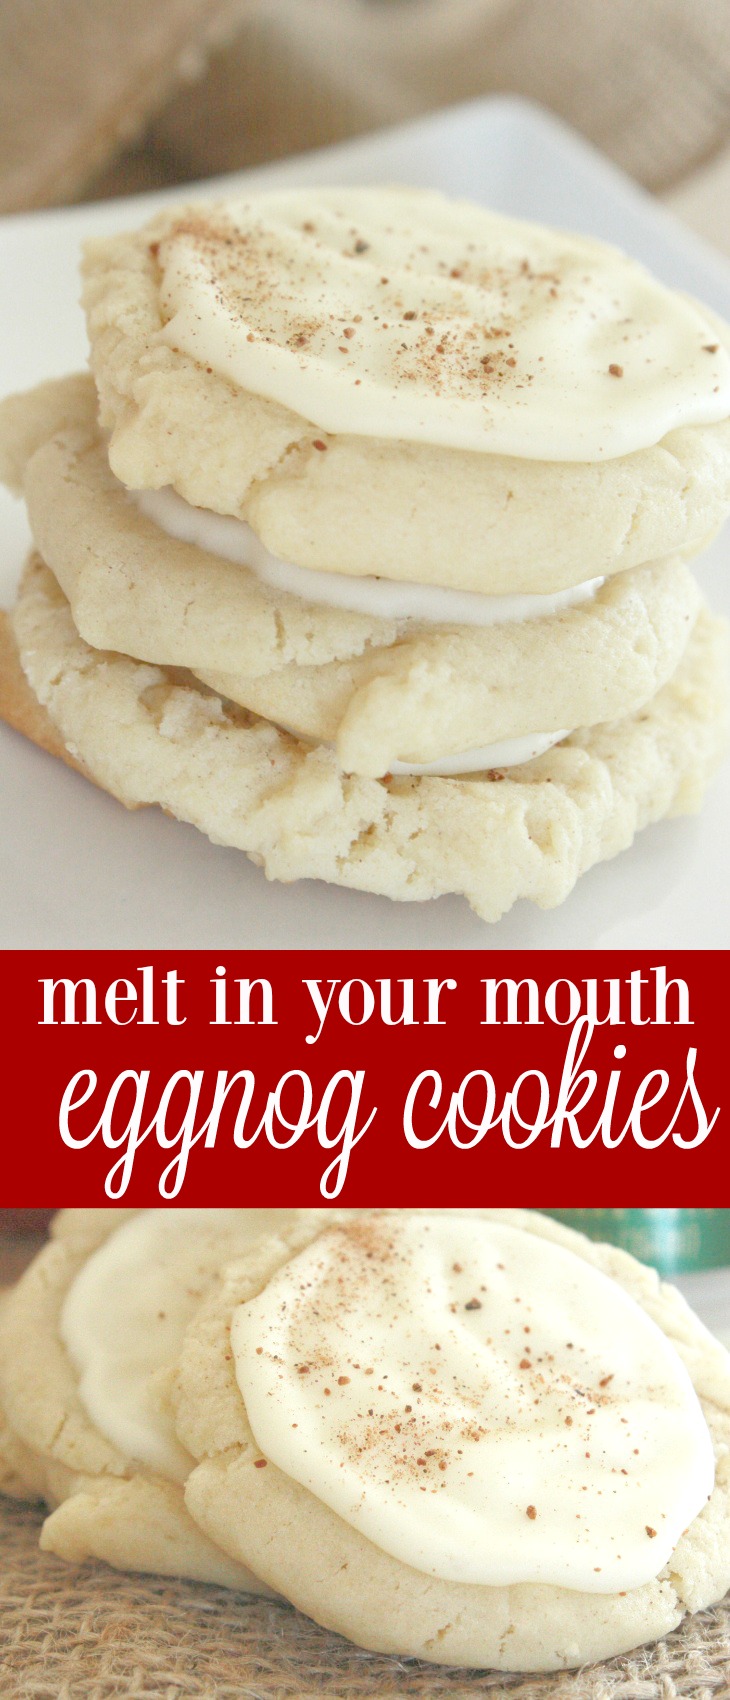
Using the back of a spoon or a small offset spatula, spread a small amount of frosting onto each cookie. Sprinkle with ground nutmeg.
Let stand about 1 hour so the nutmeg sticks and frosting is no longer sticky, then stack or box.
HELPFUL TIPS
- If cookies are stacked or boxed before frosting has had a chance to set, they may become sticky. The karo makes the frosting set-up time much quicker, but an hour is necessary before stacking or boxing.
- Frosted cookies that have had time to set-up stack nicely.
- Make sure that cookies are completely cool before frosting. Trying to frost warm cookies will result in frosting sliding off of cookies or frosting becoming runny. Let them cool completely on rack.
- Nutmeg is what gives these cookies that eggnog flavor. If you are hesitant to include it, know that without it, your cookies would basically just be sugar cookies.
- Spooning flour into measuring cup results in a lighter, more accurate measurement of flour. When you scoop your measuring cup directly into a bag of flour, you’re measuring compacted flour which results in a measurably greater amount of flour than you realize. Recipes made this way tend to turn out dense and dry. Level your measured flour for most successful baking.
- Refrigerate cookie dough for up to 3 days before baking.
VARIATIONS
ADD A PINCH OF CINNAMON
Add 1/2 tsp. cinnamon along with the nutmeg if you’re trying to achieve a more generic holiday cookie with a spice-y flavor. Adding the cinnamon takes a bit of the nutmeg out of the cookie.
COLORED SUGAR INSTEAD OF FROSTING
If you’d like an even quicker eggnog cookie that travels well, skip the frosting and press red or green colored sugar crystals into cookies before baking. Less rich but very cute and easy.
SPIKED EGGNOG VERSION
For an adult version, replace 1/4 cup eggnog in cookie dough with bourbon. Don’t add the bourbon to the frosting as this will keep it from setting-up properly, but the boozy eggnog cookies are delicious.
Any alcohol will be cooked out of the cookies.
BAKING EQUIPMENT WORTH HAVING
- A cookie scoop makes all of the cookies the same size so they bake up evenly. Without them, you’re guaranteed to have a few too-big cookies that aren’t quite done and a few small ones that are overdone.
*natural aluminum baking sheets are my favorite baking sheets to use (affiliate link). They cost less than $15 bucks, heat evenly, help cookies from over-browning on the bottom, and you can fit more cookies per sheet = fewer sheets = quicker baking.
I’ve been using them for YEARS and recommend them all of the time.
- I also use the OXO Good Grips Cookie Scoop (affiliate link) to scoop the eggnog cookie dough into consistent-size cookies that will all cook at the same time. It’s an investment but one that will last you FOREVER. I’ve had cheaper cookie scoops but they don’t compare.
STORAGE, MAKE-AHEAD, AND FREEZING
STORING BAKED COOKIES
Once the eggnog cookies have been frosted and allowed to DRY COMPLETELY, arrange them in a single layer in airtight containers. Separate layers of cookies with parchment paper.
Cookies will stay fresh at room temperature up to 4-5 days. They will begin to dry out after that but will still be okay.
MAKE-AHEAD OPTIONS
The eggnog cookie dough can be made and then stored, tightly covered, in the refrigerator for UP TO 3 DAYS ahead of baking. You can keep the dough in a bowl or form into a log, wrap, and store.
The log option can make the cookies easier to prepare closer to the time that they’ll be baked, and you simply unwrap the log, slice, arrange, and bake.
You can also BAKE COOKIES ahead of time, let them COOL COMPLETELY, and store at room temperature for UP TO 2 DAYS before frosting. Arrange cooled cookies in single layers in airtight containers with parchment paper between cookies to keep them from sticking together.
Then, frost when ready to enjoy or serve.
FREEZING
You can FREEZE eggnog cookies without frosting. Once cookies are baked and have COOLED COMPLETELY, arrange in a single layer on a large baking sheet and freeze until cookies are completely solid.
Then, store cookies in zip-top freezer bags by arranging cookies in single layers with parchment paper between cookies, and freeze for UP TO 2 MONTHS. To serve, remove as many cookies as desired from freezer storage and allow cookies to thaw at room temperature for approximately THIRTY MINUTES*.
Then, frost and enjoy.
*I highly recommend AGAINST freezing eggnog cookies AFTER they’re frosted as they don’t thaw as evenly as unfrosted cookies do. As a result, the frosting does not look as nice.
FREQUENTLY ASKED QUESTIONS
CAN I USE LOW-FAT OR NONFAT EGGNOG?
You can. Using full-fat eggnog gives the cookies their unique, spiced, custardy flavor.
Using nonfat eggnog would affect the flavor of the cookies, making them less eggnogy and less rich.
DO I REALLY HAVE TO CHILL THE DOUGH?
The answer to this one is a resounding yes. Skipping the chill results in super-flat and lacy cookies.
The recipe uses a full cup of eggnog, which makes the dough quite soft and sticky at room temperature. After an hour in the fridge, the dough is cold enough to retain its shape.
We found that 45 minutes is about as short as you can chill the dough before disaster strikes.
WHY DOES THE KARO SYRUP MATTER IN THE FROSTING?
Ever smear some eggnog cookies frosting on your hand?
It’s smooth, sturdy, and doesn’t stick. Adding an interfering agent, such as the teaspoon of Karo light corn syrup to the sugar prevents the sucrose molecules in the frosting from clustering together (aka, crystallizing) as they cool.
Without the Karo, the frosting would be a gritty, sticky mess.
CAN I MAKE THESE WITHOUT A MIXER?
These cookies can be mixed by hand with a sturdy wooden spoon and strong arm muscles. Make sure that the butter is very soft before attempting to make these by hand, and stir vigorously.
Trying to do it with cold butter would be another story altogether…
MY COOKIES CAME OUT PUFFY AND DIDN’T FLATTEN MUCH DURING BAKING.
WHAT HAPPENED?
The shape of eggnog cookies right out of the oven is supposed to resemble a puffy mound. As soon as they’re out of the oven, press down on each mound with the bottom of a glass to achieve the classic eggnog cookie shape.
The glass is supposed to flatten them considerably, as they are hot and pliable coming out of the oven.
HOW MANY COOKIES DOES THIS RECIPE MAKE?
If using a teaspoon-sized scoop you’ll get about 4-5 dozen. If you’d like bigger cookies using a tablespoon-sized scoop, you’ll of course have less cookies.
Wondering if you’ll have to adjust baking time?
Yes, if using bigger scoops they’ll take a tad longer to bake. Keep an eye on them at the 10 minute mark and add another minute or two if needed.
Eggnog Cookies with Eggnog Frosting
Ingredients
- Butter softened
- Sugar
- Eggnog
- Eggs
- Vanilla extract
- All-purpose flour
- Baking powder
- Baking soda
- Salt
- Ground nutmeg
- Powdered sugar for frosting
- Eggnog for frosting
- Karo syrup for frosting
- Butter for frosting
- Additional nutmeg optional
Instructions
- Cream butter and sugar together until light.
- Add eggnog, eggs, and vanilla and mix until combined.
- Whisk flour, baking powder, baking soda, salt, and nutmeg in a separate bowl.
- Add dry ingredients to wet ingredients and mix just until combined.
- Chill dough at least 1 hour.
- Scoop dough onto parchment-lined baking sheets.
- Bake until cookies are set.
- Flatten cookies gently with a greased glass right after baking if desired.
- Cool completely.
- Mix frosting ingredients until smooth, frost cooled cookies, and let frosting set.